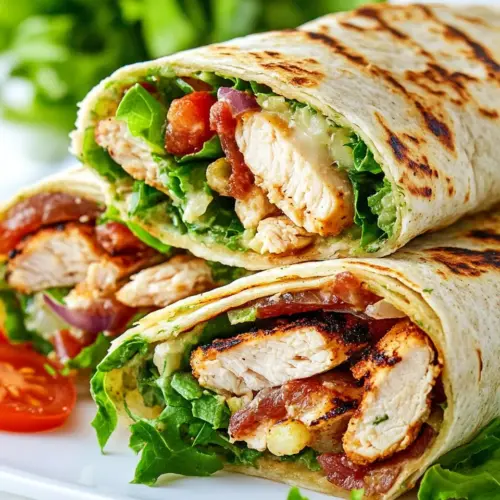
Grilled Chicken Caesar Wrap
The ultimate hand-held delight, the Grilled Chicken Caesar Wrap combines crispy lettuce, savory grilled chicken, and creamy dressing all in one delicious bite. Perfect for a quick lunch or a satisfying dinner, this easy recipe will have you craving more.
Equipment
- Chef's Knife
- Skillet
- Grater
Ingredients
- 2 cups Lemon Basil Chicken click for recipe OR 2 cups any shredded, cooked chicken
- 6 slices bacon cooked and chopped
- 3 cups romaine lettuce chopped
- 2/3 cup cherry tomatoes halved
- 1/4 cup freshly grated parmesan cheese
- 1/2 cup garlic herb croutons
- 1/2 cup Caesar salad dressing click for the best homemade!
- 1/2 teaspoon garlic powder
- 1/4 teaspoon pepper
- 5 burrito size (10-12 inch) flour tortillas
Instructions
- Chicken: Start by preparing the Lemon Basil Chicken according to the recipe directions. If you’re using pre-cooked chicken, just chop it into bite-sized pieces. If you’re cooking from scratch, let the chicken rest for about 10 minutes after cooking before chopping. This helps retain moisture. You can meal prep this chicken a few days ahead, so it’s ready when you need it!
- Filling: In a large bowl, combine all of the filling ingredients: the chopped bacon, romaine lettuce, cherry tomatoes, parmesan cheese, and croutons. Toss everything together gently. You want to ensure that each ingredient is evenly distributed, so every bite of the wrap has a balance of flavors and textures.
- Assemble: Take a burrito size tortilla and lay it flat on a clean surface. Add a generous amount of the filling mixture toward the bottom third of the tortilla. Be careful not to overfill; you want to be able to wrap it up without spilling out the sides.
- Wrap: Now, it's time to roll your wrap! Fold the edges of the tortilla in next to the filling, then fold the bottom edge over the filling. Carefully roll it up from the bottom, keeping it tight as you go. You want a firm wrap that holds together well, so squeeze gently as you roll. Once you’ve rolled it all the way up, place it seam-side down on your work surface.
- Toast (optional, recommended): Heat a cast iron skillet or a nonstick skillet over medium-high heat. If you want a crispy exterior (and trust me, you do), add the wraps seam-side down to the skillet. Toast them for a few minutes on each side or until golden brown. This step adds a delightful crunch that enhances the entire experience.
Notes
- Storage: Assembled wraps will keep in the refrigerator for up to 3 days. However, for best results, eat them fresh as the lettuce and tortillas may soften over time.
- Freezing: You can freeze the filling separately for longer storage. Just be sure to thaw it before assembling the wraps.
- Pairing: Serve the wraps with a side of fruit salad or potato chips to complement the flavors.
- Ingredient Variations: Consider adding different proteins or even grilled vegetables for a twist.
- Dressing on the Side: If you prefer a less soggy wrap, serve the Caesar dressing on the side for dipping.