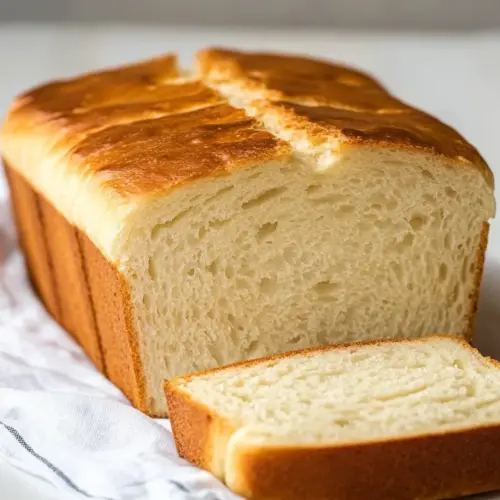
Gluten Free Bread
This Gluten Free Bread is the perfect solution for anyone craving a delicious, fluffy loaf without gluten. With its delightful texture and wholesome ingredients, it’s an easy weeknight dinner component or a tasty breakfast option. Make this recipe tonight and enjoy the warmth of freshly baked bread!
Equipment
- Frying Pan
- Whisk
- Blender
- Oven
- Chef's Knife
- Mixing Bowl
- Baking Sheet
Ingredients
- 2 1/2 tsp Active dry yeast
- 3 1/2 Tbsp Sugar, divided
- 1/4 cup Warm water 110 degrees
- 1 1/4 cups Milk warmed to 110 degrees
- 2 Tbsp Canola oil
- 2 Tbsp Butter, softened plus more for bread pan
- 3 Large eggs
- 1 Tbsp Lemon juice
- 2 cups White rice flour (320g)
- 1/2 cup Tapioca flour (66g)
- 1/2 cup Potato starch (81g)
- 1/3 cup Cornstarch (46g)
- 1 Tbsp Xanthan gum
- 1 3/4 tsp Salt
- 1 tsp Baking powder
Instructions
- Start by pouring the yeast into the bowl of an electric stand mixer. Add in 1/2 tsp of the sugar and 1/4 cup of warm water. Whisk to dissolve the yeast, and allow it to rest for about 5 to 10 minutes. You should see it become foamy, indicating that the yeast is active.
- Next, add in the remaining 3 Tbsp of sugar, the milk, canola oil, butter, eggs, and lemon juice. Fit your mixer with the paddle attachment and start whipping on low speed. Don’t worry if the butter doesn’t blend in right away; it will once the dry ingredients are added.
- Now, it’s time to add all the remaining dry ingredients into the mix. This includes the white rice flour, tapioca flour, potato starch, cornstarch, xanthan gum, salt, and baking powder. Start mixing on low speed until everything is combined, then gradually increase to medium speed and mix for around 5 minutes. If your stand mixer has a scraper attachment, use it as it makes mixing easier.
- Once mixed, the batter should have a consistency similar to that of banana bread—thick but pourable. Pour the bread dough into a buttered 9-by-5-inch baking dish. Use a rubber spatula to spread it evenly to both ends. Smooth the top using wet hands; this helps shape the loaf and prevents it from drying out as it rises.
- Transfer the dish to a warm, draft-free spot and let it rise for about 1 hour to 1 hour and 15 minutes. During the last 10 minutes of rising, preheat your oven to 375 degrees. Be gentle with the loaf to avoid deflation; it’s delicate.
- After the rising time, bake the loaf in the preheated oven for 20 minutes. Then, reduce the oven temperature to 350 degrees, tent the loaf with aluminum foil, and bake for an additional 20 minutes. The bread is done when the top center no longer feels doughy.
- Once baked, remove the bread from the oven and let it cool in the loaf pan for several minutes. Then, invert the bread onto a wire rack to cool completely.
- Once cooled, store the Gluten Free Bread in an airtight container or resealable bag in the refrigerator. When ready to serve, slice into 1/2-inch thick slices.
Notes
- Tip 1: Store leftovers in an airtight container in the refrigerator to keep them fresh.
- Tip 2: You can freeze slices for later. Just wrap them tightly in foil or plastic wrap before placing them in a freezer bag.
- Tip 3: Warm each slice in the microwave for about 10 to 15 seconds before serving for the best texture.
- Tip 4: Always use ingredients that are labeled gluten-free to prevent cross-contamination.
- Tip 5: Scoop and level your dry ingredients rather than packing them into the cup for accuracy.