Blistered Pea Hummus
The ultimate blend of fresh flavors, Blistered Pea Hummus is a creamy, vibrant dish that brightens up any mealtime. Perfect as a dip or spread, this easy recipe captures the essence of spring with sweet English peas and warm spices. Enjoy it as a healthy snack or impressive appetizer!
Equipment
- Mortar and pestle
- Juicer
- Small Saucepan
- Blender
Ingredients
- 10 to 12 cumin seeds Cumin seeds
- 5 to 7 coriander seeds Coriander seeds
- 4 cups English peas
- 1 24-ounce can Garbanzo beans skins removed
- Juice from 1 lemon Lemon juice
- 3 tablespoons Tahini
- 1 clove Garlic minced
- to taste Salt
- 1 handful Italian parsley minced
Instructions
- First, gather your tools. You’ll need a mortar and pestle or a spice grinder to crush your cumin seeds and coriander seeds. If you don’t have these, using ground spices is okay too. Start by adding the seeds into the mortar and grinding them until they resemble a fine powder. This step is crucial as it releases the essential oils and flavors, creating a robust base for your hummus.
- Next, it’s time to work with the English peas. Shuck them by pinching off the tops and pulling the string to split the seam. With your fingers, run down the seam to open the pods, releasing the sweet peas into a bowl. Don’t forget to keep the jackets; they’ll be used later to make a juice that adds color and flavor to your hummus.
- If you have a juicer, add the jackets to it and turn it on; set the juice aside. You should get about 1/3 of a cup. Remember, this step is optional, but it does enhance the flavor. If you don’t have a juicer, just set the jackets aside.
- Now, heat a small saucepan over high heat and add a teaspoon or two of olive oil. Once the oil is hot, toss in the blistered peas. Cook them for about 1 to 2 minutes, giving the pan a good shake occasionally. You want the skins to blister and become fragrant, which adds a lovely complexity to your hummus.
- In the jar of your blender or food processor, combine the crushed cumin and coriander, blistered peas, garbanzo beans, lemon juice, tahini, minced garlic, and a few pinches of salt. Pulse until the mixture is chunky. It’s all about building flavor at this stage, so don’t rush it!
- With the machine running, pour in your reserved pea juice or a splash of warm water. Keep blending until the hummus reaches a smooth consistency. If it’s too thick, add a bit more water. Always taste as you go; you can add more salt or lemon juice if needed to balance the flavors.
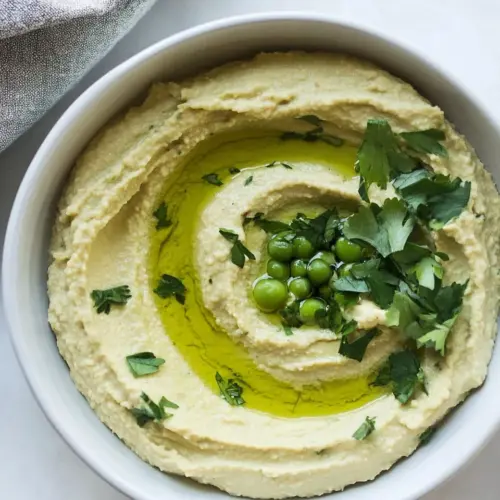
- Once your hummus is smooth-ish, transfer it to a beautiful serving bowl. Drizzle some high-quality olive oil on top, sprinkle with the minced Italian parsley, and finish with a pinch of salt. This finishing touch not only looks appealing but also enhances the flavor with freshness.
- Finally, serve your Blistered Pea Hummus with an assortment of crudités, pita chips, or spread it on your favorite sandwich. Enjoy the compliments!
Notes
- Storage: Store any leftovers in an airtight container in the fridge for up to three days. The flavors may meld and deepen over time, making it even more delicious!
- Freezing: You can freeze the hummus in a tightly sealed container for up to two months. Just make sure to let it thaw in the fridge the night before you plan to serve it.
- Pairing: This hummus pairs beautifully with crispy vegetables, pita chips, or even as a spread on sandwiches and wraps. It also complements grilled meats and fish.
- Garnishing: Consider garnishing with additional herbs like chives or microgreens for a pop of color and flavor.
- Spice It Up: If you enjoy a kick, add a pinch of cayenne or a drizzle of chili oil on top before serving.