Russian Cake Truffles
There’s something magical about making Russian Cake Truffles that fills the kitchen with warmth and nostalgia. I remember the first time I tried these delightful treats at a friend’s family gathering. The moment I popped one into my mouth, I was transported to a world of rich flavors and creamy textures. Since then, I’ve dedicated countless afternoons to perfecting my version of these truffles, experimenting with ingredients and techniques. Now, I can’t wait to share this simple yet elegant recipe with you! These truffles are the perfect sweet indulgence for any occasion, whether it’s a cozy family dinner or a special celebration.
Recipe Snapshot
2 hr 30 mins
60 mins
90 mins
Hard
120 kcal
2 g
Keto, Gluten-Free, Low FODMAP
7 g
Frying Pan, Whisk, Blender, Food Processor, Oven, Saucepan, Chef’s Knife, Cutting Board, Mixing Bowl, Wooden Spoon, Baking Sheet
Why We Love This Russian Cake Truffles
Unique Flavor Combination
The combination of flavors in Russian Cake Truffles is truly unique. The poppy seeds lend a nutty richness that harmonizes beautifully with the sweetness of the chocolate. This delightful contrast is sure to impress your guests!
Fun to Make
Rolling these truffles into perfect little balls is a fun activity, especially if you involve the kids. It’s a great way to bond and create lasting memories in the kitchen. Plus, who doesn’t love to get a little messy with chocolate?
Customization
The recipe is highly customizable to suit your taste. You can add more or less of the nuts, or even incorporate spices like cinnamon for a twist. Each batch can be a little different!
Great for Gifting
These truffles make for fantastic gifts! Pack them in a decorative box, and you have a thoughtful present that anyone would appreciate. They’re perfect for birthdays, holidays, or just because!
Deliciously Decadent
Every bite of Russian Cake Truffles is a rich, decadent experience. The combination of sweet chocolate and creamy filling will satisfy even the most discerning dessert lover.
Easy to Store
These truffles are easy to make ahead of time and store. Just keep them in the refrigerator, and you’ll have a delightful treat ready whenever the craving strikes!
What’s In This Russian Cake Truffles
The ingredients for Russian Cake Truffles come together to create a delightful blend of flavors. Each one plays a crucial role in crafting these little bites of heaven.
- 2/3 cup Flour: Provides the base structure for the cake, contributing to its texture.
- 1/2 tsp Baking Powder: Helps the cake rise, making it light and fluffy.
- 5 Eggs: Essential for binding the ingredients and adding richness.
- 1/2 cup Sugar: Sweetens the cake and adds moisture.
- 1/2 tsp Vanilla: Enhances the overall flavor profile, giving a warm aroma.
- 3/4 cup Poppy Seeds: Adds a nutty flavor and interesting texture.
- 2 cups Water: Used for cooking the poppy seeds and keeping the mixture moist.
- 6 oz Sweetened Condensed Milk: Provides sweetness and a creamy texture that enriches the filling.
- 8 oz Cool Whip: Adds airiness and creaminess to the truffle mixture.
- 3/4 cup Chopped Walnuts (optional): Adds a crunchy texture and nutty flavor, enhancing the overall experience.
- 1/2 of one bag of Chocolate Truffles: Used for melting and coating the cake balls.
- 3/4 to 1 cup White Chocolate Chips: For decorating the truffles, adding a sweet and creamy finish.
Making Russian Cake Truffles
Creating Russian Cake Truffles is a delightful process! Let’s dive into the steps together and make some magic happen in the kitchen.
Start with 3/4 cup dry poppy seeds. Place them in a pot and fill it with water, then drain. This helps to remove any impurities. Next, add 2 cups water to the pot. Over medium heat, bring the mixture to a simmer. After a few moments, turn off the heat, cover the pot, and let the seeds stand for 30 minutes. This resting time is crucial for softening the seeds.
After 30 minutes, return the pot to heat and let it simmer again for a short while before turning off the heat once more. Cover and let it sit for another 30 minutes. When you’re done, drain the poppy seeds well using a fine mesh sieve or cheesecloth to ensure none escape.
Next, using a food grinder, push the cooked and drained poppy seeds through the fine grinding disk. You will need to apply a bit of pressure to properly process them. This step is essential for that smooth truffle filling we’re aiming for.
In a bowl, stir 1/2 can of sweetened condensed milk into the ground poppy seeds and set aside. You can also refrigerate this mixture until you’re ready to assemble the truffles.
Now, preheat your oven to 350˚F. Line a large rimmed cookie baking sheet (about 12×16) with parchment paper, making it easy to remove the cake later.
Separate 5 eggs into two medium bowls for the yolks and whites. In the yolk bowl, whisk in 1/2 cup sugar and 1/2 tsp vanilla. This will create a rich, flavorful base.
Next, sift or whisk together 2/3 cup flour and 1/2 tsp baking powder. Stir this flour mixture into the yolk and sugar mixture until well blended.
In a separate bowl, beat the egg whites on high speed until stiff peaks form, which should take around 2 to 3 minutes. Gently fold these egg whites into the batter until everything is well incorporated. The goal is to maintain that light texture.
Pour the batter onto the prepared cookie sheet and bake in the preheated oven for 12 to 15 minutes, or until the top is golden. Once baked, remove the cake from the oven and let it cool to room temperature.
Once cooled, cut the cake into small dice. In a bowl, combine the crumbled cake, 8 oz tub of cool whip, prepared poppy seeds, and 3/4 cup chopped walnuts (optional). Mix on the lowest speed for 1 to 2 minutes until everything is well combined.
Now, roll the mixture into balls no larger than 3/4 inch in diameter. This is where the fun begins!
To melt the chocolate, use either a microwave or stove-top until it’s just melted. Be careful not to overheat, or it will not dip well. If it gets too watery, allow it to cool slightly to thicken.
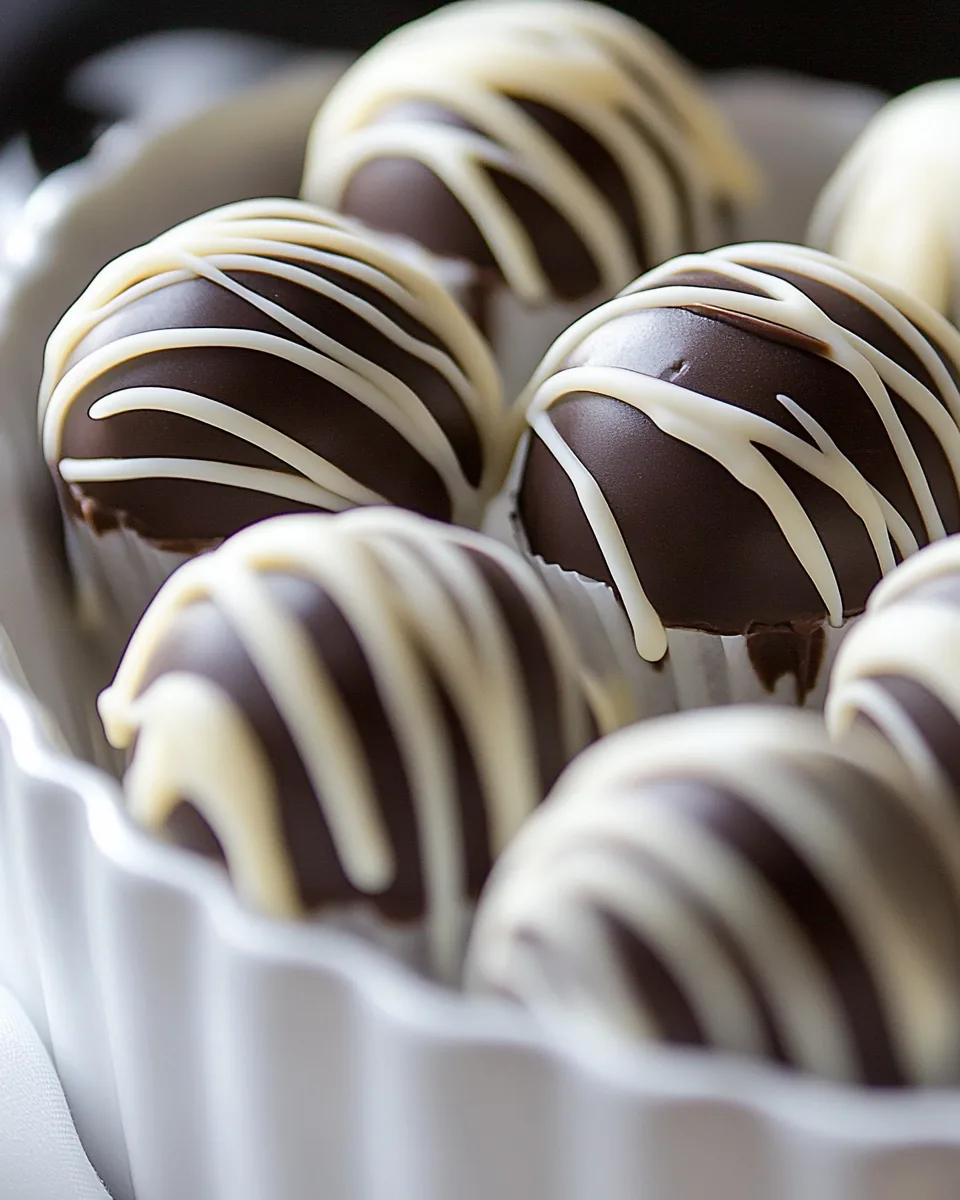
Dip each cake ball into the melted chocolate, ensuring it’s fully coated. Place them on the lined parchment paper, and refrigerate until the chocolate is set.
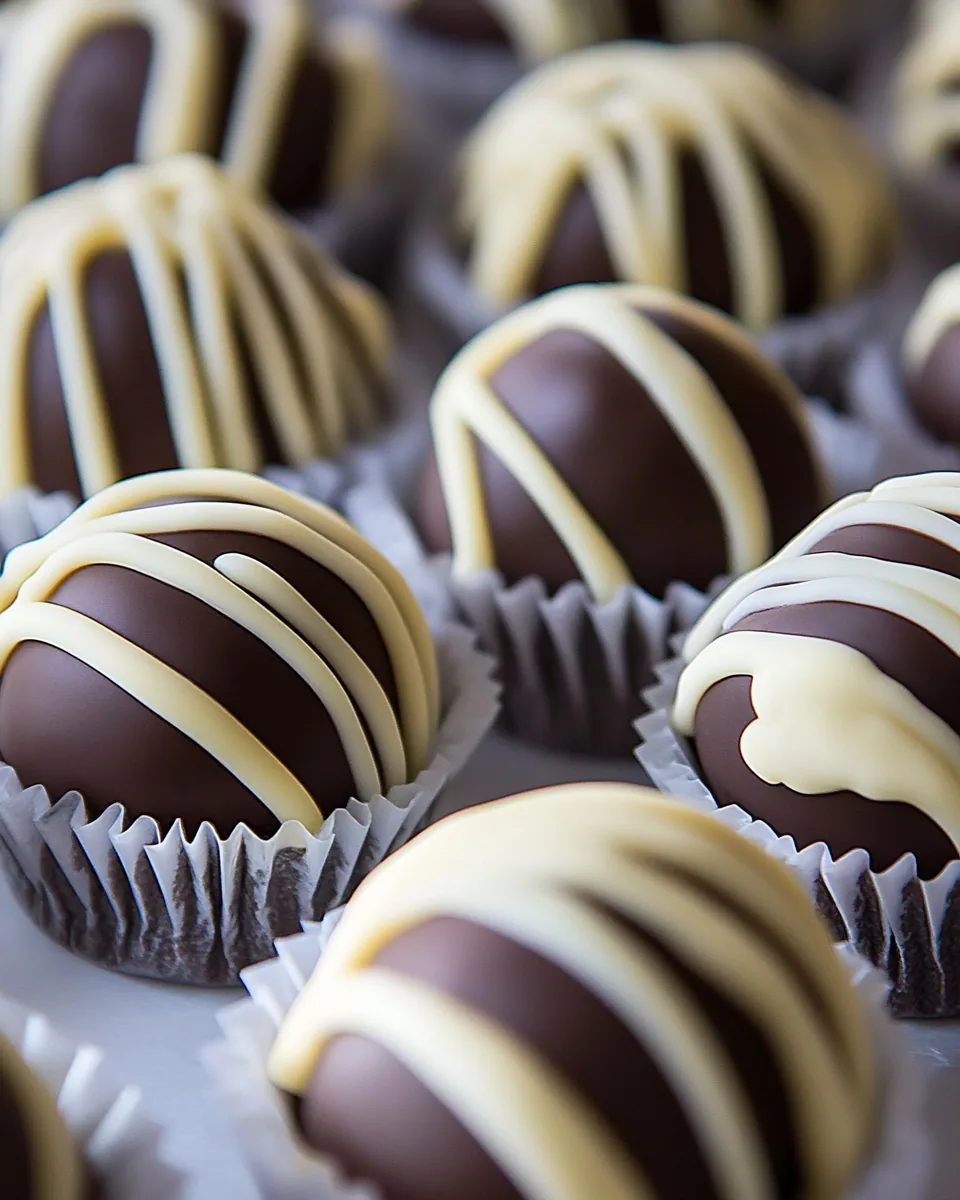
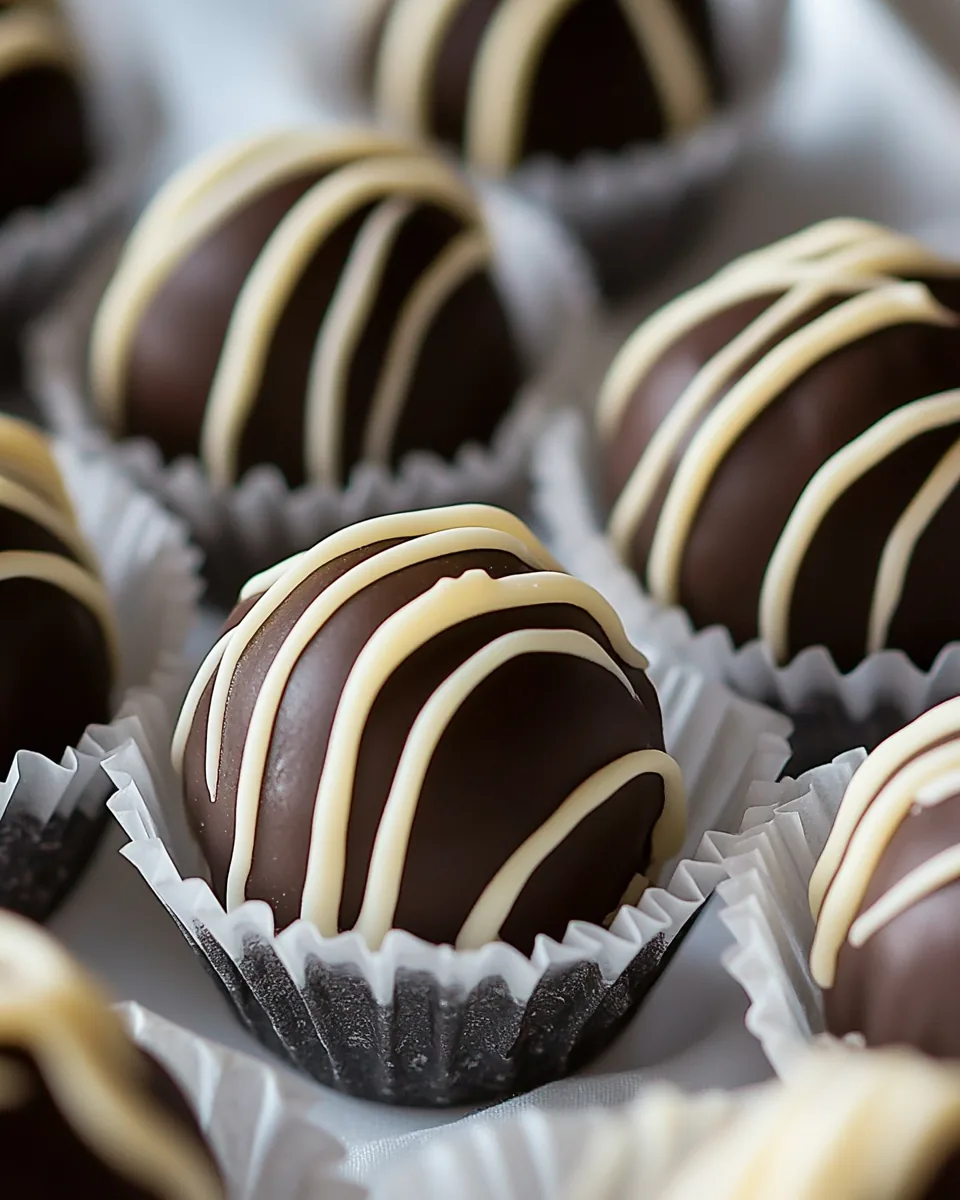
Finally, melt the white chocolate chips and pipe decorative strips over the refrigerated chocolate balls. These little details make your truffles look visually appealing!
Keep the finished truffles in the refrigerator until you’re ready to serve them. Enjoy your delicious homemade Russian Cake Truffles!
Things Worth Knowing
- Chilling Time: Refrigerating the truffles allows the chocolate coating to set properly, ensuring a clean finish when you serve them.
- Egg Separation: Make sure to separate the egg whites and yolks carefully; any yolk in the whites can prevent them from whipping to stiff peaks.
- Texture Awareness: When folding in the egg whites, be gentle to keep the mixture light and airy, which is key for a fluffy cake.
- Chocolate Melting: If you’re melting chocolate, do so in short intervals, stirring in between to prevent burning.
Tips and Tricks about Russian Cake Truffles
When making Russian Cake Truffles, there are some essential tips that can help elevate your game. Here are some insights that will ensure success!
- Storage: Keep the truffles in an airtight container in the refrigerator. They can last up to a week, but I assure you, they won’t last that long!
- Freezing: You can freeze these truffles for up to three months. Just make sure they are well-wrapped to prevent freezer burn.
- Pairing: Serve these truffles alongside a cup of coffee or tea for a delightful afternoon treat!
- Presentation: For an elegant touch, consider placing the truffles in paper cups when serving, adding a bit of flair.
- Chocolate Choices: Experiment with different chocolate types for dipping, such as dark or milk chocolate, to customize the flavor.
- Serving Size: Keep the truffle sizes small for easy eating. They are rich and satisfying, so smaller sizes go a long way!
Side Dish Ideas for Russian Cake Truffles
When it comes to serving Russian Cake Truffles, think about pairing them with complementary dishes and occasions:
- With Coffee: These truffles are perfect with a cup of freshly brewed coffee; the rich chocolate flavor complements the coffee beautifully.
- Festive Occasions: Serve them at birthday parties or holiday gatherings as a delightful dessert that everyone will love.
- Casual Gatherings: These truffles are also a great addition to casual get-togethers. They can be served on a platter for friends to enjoy.
- Sweet Buffets: If you’re hosting a sweet buffet or dessert table, these truffles are an eye-catching treat that will draw guests in.
- Picnic Treat: Pack these truffles for a picnic or potluck—everyone will appreciate the sweet surprise!
- Seasonal Flavors: You can add seasonal spices or flavors like cinnamon or nutmeg if making these truffles during the holidays.
FAQ
Conclusion
In summary, Russian Cake Truffles are a delicious and unique treat that everyone will love. Their rich flavor and delightful texture make them a special addition to any occasion. I encourage you to give this recipe a try; it’s simpler than you might think and sure to impress your friends and family!

Russian Cake Truffles
Equipment
- Frying Pan
- Whisk
- Blender
- Food Processor
- Oven
- Saucepan
- Chef's Knife
- Cutting Board
- Mixing Bowl
- Wooden Spoon
- Baking Sheet
Ingredients
- 2/3 cup Flour
- 1/2 tsp Baking Powder
- 5 units Eggs
- 1/2 cup Sugar
- 1/2 tsp Vanilla
- 3/4 cup Poppy Seeds
- 2 cups Water
- 6 oz Sweetened Condensed Milk
- 8 oz Cool Whip
- 3/4 cup Chopped Walnuts (optional)
- 1/2 bag Chocolate Truffles for melting and dipping
- 3/4 to 1 cup White Chocolate Chips for decorating
Instructions
- Start with 3/4 cup dry poppy seeds. Place them in a pot and fill it with water, then drain. This helps to remove any impurities. Next, add 2 cups water to the pot. Over medium heat, bring the mixture to a simmer. After a few moments, turn off the heat, cover the pot, and let the seeds stand for 30 minutes. This resting time is crucial for softening the seeds.
- After 30 minutes, return the pot to heat and let it simmer again for a short while before turning off the heat once more. Cover and let it sit for another 30 minutes. When you’re done, drain the poppy seeds well using a fine mesh sieve or cheesecloth to ensure none escape.
- Next, using a food grinder, push the cooked and drained poppy seeds through the fine grinding disk. You will need to apply a bit of pressure to properly process them. This step is essential for that smooth truffle filling we’re aiming for.
- In a bowl, stir 1/2 can of sweetened condensed milk into the ground poppy seeds and set aside. You can also refrigerate this mixture until you’re ready to assemble the truffles.
- Now, preheat your oven to 350˚F. Line a large rimmed cookie baking sheet (about 12x16) with parchment paper, making it easy to remove the cake later.
- Separate 5 eggs into two medium bowls for the yolks and whites. In the yolk bowl, whisk in 1/2 cup sugar and 1/2 tsp vanilla. This will create a rich, flavorful base.
- Next, sift or whisk together 2/3 cup flour and 1/2 tsp baking powder. Stir this flour mixture into the yolk and sugar mixture until well blended.
- In a separate bowl, beat the egg whites on high speed until stiff peaks form, which should take around 2 to 3 minutes. Gently fold these egg whites into the batter until everything is well incorporated. The goal is to maintain that light texture.
- Pour the batter onto the prepared cookie sheet and bake in the preheated oven for 12 to 15 minutes, or until the top is golden. Once baked, remove the cake from the oven and let it cool to room temperature.
- Once cooled, cut the cake into small dice. In a bowl, combine the crumbled cake, 8 oz tub of cool whip, prepared poppy seeds, and 3/4 cup chopped walnuts (optional). Mix on the lowest speed for 1 to 2 minutes until everything is well combined.
- Now, roll the mixture into balls no larger than 3/4 inch in diameter. This is where the fun begins!
- To melt the chocolate, use either a microwave or stove-top until it’s just melted. Be careful not to overheat, or it will not dip well. If it gets too watery, allow it to cool slightly to thicken.
- Dip each cake ball into the melted chocolate, ensuring it’s fully coated. Place them on the lined parchment paper, and refrigerate until the chocolate is set.
- Finally, melt the white chocolate chips and pipe decorative strips over the refrigerated chocolate balls. These little details make your truffles look visually appealing!
- Keep the finished truffles in the refrigerator until you’re ready to serve them. Enjoy your delicious homemade Russian Cake Truffles!
Notes
- Storage: Keep the truffles in an airtight container in the refrigerator. They can last up to a week, but I assure you, they won’t last that long!
- Freezing: You can freeze these truffles for up to three months. Just make sure they are well-wrapped to prevent freezer burn.
- Pairing: Serve these truffles alongside a cup of coffee or tea for a delightful afternoon treat!
- Presentation: For an elegant touch, consider placing the truffles in paper cups when serving, adding a bit of flair.
- Chocolate Choices: Experiment with different chocolate types for dipping, such as dark or milk chocolate, to customize the flavor.
- Serving Size: Keep the truffle sizes small for easy eating. They are rich and satisfying, so smaller sizes go a long way!