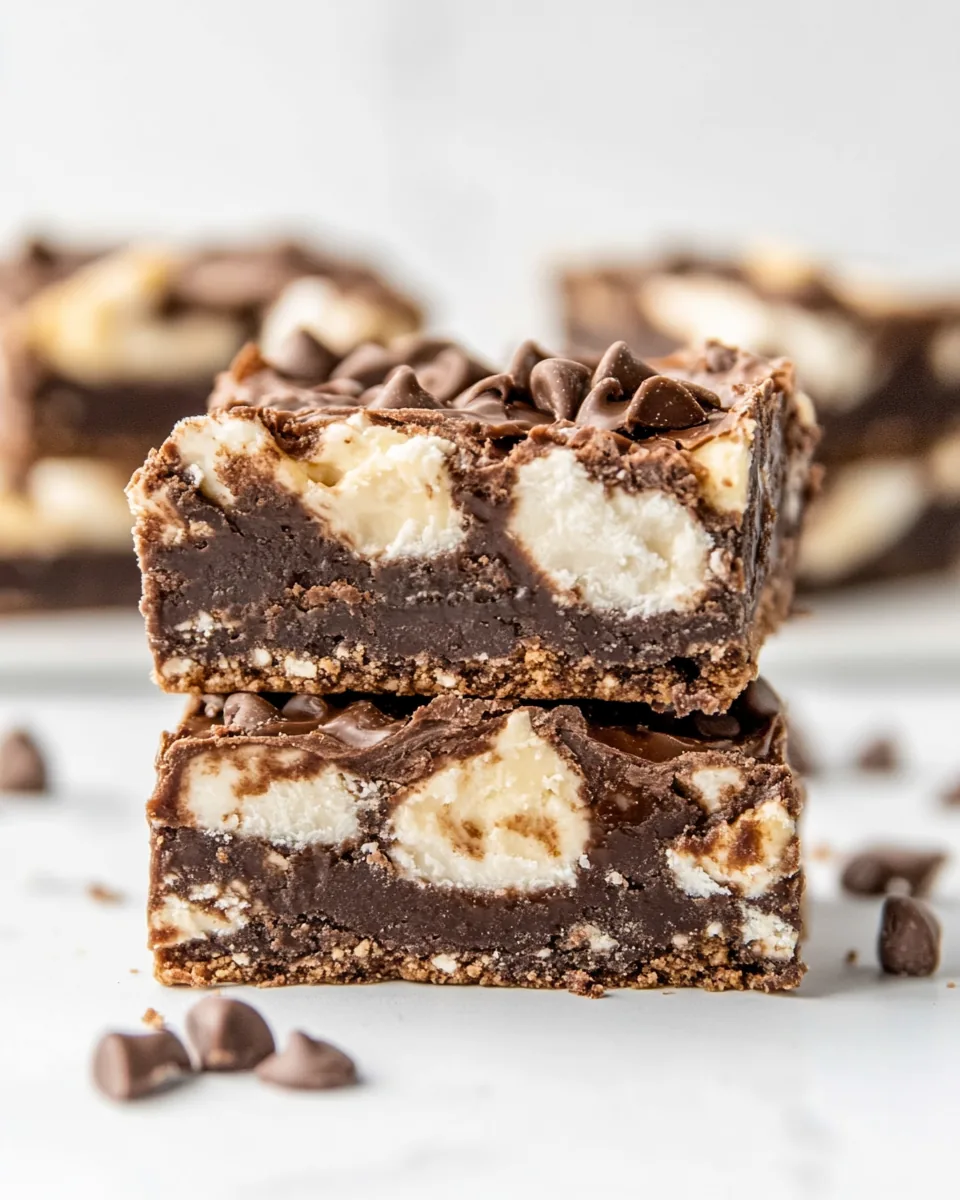
Rocky Road Fudge Bars
The moment I think of Rocky Road Fudge Bars, I’m instantly transported back to my childhood kitchen, where the air was filled with the sweet aroma of melting chocolate and buttery bliss. I remember gathering around the countertop with my family, waiting eagerly to dive into a pan of these luscious bars. Each layer was a testament to indulgence: a fudgy base crowned with a whirlwind of creamy frosting, chocolate chips, and fluffy marshmallows that brought a delightful chewiness. As we cut into the bars, I’d sneak a taste, savoring the harmony of textures and flavors that melded together so perfectly. They were always the star at family gatherings, bringing everyone together for a moment of sweet happiness.
Recipe Snapshot
1 hr 5 mins
30 mins
35 mins
Medium
250 kcal
3 g
Gluten-Free, Low FODMAP
15 g
Frying Pan, Whisk, Blender, Oven, Chef’s Knife, Mixing Bowl, Wooden Spoon, Baking Sheet
Why This Rocky Road Fudge Bars Works
Irresistible Flavor Combination
It’s hard to resist the combination of chocolate, nuts, and marshmallows in Rocky Road Fudge Bars. The richness of the chocolate pairs beautifully with the crunch of walnuts, while the marshmallows add a delightful chew. Each bite offers a perfect balance of sweetness and texture that keeps you coming back for more.
Decadent Layers
One of the standout features of these bars is the decadent layers. The base is a rich chocolate fudge that’s not only easy to make but incredibly satisfying. Then, there’s the creamy filling that takes it up a notch, ensuring that every bite is a flavor explosion. The marshmallows on top aren’t just decorative; they provide a delightful contrast to the dense fudge below.
Perfect for Any Occasion
Rocky Road Fudge Bars are incredibly versatile; they fit right in at birthday parties, holiday gatherings, or even a cozy night in. Whether you’re celebrating or just treating yourself, these bars are always a crowd-pleaser. They can even be stored for later, making them a great dessert option to have on hand.
Fun to Make
Making Rocky Road Fudge Bars is not just about the end result; it’s about the experience! The process of melting the chocolate, stirring in the ingredients, and layering the bars is a fun activity to do alone or with family. You can even get creative and add your own twist!
Kids Love Them!
If you have kids, they’ll absolutely adore helping you whip up these bars. It’s a great opportunity for them to learn about baking, and they’ll have a blast mixing ingredients and decorating the finished product. Plus, they’ll be excited to share their tasty creations with family and friends.
Quick to Prepare
You won’t need to spend all day in the kitchen to create these delicious treats. Rocky Road Fudge Bars are quick to prepare and can be ready to enjoy in no time. This makes them a perfect last-minute dessert option when you have unexpected guests or cravings!
What You Need for Rocky Road Fudge Bars
When it comes to creating Rocky Road Fudge Bars, the ingredients are simple yet effective. Each component plays a crucial role in achieving that perfect blend of chocolatey goodness, creamy texture, and delightful crunch. You’ll find that the key players—butter, unsweetened chocolate, granulated sugar, and eggs—come together to create a base that’s wonderfully fudgy and rich. The addition of walnuts and mini marshmallows not only enhance the flavor but also offer delightful texture contrasts that make every bite an experience.
- ½ cup (1 stick) butter – The cornerstone of any fudge recipe, providing richness and moisture.
- One 1-ounce square unsweetened chocolate – Adds intense chocolate flavor without the added sweetness.
- 1 cup all-purpose flour – Helps to bind the ingredients together, giving the fudge structure.
- 1 cup granulated white sugar – Essential for sweetness and helps achieve that fudgy texture.
- ¾ cup chopped walnuts – Adds a satisfying crunch and a nutty flavor that complements the chocolate.
- 2 large eggs – Vital for moisture and binding the ingredients together.
- 1 teaspoon baking powder – Helps the bars rise slightly, creating a nice texture.
- 1 teaspoon vanilla extract – Enhances the sweetness and flavor of the chocolate.
- 6 ounces cream cheese, at room temperature – Provides a creamy texture for the filling.
- ¼ cup (½ stick) butter, at room temperature – Used in the filling for added creaminess.
- ½ cup granulated white sugar – Sweetens the filling perfectly.
- 2 tablespoons all-purpose flour – Adds structure to the filling.
- ½ teaspoon vanilla extract – Adds depth to the filling flavor.
- 1 large egg – Binds the filling ingredients together.
- ¼ cup chopped walnuts – A second dose of crunch for the filling.
- 6 ounces semisweet chocolate chips – Provides pockets of melted chocolate in every bite.
- 2 cups mini marshmallows – Adds a chewy, sweet layer that’s iconic to rocky road.
- ¼ cup (½ stick) butter – For creating a smooth frosting layer on top.
- 2 tablespoons milk – Helps to achieve a creamy consistency in the frosting.
- One 1-ounce square unsweetened chocolate – Deepens the flavor of the frosting.
- 2 ounces cream cheese – Enhances the creaminess of the frosting.
- 3 cups powdered sugar, sifted – Sweetens the frosting and adds a light texture.
- 1 teaspoon vanilla extract – Balances out the sweetness of the frosting.
Step by Step Guide for Rocky Road Fudge Bars
Creating Rocky Road Fudge Bars is a delightful adventure that’s sure to impress. With just a few steps, you can transform simple ingredients into an indulgent treat that everyone will love. Follow along as I guide you through the process, highlighting tips and tricks to ensure your bars come out perfectly every time.
- Preheat your oven to 350°F (175°C). It’s important to get your oven ready because a consistent temperature is key to baking these fudge bars evenly. Meanwhile, grab your 13×9-inch pan and spray it lightly with baking spray to prevent sticking.
- In a large saucepan over low heat, melt the butter and unsweetened chocolate, whisking constantly. This should take a few minutes, and you’ll want to ensure that the mixture is smooth and well blended before moving on.
- Once melted, remove the pan from the heat and whisk in the all-purpose flour. This will help to thicken the mixture and create a batter-like consistency.
- Add in the granulated white sugar, followed by the chopped walnuts, eggs, baking powder, and vanilla extract. Mix everything until fully combined. You’ll notice a rich, thick batter forming, which is exactly what you want.
- Spread the batter evenly into your prepared pan. Use a spatula to smooth it out, making sure it reaches the corners for even baking.
- In a separate small bowl, combine the filling ingredients: cream cheese, butter, granulated sugar, flour, vanilla extract, and egg. Beat this mixture at medium speed for about one minute until it’s smooth and fluffy.
- Stir in the remaining walnuts and mix well. Now, carefully spread this filling mixture over the fudge base in the pan, ensuring it’s evenly distributed.
- Sprinkle the semisweet chocolate chips on top of the filling, allowing those little pockets of chocolate to melt into the mixture as it bakes.
- Place the pan in the oven and bake for 25 to 30 minutes. Check for doneness by inserting a toothpick into the center—if it comes out clean, your fudge bars are ready!
- As soon as you remove the pan from the oven, top it off immediately with the mini marshmallows. They’ll melt slightly from the heat, creating a gooey topping.
- Return the pan to the oven and bake for an additional 2 minutes, just to soften the marshmallows.
- In a large saucepan over low heat, combine the remaining butter, milk, unsweetened chocolate, and cream cheese. Stir until melted and blended, then remove from heat.
- Stir in the powdered sugar and vanilla extract until smooth. This mixture will form a lovely frosting.
- Pour the frosting over the marshmallows, and take a knife to lightly swirl it in for a marbled effect. This adds an extra layer of deliciousness.
- Finally, refrigerate your Rocky Road Fudge Bars until they are firm. Once set, cut them into bars and enjoy!
Things Worth Knowing
- Cooling Time: Allow the fudge bars to cool completely before cutting. This will help achieve clean edges.
- Ingredient Quality: Use high-quality chocolate for the best flavor. The better the chocolate, the richer your fudge will be.
- Storage: Store leftover bars in an airtight container in the fridge to keep them fresh.
- Serving Temperature: These bars can be enjoyed chilled or at room temperature, depending on your preference.
Tips for Success
Making Rocky Road Fudge Bars can be a breeze with the right tips! Here’s what to keep in mind to ensure your bars turn out perfectly every time.
- Storage: These bars can be stored in an airtight container in the refrigerator for up to a week.
- Freezing: You can freeze cut bars for up to three months. Just make sure to wrap them tightly in plastic wrap to avoid freezer burn.
- Variations: Feel free to get creative! Add in different nuts or even dried fruits for a unique twist.
- Serving Size: These bars are rich, so smaller pieces go a long way. Consider cutting them into bite-sized squares.
- Garnish: A sprinkle of sea salt on top of the frosting can enhance the chocolate flavor beautifully.
- Layering: For added texture, try layering different types of chocolate chips—dark, milk, and white—throughout the bars.
Serving Ideas for Rocky Road Fudge Bars
When it comes to serving Rocky Road Fudge Bars, the possibilities are endless! Here are some creative ideas to enjoy these delightful treats:
- Casual Gatherings: Serve these bars at birthday parties or family gatherings where everyone can indulge.
- With Coffee: Pair with a cup of coffee or espresso for a delightful afternoon treat.
- Picnics: Pack them in your picnic basket for a sweet surprise during a day out.
- After Dinner: They make a fantastic dessert option for dinner parties, impressing your guests with minimal effort.
- Chilled Treats: Enjoy them chilled from the fridge on a hot summer day—they’re refreshing and satisfying!
- With Ice Cream: Top a warm piece of fudge with a scoop of vanilla ice cream for an extra decadent dessert!
FAQ
Conclusion
The Rocky Road Fudge Bars recipe is a delightful blend of flavors and textures that truly stands out. With its rich chocolate base, creamy filling, and chewy marshmallow topping, every bite offers a wonderful experience. I encourage you to try making these bars; they’re incredibly satisfying and will surely brighten your day. Enjoy the process and share them with friends and family for a sweet treat that everyone will love!

Rocky Road Fudge Bars
Equipment
- Frying Pan
- Whisk
- Blender
- Oven
- Chef's Knife
- Mixing Bowl
- Wooden Spoon
- Baking Sheet
Ingredients
- ½ cup Butter
- 1 ounce Unsweetened Chocolate
- 1 cup All-Purpose Flour
- 1 cup Granulated White Sugar
- ¾ cup Chopped Walnuts
- 2 large Eggs
- 1 teaspoon Baking Powder
- 1 teaspoon Vanilla Extract
- 6 ounces Cream Cheese at room temperature
- ¼ cup Butter at room temperature
- ½ cup Granulated White Sugar
- 2 tablespoons All-Purpose Flour
- ½ teaspoon Vanilla Extract
- 1 large Egg
- ¼ cup Chopped Walnuts
- 6 ounces Semisweet Chocolate Chips
- 2 cups Mini Marshmallows
- ¼ cup Butter
- 2 tablespoons Milk
- 1 ounce Unsweetened Chocolate
- 2 ounces Cream Cheese
- 3 cups Sifted Powdered Sugar
- 1 teaspoon Vanilla Extract
Instructions
- Preheat your oven to 350°F (175°C). It’s important to get your oven ready because a consistent temperature is key to baking these fudge bars evenly. Meanwhile, grab your 13x9-inch pan and spray it lightly with baking spray to prevent sticking.
- In a large saucepan over low heat, melt the butter and unsweetened chocolate, whisking constantly. This should take a few minutes, and you’ll want to ensure that the mixture is smooth and well blended before moving on.
- Once melted, remove the pan from the heat and whisk in the all-purpose flour. This will help to thicken the mixture and create a batter-like consistency.
- Add in the granulated white sugar, followed by the chopped walnuts, eggs, baking powder, and vanilla extract. Mix everything until fully combined. You'll notice a rich, thick batter forming, which is exactly what you want.
- Spread the batter evenly into your prepared pan. Use a spatula to smooth it out, making sure it reaches the corners for even baking.
- In a separate small bowl, combine the filling ingredients: cream cheese, butter, granulated sugar, flour, vanilla extract, and egg. Beat this mixture at medium speed for about one minute until it’s smooth and fluffy.
- Stir in the remaining walnuts and mix well. Now, carefully spread this filling mixture over the fudge base in the pan, ensuring it’s evenly distributed.
- Sprinkle the semisweet chocolate chips on top of the filling, allowing those little pockets of chocolate to melt into the mixture as it bakes.
- Place the pan in the oven and bake for 25 to 30 minutes. Check for doneness by inserting a toothpick into the center—if it comes out clean, your fudge bars are ready!
- As soon as you remove the pan from the oven, top it off immediately with the mini marshmallows. They’ll melt slightly from the heat, creating a gooey topping.
- Return the pan to the oven and bake for an additional 2 minutes, just to soften the marshmallows.
- In a large saucepan over low heat, combine the remaining butter, milk, unsweetened chocolate, and cream cheese. Stir until melted and blended, then remove from heat.
- Stir in the powdered sugar and vanilla extract until smooth. This mixture will form a lovely frosting.
- Pour the frosting over the marshmallows, and take a knife to lightly swirl it in for a marbled effect. This adds an extra layer of deliciousness.
- Finally, refrigerate your Rocky Road Fudge Bars until they are firm. Once set, cut them into bars and enjoy!
Notes
- Tip 1: Allow the fudge bars to cool completely before cutting. This will help achieve clean edges.
- Tip 2: Use high-quality chocolate for the best flavor. The better the chocolate, the richer your fudge will be.
- Tip 3: Store leftover bars in an airtight container in the fridge to keep them fresh.
- Tip 4: These bars can be enjoyed chilled or at room temperature, depending on your preference.