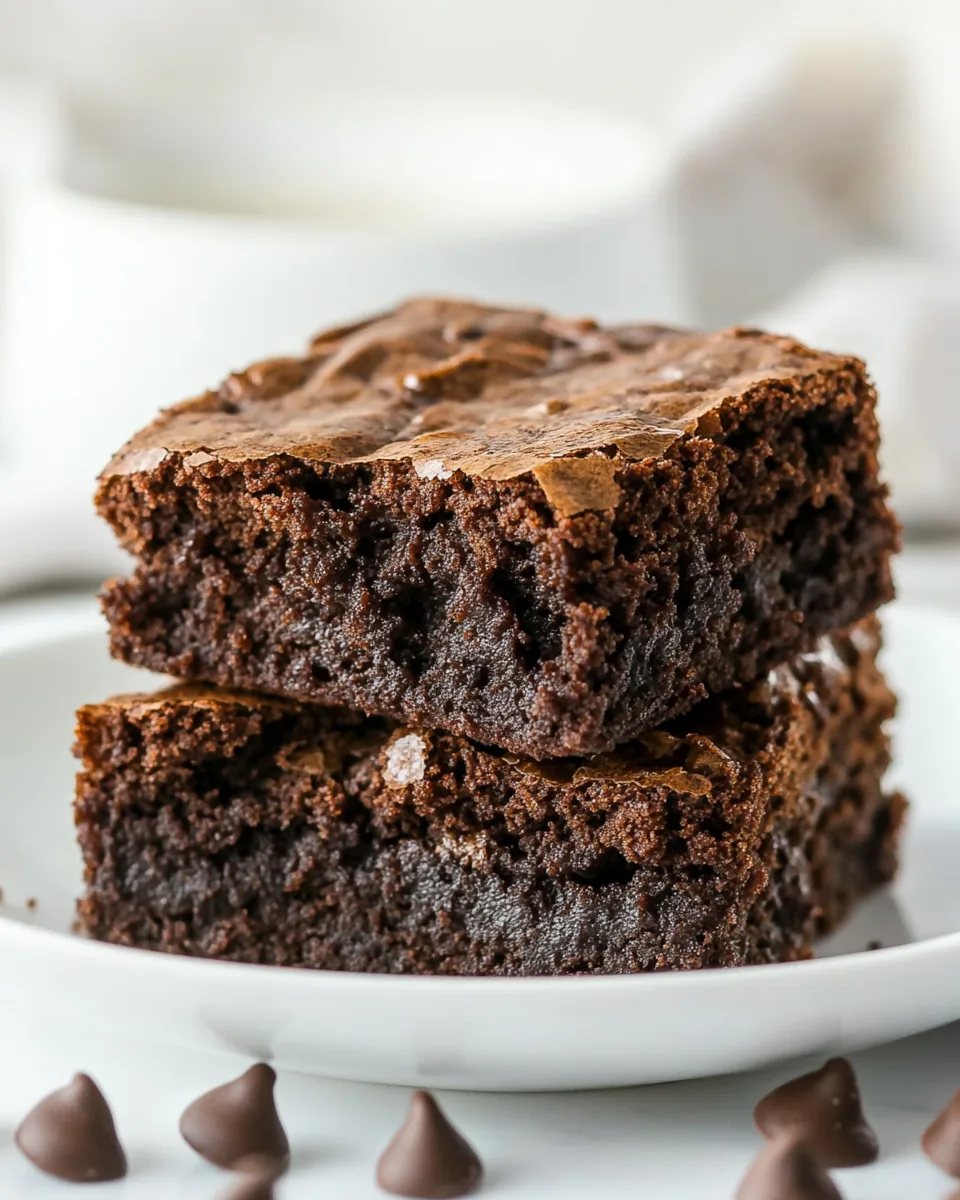
Protein Brownies
When I first stumbled upon the idea of Protein Brownies, I was skeptical. Could a dessert be both indulgent and healthy? It seemed impossible! But as I dived deeper into the recipe, I realized these brownies could satisfy my sweet tooth without the guilt. One rainy afternoon, with the smell of fresh chocolate filling the air, I decided to give them a try. As I mixed the ingredients, I felt a sense of excitement. Could these brownies deliver the rich chocolate flavor I crave while also packing a protein punch? The answer was a resounding yes! With every bite, I enjoyed the fudgy texture and knew I had found a new favorite.
Recipe Snapshot
40 mins
10 mins
30 mins
Medium
140 kcal
7 g
Keto, Paleo, Gluten-Free
9 g
Frying Pan, Oven, Mixing Bowl, Baking Sheet
Why This Protein Brownies Shines
Nutritious Ingredients
One of the best aspects of Protein Brownies is the ingredients. They’re intentionally chosen to pack a nutritious punch without sacrificing flavor. The use of almond flour adds a nutty richness while keeping the brownies gluten-free. Chocolate protein powder is a wonderful way to sneak in protein, perfect for post-workout recovery or a midday snack. Plus, the addition of erythritol makes these brownies lower in sugar, allowing you to indulge without guilt.
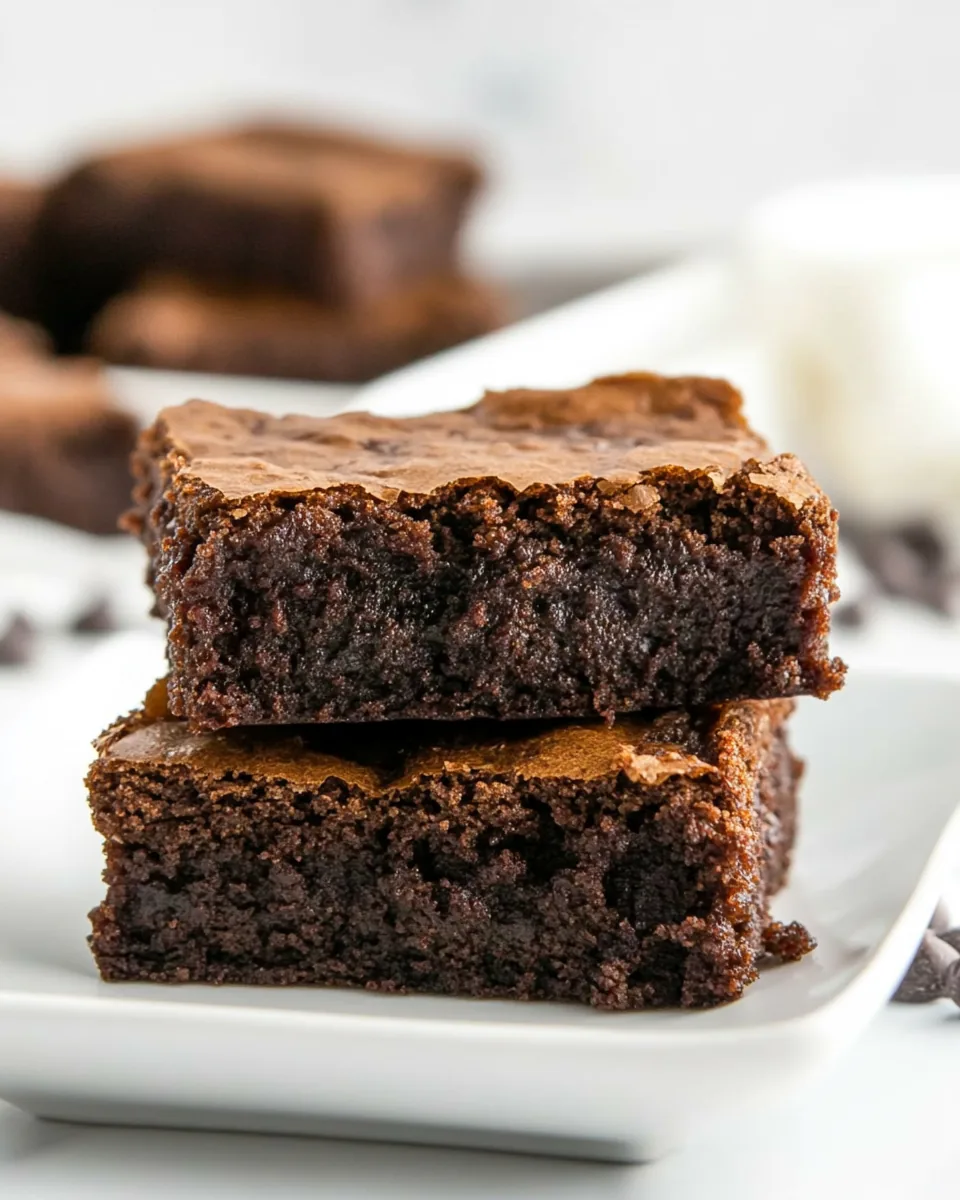
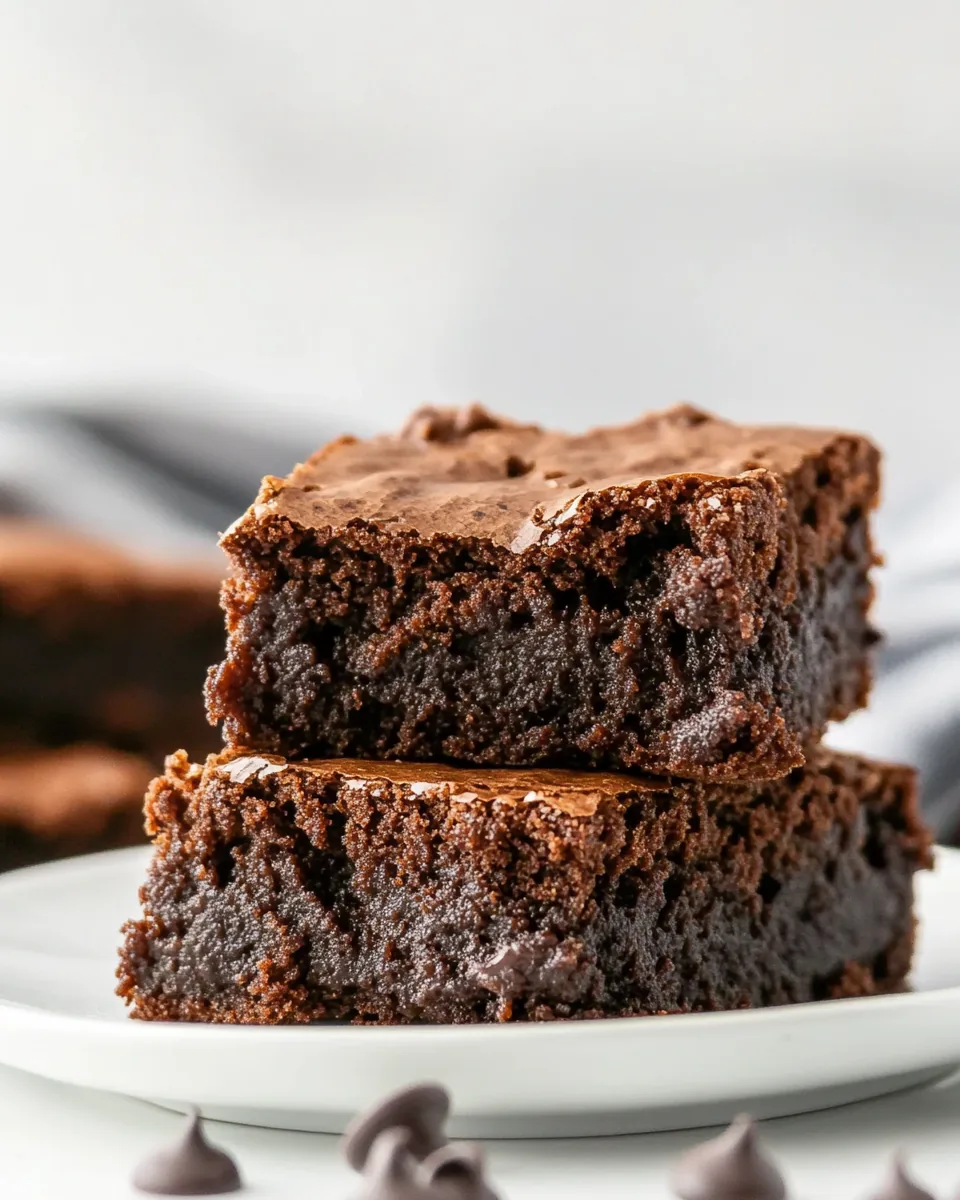
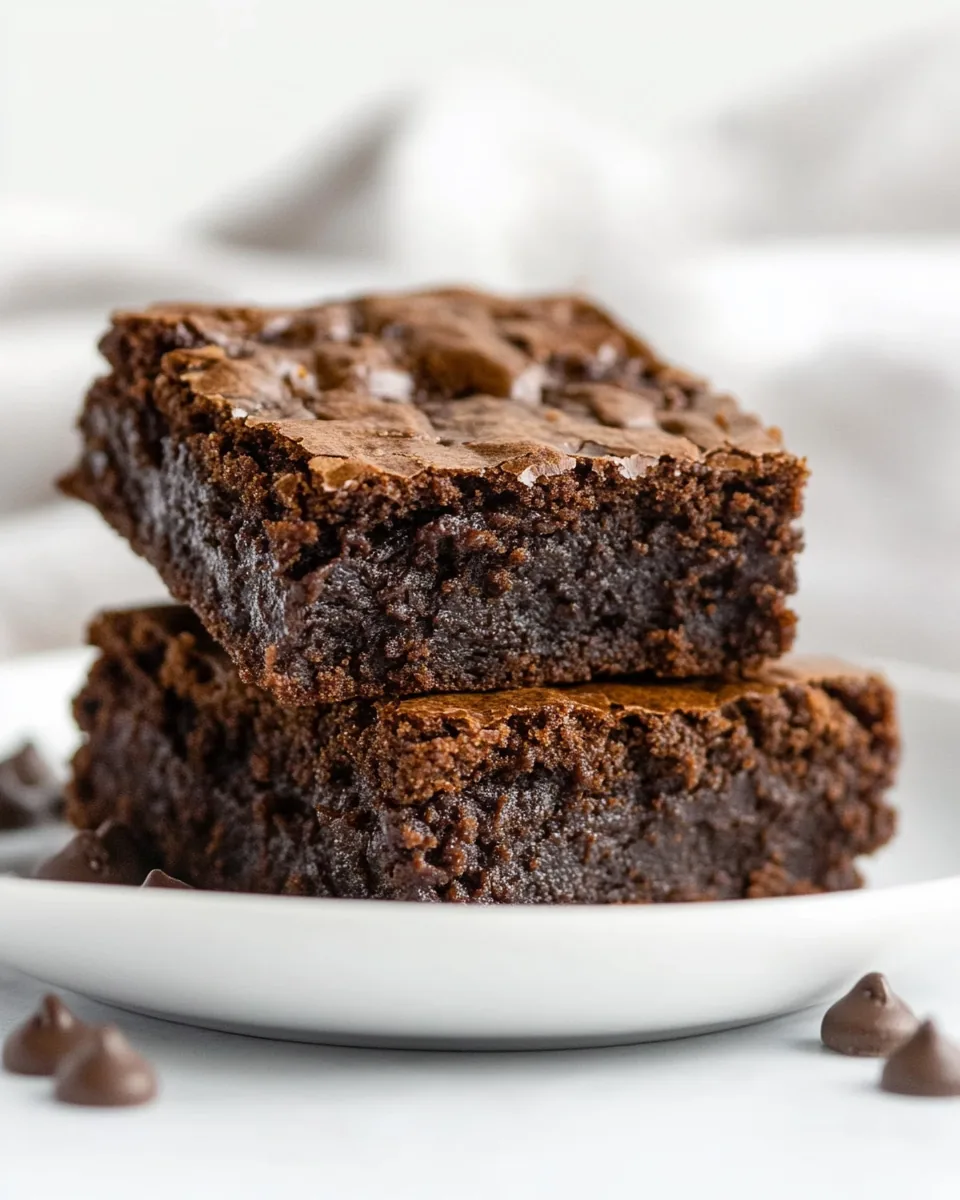
Perfectly Fudgy Texture
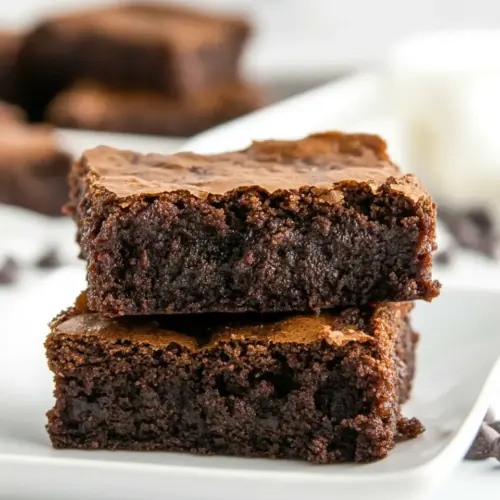
Let’s talk about texture. A good brownie must be fudgy, and these Protein Brownies deliver! The combination of melted butter (or coconut oil) and eggs creates a moist base that holds everything together beautifully. You won’t find a dry crumb here; instead, you’ll bite into a soft, rich brownie that feels decadent.
Customizable Recipe
Another reason to love Protein Brownies is their versatility. Not a fan of a specific ingredient? You can easily swap it out! Use your favorite protein powder, or incorporate different add-ins like nuts or dried fruits. This flexibility allows you to make them your own, whether you’re preparing for a party or just craving something sweet at home.
Guilt-Free Indulgence
We all crave something sweet, but traditional brownies can be loaded with sugars and unhealthy fats. These Protein Brownies offer a guilt-free alternative that satisfies those cravings. You can enjoy them knowing they’re packed with protein and healthy fats while being low in sugar. It’s a win-win!
Great for Meal Prep
Another aspect I appreciate about these brownies is their suitability for meal prep. Bake a batch at the beginning of the week, and you’ve got a nutritious snack ready to go. They’re perfect for a quick breakfast or an energizing midday treat that won’t derail your healthy eating plans.
Ingredients for Protein Brownies
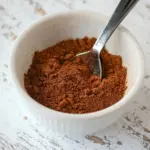
When creating Protein Brownies, the ingredients play a crucial role in both flavor and texture. Each component works harmoniously to create a delicious treat that’s also nutritious. The star of the show is definitely the almond flour, which gives the brownies a delightful nutty flavor while keeping them gluten-free. Along with chocolate protein powder, these brownies are a great way to include extra protein in your diet.
- ¾ cup almond flour: A gluten-free alternative to regular flour that provides a nutty flavor and adds moisture.
- ¾ cup chocolate protein powder: Essential for packing protein into your brownies. You can also use a mix of protein and collagen powder for added benefits.
- ¾ cup erythritol sweetener: A low-calorie sweetener that helps keep these brownies sugar-free, without compromising on sweetness.
- 1/3 cup unsweetened cocoa powder: Adds a rich chocolate flavor and enhances the fudgy texture.
- 1 teaspoon baking powder: Ensures the brownies rise slightly, adding to their soft texture.
- ¼ teaspoon salt: Enhances flavor and balances the sweetness of the brownies.
- 10 tablespoons melted butter or melted coconut oil: Provides moisture and richness to the brownies.
- 3 large eggs: Binds the ingredients together, creating a fudgy consistency.
- 1 tablespoon vanilla extract: Adds depth of flavor and enhances the sweetness.
- 1 cup keto chocolate chips or regular: For that extra chocolatey goodness!
Putting Together Protein Brownies
Making Protein Brownies is a fun and straightforward process. You’ll love how quickly they come together, and you’ll be rewarded with a delicious treat that’s perfect for any occasion. Let’s get started!
- Preheat your oven to 350°F. This step is crucial for achieving that perfect bake. While the oven heats up, grab an 8 x 8-inch baking dish. Grease the bottom and sides with a little butter or oil to prevent sticking.
- In a large mixing bowl, combine almond flour, chocolate protein powder, erythritol sweetener, unsweetened cocoa powder, baking powder, and salt. Use a whisk to mix them well until everything is evenly distributed. This ensures every bite has a consistent flavor.
- Next, add in the melted butter (or coconut oil), eggs, and vanilla extract to the bowl. Mix with a spatula or electric mixer until the batter is smooth and creamy.
- Once your batter is well combined, fold in ¾ cup of the keto chocolate chips. This will give your brownies delightful pockets of melted chocolate. The batter will be thick, which is what you want!
- Transfer the brownie batter to the greased baking dish, spreading it evenly. Use a spatula to smooth the top for a nice finish.
- Sprinkle the remaining chocolate chips over the top of the batter. This not only adds a beautiful look but gives more chocolatey goodness in every bite.
- Now, it’s time to bake! Place the baking dish in the preheated oven and bake for 25 to 30 minutes. You’ll know they are ready when the center appears puffy and a toothpick inserted comes out with a few moist crumbs.
- After baking, remove the brownies from the oven and let them cool in the dish for at least 15 minutes. This cooling time helps them set, making it easier to cut into squares.
- Once cooled, cut them into pieces and serve. You can enjoy them warm or let them cool completely for a firmer brownie.
Things Worth Knowing
- Don’t overmix: Mixing the batter too much can lead to tough brownies. Just mix until combined.
- Check doneness: Ovens can vary, so start checking for doneness a few minutes before the timer goes off.
- Cool before cutting: Allow the brownies to cool in the pan to set properly and make cutting easier.
- Store properly: Keep brownies in an airtight container to maintain freshness and prevent drying out.
How to Switch It Up
Want to make your Protein Brownies unique? You’re in luck! There are countless ways to tweak this recipe to match your taste or dietary preferences.
- Experiment with sweeteners: Try different low-calorie sweeteners like stevia or monk fruit for varied flavors.
- Add spices: Incorporate cinnamon or a pinch of sea salt on top for an extra flavor boost.
- Nutty variations: Add chopped walnuts or almonds for crunch and additional nutrients.
- Try different protein powders: Use flavored protein powder like vanilla or peanut butter for a new twist.
- Frost for indulgence: Top them with a layer of Greek yogurt frosting or a drizzle of nut butter.
What Complements This Protein Brownies
Pairing Protein Brownies with the right accompaniments can elevate your dessert experience. Here are some delightful pairings to consider:
- Fresh fruits: Serve with sliced strawberries or raspberries for a refreshing contrast to the rich chocolate.
- Coffee or tea: Enjoy with a cup of coffee or herbal tea for a balanced afternoon snack.
- Ice cream: A scoop of vanilla or chocolate ice cream on the side makes for an indulgent treat.
- Nut butter drizzle: Drizzle with almond or peanut butter for added flavor and healthy fats.
- Yogurt topping: A dollop of vanilla yogurt adds creaminess and a tangy flavor balance.
FAQ
Conclusion
These Protein Brownies are a delicious and guilt-free treat that satisfy your sweet cravings while providing a boost of protein. I encourage you to try this recipe and discover how delightful healthy desserts can be. You won’t regret whipping up a batch that is not only nutritious but also incredibly satisfying!
Protein Brownies
Equipment
- Frying Pan
- Oven
- Mixing Bowl
- Baking Sheet
Ingredients
- ¾ cup almond flour
- ¾ cup chocolate protein powder or ½ cup protein + ¼ cup collagen powder
- ¾ cup erythritol sweetener or granulated sugar
- 1/3 cup unsweetened cocoa powder
- 1 teaspoon baking powder
- ¼ teaspoon salt
- 10 tablespoons melted butter or melted coconut oil
- 3 large eggs
- 1 tablespoon vanilla extract
- 1 cup keto chocolate chips or regular
Instructions
- Preheat your oven to 350°F. This step is crucial for achieving that perfect bake. While the oven heats up, grab an 8 x 8-inch baking dish. Grease the bottom and sides with a little butter or oil to prevent sticking.
- In a large mixing bowl, combine almond flour, chocolate protein powder, erythritol sweetener, unsweetened cocoa powder, baking powder, and salt. Use a whisk to mix them well until everything is evenly distributed. This ensures every bite has a consistent flavor.
- Next, add in the melted butter (or coconut oil), eggs, and vanilla extract to the bowl. Mix with a spatula or electric mixer until the batter is smooth and creamy.
- Once your batter is well combined, fold in ¾ cup of the keto chocolate chips. This will give your brownies delightful pockets of melted chocolate. The batter will be thick, which is what you want!
- Transfer the brownie batter to the greased baking dish, spreading it evenly. Use a spatula to smooth the top for a nice finish.
- Sprinkle the remaining chocolate chips over the top of the batter. This not only adds a beautiful look but gives more chocolatey goodness in every bite.
- Now, it’s time to bake! Place the baking dish in the preheated oven and bake for 25 to 30 minutes. You’ll know they are ready when the center appears puffy and a toothpick inserted comes out with a few moist crumbs.
- After baking, remove the brownies from the oven and let them cool in the dish for at least 15 minutes. This cooling time helps them set, making it easier to cut into squares.
- Once cooled, cut them into pieces and serve. You can enjoy them warm or let them cool completely for a firmer brownie.
Notes
- Tip 1: These brownies make 12 large or 16 smaller pieces. They are best served within the first 48 hours.
- Tip 2: Wrap very well and store in an airtight container if planning to save for several days.
- Tip 3: Nutritional facts can greatly vary based on ingredients used.