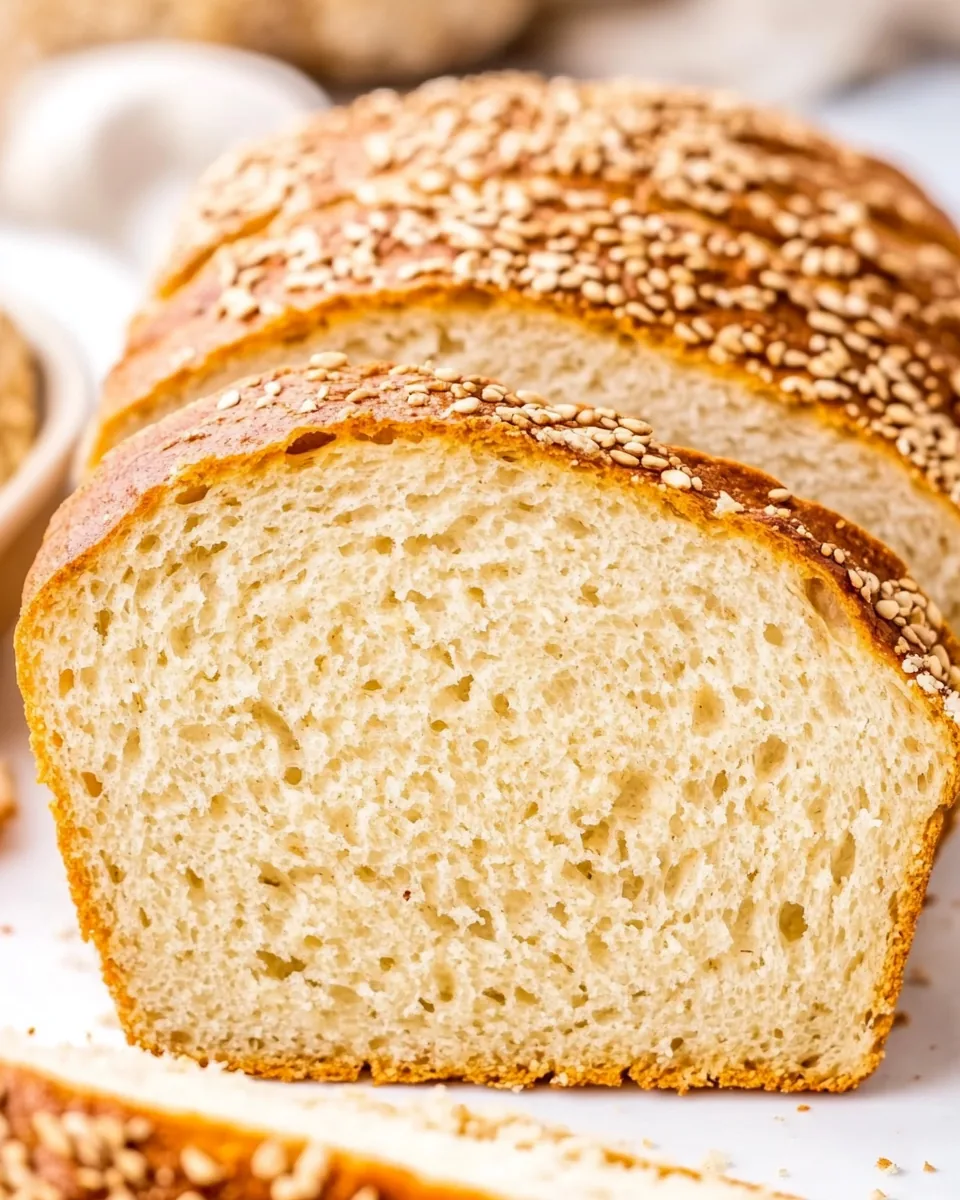
Protein Bread Recipe
Every time I crave a comforting slice of bread, I remember the first time I tried making Protein Bread Recipe. It was a rainy afternoon, and I felt a sudden urge to create something wholesome and nourishing. The idea of a bread that packs a protein punch intrigued me, and I couldn’t resist the challenge. This bread has become a staple in my kitchen, not only because it’s delicious but also because it aligns perfectly with my health goals. Each bite is a reminder that you can enjoy your favorite foods without compromising on nutrition.
Recipe Snapshot
35 mins
5 mins
30 mins
Medium
120 kcal
15 g
Keto, Paleo, Whole30
4 g
Frying Pan, Whisk, Oven, Chef’s Knife, Mixing Bowl, Baking Sheet
Why You Need This Protein Bread Recipe
Health Boost
This Protein Bread Recipe is an absolute game-changer for anyone looking to increase their protein intake. With ingredients like whey protein powder and egg whites, this loaf is not just filling—it’s a fantastic source of energy and helps keep you satisfied.
Simple Preparation
One of the best things about this recipe is how straightforward it is. You don’t need to be a master baker to whip up this delicious bread. With just a few steps and simple ingredients, you’ll have a loaf ready to enjoy.
Versatile Uses
This bread is incredibly versatile! Use it for sandwiches, toast it with your favorite spreads, or simply enjoy it as is. The flavor pairs well with both sweet and savory toppings, making it a perfect addition to any meal.
Low Carb Alternative
If you’re following a low-carb diet, this Protein Bread Recipe fits the bill perfectly. With no traditional flours, it provides a satisfying bread experience without the carbs. It’s a smart option for anyone looking to cut down on their carb intake.
Perfect for Meal Prep
This bread can be made in advance and stored, making it an ideal choice for meal prep. Bake a loaf at the beginning of the week, and you’ll have nutritious slices ready to go whenever hunger strikes.
Great for All Occasions
Whether you’re hosting a brunch or just need a quick snack, this protein-packed bread is suitable for all occasions. Its light texture and mild flavor make it a crowd-pleaser!
What Goes Into Protein Bread Recipe
When creating this Protein Bread Recipe, you’re combining ingredients that not only work well together but also contribute to the nutritional profile of the bread. Each component plays a significant role in achieving the perfect texture and flavor. The star players include egg whites for fluffiness and almond flour for a nutty flavor that complements the protein.
- 10 large egg whites: Egg whites are the backbone of this recipe, providing structure and lift. They help create a fluffy texture while being low in calories.
- 1/4 teaspoon salt: A pinch of salt enhances the flavors of the bread and helps to balance the sweetness of any toppings.
- 1 cup whey protein powder (unflavored): This is the powerhouse ingredient that boosts the protein content, making the bread a filling choice.
- 1/2 cup almond flour: Almond flour not only adds a rich, nutty flavor but also keeps the bread moist without the need for traditional flour.
- 1 tablespoon psyllium husk powder: This ingredient is key for binding and giving the bread a desirable texture, making it a great alternative to gluten.
- 2 teaspoons baking powder: Essential for leavening, baking powder helps the bread rise, resulting in a light and airy loaf.
Making This Protein Bread Recipe
Making Protein Bread Recipe is straightforward and fun! You’ll enjoy the process as much as the end result. With just a handful of ingredients and a few steps, you’ll have a delicious loaf to savor.
- Preheat your oven to 160C/325F. Prepare your loaf pan by lining it with parchment paper. This helps prevent sticking and makes clean-up a breeze.
- In a large dry bowl, take your egg whites and a pinch of salt. Using a hand or stand mixer, whisk the egg whites until they form stiff peaks. This will take about 5 to 7 minutes. You’ll know they’re ready when you can hold the bowl upside down and the peaks stay firm.
- Next, add in the whey protein powder, almond flour, psyllium husk powder, and baking powder. Whisk on low speed until everything is well combined. Be careful not to overmix, as you want to keep that airy texture.
- Using a spatula, transfer the mixture into the lined loaf tin. Smooth the top with the spatula to ensure an even shape. This is crucial for even baking, so take your time here.
- Place the loaf in the oven and bake for 30 minutes. Keep an eye on it; you’ll want it to be golden brown on top.
- Once baked, turn off the oven and crack the door slightly. Let the bread cool in the oven for another 30 minutes. This slow cooling helps maintain its moisture and texture.
- After the cooling period, carefully remove the bread from the oven and out of the loaf pan. Slice it into pieces as desired, and enjoy!
Things Worth Knowing
Things Worth Knowing
- Room temperature eggs: They will whisk up faster than cold egg whites.
- Ideal loaf pan: I find an 8 x 4-inch loaf pan works best to achieve a good rise and texture.
- Storage: Store leftovers in an airtight container in the refrigerator for up to one week.
- Cooling the bread: Allowing the bread to cool slowly helps enhance its texture and flavor.
- Slice while cool: For best results, let the bread cool completely before slicing to prevent it from crumbling.
How to Switch It Up
If you’re looking to get creative with your Protein Bread Recipe, there are plenty of ways to switch it up and make it your own! Here are some tips to consider:
- Add spices: Consider adding spices like cinnamon or nutmeg to your batter for a warm flavor twist.
- Mix in seeds: You can incorporate seeds like chia or flaxseed for added nutrition and crunch.
- Experiment with sweeteners: If you prefer a touch of sweetness, try adding a natural sweetener like honey or maple syrup.
- Top it off: Serve the bread with toppings like avocado, nut butter, or a sprinkle of cinnamon sugar for extra flavor.
- Make it savory: Add herbs like rosemary or thyme to the batter for a deliciously savory variation.
How to Serve Protein Bread Recipe
Serving your Protein Bread Recipe can be just as fun as making it. Here’s how to highlight this nutritious bread:
- As a sandwich: Use it as the base for your favorite sandwiches. Its protein content makes it filling and satisfying.
- With breakfast: Toast slices and top them with scrambled eggs or cottage cheese for a hearty breakfast.
- Snacks: Enjoy it as a snack with nut butter or hummus for a quick energy boost throughout the day.
- Brunch gatherings: Serve it as part of a brunch spread, alongside fresh fruits and yogurt.
- Seasonal celebrations: This bread is perfect for family gatherings or holiday meals, adding a healthy option to your table.
- Storage tips: Keep it in an airtight container at room temperature for up to a week or slice and freeze for longer storage.
FAQ
Conclusion
This Protein Bread Recipe is special because it offers the perfect blend of taste and nutrition, making it an ideal choice for anyone seeking a healthier bread option. I encourage you to give this recipe a try; you won’t be disappointed! Enjoy it fresh out of the oven or as part of your meal prep, and savor each bite knowing you’ve made a smart choice for your health.
Protein Bread Recipe
Equipment
- Frying Pan
- Whisk
- Oven
- Chef's Knife
- Mixing Bowl
- Baking Sheet
Ingredients
- 10 large egg whites
- 1/4 teaspoon salt
- 1 cup whey protein powder (unflavored)
- 1/2 cup almond flour
- 1 tablespoon psyllium husk powder
- 2 teaspoons baking powder
Instructions
- Preheat your oven to 160C/325F. Prepare your loaf pan by lining it with parchment paper. This helps prevent sticking and makes clean-up a breeze.
- In a large dry bowl, take your egg whites and a pinch of salt. Using a hand or stand mixer, whisk the egg whites until they form stiff peaks. This will take about 5 to 7 minutes. You'll know they're ready when you can hold the bowl upside down and the peaks stay firm.
- Next, add in the whey protein powder, almond flour, psyllium husk powder, and baking powder. Whisk on low speed until everything is well combined. Be careful not to overmix, as you want to keep that airy texture.
- Using a spatula, transfer the mixture into the lined loaf tin. Smooth the top with the spatula to ensure an even shape. This is crucial for even baking, so take your time here.
- Place the loaf in the oven and bake for 30 minutes. Keep an eye on it; you'll want it to be golden brown on top.
- Once baked, turn off the oven and crack the door slightly. Let the bread cool in the oven for another 30 minutes. This slow cooling helps maintain its moisture and texture.
- After the cooling period, carefully remove the bread from the oven and out of the loaf pan. Slice it into pieces as desired, and enjoy!
Notes
- Room temperature eggs: They will whisk up faster than cold egg whites.
- Ideal loaf pan: I find an 8 x 4-inch loaf pan works best to achieve a good rise and texture.
- Storage: Store leftovers in an airtight container in the refrigerator for up to one week.
- Cooling the bread: Allowing the bread to cool slowly helps enhance its texture and flavor.
- Slice while cool: For best results, let the bread cool completely before slicing to prevent it from crumbling.