Peeps Rice Krispie Treats
Every time I think of spring, I’m reminded of the excitement that comes with Easter, especially when it involves making Peeps Rice Krispie Treats. As a kid, I would eagerly anticipate those marshmallow bunnies and chicks appearing on the shelves, ready to be devoured. One year, I decided to combine my love for the classic Rice Krispie treat with these colorful confections. The result was pure magic! The vibrant layers of colored marshmallow and crispy cereal create a playful treat that never fails to bring a smile. Whether I’m making them for a holiday gathering or just to satisfy a sweet tooth, these treats are always a hit. They’re not just a dessert; they’re a joyful experience that captures the essence of spring. Let’s dive into how you can recreate this fun and festive treat at home.
Recipe Snapshot
20 mins
20 mins
0 mins
Medium
180 kcal
1 g
Gluten-Free, Low FODMAP
7 g
Wooden Spoon, Frying Pan, Mixing Bowl
Why This Peeps Rice Krispie Treats Works
A Touch of Nostalgia
There’s something truly nostalgic about Peeps Rice Krispie Treats. They remind me of simpler times spent in the kitchen with my family. We would gather around, giggling as we mixed the ingredients and pressed the layers into the pan. The laughter and the sweet aroma of melting marshmallows filled the air, creating a warm and inviting atmosphere that I cherish to this day.
Colorful and Fun
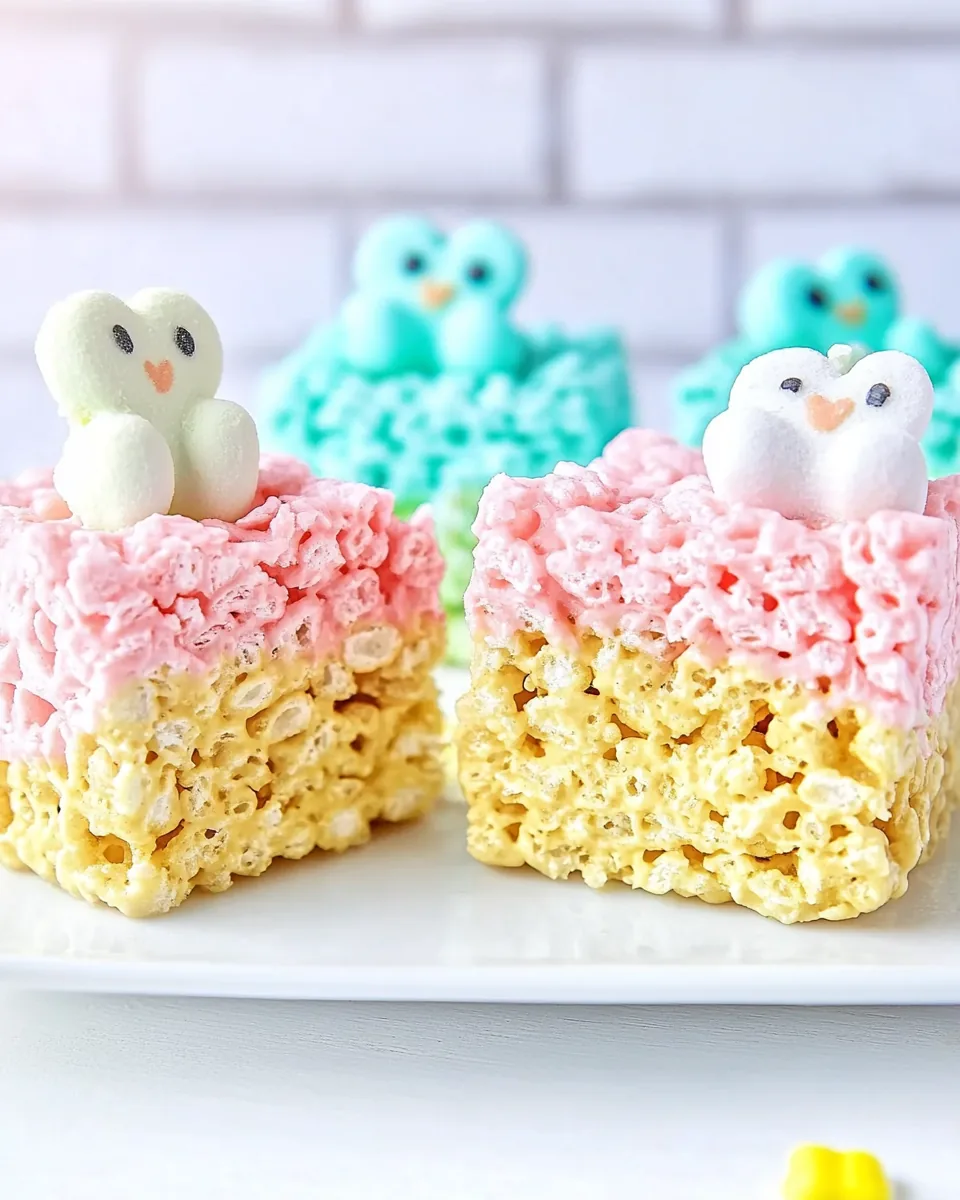
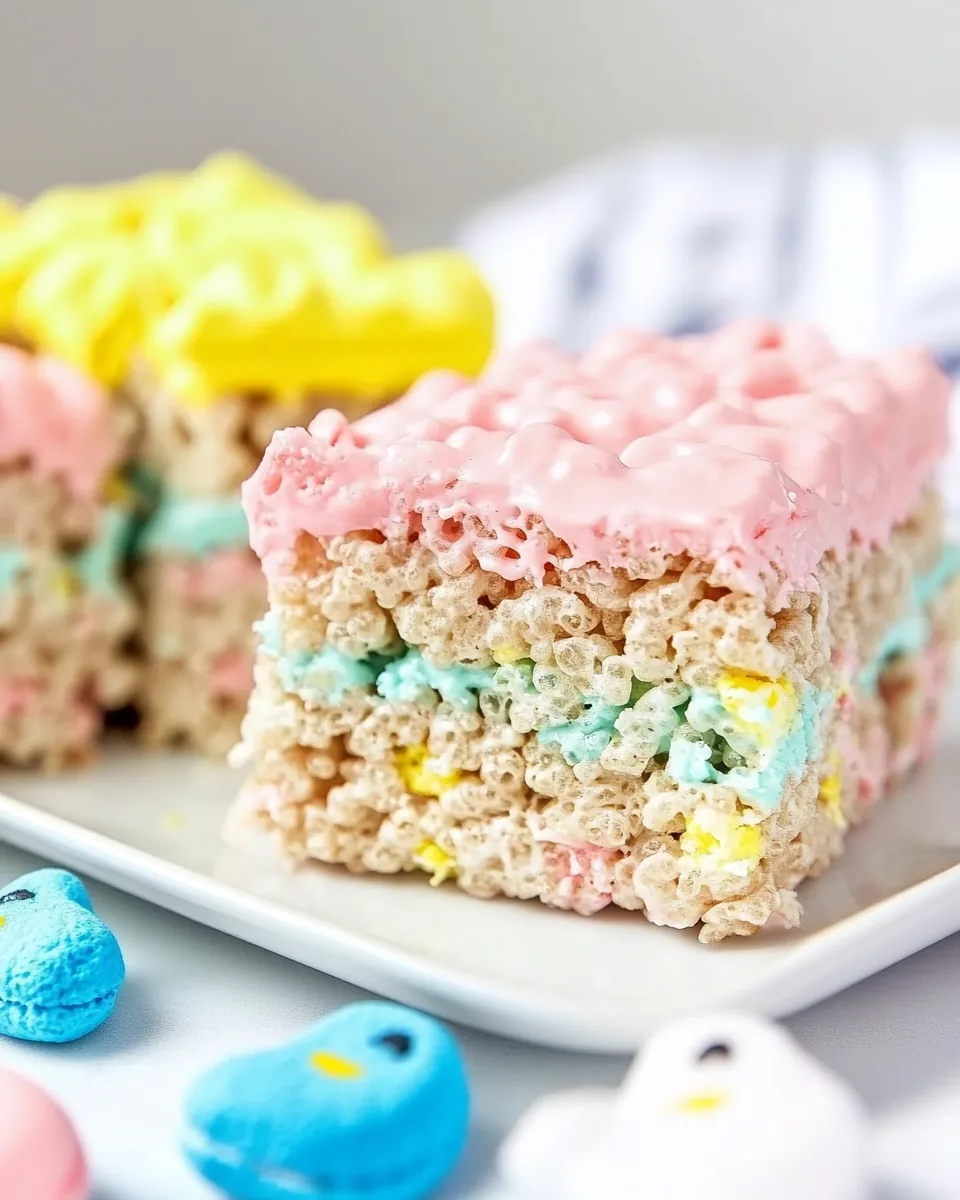
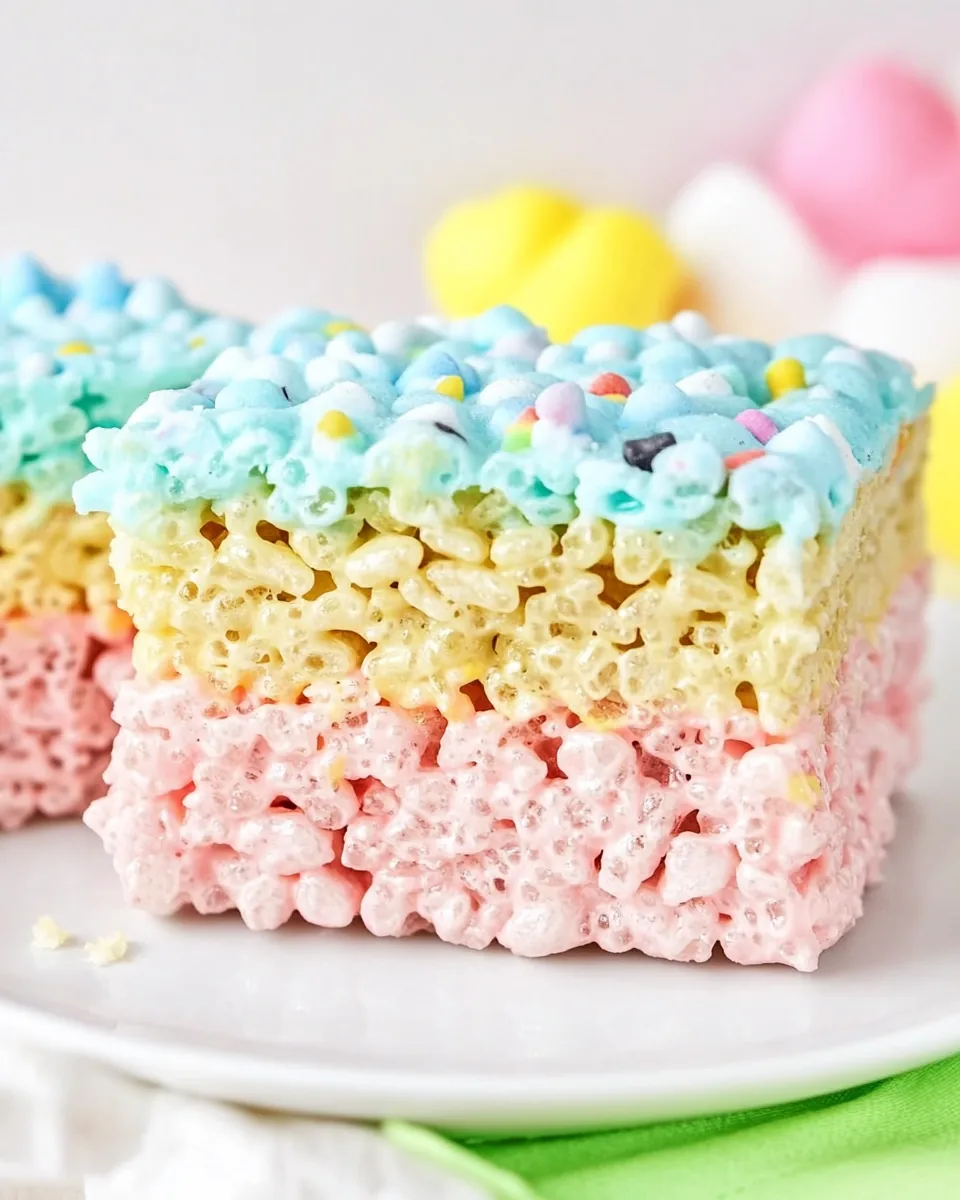
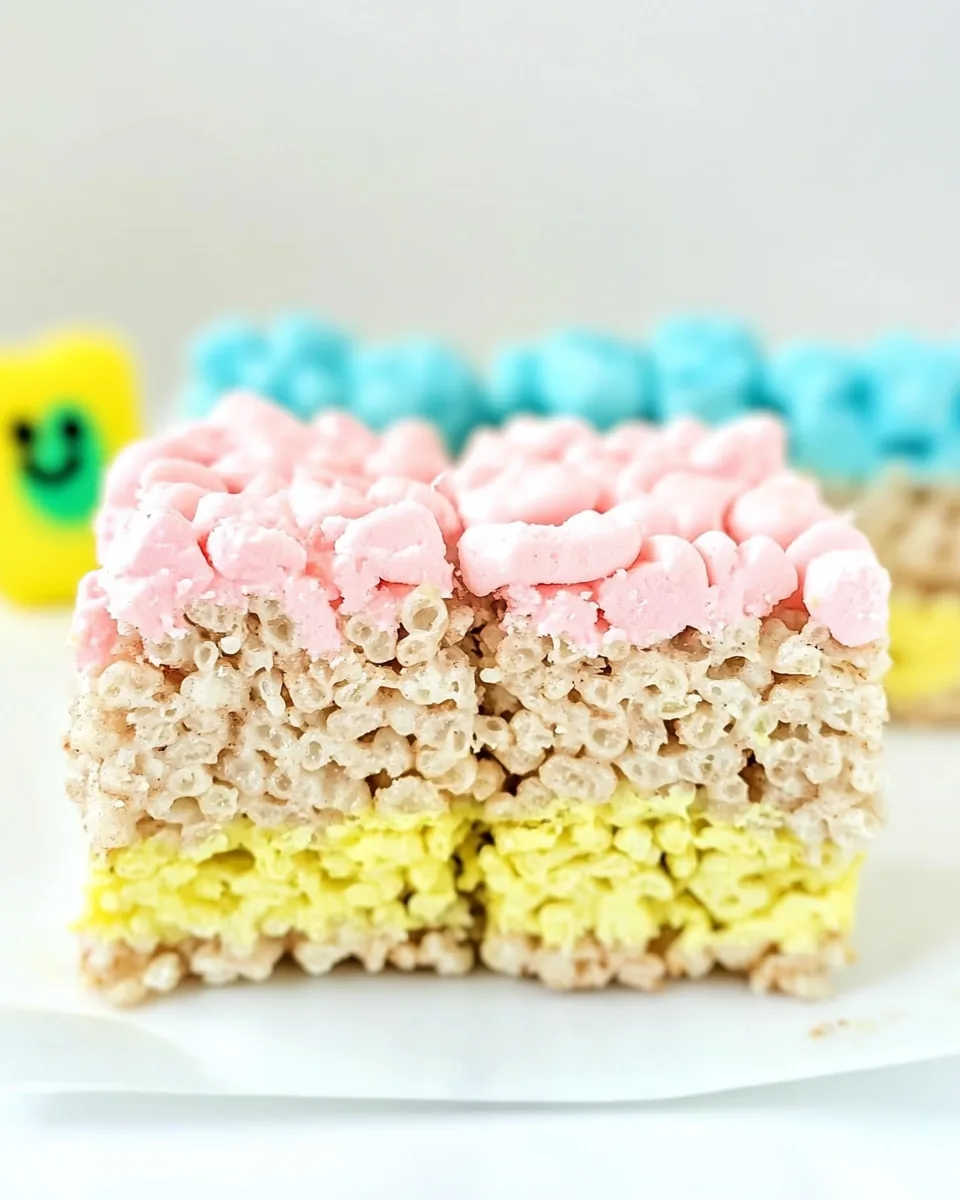
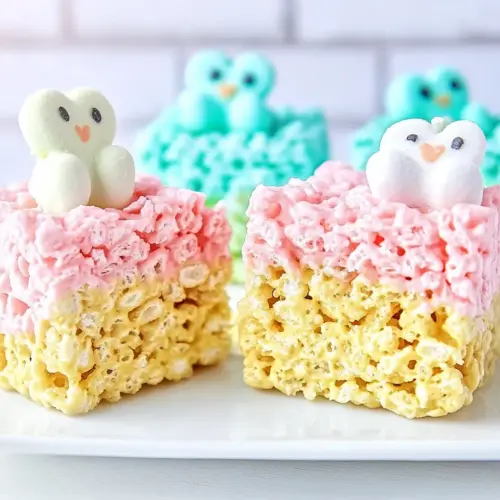
The vibrant colors of the PEEPS add an element of whimsy to the treats. Each layer can be a different color, making it not just a treat but a visual delight! Kids and adults alike love the bright hues, and they are perfect for Easter celebrations or any springtime gathering.
Simple Ingredients
One of the best things about these treats is the simplicity of the ingredients. With just a few staples like butter, mini marshmallows, and Rice Krispies, you can whip up a batch in no time. It’s a fantastic opportunity to get children involved in the kitchen and teach them about baking.
Versatile and Adaptable
You can easily adapt the recipe to suit your preferences. Want to add some extra crunch? Throw in some chopped nuts or candy pieces! Looking for a different flavor? Experiment with various food colorings or flavored marshmallows. This flexibility makes it a recipe worth trying over and over.
Perfect for Any Occasion
While these treats are perfect for Easter, I’ve discovered they’re suitable for any occasion. Birthdays, school parties, or just a sweet treat on a sunny day—these Peeps Rice Krispie Treats fit right in. Their festive appearance and delightful taste make any gathering more cheerful.
Sharing is Caring
There’s something special about sharing these treats with friends and family. Wrapped up in colorful cellophane, they make fantastic gifts for neighbors or a sweet addition to a potluck. Watching someone take a bite and see their eyes light up is truly rewarding.
What You Need for Peeps Rice Krispie Treats
To create the most delightful Peeps Rice Krispie Treats, we need to gather some essential ingredients. Each element plays a crucial role in crafting this sweet masterpiece. The combination of PEEPS, mini marshmallows, and Rice Krispies not only gives this treat its signature flavor but also contributes to its colorful appearance and crispy texture. Let’s take a look at the key players in this recipe!
- 81.38-ounce PEEPS Rainbow pops (4 colors of peeps in each pop – pink, blue, green & yellow) – These marshmallow treats provide both flavor and color, making them essential for the festive look of the dessert.
- 2 cups mini marshmallows (divided into four ½-cup portions) – These will melt down to help bind the cereal together, creating that gooey texture we all love.
- ¾ cup salted butter (room temperature and divided into four 3-tablespoon portions) – The butter adds richness and helps the marshmallows melt smoothly.
- 2 teaspoons vanilla extract (divided into four ½-cup portions) – This adds a delightful hint of flavor to the mixture.
- 8 cups Rice Krispies cereal (divided into four 2-cup portions) – The base of the treat, providing that iconic crunch.
Step by Step Instructions for Peeps Rice Krispie Treats
Making Peeps Rice Krispie Treats is not just about following a recipe; it’s about enjoying the process. Gather your ingredients and set up your workspace, as things will move quickly once you start melting those marshmallows. Let’s get to it!
- Spray a 9×13-inch baking pan with baking spray and set it aside. It’s essential to prepare your pan ahead of time to ensure the treats will come out easily once set.
- Prepare all your ingredients before you start making these treats. You’ll need four medium-sized microwave-safe mixing bowls for this recipe. If you have only one or two mixing bowls, wash them between mixing each colored batch. This prep is crucial to keep everything organized.
- Remove the PEEPS from their lollipop sticks and sort them by color. This will make it easier to work through each layer without confusion.
- In a microwave-safe bowl, add ½ cup of mini marshmallows, 3 tablespoons of butter, and all 8 green PEEPS. Microwave on high for 45 seconds to 1 minute. Keep an eye on them; you want them to melt, not burn.
- Once melted, stir in ½ teaspoon of vanilla extract and mix until smooth. The mixture should be velvety and cohesive.
- Next, fold in 2 cups of Rice Krispie cereal until all the cereal is coated in the colored marshmallow mixture. Be gentle to avoid crushing the cereal; just mix until well combined.
- Layer the green-colored marshmallow-coated Rice Krispie mixture into the bottom of your prepared baking dish. Using your hands or a spatula, gently press the mixture into an even layer. It should be tightly packed for the best results.
- Repeat steps 4 to 7 for the yellow PEEPS followed by blue PEEPS and pink PEEPS. Each layer should be pressed down firmly to ensure they stick together nicely.
- Once all four layers are assembled, press down on the final layer to pack it tightly. This step is vital for ensuring your treats hold their shape when you cut them.
- Place the baking dish into the refrigerator for 30 minutes to allow the Peeps Rice Krispies to cool and set completely. This cooling time helps the layers firm up and makes slicing easier.
Things Worth Knowing
- Make sure you are using fresh PEEPS and mini marshmallows. They melt much easier and smoother, ensuring a perfect texture.
- If you want to deepen the colors of your layers, consider adding a few drops of liquid or gel food coloring. Start with just a few drops and adjust as necessary for your desired intensity.
- Wet your hands with warm water or spray them lightly with cooking spray to prevent the marshmallow mixture from sticking while pressing it down in the dish.
- While you can allow your Peeps Rice Krispies to set on the counter, chilling them in the refrigerator for about an hour makes them easier to cut.
Ways to Adapt This Recipe
If you’re looking to customize your Peeps Rice Krispie Treats, here are some fun ideas to make them your own:
- Storage: Store leftovers in an airtight container at room temperature. They’ll stay fresh for up to 3 days, but trust me, they’ll likely be gone before then!
- Freezing: Yes, you can freeze these treats! Just wrap them in plastic wrap and then place in a freezer-safe bag. They’ll last for about a month in the freezer.
- Variations: Get creative with flavors! Try using flavored mini marshmallows or adding different types of cereal for a unique twist.
- Decorations: Feel free to add festive sprinkles or drizzle melted chocolate over the top for an extra touch of sweetness.
- Layering: You can create more than four layers if you wish. Just adjust the amounts of ingredients accordingly for a taller treat!
Serving This Peeps Rice Krispie Treats
Creating a delicious dessert is just the beginning; knowing how to serve it is equally important. Here are some fun ideas for serving your Peeps Rice Krispie Treats:
- Presentation: Cut into squares or fun shapes using cookie cutters for a playful presentation that’s perfect for parties.
- Occasions: These treats are perfect for Easter gatherings, spring picnics, or birthday parties. Their colorful nature brings joy wherever they go!
- Pairing: Serve with fresh fruit, like strawberries or blueberries, to balance the sweetness. A scoop of vanilla ice cream on the side also complements the treats beautifully.
- Storage: Keep leftover treats in an airtight container. If you plan to serve later, consider storing them in a cool place to maintain their freshness.
- Seasonal Themes: Don’t hesitate to adapt the colors and flavors based on the season or holiday. Use pastel shades for spring or warmer tones for fall!
FAQ
Conclusion
Peeps Rice Krispie Treats are not just a delightful dessert; they embody the joy of spring and the nostalgia of childhood. Their colorful layers and crunchy texture make them a fantastic treat for any occasion. I encourage you to give this fun recipe a try and bring a smile to your loved ones with these whimsical goodies!
Peeps Rice Krispie Treats
Equipment
- Wooden Spoon
- Frying Pan
- Mixing Bowl
Ingredients
- 81.38 ounce PEEPS Rainbow pops 4 colors of peeps in each pop – pink, blue, green & yellow
- 2 cups mini marshmallows divided into four ½-cup portions
- ¾ cup salted butter room temperature and divided into four 3-tablespoon portions
- 2 teaspoons vanilla extract divided into four ½-cup portions
- 8 cups Rice Krispies cereal divided into four 2-cup portions
Instructions
- Spray a 9×13-inch baking pan with baking spray and set it aside.
- Prepare all your ingredients before you start making these treats.
- Remove the PEEPS from their lollipop sticks and sort them by color.
- In a medium-sized microwave-safe bowl, add ½ cup of mini marshmallows, 3 tablespoons of butter, and all 8 green PEEPS. Microwave on high for 45 seconds to 1 minute.
- Add ½ teaspoon of vanilla extract and stir to combine until smooth.
- Fold in 2 cups of Rice Krispie cereal until all the cereal is coated.
- Layer the green marshmallow mixture into the prepared baking dish and press down into an even layer.
- Repeat with yellow, blue, and pink PEEPS, pressing down firmly each time.
- Once all layers are packed, place the dish in the refrigerator for 30 minutes.
Notes
- Tip 1: Make sure you are using fresh PEEPS and mini marshmallows for better melting.
- Tip 2: Consider adding food coloring to enhance the colors.
- Tip 3: Wet your hands to prevent sticking.
- Tip 4: Chilling helps hold the shape.