Israeli Couscous Recipe
There’s something magical about the simplicity and comfort of a well-made Israeli Couscous Recipe. It’s a dish that reminds me of family gatherings, where laughter fills the air and every bite tells a story. I remember the first time I had this dish at a friend’s dinner party; the pearls of couscous danced in a beautiful medley of flavors and textures, pulling me in for more. As I watched my friend masterfully prepare it, I couldn’t help but feel inspired to recreate that cozy moment in my own kitchen. The beauty of this Israeli Couscous Recipe lies not just in its taste, but in its versatility—it can be a side dish, a main course, or even a salad base. Each bite offers a delightful chewiness, a canvas for whatever fresh ingredients and herbs I choose to include. Whether served warm or at room temperature, it’s a perfect dish for any occasion.
Recipe Snapshot
20 mins
5 mins
15 mins
Medium
250 kcal
6 g
Keto, Whole30, Vegan
6 g
Frying Pan, Large Pot, Saucepan, Chef’s Knife, Wooden Spoon
What makes this Israeli Couscous Recipe truly special is how easily it fits into my busy life. It requires minimal effort but delivers maximum flavor, making it a go-to for weeknight dinners or potluck contributions. It’s the kind of dish that I can whip up in no time, and it’s always a hit with family and friends. I love how the simple ingredients come together to create something so satisfying, and I know you’ll feel the same way after your first bite.
The Magic of This Israeli Couscous Recipe
A Versatile Base
One of the best things about this Israeli Couscous Recipe is its versatility. You can easily adapt it to suit whatever ingredients you have on hand. Want to throw in some sautéed vegetables? Go for it! Craving a touch of protein? Toss in some grilled chicken or chickpeas. The options are endless, and that’s why I love it.
Quick and Easy
With just a few simple ingredients, this dish comes together in no time. The cooking process is straightforward, making it ideal for those busy weeknights when you need something delicious without spending hours in the kitchen. I appreciate recipes like this that allow me to enjoy a homemade meal without the stress.
Perfect for Meal Prep
This Israeli Couscous Recipe is fantastic for meal prep! I often make a big batch at the beginning of the week, and it keeps beautifully in the fridge. It’s great for lunches or a quick dinner, and it’s just as tasty served cold as it is warm—perfect for summer picnics!
Flavorful and Nutritious
Couscous is not just delicious; it’s also a nutritious option! It’s a great source of carbohydrates and can be paired with a variety of healthy ingredients, like fresh vegetables and herbs. I love how I can create a wholesome meal that feels indulgent but is still good for me.
Community and Connection
Finally, food has a way of bringing people together. This Israeli Couscous Recipe is perfect for sharing. Whether it’s a family gathering, a picnic with friends, or a simple dinner at home, it creates opportunities for connection and conversation over a shared love of good food.
What You Need for Israeli Couscous Recipe
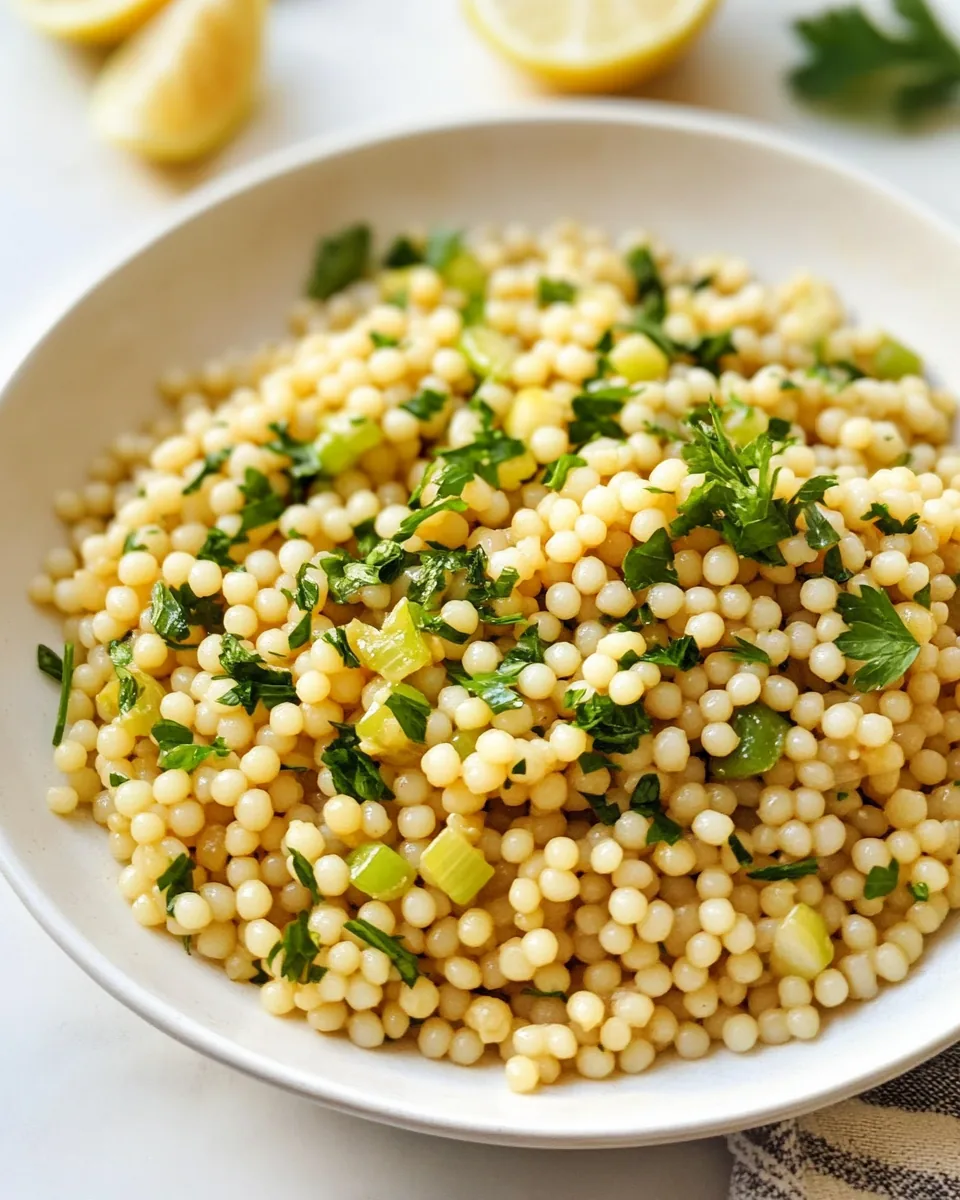
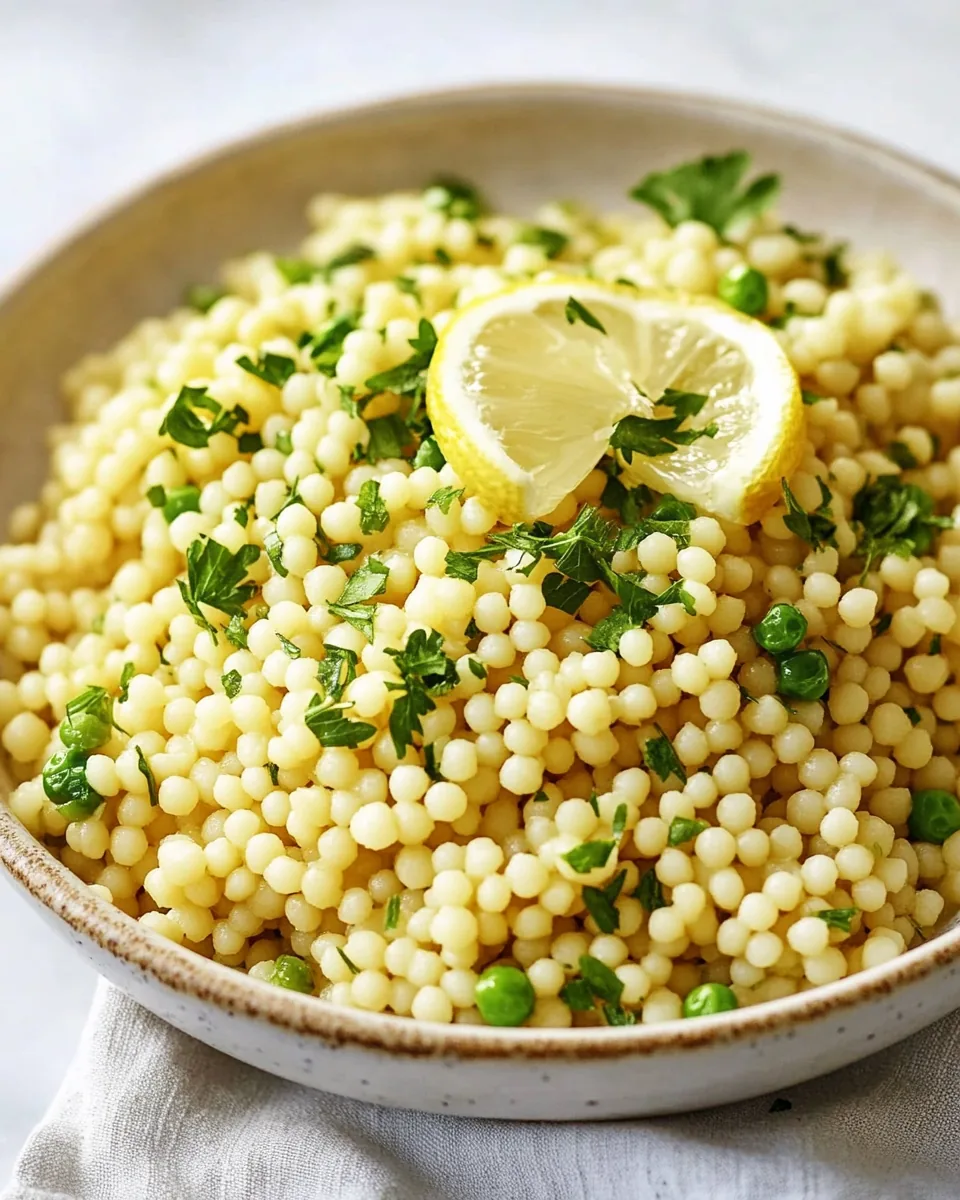
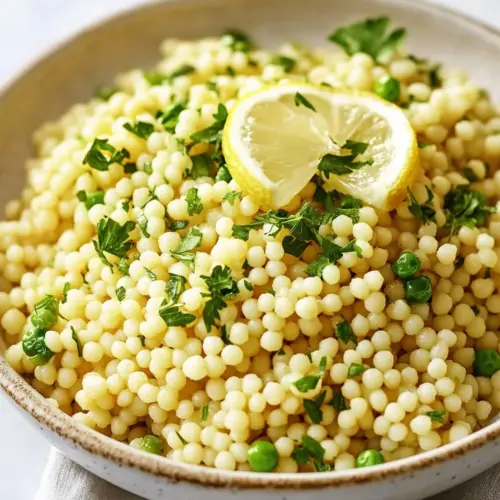
When it comes to the ingredients for this Israeli Couscous Recipe, each one plays a vital role in creating a harmonious dish. The blend of textures and flavors not only makes it enjoyable to eat but also encourages a balanced meal. The heart of this recipe is the pearl couscous, which acts as a wonderful canvas for all the other ingredients. Together, they create an unforgettable experience you’ll want to share with others.
- 1 cup pearl couscous – The star of the dish, giving a delightful chewiness and subtle nutty flavor.
- 2 tablespoons extra virgin olive oil – Adds richness and a smooth texture, enhancing all the flavors.
- 1 3/4 cups chicken broth or vegetable broth – Infuses the couscous with savory depth, making each bite flavorful.
- 1/2 teaspoon kosher salt – Essential for bringing out the natural flavors of the ingredients.
- 1/4 cup fresh parsley, chopped – A burst of freshness that brightens the dish.
- Zest of 1 lemon – Adds a vibrant citrusy note, elevating the overall taste.
- Salt and pepper to taste – The finishing touch to balance the flavors.
Recipe Directions for Israeli Couscous Recipe

Making this Israeli Couscous Recipe is just as enjoyable as eating it! The steps are straightforward and allow you to engage with each ingredient. I love how the simple act of cooking can transform these raw components into a comforting dish that fills the home with enticing aromas.
- Start by heating the olive oil in a medium saucepan over medium-high heat. This is a crucial step as it will infuse the oil with flavor before you add the pearl couscous. Give it a few moments until the oil shimmers, indicating it’s ready for the next step.
- Add the pearl couscous to the pan, stirring frequently as it toasts. You want to achieve a lovely golden brown color, which takes about 3 to 4 minutes. The aroma will be nutty and warm, setting the stage for the flavors to come.
- Once the couscous is toasted, carefully pour in the chicken broth and add the kosher salt. The liquid will bubble up as it hits the hot pan, creating an inviting scene. Bring it to a boil before reducing the heat to low.
- Cover the pan with a lid and let it simmer for 10 to 12 minutes. During this time, the couscous will absorb the broth and become tender. You might want to sneak a peek to see how it’s progressing—just be sure to keep the lid on!
- After the cooking time, remove the pan from heat. Fluff the couscous with a fork to separate the grains. This step is essential as it airifies the dish, making it light and fluffy.
- Next, stir in the chopped parsley and lemon zest. The fresh herbs and zest will brighten the dish and add a pop of color. Mix until everything is well combined.
- Finally, season with salt and pepper to taste. This last step allows you to adjust the flavors to your preference, ensuring a perfectly seasoned dish.
- Serve warm and enjoy the delightful combination of flavors and textures. You can also let it cool and serve it at room temperature for a refreshing salad-like dish.
- This Israeli Couscous Recipe is perfect as a side or can stand alone as a light meal. Feel free to add other ingredients, like grilled vegetables or chickpeas, to make it your own!
Things Worth Knowing
- Toasting the couscous: This process enhances the flavor and adds depth to the dish.
- Broth choice: Using homemade broth can elevate the taste, but store-bought works well too.
- Fresh herbs: Adding herbs at the end preserves their flavor and color.
- Texture matters: Fluffing after cooking helps to keep the couscous airy rather than clumpy.
Helpful Notes about Israeli Couscous Recipe

When it comes to making this Israeli Couscous Recipe, a few helpful tips can elevate your experience. Each note will guide you through the process and ensure delicious results every time.
- Storage: Leftovers can be stored in an airtight container in the fridge for up to 4 days.
- Freezing: You can freeze the cooked couscous for up to 3 months; just make sure to cool it completely before placing it in a freezer-safe container.
- Pairing: This dish pairs wonderfully with grilled vegetables or a fresh salad for a complete meal.
- Flavor boosters: Consider adding spices like cumin or coriander for an extra flavor kick.
- Serving temperature: Enjoy it warm or cold, as it makes a versatile dish for any season.
Best Served With
The beauty of the Israeli Couscous Recipe is its adaptability when it comes to serving. Here are some delightful ways to enjoy this dish:
- With grilled chicken: It makes a wonderful side dish, complementing the smoky flavors of grilled meats.
- As a warm salad: Toss in roasted vegetables and a light vinaigrette for a refreshing summer dish.
- At potlucks: This recipe travels well and is perfect for sharing at gatherings.
- For lunch: Serve it cold mixed with fresh greens for a nutritious midday meal.
- During Ramadan: It can be a fulfilling option for Iftar, providing energy and warmth after fasting.
- Seasonal pairings: In winter, serve it warm; in summer, consider it room temperature with vibrant diced vegetables.
FAQ
Conclusion
Overall, this Israeli Couscous Recipe is a delightful dish that brings comfort and flavor to your table. It’s a versatile recipe that allows for creativity and experimentation. I encourage you to give it a try; you’ll find it to be a perfect addition to your culinary repertoire. Enjoy the cooking process and the delicious results with your loved ones!
Israeli Couscous Recipe
Equipment
- Frying Pan
- Large Pot
- Saucepan
- Chef's Knife
- Wooden Spoon
Ingredients
- 1 cup pearl couscous
- 2 tablespoons extra virgin olive oil
- 1.75 cups chicken broth
- 0.5 teaspoon kosher salt
- 0.25 cup fresh parsley
- 1 zest lemon
- salt and pepper to taste
Instructions
- Start by heating the olive oil in a medium saucepan over medium-high heat. This is a crucial step as it will infuse the oil with flavor before you add the pearl couscous. Give it a few moments until the oil shimmers, indicating it’s ready for the next step.
- Add the pearl couscous to the pan, stirring frequently as it toasts. You want to achieve a lovely golden brown color, which takes about 3 to 4 minutes. The aroma will be nutty and warm, setting the stage for the flavors to come.
- Once the couscous is toasted, carefully pour in the chicken broth and add the kosher salt. The liquid will bubble up as it hits the hot pan, creating an inviting scene. Bring it to a boil before reducing the heat to low.
- Cover the pan with a lid and let it simmer for 10 to 12 minutes. During this time, the couscous will absorb the broth and become tender. You might want to sneak a peek to see how it’s progressing—just be sure to keep the lid on!
- After the cooking time, remove the pan from heat. Fluff the couscous with a fork to separate the grains. This step is essential as it airifies the dish, making it light and fluffy.
- Next, stir in the chopped parsley and lemon zest. The fresh herbs and zest will brighten the dish and add a pop of color. Mix until everything is well combined.
- Finally, season with salt and pepper to taste. This last step allows you to adjust the flavors to your preference, ensuring a perfectly seasoned dish.
- Serve warm and enjoy the delightful combination of flavors and textures. You can also let it cool and serve it at room temperature for a refreshing salad-like dish.
- This Israeli Couscous Recipe is perfect as a side or can stand alone as a light meal. Feel free to add other ingredients, like grilled vegetables or chickpeas, to make it your own!
Notes
- Tip 1: Leftovers can be stored in an airtight container in the fridge for up to 4 days.
- Tip 2: You can freeze the cooked couscous for up to 3 months; just make sure to cool it completely before placing it in a freezer-safe container.
- Tip 3: This dish pairs wonderfully with grilled vegetables or a fresh salad for a complete meal.
- Tip 4: Consider adding spices like cumin or coriander for an extra flavor kick.
- Tip 5: Enjoy it warm or cold, as it makes a versatile dish for any season.