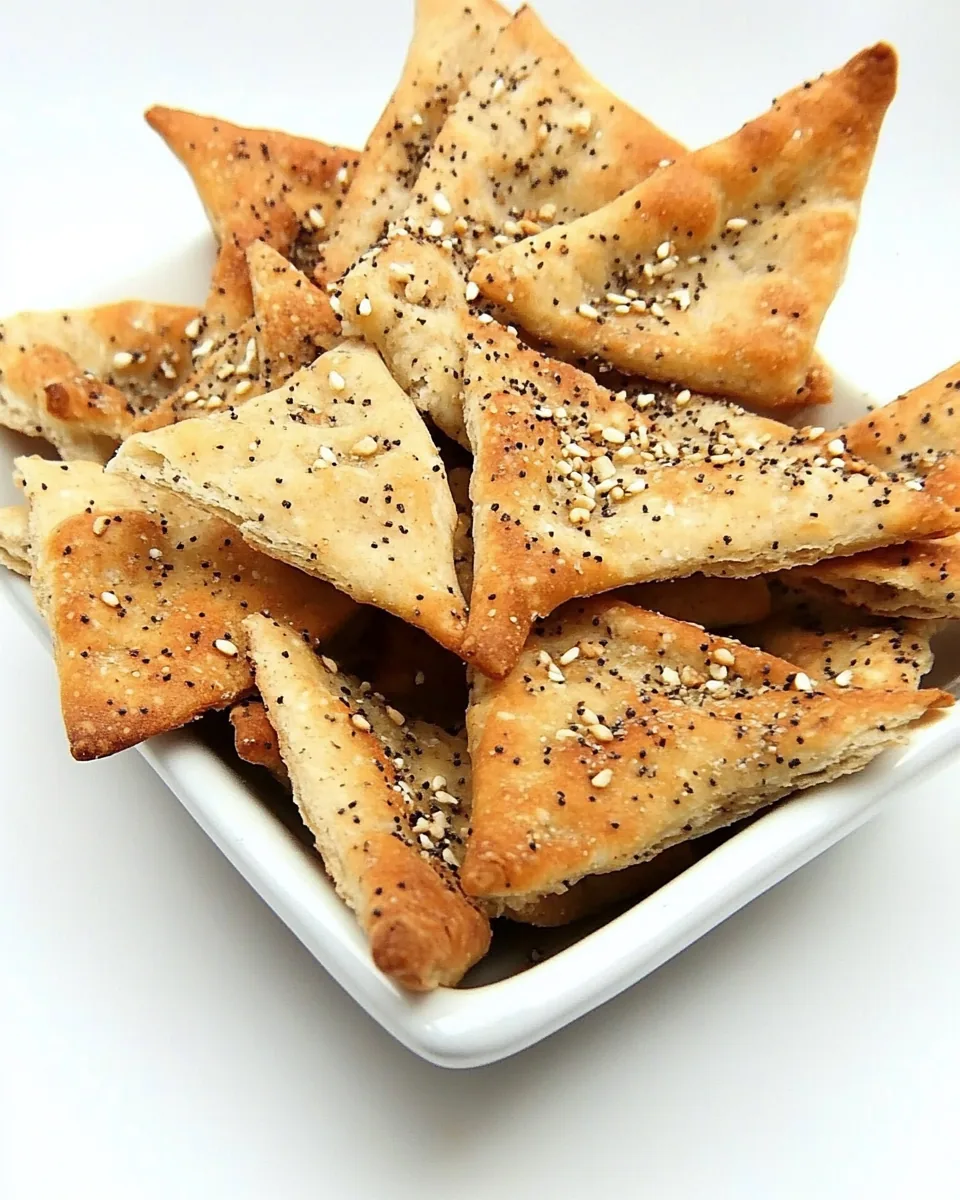
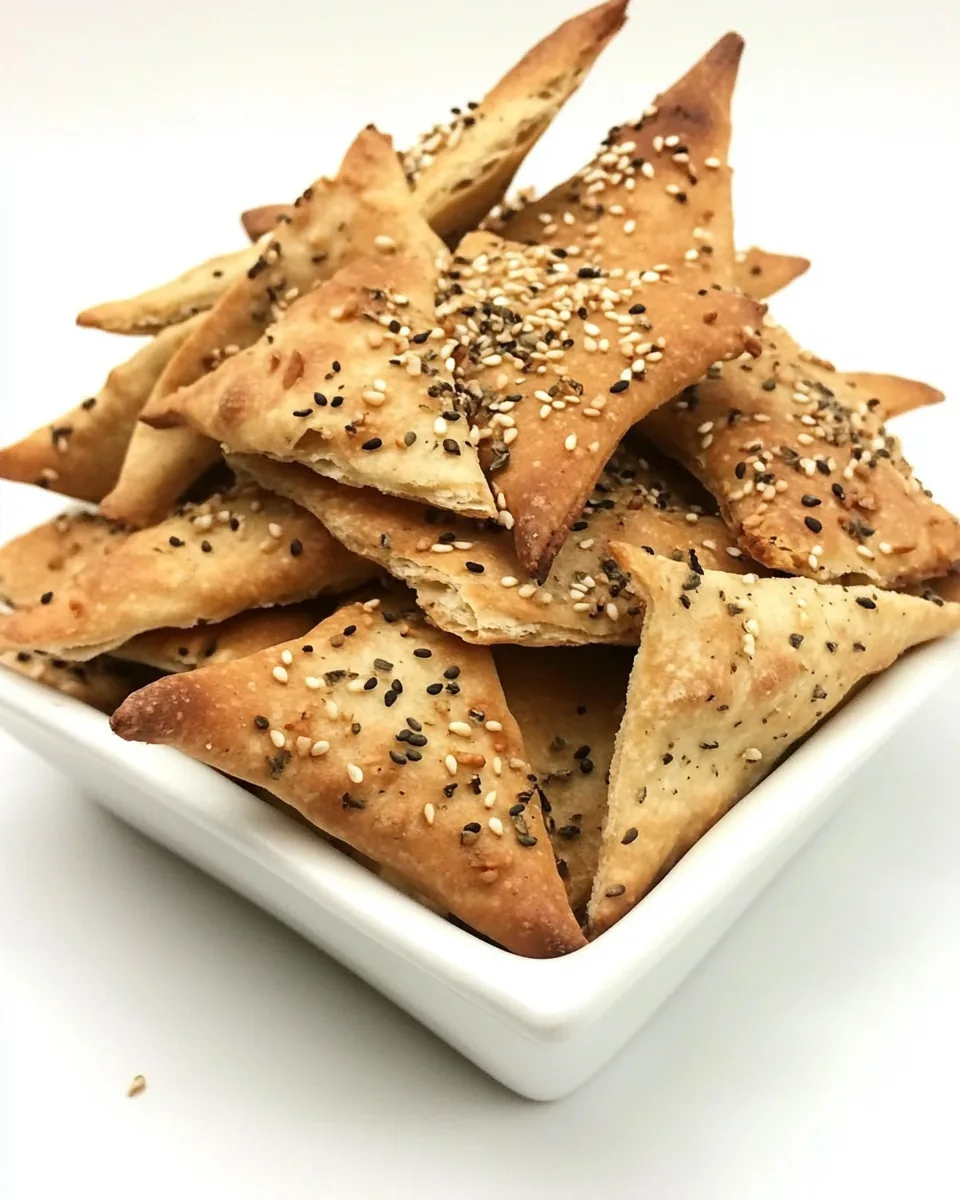
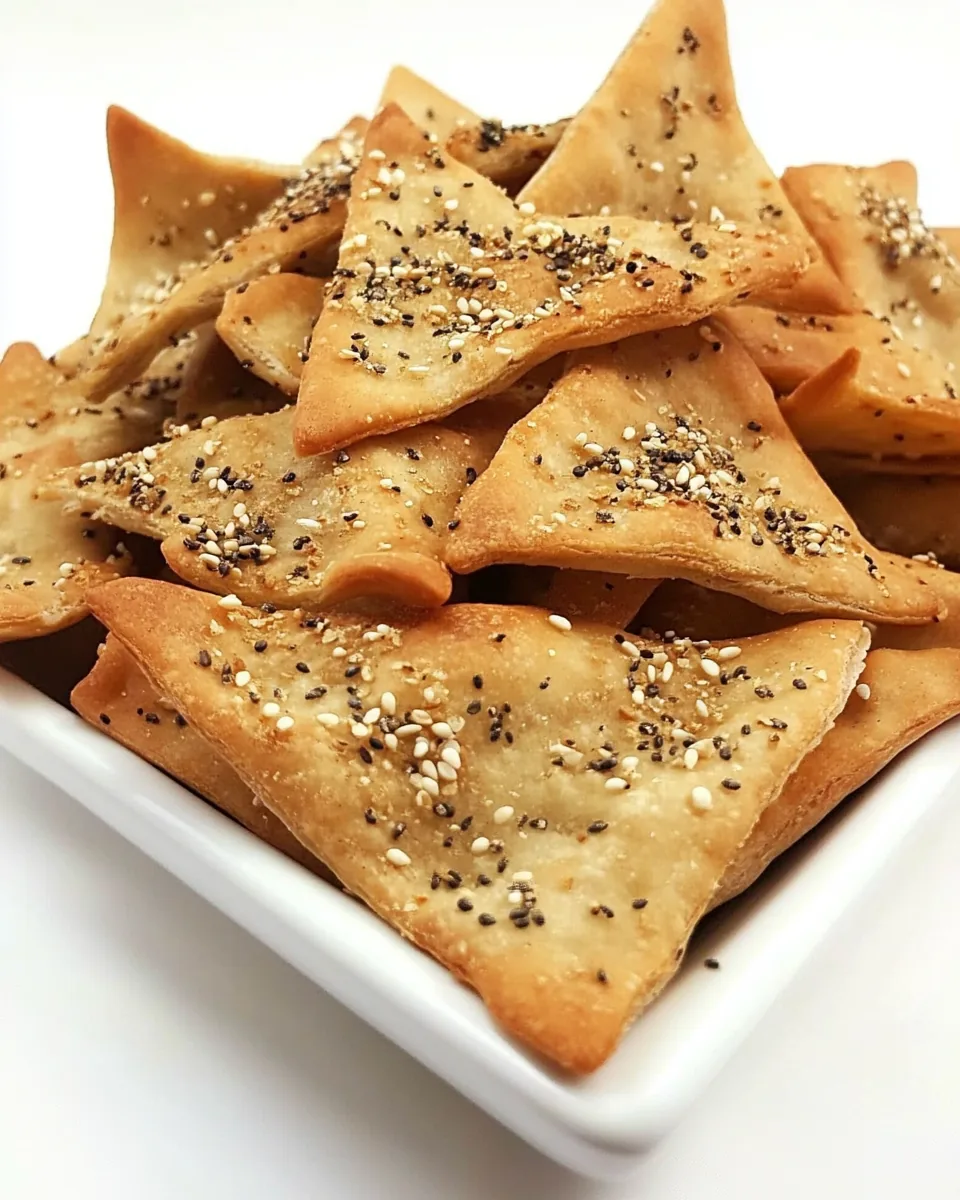
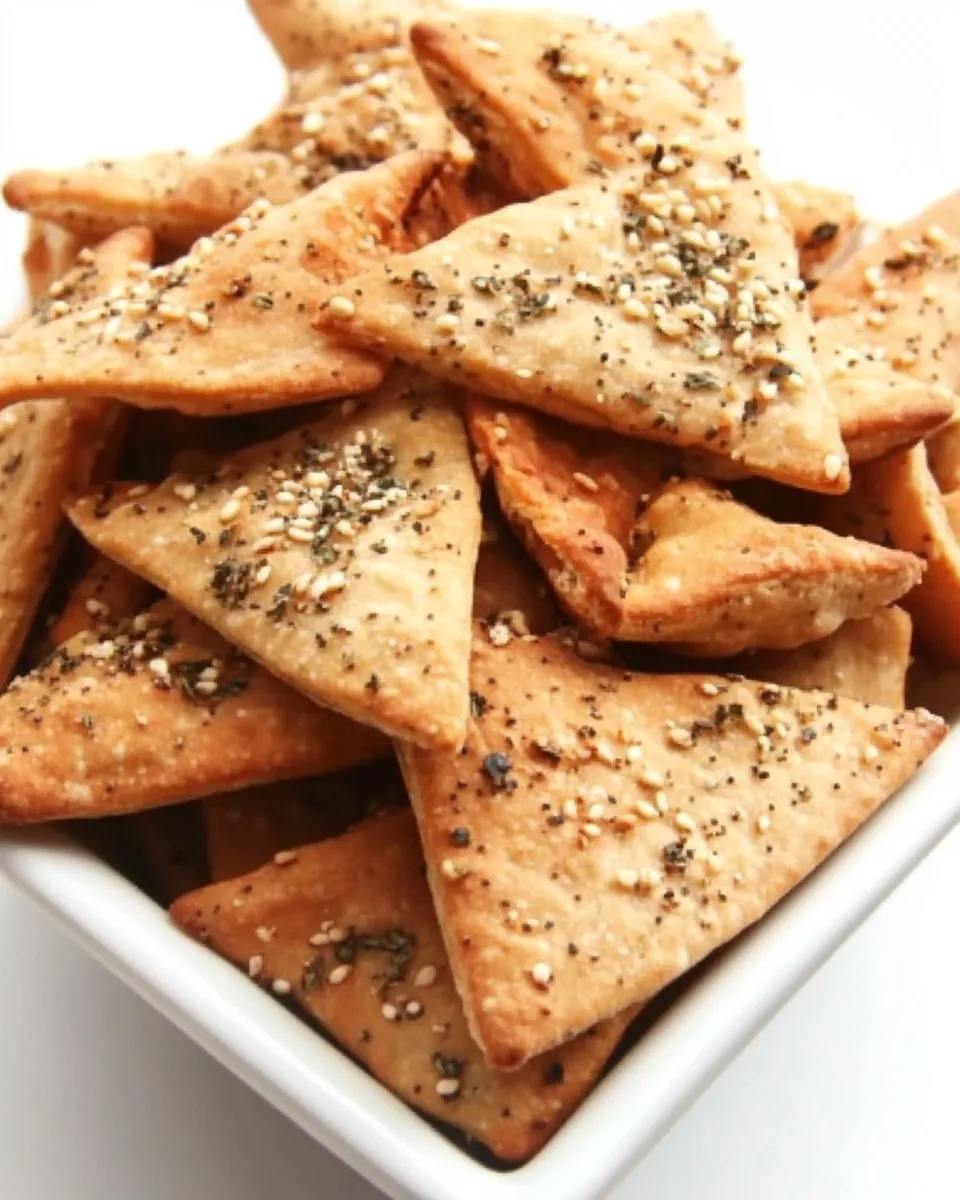
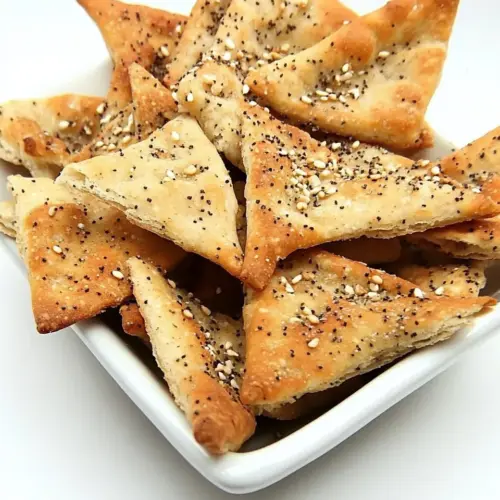
Baked Pita Chips
There’s something undeniably satisfying about homemade snacks, and that’s exactly why I love making Baked Pita Chips. One evening, I found myself craving a crunchy, salty treat to accompany my favorite dip. Instead of reaching for the store-bought options, I decided to whip up a batch of these crispy delights. The aroma of baking pita filled my kitchen, and I knew I was onto something special. These chips are not only easy to make but also customizable, allowing you to experiment with various seasonings to match your mood. Whether you’re hosting a party, enjoying a quiet night in, or need a quick snack for the kids, Baked Pita Chips are the answer!
Recipe Snapshot
20 mins
10 mins
10 mins
Medium
180 kcal
3 g
Paleo, Vegan, Gluten-Free
8 g
Food Processor, Oven, Blender, Baking Sheet
What You’ll Enjoy About This Baked Pita Chips
Perfect for Any Occasion
I love how Baked Pita Chips can fit into any occasion. They’re perfect for game nights, movie marathons, or even as a healthy snack option during the day. You can enjoy them plain, or pair them with dips like hummus or baba ghanoush for a delightful treat.
Healthy and Guilt-Free
Unlike traditional chips, these pita chips are baked, not fried, making them a healthier option. You can control the amount of oil and seasoning, so you can feel good about indulging in these tasty snacks. Plus, they are packed with flavor without all the extra calories that come from store-bought varieties.
Versatile Flavor Combinations
One of the best things about Baked Pita Chips is how customizable they are. You can experiment with different spices and herbs according to your taste. Whether you prefer a classic salted version or something with a bit of a kick, the possibilities are endless. I often enjoy adding za’atar for a Middle Eastern twist or a sprinkle of garlic powder for an extra flavor punch.
Quick and Easy Preparation
These chips come together in no time! With just a few simple steps, you can have a fresh batch ready to go. It’s a great way to use up leftover pita bread as well. I often make them when I have a few rounds left in the pantry that need to be used.
Perfect for Sharing
Making Baked Pita Chips is a fun activity to do with family or friends. Everyone can participate in brushing the pita with oil and sprinkling on their favorite seasonings. This makes it not just a recipe, but an enjoyable experience that brings people together.
Budget-Friendly Snack
If you’re looking for a snack that won’t break the bank, look no further. Making your own pita chips is incredibly affordable compared to buying pre-packaged snacks, and they taste so much better fresh out of the oven.
Ingredients You’ll Need for Baked Pita Chips
When it comes to making Baked Pita Chips, the ingredients are simple, but they pack a punch. The key players in this recipe are pita bread, olive oil, and seasonings. Together, they create a deliciously crunchy treat that’s perfect for snacking or serving at gatherings.
- 4 pita bread rounds – These are the base of your chips. Look for fresh pita for the best crunch.
- 1/4 cup extra virgin olive oil – This adds flavor and helps the chips crisp up nicely.
- Salt – Essential for enhancing the flavor. Adjust to your taste!
- Garlic powder (optional) – For those who enjoy a garlicky kick, this is a great addition.
- Za’atar seasoning OR dried parsley flakes and sesame seeds – Feel free to use za’atar for a traditional flavor or the alternative for a different taste profile.
Making Baked Pita Chips
Creating Baked Pita Chips is a straightforward process that yields delightful results. You’ll be amazed at how quickly you can whip these up. Let’s dive into the steps that will lead you to delicious homemade chips!
- First, preheat your oven to 400 degrees F. This is the perfect temperature for achieving that golden brown color we all love in chips.
- Next, take a baking sheet and brush it with a generous amount of olive oil, ensuring it’s coated evenly. This will prevent the chips from sticking and contribute to their crispiness.
- Now, grab your first pita round and brush the top with more olive oil. Make sure to cover it completely, as this will enhance the flavor and texture.
- Sprinkle salt over the pita to your taste. If you’re feeling adventurous, add a light dusting of garlic powder for an added depth of flavor.
- If using, liberally sprinkle za’atar seasoning across the top. Remember, some blends contain salt, so adjust your seasoning accordingly.
- If you don’t have za’atar, don’t worry! You can substitute it with dried parsley flakes and sesame seeds for a different flavor profile that still tastes amazing.
- Cut the pita in half, then into quarters, and finally into eighths, creating eight equal-sized triangles. This is where the fun begins!
- Place the pita triangles on the oiled baking sheet, seasoning-side facing up. Be sure to keep them in a single layer for even cooking.
- Once all your pita is on the sheet, pop it into the oven. Bake for about 8 to 10 minutes, but keep an eye on them. Chips can turn from golden to burnt quickly!
- When they’re perfectly crisp and golden brown, remove them from the oven and let them cool. They’ll get even crunchier as they do.
- Lastly, serve your Baked Pita Chips on their own or with your favorite dip like hummus or baba ghanoush. Store any leftovers in a sealed container to keep them fresh!
Things Worth Knowing
- Uniform Size: Make sure to cut the pita evenly for consistent baking. This ensures that all chips finish baking at the same time.
- Watch Closely: Keep an eye on the chips towards the end of baking to prevent them from burning.
- Experiment with Flavors: Feel free to try different spice blends to create your own unique flavor.
- Cooling is Key: Allow the chips to cool on the baking sheet—this helps them crisp up even more.
Tips and Tricks about Baked Pita Chips
When it comes to mastering Baked Pita Chips, a few tips and tricks can make a big difference. Here’s how to perfect your snacking experience.
- Storage: Store your pita chips in a sealed container to maintain their crispiness. They can last for a week if kept airtight.
- Freezing: You can freeze any unbaked, seasoned pita triangles. Just place them in a single layer on a baking sheet, freeze until solid, then transfer to a zip-top bag for future baking.
- Pairing: These chips are fantastic with dips like hummus, tzatziki, or babaghanoush, making your snack time more delightful.
- Seasoning Variations: Experiment with different herbs or spices to suit your taste—try paprika, cumin, or even chili powder for a twist!
- Adjusting Oil: If you prefer a lighter version, you can spray the pita rounds with olive oil instead of brushing them for less fat.
- Serving Size: Portion your pita chips into small bowls or snack bags to keep yourself from overindulging!
Side Dish Ideas for Baked Pita Chips
When serving Baked Pita Chips, consider pairing them with a variety of delicious options. Below are some ideas that will enhance your culinary experience:
- Hummus: This classic pairing provides a creamy contrast to the crunch of the pita chips.
- Tzatziki: The cool, yogurt-based dip complements the warm spices beautifully.
- Guacamole: For a twist, dip your pita chips in homemade guacamole for a flavor explosion.
- Cheese Platter: Serve alongside a cheese board for a delightful appetizer spread.
- Salads: Crumble chips over your favorite salads for a satisfying crunch and added flavor.
- Snack Mix: Incorporate the chips into a homemade snack mix with nuts and dried fruits for a healthy treat.
- Picnic Treat: Pack them for picnics or outings as a portable snack that everyone will enjoy.
- Seasonal Dips: Experiment with seasonal dips, using fresh ingredients to match the time of year.
FAQ
Conclusion
In conclusion, Baked Pita Chips are a delightful snack that combines simplicity with flavor. They are easy to make, healthier than traditional snacks, and endlessly customizable. I encourage you to try making this recipe for yourself! It’s a fantastic way to enjoy a crunchy treat that pairs beautifully with your favorite dips. So, gather your ingredients and let’s get snacking!
Baked Pita Chips
Equipment
- Food Processor
- Oven
- Blender
- Baking Sheet
Ingredients
- 4 pita bread rounds pita bread
- 1/4 cup extra virgin olive oil
- Salt
- Garlic powder (optional)
- Za'atar seasoning OR dried parsley flakes and sesame seeds
Instructions
- First, preheat your oven to 400 degrees F. This is the perfect temperature for achieving that golden brown color we all love in chips.
- Next, take a baking sheet and brush it with a generous amount of olive oil, ensuring it’s coated evenly. This will prevent the chips from sticking and contribute to their crispiness.
- Now, grab your first pita round and brush the top with more olive oil. Make sure to cover it completely, as this will enhance the flavor and texture.
- Sprinkle salt over the pita to your taste. If you're feeling adventurous, add a light dusting of garlic powder for an added depth of flavor.
- If using, liberally sprinkle za'atar seasoning across the top. Remember, some blends contain salt, so adjust your seasoning accordingly.
- If you don’t have za'atar, don’t worry! You can substitute it with dried parsley flakes and sesame seeds for a different flavor profile that still tastes amazing.
- Cut the pita in half, then into quarters, and finally into eighths, creating eight equal-sized triangles. This is where the fun begins!
- Place the pita triangles on the oiled baking sheet, seasoning-side facing up. Be sure to keep them in a single layer for even cooking.
- Once all your pita is on the sheet, pop it into the oven. Bake for about 8 to 10 minutes, but keep an eye on them. Chips can turn from golden to burnt quickly!
- When they’re perfectly crisp and golden brown, remove them from the oven and let them cool. They’ll get even crunchier as they do.
- Lastly, serve your Baked Pita Chips on their own or with your favorite dip like hummus or baba ghanoush. Store any leftovers in a sealed container to keep them fresh!
Notes
- Tip 1: You will also need: A baking sheet
- Tip 2: Store your pita chips in a sealed container to maintain their crispiness. They can last for a week if kept airtight.
- Tip 3: You can freeze any unbaked, seasoned pita triangles. Just place them in a single layer on a baking sheet, freeze until solid, then transfer to a zip-top bag for future baking.
- Tip 4: These chips are fantastic with dips like hummus, tzatziki, or babaghanoush, making your snack time more delightful.
- Tip 5: Experiment with different herbs or spices to suit your taste—try paprika, cumin, or even chili powder for a twist!
- Tip 6: Portion your pita chips into small bowls or snack bags to keep yourself from overindulging!