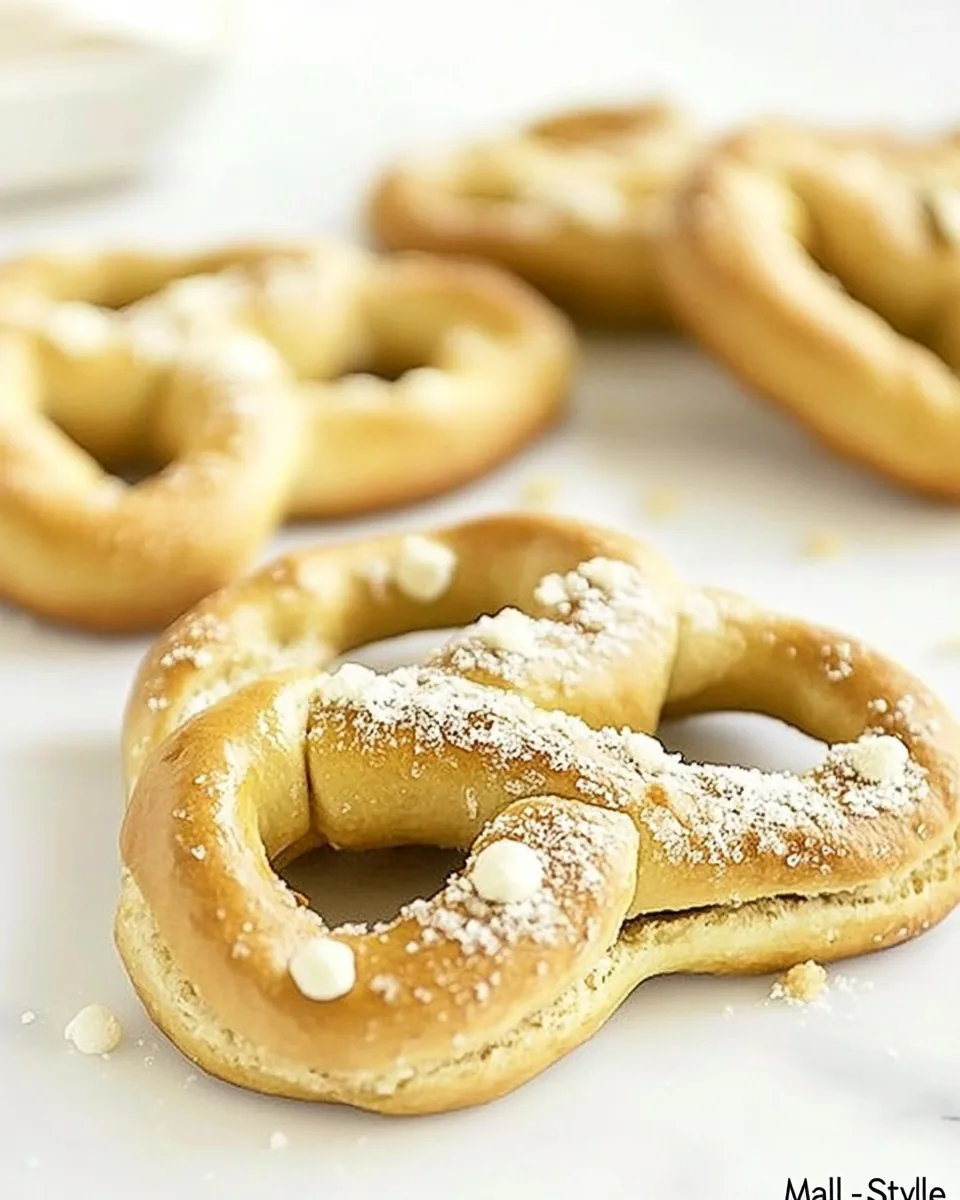
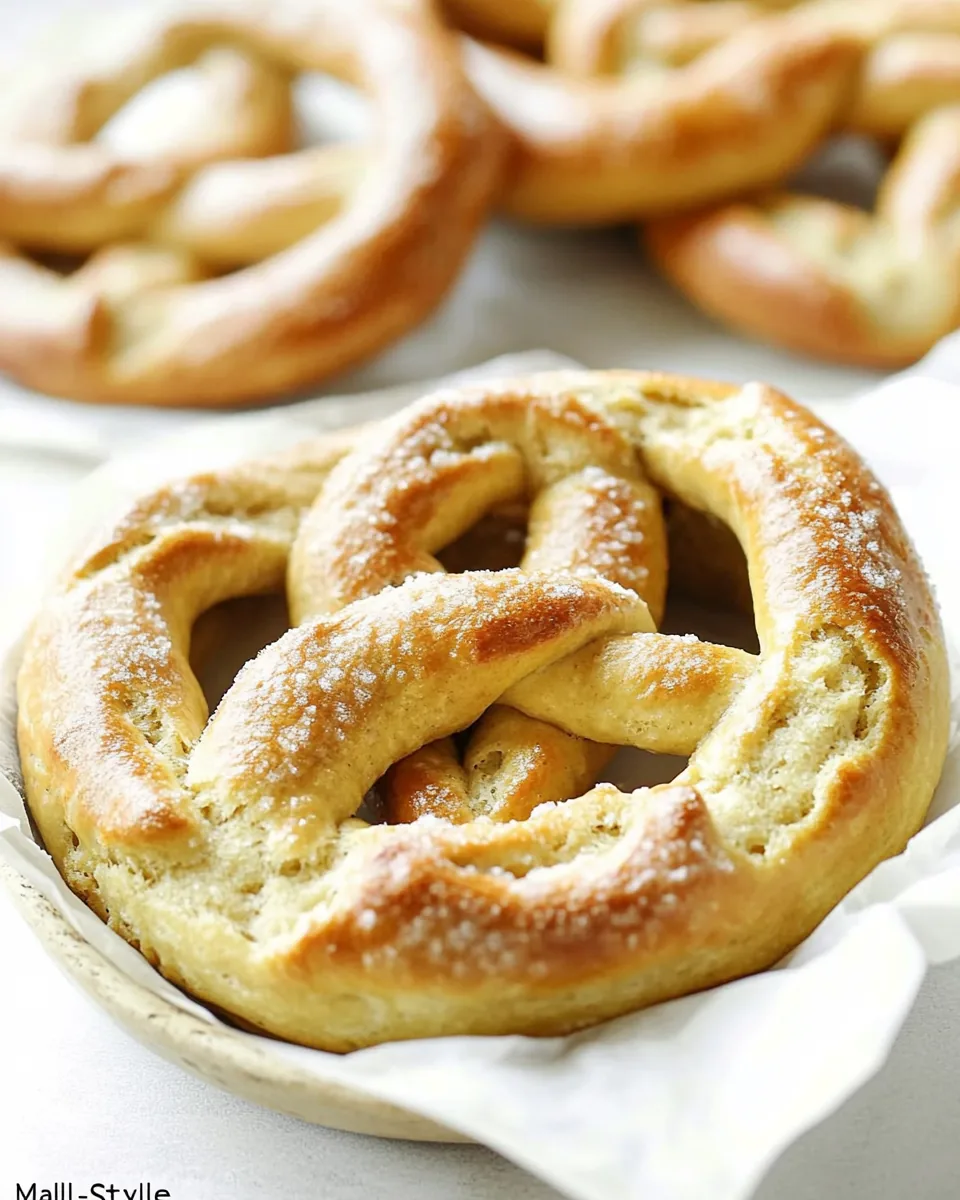
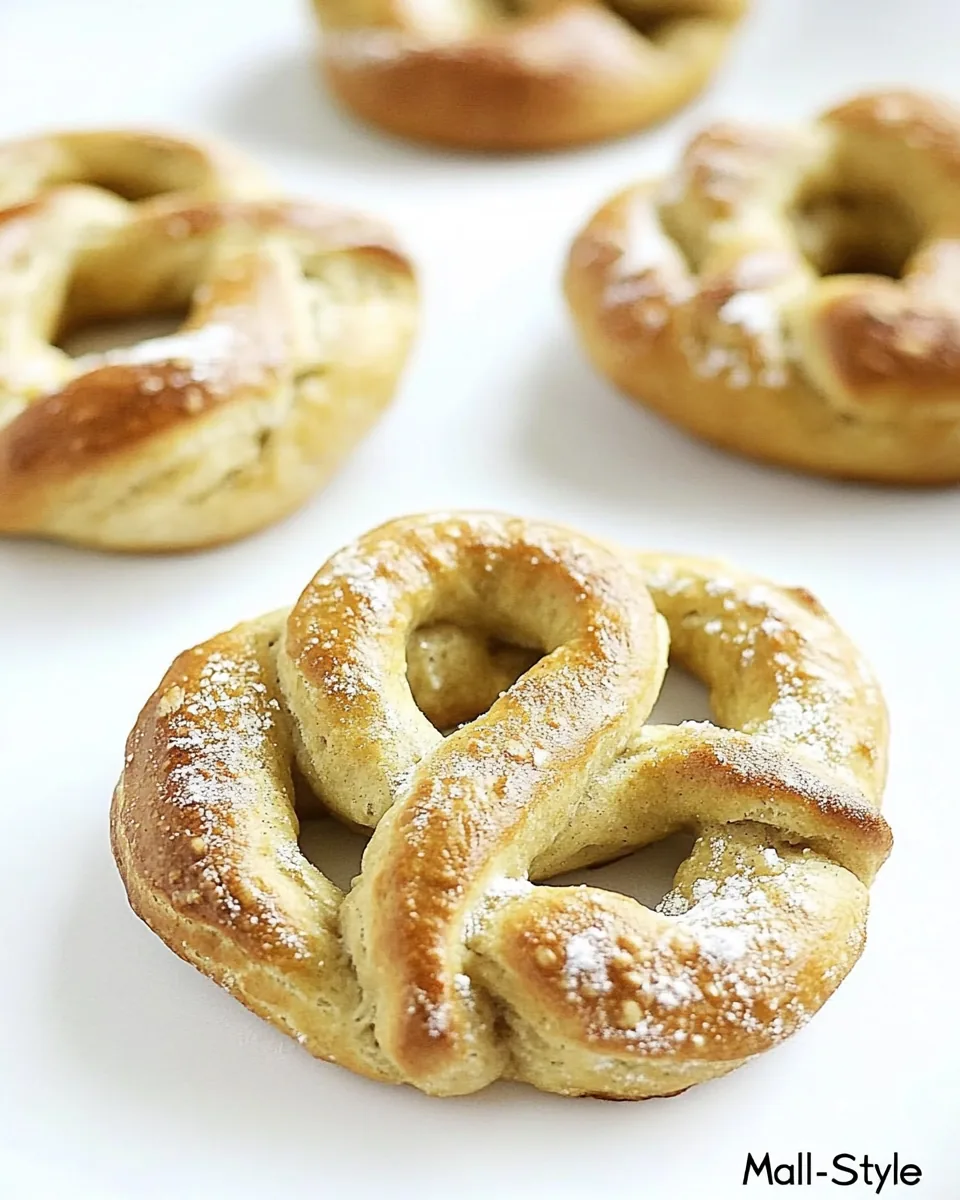
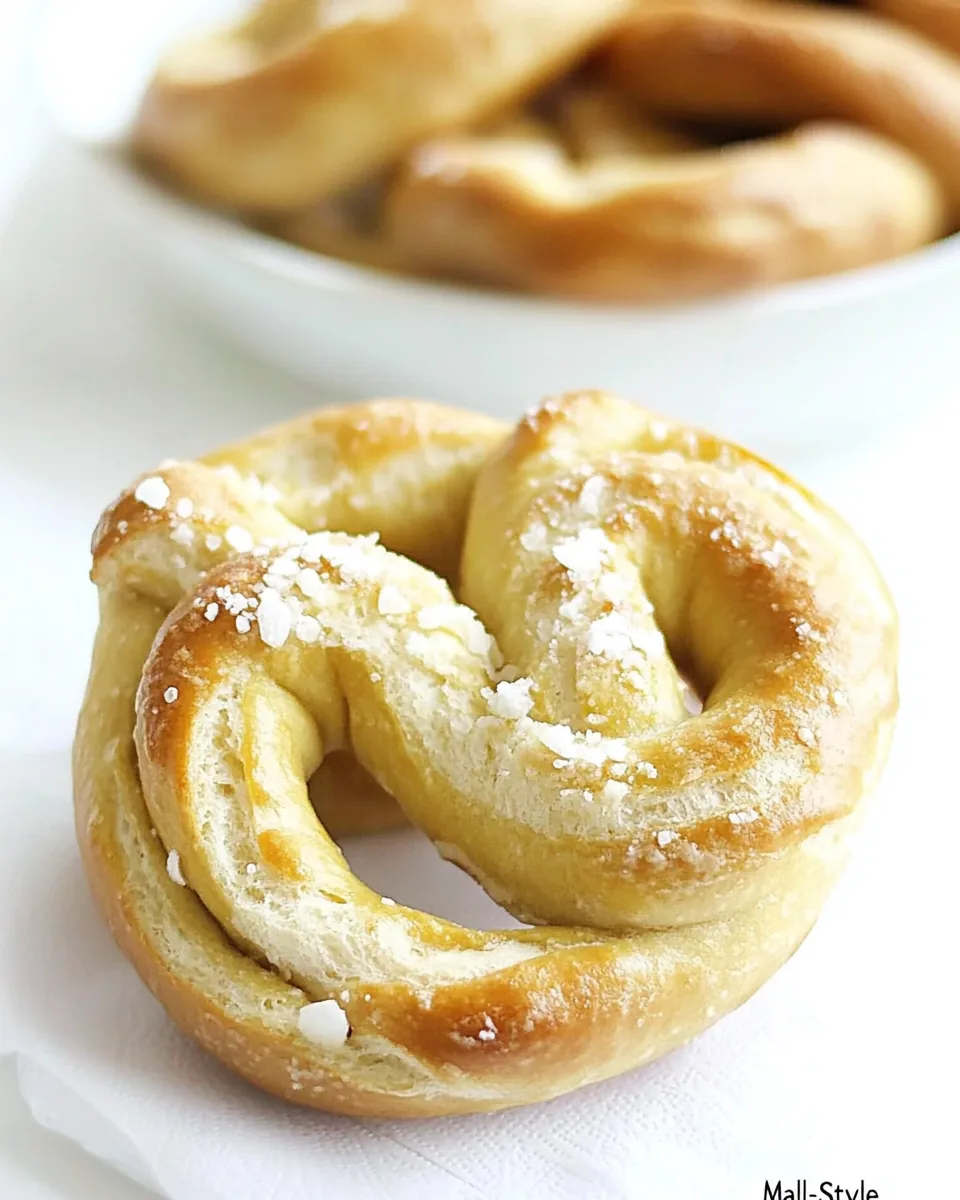
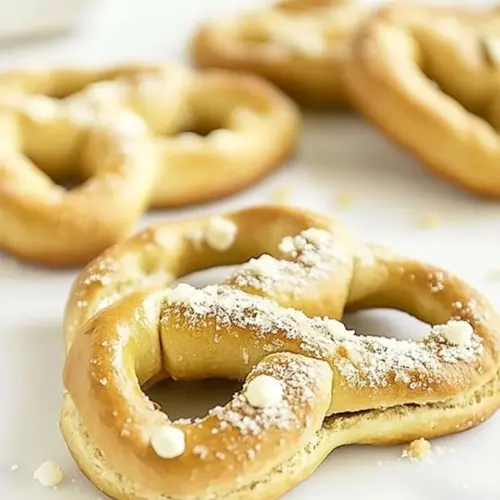
Homemade Mall Style Pretzels
There’s something so nostalgic about the smell of warm, freshly baked pretzels wafting through the air, especially when they remind you of a trip to the mall. You know, those moments when you’d grab a soft, chewy pretzel, fresh out of the oven, and dip it into some mustard or cheese sauce? Well, I decided to recreate that experience at home with these Homemade Mall Style Pretzels. Not only does making these pretzels bring back beautiful memories, but it also fills your kitchen with an incredible aroma that’s bound to make everyone gather around. Trust me, once you bite into that soft, perfectly salted dough, you’ll understand why I love this recipe so much.
Recipe Snapshot
60 mins
0 mins
0 mins
Medium
210 kcal
5 g
Gluten-Free, Low FODMAP
8 g
Frying Pan, Oven, Wooden Spoon, Cutting Board, Mixing Bowl, Baking Sheet
What Sets This Homemade Mall Style Pretzels Apart
It’s All About the Texture
One reason I absolutely love making Homemade Mall Style Pretzels is the sensational texture. The outer crust is beautifully golden and slightly chewy, while the inside is soft and fluffy. Every bite is a delightful mix of crunch and softness that keeps you coming back for more.
Endless Variations
These pretzels are incredibly versatile! You can enjoy them plain, sprinkle them with coarse salt, or even get creative with toppings like cheese or jalapenos. The Homemade Mall Style Pretzels can easily be tailored to suit your cravings and preferences, making them perfect for any occasion.
A Fun Activity
Making pretzels is also a fantastic family activity. It’s enjoyable to roll the dough and shape it into pretzels, and kids love getting involved. You’ll create wonderful memories in the kitchen while teaching your loved ones the art of making these beloved snacks.
Perfect for Any Gathering
Whether it’s a movie night, game day, or a simple family dinner, these Homemade Mall Style Pretzels can be the star of your spread. Serve them warm with a variety of dips, and they’ll be a hit with everyone!
Fast and Simple
While some bread recipes can be time-consuming, these pretzels are relatively quick and straightforward. With just a few ingredients and a bit of patience, you can whip up a batch in no time. You’ll love how easy it is to impress your friends and family!
Deliciously Homemade
Lastly, there’s something truly special about making something from scratch. The satisfaction of kneading the dough, letting it rise, and then baking it to perfection is an experience you won’t forget. Each Homemade Mall Style Pretzel is made with love, and that makes all the difference.
Key Ingredients for Homemade Mall Style Pretzels
The ingredients for Homemade Mall Style Pretzels are simple yet effective, each playing a crucial role in achieving that perfect bite. From the basic flour to the rich butter, every element works harmoniously to create a delightful snack that brings joy to any occasion.
- 1 cup Milk – Acts as a warm base to activate the yeast, creating a soft texture.
- 1 package Active Dry Yeast – Essential for leavening, helping the dough rise perfectly.
- 3 tablespoons Packed Light Brown Sugar – Adds a touch of sweetness that balances the flavors.
- 2 1/4 cups All-Purpose Flour – The backbone of the recipe, giving structure to the pretzel.
- 10 tablespoons Unsalted Butter – Adds richness and flavor, making the pretzels deliciously indulgent.
- 1 teaspoon Fine Salt – Enhances the overall flavor of the pretzels.
- 1/3 cup Baking Soda – Used in the boiling step to create that signature brown crust.
- 2 tablespoons Coarse Salt – For sprinkling on top, providing a delightful crunch.
- Asiago Variation: Add 1/2 cup Asiago Cheese and 1/2 cup Jalapenos for a spicy twist!
How to Assemble Homemade Mall Style Pretzels
Making Homemade Mall Style Pretzels is a rewarding experience that’s surprisingly easy to tackle. Let’s dive into the steps of this delicious journey!
- Begin by heating milk in a small saucepan until it reaches about 110 degrees. This warm temperature is crucial for activating the yeast. Be careful not to overheat!
- Once the milk is warm, pour it into a medium bowl and sprinkle the active dry yeast over it. Allow it to sit for about 2 minutes to soften.
- Stir in brown sugar and 1 cup of flour using a wooden spoon. This creates the initial mixture that will become your dough.
- Next, take 2 tablespoons of butter, dice it, and let it soften before adding it to the mixture. This will contribute to the wonderful flavor.
- Gradually incorporate the remaining 1 1/4 cups of flour along with fine salt until a sticky dough forms.
- Transfer the dough to a lightly floured surface and knead for about 5 minutes. You want it to be smooth but still slightly tacky. Add more flour as needed.
- Shape the kneaded dough into a ball and place it in a greased bowl. Cover with plastic wrap and let it rise in a warm spot for about 1 hour, or until it doubles in size.
- Preheat your oven to 450 degrees and line two baking sheets with parchment paper. This will help prevent sticking.
- After the dough has risen, gently punch it down to deflate it and transfer it to a floured surface. Divide the dough into 6 equal pieces.
- Roll each piece into a 30-inch rope. Use your palms to stretch the dough, and don’t be afraid to slap the middle of the rope on the counter to help it along.
- Form each rope into a classic pretzel shape. Don’t worry if they aren’t perfect; each one will have its unique charm.
- Prepare a large bowl with warm water and dissolve the baking soda in it. This solution is what will give your pretzels that gorgeous brown color.
- Carefully dip each pretzel into the soda solution, then place them on the prepared baking sheets. Sprinkle with coarse salt for that iconic pretzel flavor.
- Bake for about 10 to 12 minutes or until the pretzels are golden brown. Remove from the oven and let them cool slightly before enjoying.
Things Worth Knowing
- Perfect Temperature: Ensure your milk is around 110 degrees to properly activate the yeast.
- Kneading Technique: Knead the dough just enough to achieve a smooth texture, being careful not to overwork it.
- Boiling Solution: The baking soda solution is key for achieving that delicious brown crust.
- Resting Time: Allow the dough to rise fully for the best texture. Patience is important!
Expert Tips about Homemade Mall Style Pretzels
When it comes to making Homemade Mall Style Pretzels, I have a few expert tips to ensure you get it just right. Follow these suggestions to elevate your pretzel game!
- Storage: Keep any leftover pretzels in an airtight container at room temperature for up to 2 days. Reheat them in an oven for that fresh taste!
- Freezing: You can freeze uncooked pretzel shapes. Just place them on a baking sheet, freeze until solid, and transfer to a freezer bag. When ready to bake, boil and bake from frozen!
- Pairing: Serve with a variety of dips like mustard, cheese sauce, or even a spicy salsa to complement the pretzels.
- Experiment with Flavors: Feel free to add different seasonings or toppings to your pretzels for a unique twist. Try garlic powder or everything bagel seasoning!
- Personal Touch: Make it a family activity! Get everyone involved in shaping and decorating the pretzels; it’s a fun way to spend time together.
How to Serve Homemade Mall Style Pretzels
When it comes to serving your Homemade Mall Style Pretzels, the options are endless. Here’s how to make the most out of these delicious treats:
- Casual Gatherings: Serve warm pretzels at movie nights or game days. They’re the perfect finger food to snack on while enjoying your favorite film or game.
- Parties: Create a pretzel bar at your next get-together. Offer various dips and toppings for guests to customize their own pretzel experience.
- Lunchboxes: Add pretzels to lunchboxes for a delightful treat that kids and adults alike will love. Pair with cheese or veggies for a balanced meal.
- Picnics: These pretzels are also an excellent choice for picnics. Their portability makes them easy to transport, and they taste just as good at room temperature.
- Seasonal Pairing: In the fall, pair your pretzels with warm apple cider for a comforting treat. In summertime, enjoy them with a fresh garden salad.
- Leftovers: If you have leftovers, store them properly to keep them fresh. They can be reheated easily for a quick snack later.
FAQ
Conclusion
The Homemade Mall Style Pretzels are a delightful treat that can warm your heart and satisfy your cravings. Each pretzel embodies the nostalgia of a mall visit while giving you the satisfaction of making something from scratch. I encourage you to try this recipe and enjoy the process of creating something special in your kitchen. Your family and friends will thank you for it, and you might just find a new favorite snack in the process!
Homemade Mall Style Pretzels
Equipment
- Frying Pan
- Oven
- Wooden Spoon
- Cutting Board
- Mixing Bowl
- Baking Sheet
Ingredients
- 1 cup Milk
- 1 package Active Dry Yeast
- 3 tablespoons Packed Light Brown Sugar
- 2.25 cups All-Purpose Flour
- 10 tablespoons Unsalted Butter
- 1 teaspoon Fine Salt
- 0.33 cup Baking Soda
- 2 tablespoons Coarse Salt
- 0.5 cup Asiago Cheese Optional
- 0.5 cup Jalapenos Optional
Instructions
- Begin by heating milk in a small saucepan until it reaches about 110 degrees. This warm temperature is crucial for activating the yeast. Be careful not to overheat!
- Once the milk is warm, pour it into a medium bowl and sprinkle the active dry yeast over it. Allow it to sit for about 2 minutes to soften.
- Stir in brown sugar and 1 cup of flour using a wooden spoon. This creates the initial mixture that will become your dough.
- Next, take 2 tablespoons of butter, dice it, and let it soften before adding it to the mixture. This will contribute to the wonderful flavor.
- Gradually incorporate the remaining 1 1/4 cups of flour along with fine salt until a sticky dough forms.
- Transfer the dough to a lightly floured surface and knead for about 5 minutes. You want it to be smooth but still slightly tacky. Add more flour as needed.
- Shape the kneaded dough into a ball and place it in a greased bowl. Cover with plastic wrap and let it rise in a warm spot for about 1 hour, or until it doubles in size.
- Preheat your oven to 450 degrees and line two baking sheets with parchment paper. This will help prevent sticking.
- After the dough has risen, gently punch it down to deflate it and transfer it to a floured surface. Divide the dough into 6 equal pieces.
- Roll each piece into a 30-inch rope. Use your palms to stretch the dough, and don’t be afraid to slap the middle of the rope on the counter to help it along.
- Form each rope into a classic pretzel shape. Don’t worry if they aren’t perfect; each one will have its unique charm.
- Prepare a large bowl with warm water and dissolve the baking soda in it. This solution is what will give your pretzels that gorgeous brown color.
- Carefully dip each pretzel into the soda solution, then place them on the prepared baking sheets. Sprinkle with coarse salt for that iconic pretzel flavor.
- Bake for about 10 to 12 minutes or until the pretzels are golden brown. Remove from the oven and let them cool slightly before enjoying.
Notes
- Storage: Keep any leftover pretzels in an airtight container at room temperature for up to 2 days. Reheat them in an oven for that fresh taste!
- Freezing: You can freeze uncooked pretzel shapes. Just place them on a baking sheet, freeze until solid, and transfer to a freezer bag. When ready to bake, boil and bake from frozen!
- Pairing: Serve with a variety of dips like mustard, cheese sauce, or even a spicy salsa to complement the pretzels.
- Experiment with Flavors: Feel free to add different seasonings or toppings to your pretzels for a unique twist. Try garlic powder or everything bagel seasoning!
- Personal Touch: Make it a family activity! Get everyone involved in shaping and decorating the pretzels; it’s a fun way to spend time together.