Zucchini Pizza Crust
The first time I made Zucchini Pizza Crust, I was looking for a way to enjoy my favorite comfort food without the guilt. As I mixed the ingredients, memories of summer nights spent in the kitchen with my family flooded back. We always experimented with different toppings on our pizzas, but now I had an exciting new base to play with. The idea of using zucchini to create a delicious crust felt revolutionary—fresh, healthy, and full of flavor! It was a fun challenge to see how I could make a pizza that not only satisfied my cravings but also stayed light and nutritious. I remember the first bite; the crust was crispy on the outside, tender inside, and it complemented the toppings perfectly. Now, every time I make Zucchini Pizza Crust, I feel like I’m bringing a taste of those cherished moments to life, and I’m thrilled to share this recipe with you!
Recipe Snapshot
60 mins
20 mins
40 mins
Medium
160 kcal
9 g
Gluten-Free, Low FODMAP
9 g
Frying Pan, Blender, Oven, Grater, Chef’s Knife, Mixing Bowl, Baking Sheet
The Beauty of This Zucchini Pizza Crust
It’s Low-Carb and Gluten-Free
One of the best reasons to love Zucchini Pizza Crust is its incredible health benefits. Zucchini is naturally low in carbohydrates, making this pizza crust a fantastic option for those looking to reduce their carb intake. Plus, it’s gluten-free, which is a great alternative for anyone with gluten sensitivities. You can enjoy pizza without the worry!
Kid-Friendly and Fun to Make
If you’re trying to get kids involved in the kitchen, this is a perfect recipe! Kids love to help shape the crust and choose their favorite toppings. You can make it a fun family activity, allowing everyone to personalize their pizza. Watching them create their masterpieces is sure to be a hit!
It’s Versatile
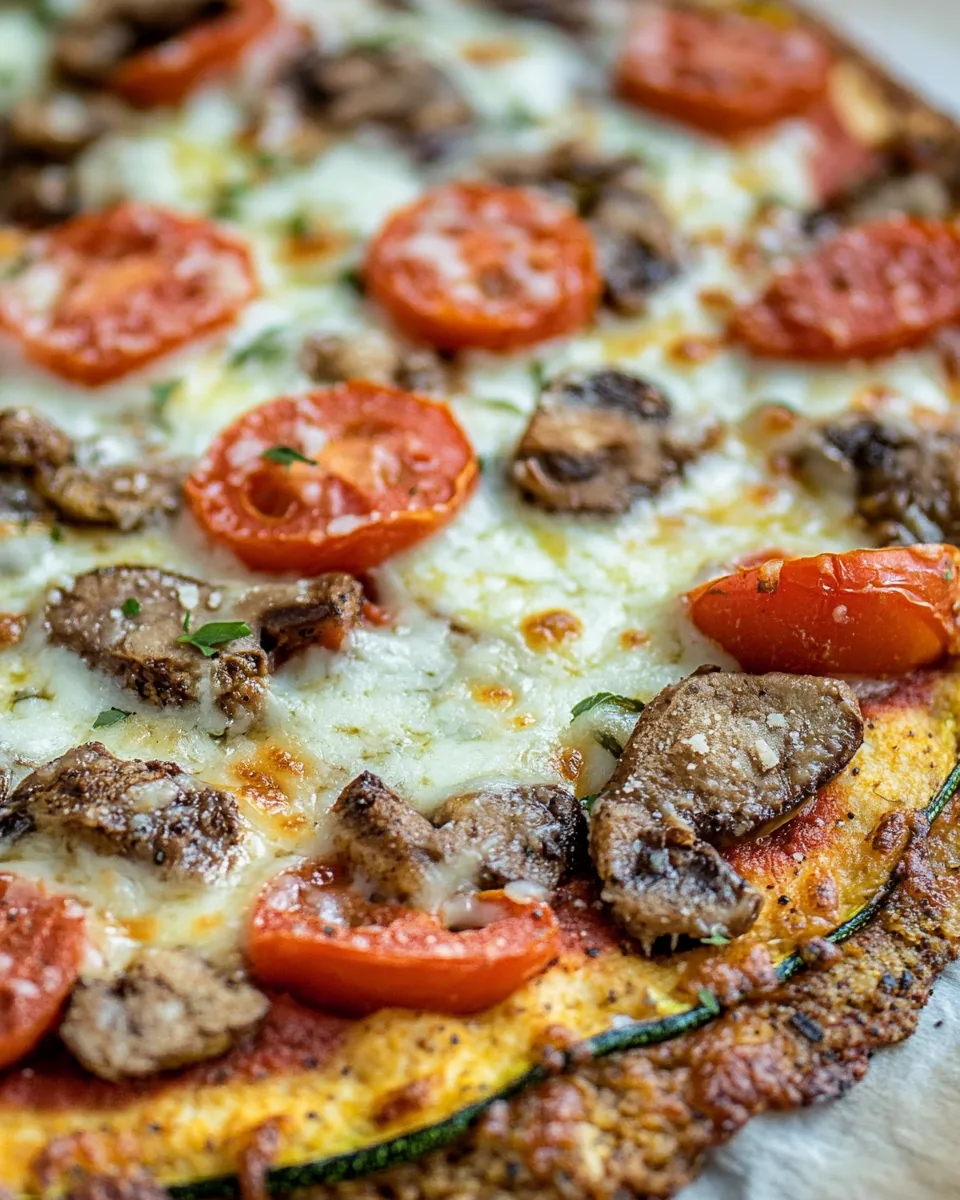
Zucchini Pizza Crust is incredibly versatile. While I love my classic toppings like marinara, mozzarella, and fresh veggies, you can get creative! Think BBQ chicken, pesto with goat cheese, or even a breakfast-style pizza with eggs and spinach. The possibilities are endless,and that’s what keeps it exciting!
Perfect for Meal Prep
Another reason to adore this recipe is its meal prep potential. You can make the crust in advance and store it in the fridge or freezer. When you’re ready to eat, just add your toppings and pop it in the oven. It’s a great way to have a quick and healthy meal ready to go.
Deliciously Satisfying
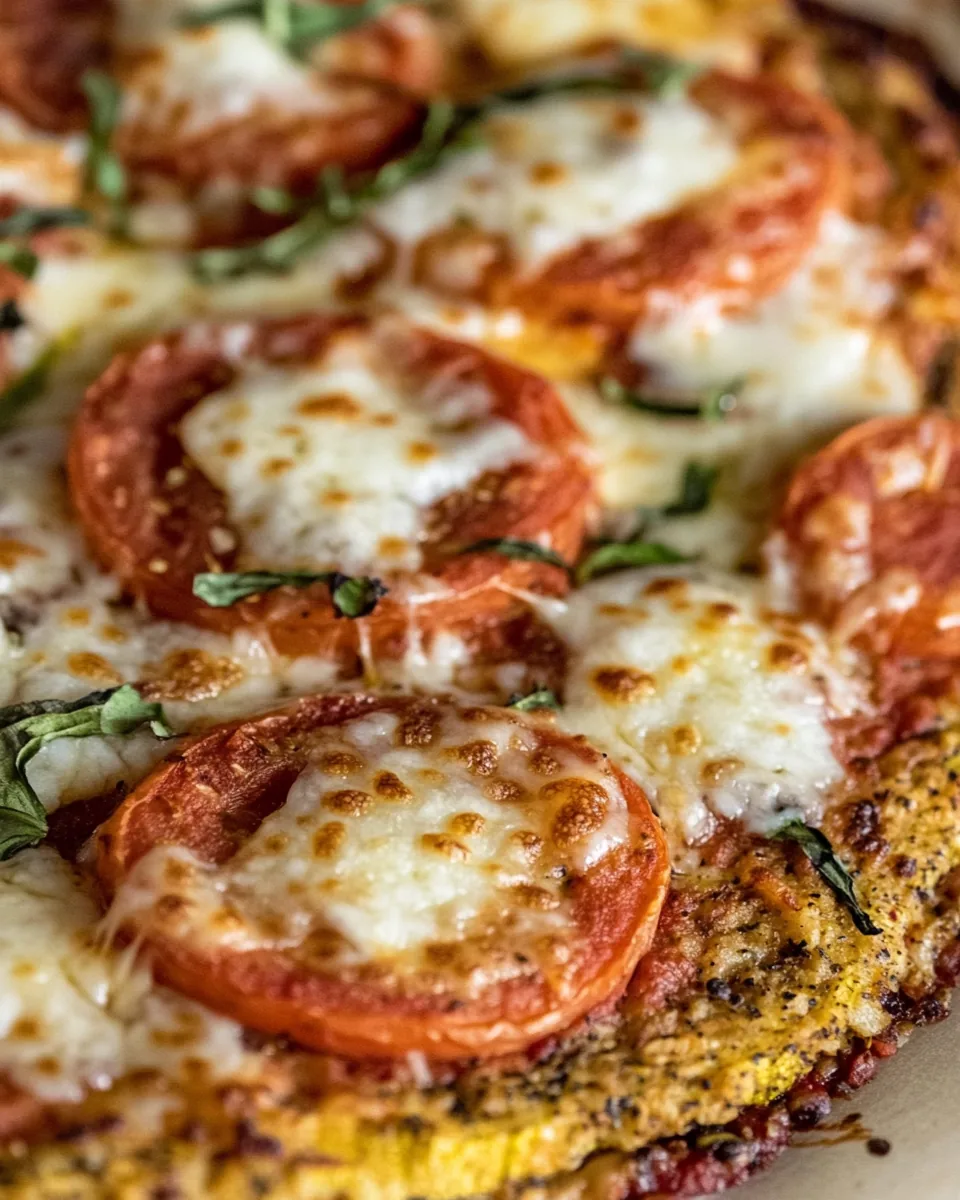
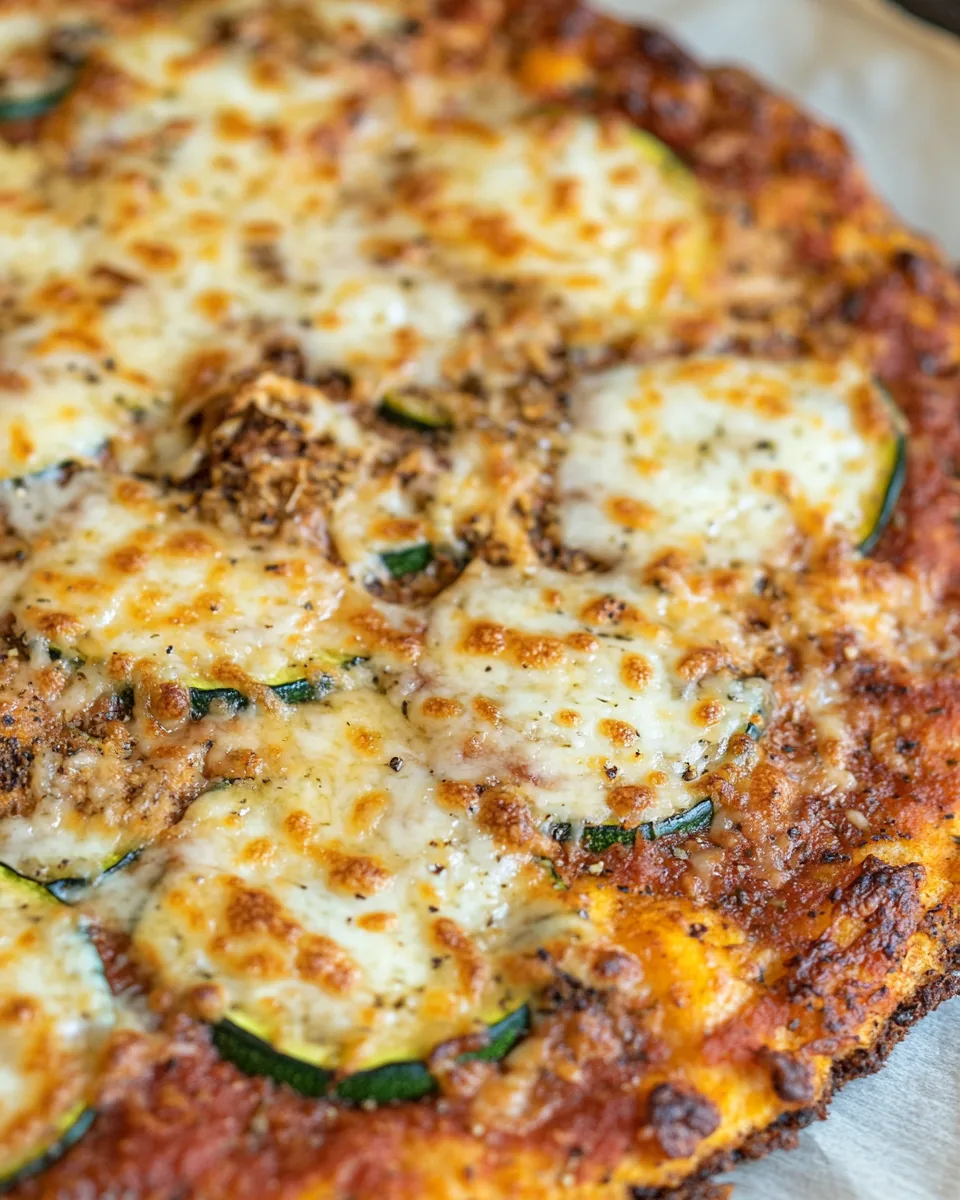
Finally, Zucchini Pizza Crust is just darn tasty! It has the perfect texture—crispy on the edges and soft in the center. The flavors of the cheese, zucchini, and herbs meld beautifully together, making each bite a delightful experience. You won’t even miss traditional pizza dough!
Recipe Ingredients for Zucchini Pizza Crust
When crafting the perfect Zucchini Pizza Crust, it’s all about finding harmony among the ingredients. Each component plays a key role in ensuring a delicious and functional crust. The primary star here is the zucchini, which lends moisture and flavor. Eggs act as a binder, while flour provides structure. The cheeses bring richness and enhance the taste, and the olive oil adds a touch of healthy fat to keep things moist. Together, these ingredients make a dynamic, tasty base for your favorite toppings.
- Zucchini: 2 cups grated zucchini (packed and squeezed dry) – This is the main ingredient. Squeezing out the moisture is crucial to achieve a crispy crust.
- Eggs: 2 large eggs, beaten – They act as a binder, helping to hold the crust together.
- Flour: ¼ cup all-purpose flour – This adds structure. You can substitute it with gluten-free flour to keep the recipe gluten-free.
- Mozzarella Cheese: ½ cup finely shredded mozzarella cheese – This adds creaminess and flavor to the crust.
- Parmesan Cheese: ½ cup finely grated fresh Parmesan cheese – Brings a sharp, savory note that enhances the overall taste.
- Olive Oil: 1 tablespoon extra virgin olive oil – This adds moisture and flavor, helping the crust cook evenly.
- Italian Seasoning: 1 teaspoon Italian seasoning – A blend of herbs that elevates the flavor of the crust.
- Pizza Sauce and Toppings: as desired – Go wild with your favorite toppings!
Instructions for Zucchini Pizza Crust
Making a Zucchini Pizza Crust is a delightful process that can be easily tackled. Follow these steps to create a delicious base for your pizza masterpiece:
- Preheat your oven to 400°F (about 200°C). This is crucial for achieving that crispy crust. While the oven heats, grab a flat cookie sheet or pizza pan and line it with parchment paper. To ensure nothing sticks, give the parchment a light spray with nonstick cooking spray.
- In a medium bowl, combine the grated zucchini, beaten eggs, flour, mozzarella cheese, Parmesan cheese, olive oil, and Italian seasoning. Take your time mixing these ingredients together until they’re well combined. Aim for a thick, cohesive mixture.
- Now it’s time to shape the crust! Transfer the zucchini mixture onto the prepared parchment paper. Use your hands to pat it into a thin, round shape about 12 to 14 inches in diameter. Make sure it’s evenly spread, as this helps it bake uniformly.
- Place the pizza crust in your preheated oven and bake for about 30 minutes. Look for a golden brown color around the edges as an indicator that it’s done. Keep an eye on it; you want it perfectly cooked, not burnt!
- Once the crust is golden, carefully remove it from the oven. Flip the crust over to ensure both sides get that lovely, crispy texture. Return it to the oven for an additional 10 minutes. Watch closely during this time to prevent over-browning!
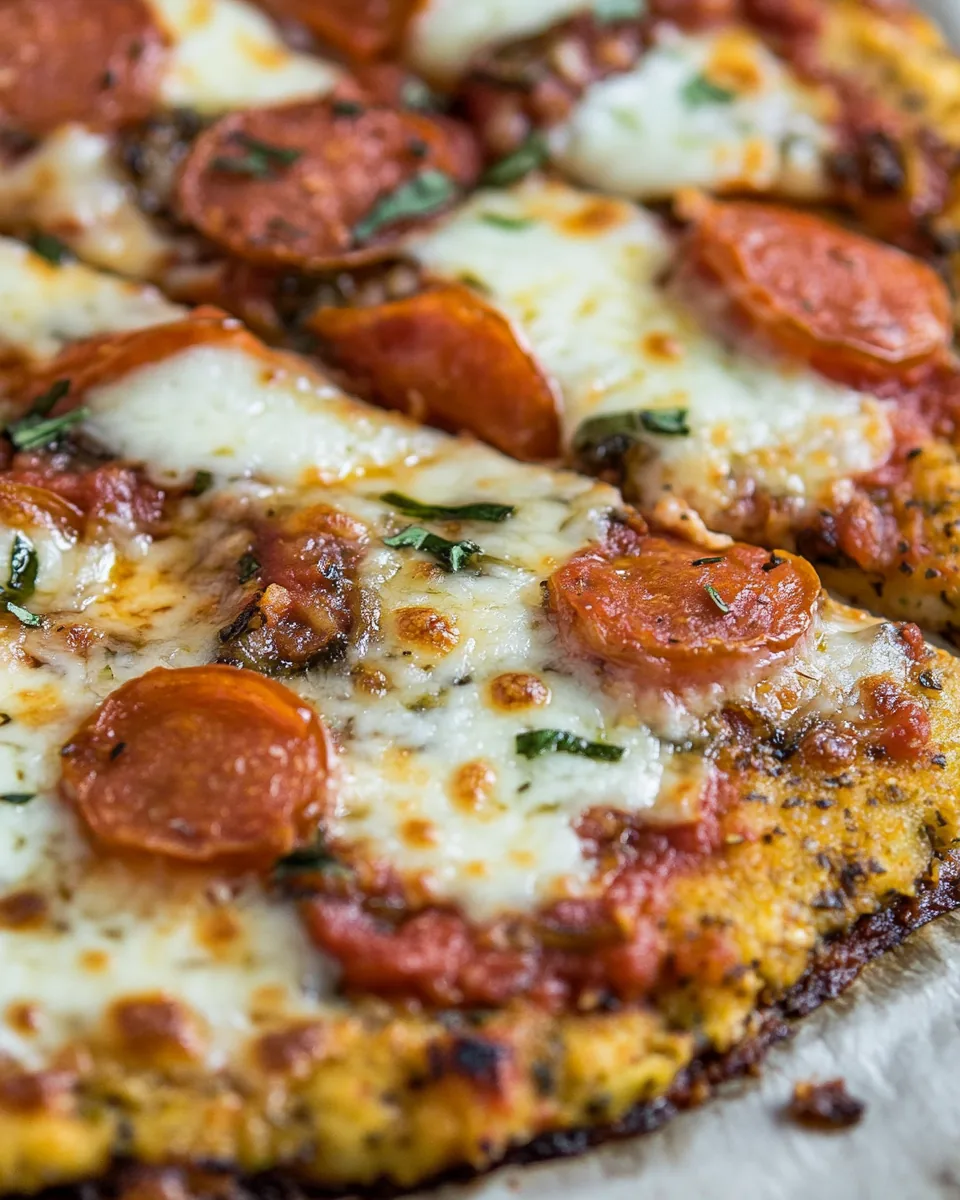
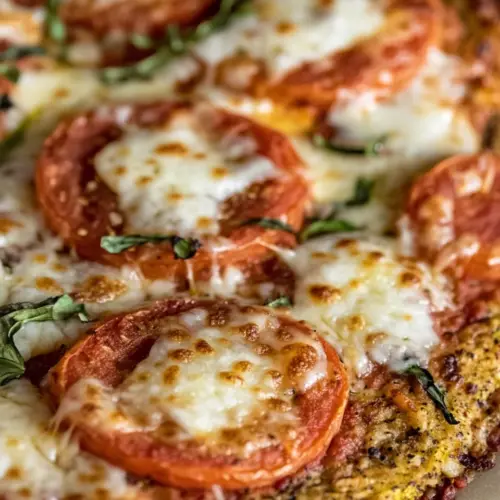
- Remove the crust one last time and add your favorite pizza sauce and toppings. Get creative! Whether you prefer classic pepperoni or a veggie overload, this is your chance to make it your own.
- After topping it off, place the pizza back in the oven just until the cheese melts and everything is heated through. This usually takes about 5 to 10 minutes.
- Once everything looks delicious, remove it from the oven and let it cool for a few minutes. Slice it up and enjoy each bite of your homemade Zucchini Pizza Crust.
- Don’t forget to savor the moment! You’ve created something special that brings together health and comfort.
Things Worth Knowing
- Squeeze It Dry: The more moisture you can extract from the zucchini, the better the crust will turn out. Aim for less than 1/3 cup moisture after squeezing.
- Watch the Oven: Keep an eye on the crust as it bakes. Ovens can vary, and you want to catch it at that perfect golden brown stage.
- Experiment with Toppings: Feel free to get creative! Try different sauces and toppings to keep things exciting.
- Storing Leftovers: If you have any leftovers, store them in an airtight container in the fridge for up to three days. Reheat in the oven for best results.
Pro Tips and Tweaks
To get the absolute best out of your Zucchini Pizza Crust, I’ve gathered some of my top tips below:
- Storage: To keep leftovers fresh, store the slices in an airtight container in the fridge for up to three days.
- Freezing: You can freeze the unbaked crust for up to a month. Just thaw it before adding toppings and baking.
- Variations: Experiment with different cheeses or herbs. Try adding feta cheese or fresh basil to elevate the flavor.
- Thickness Matters: For a thicker crust, don’t spread it as thin. Just remember, it will take longer to bake!
- Serving Size: This recipe yields about six slices, perfect for a small gathering or family meal.
- Make It Spicy: For those who enjoy a kick, add some crushed red pepper flakes to the mixture or top your pizza with spicy sausage.
- Use Fresh Ingredients: Whenever possible, use fresh vegetables and real cheese to enhance the pizza’s overall flavor.
Perfect Matches for Zucchini Pizza Crust
- Salads: Pair this pizza with a refreshing green salad or a light arugula salad to balance the meal.
- Occasions: It’s perfect for casual weeknight dinners, lunch gatherings, or even a family game night.
- Storage Tips: Leftover slices can be stored in the fridge or wrapped in foil for lunch the next day.
- Seasonal Pairings: During summer, add fresh tomatoes and basil as toppings to highlight seasonal produce.
- Meal Prep: Make multiple crusts ahead of time and store them in the freezer for an easy weeknight meal.
FAQ
Conclusion
The Zucchini Pizza Crust stands out as a delicious and healthy alternative to traditional pizza. It’s a fantastic way to enjoy pizza night without the guilt of high carbs. I encourage you to give it a try and discover how simple it is to create a healthier version of your favorite dish. You might just find that you love it even more than the classic! Enjoy making your own variations and sharing this recipe with friends and family.
Zucchini Pizza Crust
Equipment
- Frying Pan
- Blender
- Oven
- Grater
- Chef's Knife
- Mixing Bowl
- Baking Sheet
Ingredients
- 2 cups Zucchini grated, packed, squeezed dry
- 2 large Eggs beaten
- ¼ cup Flour can substitute gluten-free flour
- ½ cup Mozzarella Cheese finely shredded
- ½ cup Parmesan Cheese finely grated
- 1 tablespoon Olive Oil extra virgin
- 1 teaspoon Italian Seasoning
- Pizza Sauce and Toppings as desired
Instructions
- Preheat your oven to 400°F (about 200°C). This is crucial for achieving that crispy crust. While the oven heats, grab a flat cookie sheet or pizza pan and line it with parchment paper. To ensure nothing sticks, give the parchment a light spray with nonstick cooking spray.
- In a medium bowl, combine the grated zucchini, beaten eggs, flour, mozzarella cheese, Parmesan cheese, olive oil, and Italian seasoning. Take your time mixing these ingredients together until they’re well combined. Aim for a thick, cohesive mixture.
- Now it's time to shape the crust! Transfer the zucchini mixture onto the prepared parchment paper. Use your hands to pat it into a thin, round shape about 12 to 14 inches in diameter. Make sure it’s evenly spread, as this helps it bake uniformly.
- Place the pizza crust in your preheated oven and bake for about 30 minutes. Look for a golden brown color around the edges as an indicator that it’s done. Keep an eye on it; you want to catch it at that perfect golden brown stage.
- Once the crust is golden, carefully remove it from the oven. Flip the crust over to ensure both sides get that lovely, crispy texture. Return it to the oven for an additional 10 minutes. Watch closely during this time to prevent over-browning!
- Remove the crust one last time and add your favorite pizza sauce and toppings. Get creative! Whether you prefer classic pepperoni or a veggie overload, this is your chance to make it your own.
- After topping it off, place the pizza back in the oven just until the cheese melts and everything is heated through. This usually takes about 5 to 10 minutes.
- Once everything looks delicious, remove it from the oven and let it cool for a few minutes. Slice it up and enjoy each bite of your homemade Zucchini Pizza Crust.
- Don’t forget to savor the moment! You’ve created something special that brings together health and comfort.
Notes
- Squeeze It Dry: The more moisture you can extract from the zucchini, the better the crust will turn out. Aim for less than 1/3 cup moisture after squeezing.
- Watch the Oven: Keep an eye on the crust as it bakes. Ovens can vary, and you want to catch it at that perfect golden brown stage.
- Experiment with Toppings: Feel free to get creative! Try different sauces and toppings to keep things exciting.
- Storing Leftovers: If you have any leftovers, store them in an airtight container in the fridge for up to three days. Reheat in the oven for best results.