St Patrick’s Day Crinkle Cookies
As the vibrant greens of spring emerge, I can’t help but get excited about one of my favorite treats: St Patrick’s Day Crinkle Cookies. These delightful cookies are a festive addition to any celebration, especially around St. Patrick’s Day. The moment I take the first bite, I’m transported back to my childhood kitchen, where the scent of baking filled the air. I remember rolling the dough in powdered sugar, giggling as the sweet coating clung to my fingers. It was a messy but joyful process, one that brought my family together during this special time of year. The combination of flavors in these cookies is simply irresistible. The lightness of cake mix meets the nutty undertones of pistachio pudding, creating a unique taste that makes everyone come back for more. Whether you’re hosting a gathering or just treating yourself, these cookies are sure to impress.
Recipe Snapshot
19 mins
10 mins
9 mins
Medium
150 kcal
2 g
Vegan, Gluten-Free
7 g
Pre-Cut Parchment Paper, Baking Sheets, Nordic Ware Aluminum Half Sheet Pans
Why This St Patrick’s Day Crinkle Cookies Shines
They’re Super Easy to Make
One of the standout features of St Patrick’s Day Crinkle Cookies is their simplicity. With just a handful of ingredients, you can whip up a batch in no time. There’s something so satisfying about mixing everything together and letting the oven do the magic. It’s a perfect recipe for those who want to bring a bit of sweetness to their day without spending hours in the kitchen.
Colorful and Fun
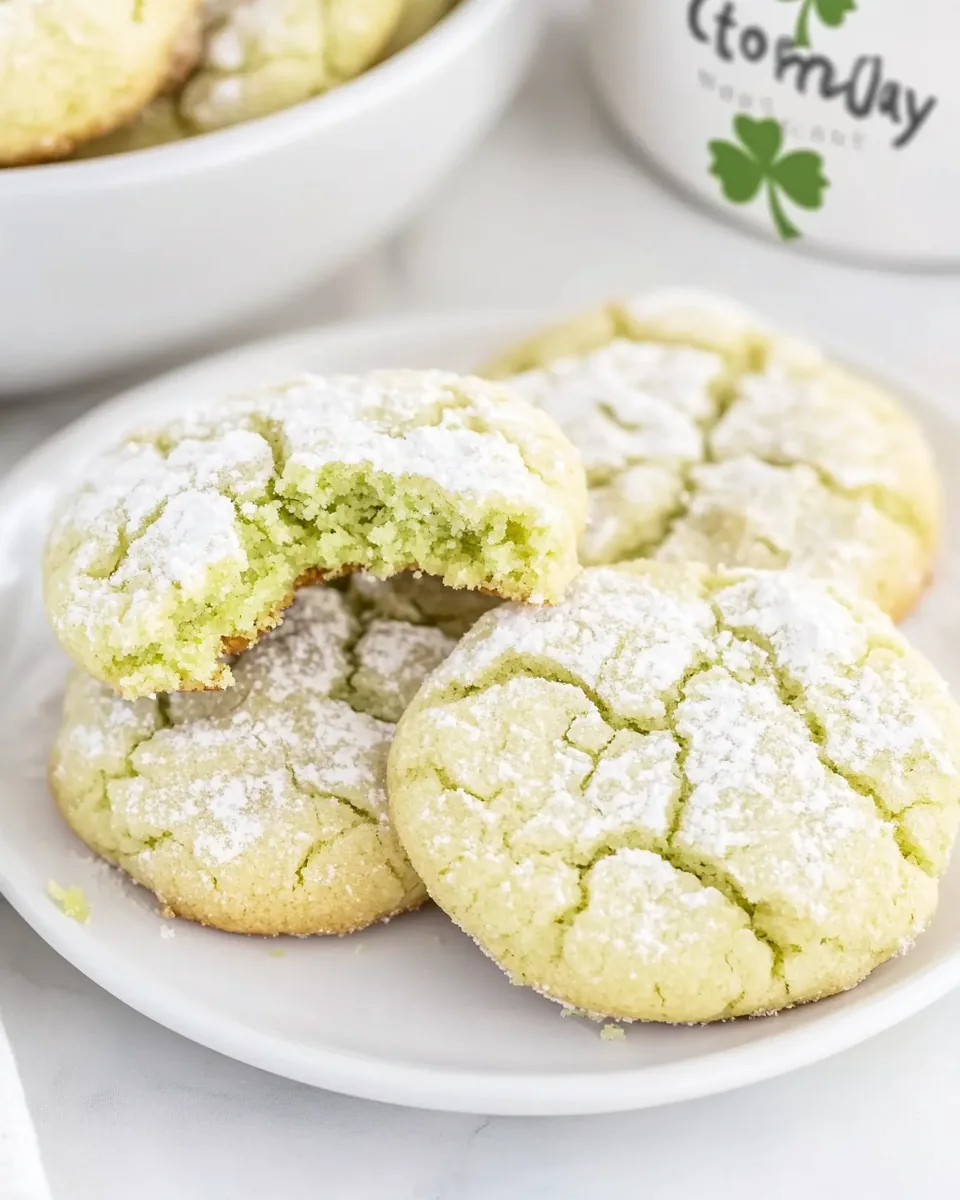
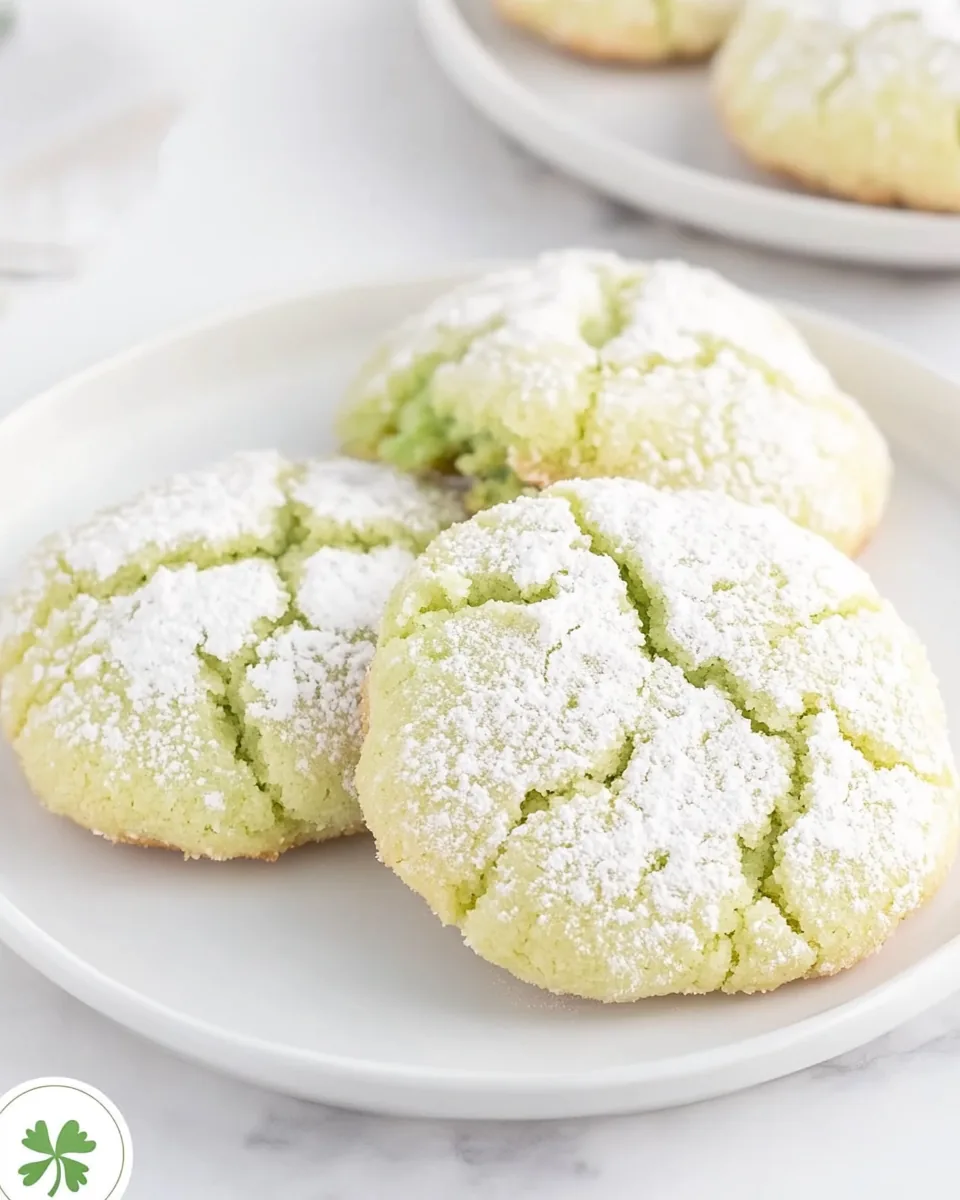
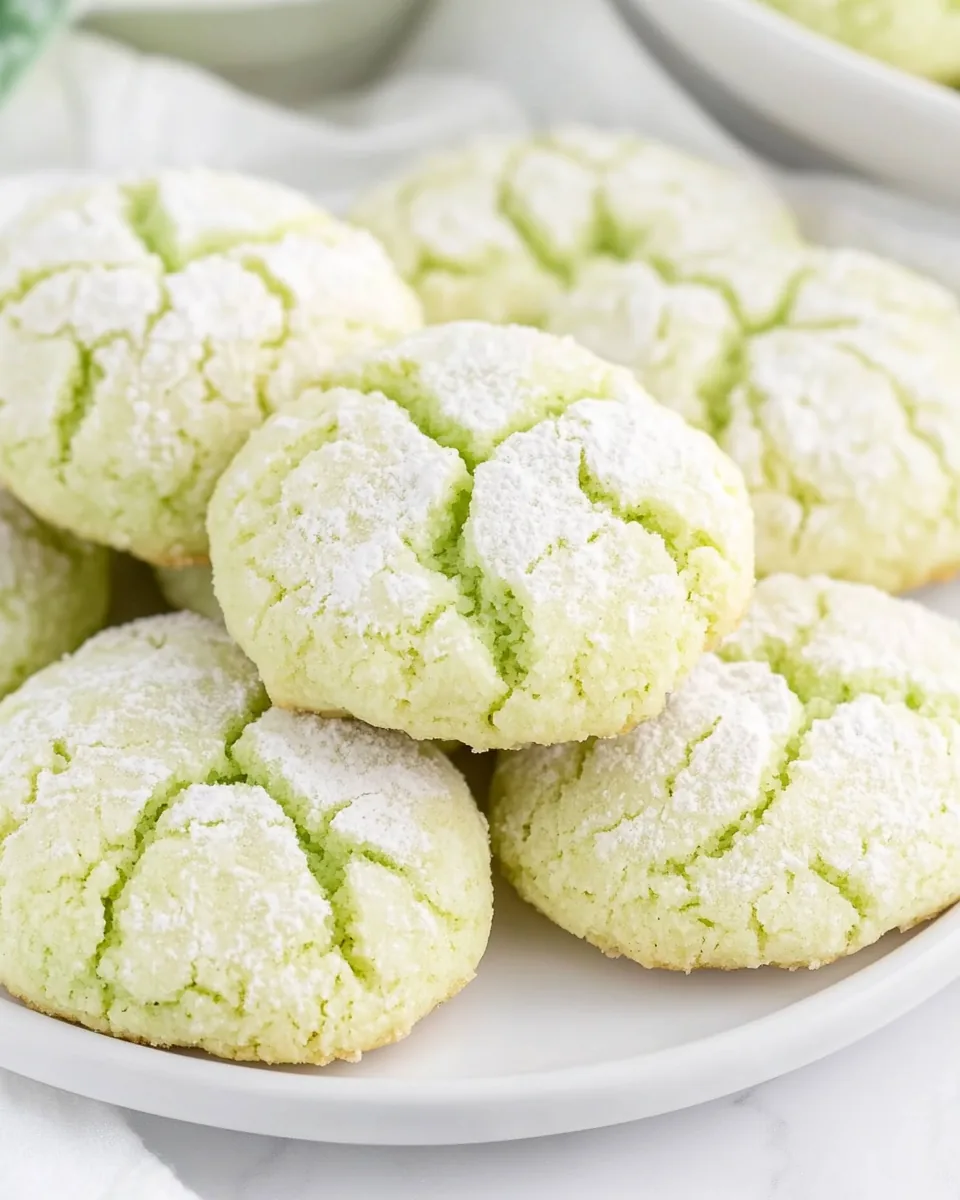
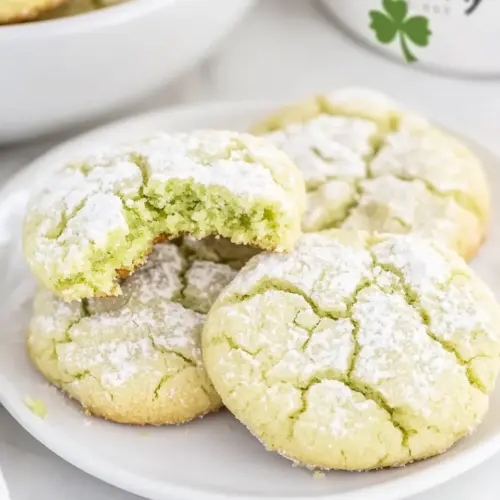
These cookies aren’t just delicious; they’re also visually appealing. The bright green hues from the pistachio pudding are complemented by the snowy dusting of powdered sugar, creating a festive look that’s perfect for any celebration. You can even add a drop or two of green food coloring for that extra pop! This makes them a charming treat for parties, especially when you want to impress guests.
Perfect for Sharing
There’s something magical about baking that brings people together. These cookies are ideal for sharing with friends and family, whether it’s at a potluck, a picnic, or just a cozy gathering at home. I love to pack them in cute boxes or tins and give them as gifts. Everyone enjoys a little sweet treat, and these cookies are sure to bring a smile to anyone’s face!
Great for Any Occasion
While they’re particularly delightful for St. Patrick’s Day, the charm of St Patrick’s Day Crinkle Cookies extends beyond just one holiday. They’re versatile enough to be made for any occasion, from springtime celebrations to casual get-togethers. Their unique flavor profile makes them a hit all year round!
A Delicious Twist on Tradition
Typically, crinkle cookies are made with chocolate or vanilla, but the pistachio twist makes these cookies stand out. The nutty flavor adds depth and a delightful surprise that will keep everyone guessing about the secret ingredient. It’s a fun way to introduce something new while still honoring beloved cookie traditions.
Stress-Free Baking
If you’re like me, the kitchen can sometimes feel overwhelming, especially during busy seasons. The beauty of these cookies is that they require minimal preparation and cleanup. You can quickly mix, scoop, and bake without the stress of complicated techniques. It’s a worry-free baking experience that yields delicious results!
Main Ingredients for St Patrick’s Day Crinkle Cookies

The ingredients for St Patrick’s Day Crinkle Cookies are wonderfully straightforward and contribute to the delightful texture and taste of these cookies. The key players in this recipe include cake mix, pistachio pudding, and eggs, which come together to create a soft, chewy cookie. The use of confectioners’ sugar not only provides sweetness but also gives these cookies their signature crinkled appearance.
- White Cake Mix (15.25 ounces) – The foundation of these cookies, providing a light and fluffy texture. It simplifies the process by eliminating the need for measuring flour, baking powder, and other basic ingredients.
- Instant Pistachio Pudding Mix (3.4 ounces) – This adds a unique flavor and moisture to the cookies. Its vibrant green color also makes the cookies visually appealing.
- Large Eggs (2) – Essential for binding the ingredients together, eggs help create a chewy texture. They also add richness to the flavor.
- Vegetable Oil (½ cup) – This ingredient ensures the cookies remain moist and tender, preventing them from drying out during baking.
- Pure Vanilla Extract (1 teaspoon) – A staple in baking, vanilla enhances the overall flavor profile, adding warmth and depth to the cookies.
- Confectioners’ Sugar (⅓ cup) – Not only does this sweetener provide a sugary taste, but it also coats the cookies before baking, ensuring that beautiful crinkle effect.
Step by Step Guide for St Patrick’s Day Crinkle Cookies
Baking St Patrick’s Day Crinkle Cookies is an enjoyable process, and I’m excited to guide you through each step. You’ll find that it’s as simple as mixing, scooping, and baking! Just follow these detailed instructions for cookies that are sure to impress.
Preheat your oven to 375°F. This is an essential step to ensure your cookies bake properly. A hot oven creates the perfect environment for the cookies to rise and develop that lovely crinkle.
Line a baking sheet with pre-cut parchment paper. This makes for easy cleanup and prevents the cookies from sticking to the pan. If you don’t have parchment paper, you could lightly grease the pan as an alternative.
In the bowl of your stand mixer fitted with the paddle attachment, or in a large bowl with a hand mixer, combine the cake mix, pudding mix, eggs, oil, and vanilla extract. Mix until everything is well blended; the dough will be quite thick and slightly sticky.
Place the confectioners’ sugar into a medium bowl. This will be used for rolling your cookie dough balls. Make sure it’s enough to coat the cookies generously.
Using a medium cookie scoop (about 1½ tablespoons), drop balls of dough into the bowl with confectioners’ sugar. The dough will indeed be sticky, so you may want to use your hands to help roll them in the sugar until they’re fully coated.
Gently form the dough into a ball by rolling it lightly between your palms. This ensures that the dough holds its shape during baking and creates that delicious crinkle effect on the surface.
Place the dough balls on the prepared baking pan, leaving about two inches of space between each cookie. This allows them to spread without sticking together.
Bake in the preheated oven for 7 to 9 minutes. Keep an eye on them; they should be set at the bottom but may still look slightly undercooked in the middle. This is the key to achieving that soft, chewy texture!
Once baked, allow the cookies to cool on the pan for 5 minutes before transferring them to a wire rack. This resting time helps them firm up and makes them easier to handle.
Things Worth Knowing
- Cooling Time Is Crucial: Allowing cookies to cool on the baking sheet helps maintain their structure. If you move them too soon, they may crumble.
- Check for Doneness: The best way to know if the cookies are done is by their appearance. They should be lightly golden around the edges and slightly puffed up.
- Mixing Technique: When combining the dough, avoid overmixing to prevent the cookies from becoming tough.
- Flavor Enhancement: Feel free to add in your favorite nuts or chocolates for extra flavor, but make sure they complement the pistachio.
Helpful Notes about St Patrick’s Day Crinkle Cookies
While making St Patrick’s Day Crinkle Cookies, it’s always good to keep a few notes in mind. Here are some tips to enhance your baking experience.
- Storage: Keep any leftover cookies in an airtight container at room temperature for up to three days. They’ll stay soft and delicious!
- Freezing: Yes, you can freeze these cookies! Just let them cool completely, then place them in a freezer-safe bag for up to three months.
- Pairing: These cookies pair wonderfully with a cup of tea or coffee, perfect for an afternoon treat or dessert.
- Variations: Try adding a few drops of mint extract to the dough for a refreshing twist!
- Presentation: Consider dusting additional confectioners’ sugar on top before serving for a lovely finish.
- Coloring: For a more festive look, mix in a bit of green food coloring to the dough.
What to Serve With St Patrick’s Day Crinkle Cookies
When serving St Patrick’s Day Crinkle Cookies, consider pairing them with various delightful treats and beverages to enhance your gathering experience. Here are some ideas to get you started:
- Coffee or Tea: These cookies go hand-in-hand with a warm cup of coffee or tea, making for a perfect afternoon snack.
- Fruit Salads: Fresh fruit salads bring a refreshing contrast to the sweetness of the cookies, balancing the flavors nicely.
- Iced Drinks: Serve these cookies alongside a cold iced coffee or sparkling water for a refreshing treat.
- Festive Desserts: Consider mixing in other green-themed desserts, such as mint brownies or pistachio mousse, to keep the theme going.
- Celebration Platters: They can be a lovely addition to any dessert platter, especially during spring celebrations or St. Patrick’s Day festivities.
- Picnics: These cookies are easy to pack, making them an excellent choice for picnics or outdoor gatherings.
FAQ
Conclusion
The St Patrick’s Day Crinkle Cookies are a sweet and festive treat that brings joy to any gathering. With their vibrant color and soft texture, they stand out as a delightful dessert. I encourage you to give this recipe a try, and I’m sure you’ll find them to be a favorite among friends and family. Embrace the spirit of the season and enjoy baking these charming cookies today!
St Patrick’s Day Crinkle Cookies
Equipment
- Pre-Cut Parchment Paper
- Baking Sheets
- Nordic Ware Aluminum Half Sheet Pans
Ingredients
- 1 box White Cake Mix 15.25 ounces
- 1 box Instant Pistachio Pudding Mix 3.4 ounces
- 2 large Large Eggs
- ½ cup Vegetable Oil
- 1 teaspoon Pure Vanilla Extract
- ⅓ cup Confectioners’ Sugar
Instructions
- Preheat your oven to 375°F. This is an essential step to ensure your cookies bake properly. A hot oven creates the perfect environment for the cookies to rise and develop that lovely crinkle.
- Line a baking sheet with pre-cut parchment paper. This makes for easy cleanup and prevents the cookies from sticking to the pan. If you don’t have parchment paper, you could lightly grease the pan as an alternative.
- In the bowl of your stand mixer fitted with the paddle attachment, or in a large bowl with a hand mixer, combine the cake mix, pudding mix, eggs, oil, and vanilla extract. Mix until everything is well blended; the dough will be quite thick and slightly sticky.
- Place the confectioners’ sugar into a medium bowl. This will be used for rolling your cookie dough balls. Make sure it’s enough to coat the cookies generously.
- Using a medium cookie scoop (about 1½ tablespoons), drop balls of dough into the bowl with confectioners’ sugar. The dough will indeed be sticky, so you may want to use your hands to help roll them in the sugar until they’re fully coated.
- Gently form the dough into a ball by rolling it lightly between your palms. This ensures that the dough holds its shape during baking and creates that delicious crinkle effect on the surface.
- Place the dough balls on the prepared baking pan, leaving about two inches of space between each cookie. This allows them to spread without sticking together.
- Bake in the preheated oven for 7 to 9 minutes. Keep an eye on them; they should be set at the bottom but may still look slightly undercooked in the middle. This is the key to achieving that soft, chewy texture!
- Once baked, allow the cookies to cool on the pan for 5 minutes before transferring them to a wire rack. This resting time helps them firm up and makes them easier to handle.
Notes
- Storage: Keep any leftover cookies in an airtight container at room temperature for up to three days. They’ll stay soft and delicious!
- Freezing: Yes, you can freeze these cookies! Just let them cool completely, then place them in a freezer-safe bag for up to three months.
- Pairing: These cookies pair wonderfully with a cup of tea or coffee, perfect for an afternoon treat or dessert.
- Variations: Try adding a few drops of mint extract to the dough for a refreshing twist!
- Presentation: Consider dusting additional confectioners’ sugar on top before serving for a lovely finish.
- Coloring: For a more festive look, mix in a bit of green food coloring to the dough.