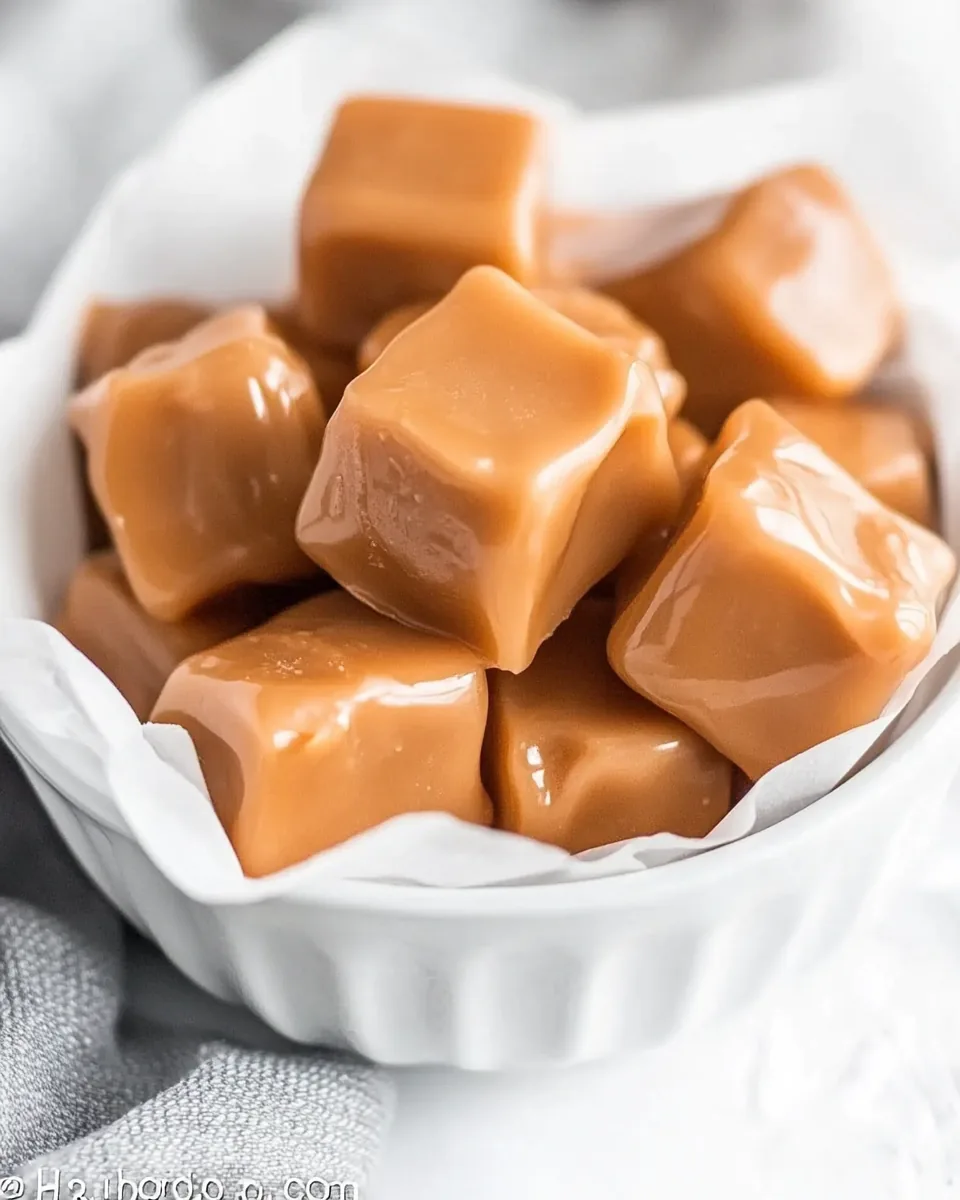
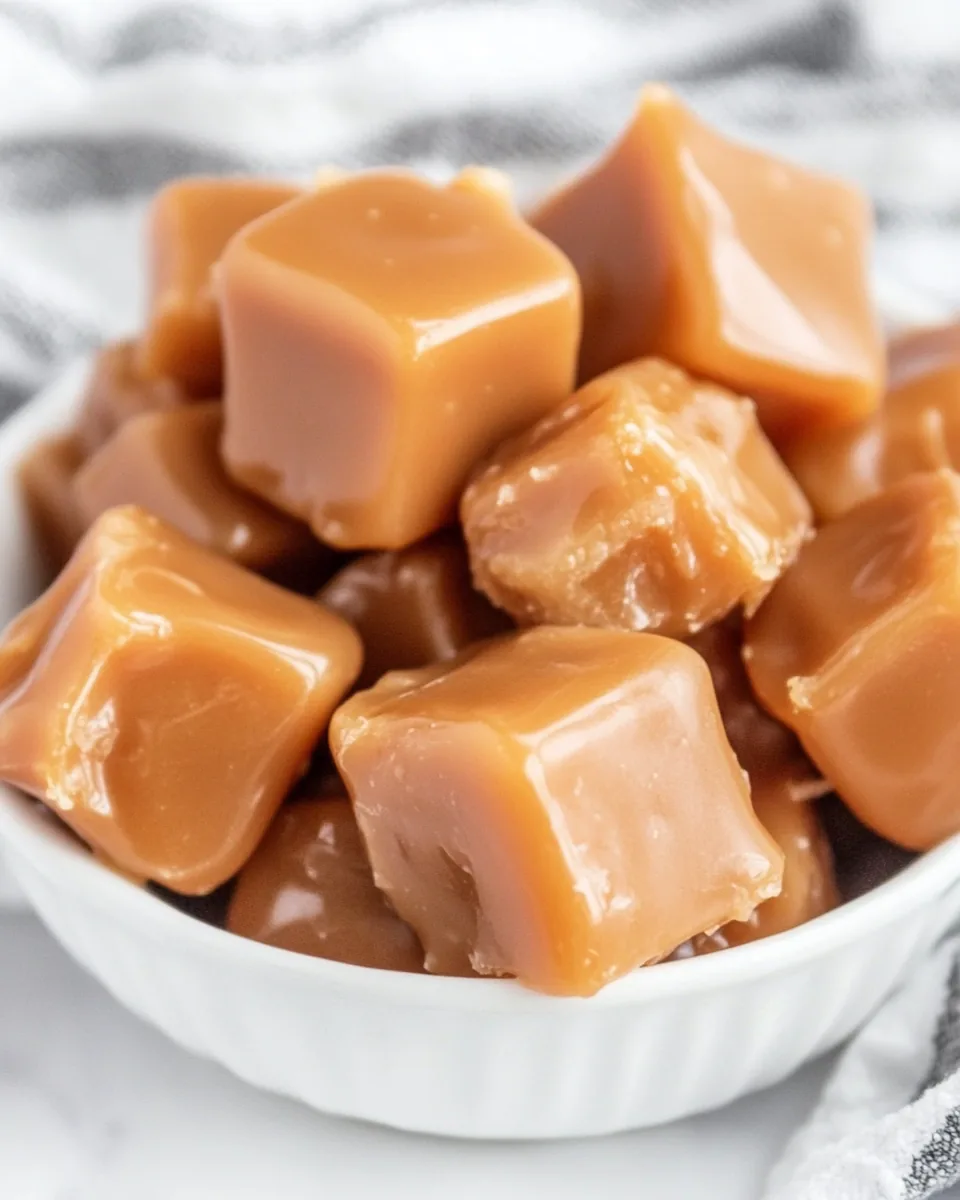
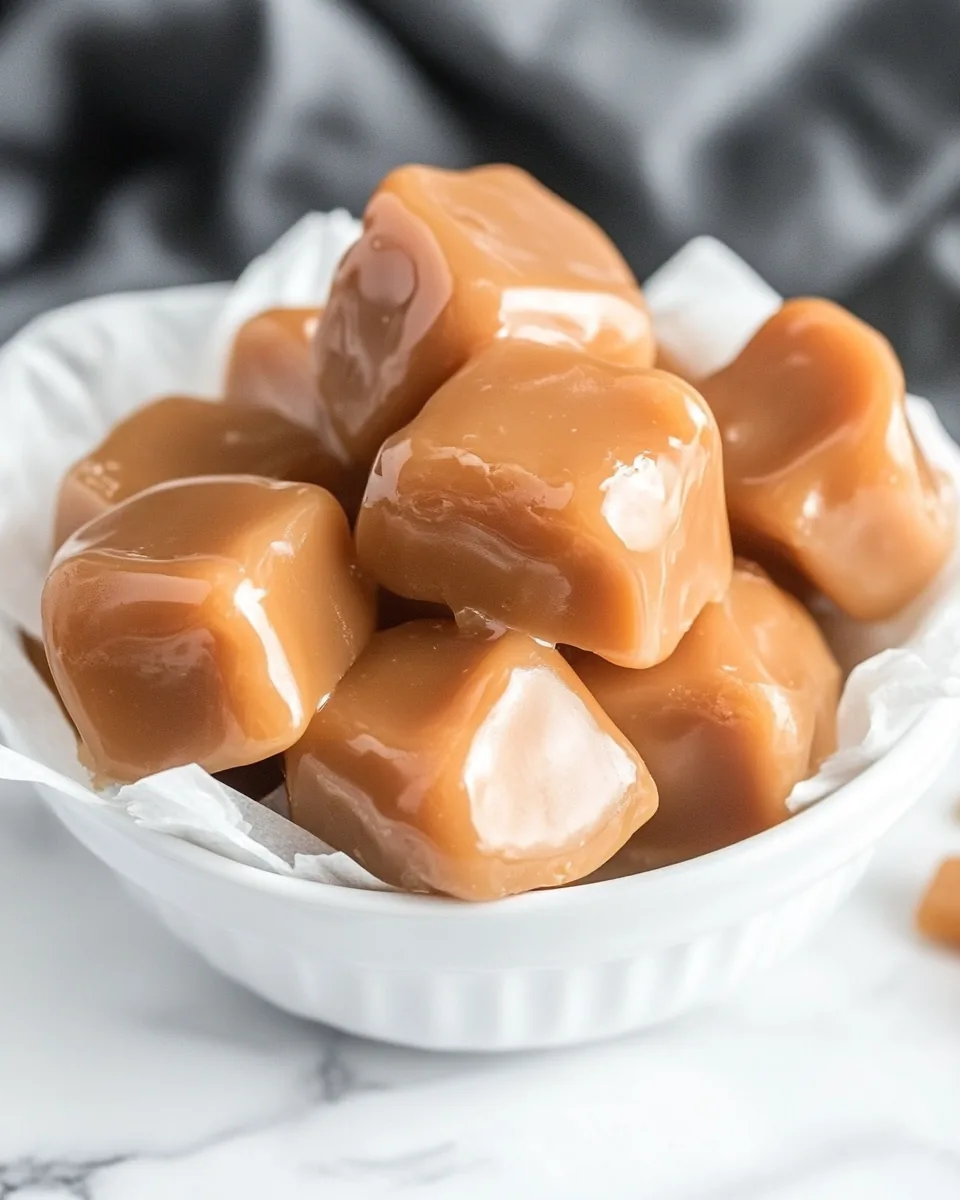
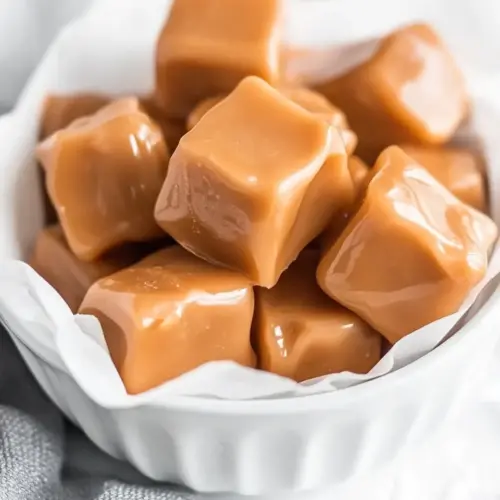
Soft Chewy Cream Caramels
There’s something truly special about making Soft Chewy Cream Caramels in your own kitchen. I remember the first time I attempted these delightful candies, my kitchen transformed into a warm, sweet haven filled with the rich aroma of melting butter and sugar. It felt like a cozy embrace, especially as I watched the golden mixture bubble and thicken, promising a treat that would melt in your mouth. The joy was not just in the eating, but in the making; stirring, waiting, and finally, slicing into those perfectly square pieces wrapped in wax paper. This experience isn’t just about candy; it’s about creating memories and sharing them with loved ones.
Recipe Snapshot
60 mins
0 mins
0 mins
Medium
120 kcal
1 g
Gluten-Free, Low FODMAP
7 g
Frying Pan, Large Pot, Chef’s Knife, Mixing Bowl, Wooden Spoon
There’s a unique satisfaction when you create something from scratch, especially if it brings a smile to others. I often find myself reaching for these Soft Chewy Cream Caramels during gatherings or quiet evenings at home, wrapped in nostalgia and sweetness. They remind me of simpler times, and there’s something heartwarming about sharing them with friends or tucking them into lunchboxes. Each bite is a delightful reminder of why I love cooking and creating in my kitchen.
The Best Thing About This Soft Chewy Cream Caramels
1. The Perfect Texture
The beauty of Soft Chewy Cream Caramels lies in their texture. Unlike regular caramels, these are soft and chewy, melting just right in your mouth. The combination of butter and heavy cream creates a smooth consistency that’s a pleasure to enjoy.
2. Rich, Indulgent Flavor
Every piece bursts with rich, buttery flavor, thanks to the high-quality ingredients like sugar and corn syrup. The deep sweetness balanced with a hint of vanilla makes them irresistible.
3. Simple Yet Impressive
Despite their gourmet taste, Soft Chewy Cream Caramels are simple to make. With just a handful of ingredients and straightforward steps, anyone can whip up these treats. It’s a great way to impress family and friends without spending hours in the kitchen.
4. Perfect for Gifting
These caramels make for fantastic gifts. Wrap them in pretty packaging and share them during holidays or special occasions. Who wouldn’t appreciate receiving a box of homemade candy?
5. Versatility
While delicious on their own, Soft Chewy Cream Caramels can also be used in various desserts. Think caramel sauces for ice cream or as a sweet addition to baked goods. The possibilities are endless!
Ingredients Overview for Soft Chewy Cream Caramels
The ingredients for Soft Chewy Cream Caramels are simplicity at its finest. Each element plays a crucial role in creating the perfect caramel. The combination of butter and heavy cream ensures that the caramels are rich and creamy, while corn syrup helps to achieve that delightful chewiness. Together, these ingredients come together to create a comforting treat that feels homemade and personal.
- 1 cup butter (2 sticks): Provides that rich, creamy base that makes the caramels so indulgent.
- 2 cups sugar: The sweet backbone of the recipe, crucial for that delightful sweetness.
- 2 cups heavy cream: Adds creaminess and helps in achieving a smooth texture.
- ½ cup light corn syrup: Helps prevent crystallization, ensuring a chewy consistency.
- 2 teaspoons vanilla: Enhances the overall flavor, bringing warmth to the caramels.
Preparation Steps for Soft Chewy Cream Caramels
Making Soft Chewy Cream Caramels is a rewarding journey that involves a bit of patience but results in a delicious reward. Let’s dive into the preparation steps!
- Start by lining an 8×8 pan with non-stick foil. This will help your caramels come out easily once they’re set, preventing any sticking or tearing. Make sure the foil is cut to size, so it hangs over the edges of the pan slightly.
- Melt butter in a heavy saucepan over medium heat. As the butter begins to melt, it’ll fill your kitchen with a comforting aroma. Stir it regularly to ensure it melts evenly and doesn’t brown.
- Add sugar, heavy cream, and light corn syrup to the melted butter. Mix everything together thoroughly until the sugar is completely dissolved. This uniformity is critical for achieving that perfect caramel texture.
- Bring the mixture to a gentle boil while stirring occasionally. As it heats, the consistency will start to thicken. Keep an eye on the temperature; this is where the candy thermometer comes in handy!
- Insert a candy thermometer into the mixture and continue boiling over medium-low heat. Watch closely as the temperature rises, stirring occasionally to prevent any burning. The goal is to get it to 247-248°F for that soft, chewy texture.
- If you prefer a firmer caramel, allow it to cook to 250°F. This process can take quite a while, up to an hour, so don’t rush it. Patience is key!
- Once it reaches your desired temperature, remove the saucepan from heat. Add vanilla and stir to combine. The addition of vanilla will enhance the flavor, making your caramels even more delightful.
- Pour the caramel mixture into the prepared pan. It will be hot, so be careful! Spread it evenly across the pan with a spatula if needed.
- Allow the caramel to cool completely. Once it’s set, use the foil to lift it from the pan and place it on a cutting board.
- Slice into 1-inch squares and wrap each piece in wax paper. This not only keeps them fresh but also makes for a lovely presentation.
- These caramels freeze well, so feel free to make a batch ahead of time!
Things Worth Knowing
- Temperature Monitoring: Using a candy thermometer is essential for achieving the right texture. Too low, and your caramels won’t set; too high, and they’ll become hard.
- Stirring: Constant stirring during the melting and boiling phases ensures even cooking and prevents burning.
- Cooling Time: Allowing the caramels to cool completely is crucial. Don’t rush this step, as they need to firm up properly.
- Wax Paper: Wrapping your caramels in wax paper not only makes them easy to store but also gives them a professional touch.
Customization Ideas

There are so many ways to customize your Soft Chewy Cream Caramels. Here are some tips to get creative!
- Storage: Store your homemade caramels in an airtight container at room temperature. They can last up to two weeks this way.
- Freezing: Yes, you can freeze these caramels! Just ensure they’re wrapped tightly in wax paper and stored in an airtight container.
- Variations: Consider adding a pinch of sea salt on top before they set for a salted caramel twist.
- Flavor Infusions: You can infuse the cream with flavors like coffee or citrus before mixing it into the caramel for an exciting twist!
- Mix-Ins: Stir in nuts or chocolate chips after removing from heat for added texture and flavor.
How to Enjoy Soft Chewy Cream Caramels
When it comes to enjoying Soft Chewy Cream Caramels, the options are endless!
- Sweet Treats: Serve them as a sweet treat after dinner or as a pick-me-up during the day. They’re perfect for satisfying that sweet tooth!
- Gift Giving: These caramels are wonderful homemade gifts. Wrap them beautifully, and they’ll be a hit at any gathering.
- Seasonal Treat: Perfect for holidays or special occasions, they bring a touch of homemade charm to any celebration.
- Pair with Coffee: Enjoy with a cup of coffee or tea for a delightful afternoon treat.
- Picnic Snack: Their portability makes them an excellent snack for picnics or road trips. Just pack them in a container!
FAQ
Conclusion
The rich, buttery goodness of Soft Chewy Cream Caramels makes them a standout treat. Their soft and chewy texture combined with a delightful sweetness truly elevates this homemade candy. I encourage you to give this recipe a try; the process is simple, and the results are incredibly rewarding. Whether you’re enjoying them yourself or sharing them with loved ones, these caramels are sure to bring joy and satisfaction. Happy cooking!
Soft Chewy Cream Caramels
Equipment
- Frying Pan
- Large Pot
- Chef's Knife
- Mixing Bowl
- Wooden Spoon
Ingredients
- 1 cup Butter
- 2 cups Sugar
- 2 cups Heavy Cream
- ½ cup Corn Syrup
- 2 teaspoons Vanilla
Instructions
- Line an 8x8 pan with non-stick foil. Set aside.
- Melt the butter in a heavy saucepan. Stir in the sugar, cream, and corn syrup. Mix and bring to a gentle boil and stir until the sugar is melted.
- Insert a candy thermometer and continue boiling over medium-low heat until the candy reaches 247-248°.
- Stir occasionally.
- If you like your caramel slightly firmer, let it cook to 250°. This can take 45 minutes to an hour, so be patient.
- Remove from the heat, add the vanilla, and stir to combine. Pour into prepared pan.
- Allow caramel to cool, then lift from the pan using the foil as a sling.
- Place on a cutting board and slice into 1-inch squares. Wrap in wax paper.
- These freeze well.
Notes
- Storage: Store your homemade caramels in an airtight container at room temperature. They can last up to two weeks this way.
- Freezing: Yes, you can freeze these caramels! Just ensure they’re wrapped tightly in wax paper and stored in an airtight container.
- Variations: Consider adding a pinch of sea salt on top before they set for a salted caramel twist.
- Flavor Infusions: You can infuse the cream with flavors like coffee or citrus before mixing it into the caramel for an exciting twist!
- Mix-Ins: Stir in nuts or chocolate chips after removing from heat for added texture and flavor.