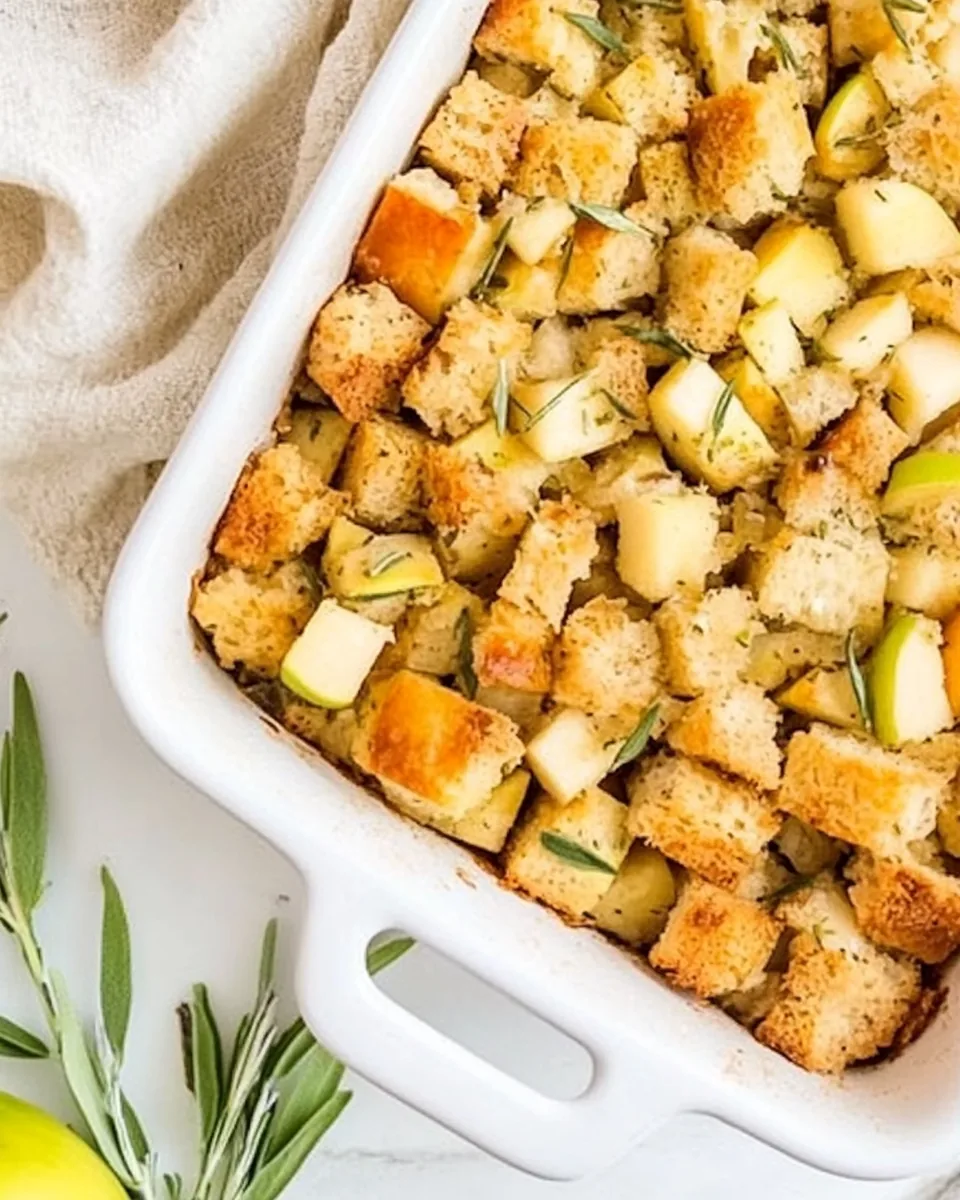
Simple Apple Sage Stuffing
The Simple Apple Sage Stuffing is a cherished dish that brings warmth and comfort to any gathering. Picture a crisp autumn day, leaves beginning to fall, and the inviting aroma of freshly baked stuffing wafting through the house. This stuffing is not just an accompaniment; it’s a cornerstone of holiday meals, especially during Thanksgiving. The combination of crusty bread, juicy apples, and fragrant herbs creates a melody of flavors that dances on your palate. I remember the first time I made this recipe for my family. We gathered around the table, and as soon as we took a bite, the joy on everyone’s faces told me that I had created something special. The crunch of the bread with the soft, sweet apples is truly a match made in heaven. It’s easy to make, and you can prepare it ahead of time, which makes it perfect for busy holiday cooking. As you prepare this dish, you’ll find yourself reminiscing about family traditions and the rich history that stuffing holds in our lives. Let’s dive into the reasons why this Simple Apple Sage Stuffing is such a beloved recipe and how you can make it a part of your holiday traditions.
Recipe Snapshot
55 mins
20 mins
35 mins
Medium
280 kcal
7 g
Gluten-Free
12 g
Skillet, Whisk, Oven, Chef’s Knife, Cutting Board, Mixing Bowl, Wooden Spoon, Baking Sheet
Why This Simple Apple Sage Stuffing Is a Winner
Versatile Dish
The Simple Apple Sage Stuffing transcends the boundaries of traditional stuffing. It’s not just for turkey! You can serve it with chicken, pork, or even as a standalone vegetarian dish. Its versatility makes it a favorite for family dinners, potlucks, and holiday gatherings.
Flavor Explosion
The combination of crusty bread, sweet apples, and fresh herbs creates a flavor explosion that is both comforting and sophisticated. The hint of sage and thyme balances the sweetness of the apples, making each bite a delightful experience.
Easy to Prepare
One of the best things about this recipe is its simplicity. With just a few ingredients, you can whip up a delicious stuffing that will impress your guests. The preparation is straightforward, allowing you to focus on other dishes without stress.
Make-Ahead Friendly
Worried about time on the big day? No problem! You can prepare the Simple Apple Sage Stuffing a day in advance, making your holiday cooking flow more easily. Just reheat it in the oven while your turkey rests, and enjoy the ease of a well-timed meal.
A Family Tradition
This stuffing recipe has been passed down through generations in my family, and every year we sit down to reminisce about the memories we’ve made. It’s a recipe that brings everyone together, and I love sharing it with friends and family.
Healthy Ingredients
By using fresh ingredients like celery, apples, and herbs, you’re not just making a delicious dish; you’re also choosing healthier options. This stuffing is packed with flavor and nutrients, making it a wholesome addition to your holiday table.
Ingredients for Simple Apple Sage Stuffing
The ingredients for Simple Apple Sage Stuffing are simple yet impactful. Each component plays a crucial role in creating a harmonious blend of flavors and textures. The key players in this recipe, such as crusty bread, fresh herbs, and apples, work together beautifully to bring out the best in each other.
- 1 crusty white bread like French loaf (approx. 20 oz), day old, cubed
- 1 large apple, small diced, or 2 small/medium
- 4 celery stalks, chopped
- 1 medium onion, diced
- 1 Tbsp fresh chopped sage (or 1 tsp dried sage)
- 1 Tbsp freshly chopped thyme (or 1 tsp dried thyme)
- 2 cups chicken broth
- 2 large eggs
- 8-10 Tbsp butter, 1 stick, 6 Tbsp to sauté, 2-4 Tbsp for topping
- pinch of nutmeg
- cracked pepper
- sea salt
Instructions for Simple Apple Sage Stuffing
Making the Simple Apple Sage Stuffing is a delightful experience that fills your kitchen with wonderful aromas. Follow these steps, and I promise you’ll create a dish that will be requested for years to come.
Begin with bread sliced into one inch pieces that have set out overnight. If you do not have time for this, heat your oven to 325°F and place cubed bread on a baking sheet. Bake for about 30 minutes or until dried out. The goal is to have a sturdy base for your stuffing.
Once your bread is ready, preheat the oven to 375°F. It’s important to have the oven hot enough to create that crispy topping we all love.
Place the dried bread into a large bowl, where all the delicious ingredients will come together.
In a skillet, heat 6 Tbsp of butter until melted. Add in the celery and onion, cooking until softened, about 5-7 minutes. You want the vegetables to be translucent but not browned, allowing their natural sweetness to shine.
Once softened, add in the fresh herbs and cook for another 1-2 minutes. The fragrance will fill the air, making your mouth water.
Transfer the celery and onion mixture to the bowl with the bread. Fold everything together gently to ensure the bread absorbs all those delicious flavors.
Now, add in the diced apple as well, mixing it in carefully. The apple adds a sweetness that’ll complement the savory elements beautifully.
In a small bowl, whisk together the eggs, chicken broth, nutmeg, and salt and pepper to your liking. This mixture will add moisture and richness to your stuffing.
Pour the egg mixture into the bread and stir to coat evenly. Take your time here; you want every piece of bread to soak up that flavorful liquid.
Pour the stuffing into a greased casserole dish, spreading it evenly. Drizzle or dab the remaining 2-4 Tbsp of melted butter over the top for that golden crust.
Cover the dish with foil and bake for about 20-25 minutes. This initial baking will help everything meld together.
After 25 minutes, remove the foil and bake for another 10 minutes or until the top reaches your desired crispiness. You’ll know it’s done when it’s golden brown and smells heavenly.
Remove from the oven and allow to cool for 5-10 minutes. This resting time lets the flavors settle. Add freshly chopped herbs to garnish and serve!
Things Worth Knowing
- Use Day-Old Bread: It’s best to use bread that has been sitting out for a day or two. This helps it absorb the liquid without becoming mushy.
- Herb Variations: Feel free to experiment with different herbs. Rosemary or parsley can add unique flavors to your stuffing.
- Texture Tips: For a crispier top, spread the stuffing on a large sheet pan instead of a baking dish. This allows more surface area to brown.
- Moisture Control: Ensure there’s enough butter and broth to keep the stuffing moist. If it seems dry before baking, add a little more broth.
- Serving Suggestions: This stuffing pairs well with roasted meats, or can be served as a delicious vegetarian side dish.
Ways to Customize
It’s always fun to customize the Simple Apple Sage Stuffing to suit your taste. Here are some ideas to make it your own.
- Add Nuts: Consider mixing in some toasted walnuts or pecans for a delightful crunch.
- Mix in Dried Fruits: Dried cranberries or apricots can add a touch of sweetness that complements the apple.
- Different Breads: Try using whole grain or sourdough bread for a different flavor profile.
- Spice it Up: Add a pinch of cayenne or some chopped jalapeños for a spicy twist.
- Make it Vegan: Substitute butter with plant-based margarine and use vegetable broth instead of chicken broth.
Serving Options for Simple Apple Sage Stuffing
When it comes to serving the Simple Apple Sage Stuffing, there are endless possibilities that can elevate your meal. Here’s how you can serve this delicious dish:
- Accompaniment to Main Dishes: This stuffing is perfect with roast turkey or chicken and makes a wonderful side for holiday feasts.
- A Standalone Dish: Serve it as a vegetarian main course option, paired with a fresh salad for a light yet satisfying meal.
- Leftover Ideas: Combine leftover stuffing with some eggs for a delicious breakfast scramble.
- Seasonal Pairings: This dish shines during fall and winter, making it ideal for Thanksgiving or Christmas dinners.
- Storage: Store any leftover stuffing in an airtight container in the fridge for up to 5 days, or freeze for up to 3 months.
FAQ
Conclusion
The Simple Apple Sage Stuffing truly stands out as a heartwarming dish that captures the essence of holiday cooking. Its perfect blend of flavors makes it a beloved recipe that will create lasting memories. I encourage you to give it a try for your next gathering or holiday meal. You’ll undoubtedly impress your family and friends with this delightful side dish, and they’ll be coming back for seconds!
Simple Apple Sage Stuffing
Equipment
- Skillet
- Whisk
- Oven
- Chef's Knife
- Cutting Board
- Mixing Bowl
- Wooden Spoon
- Baking Sheet
Ingredients
- 20 oz Crusty white bread like French loaf, day old, cubed
- 1 Large apple small diced, or 2 small/medium
- 4 Celery stalks chopped
- 1 Medium onion diced
- 1 Tbsp Fresh chopped sage or 1 tsp dried sage
- 1 Tbsp Freshly chopped thyme or 1 tsp dried thyme
- 2 cups Chicken broth
- 2 Large eggs
- 8-10 Tbsp Butter 1 stick, 6 Tbsp to sauté, 2-4 Tbsp for topping
- 1 pinch Nutmeg
- 1 Cracked pepper
- 1 Sea salt
Instructions
- Begin with bread sliced into one inch pieces that have set out overnight. If you do not have time for this, heat your oven to 325°F and place cubed bread on a baking sheet. Bake for about 30 minutes or until dried out.
- Once your bread is ready, preheat the oven to 375°F.
- Place the dried bread into a large bowl.
- In a skillet, heat 6 Tbsp of butter until melted. Add in the celery and onion, cooking until softened, about 5-7 minutes.
- Once softened, add in the fresh herbs and cook for another 1-2 minutes.
- Transfer the celery and onion mixture to the bowl with the bread.
- Now, add in the diced apple as well.
- In a small bowl, whisk together the eggs, chicken broth, nutmeg, and salt and pepper to your liking.
- Pour the egg mixture into the bread and stir to coat evenly.
- Pour the stuffing into a greased casserole dish, spreading it evenly.
- Cover the dish with foil and bake for about 20-25 minutes.
- After 25 minutes, remove the foil and bake for another 10 minutes or until the top reaches your desired crispiness.
- Remove from the oven and allow to cool for 5-10 minutes. Add freshly chopped herbs to garnish and serve!
Notes
- Storage: Transfer to an airtight container and refrigerate for about 4-5 days.
- Freezing: You can also freeze this recipe for up to 3 months.
- Moisture Control: Ensure there’s enough butter and broth to keep the stuffing moist.
- Texture Tips: For a crispier top, spread the stuffing on a large sheet pan instead of a baking dish.
- Butter Adjustment: You can lessen the butter by about 1-2 Tbsp if desired.