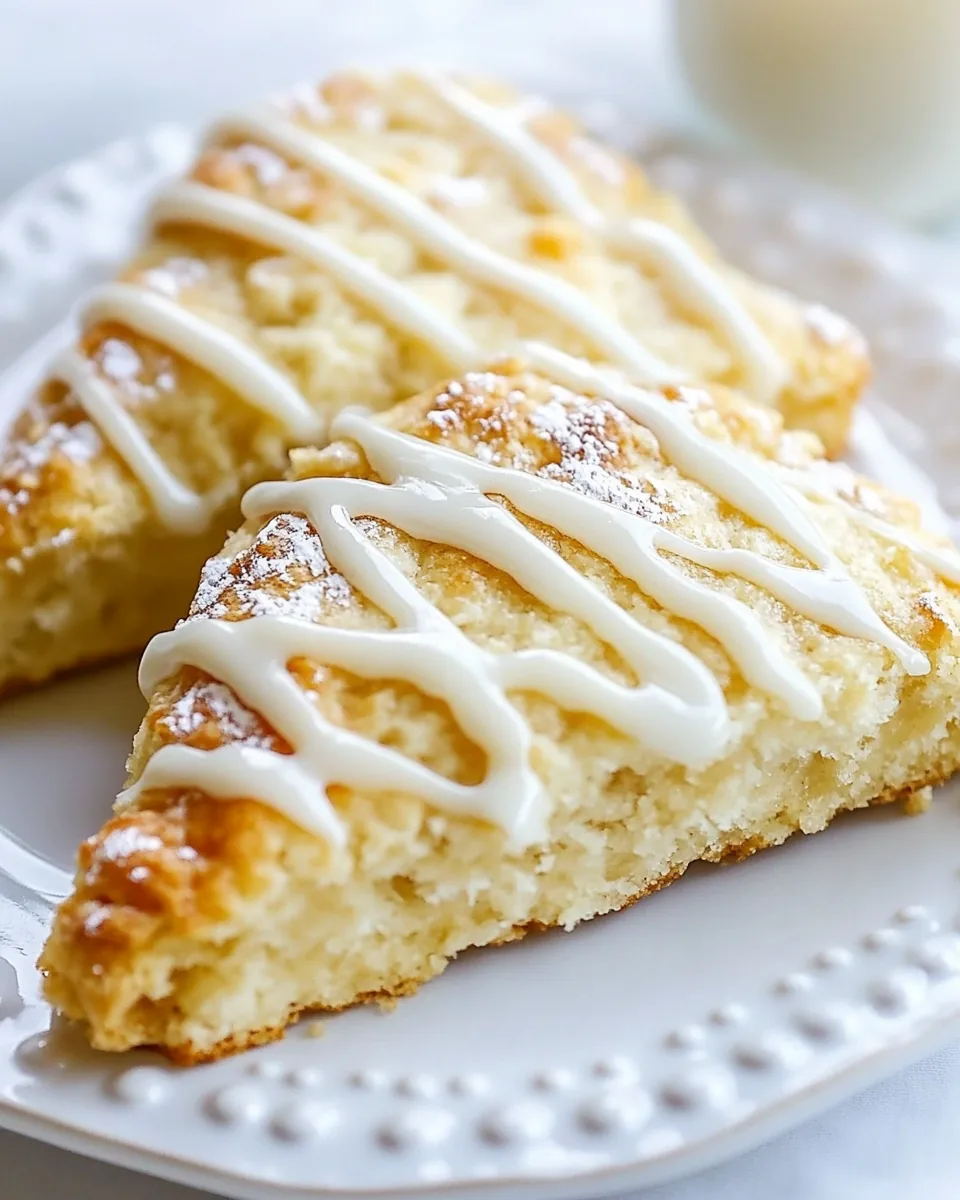
Scones
There’s something magical about enjoying fresh-baked Scones on a leisurely weekend morning, don’t you think? The aroma wafting through the kitchen immediately transports me back to my childhood, where we would gather around the table with family, excited to dive into warm, flaky pastries. Let me tell you, baking scones isn’t just about the end result; it’s about the process, the anticipation, and the joy of sharing something delicious. Whether it’s a warm cup of tea or a delightful fruit preserve, scones are the perfect companion. I remember the first time I tried making them; I was a bit nervous but completely enchanted by how simple and rewarding it was. Now, I can’t help but whip them up whenever I want to impress guests or treat myself. So, let’s explore the art of making perfect scones together!
Recipe Snapshot
33 mins
10 mins
23 mins
Medium
250 kcal
3 g
Gluten-Free, Low FODMAP
12 g
Whisk, Blender, Oven, Chef’s Knife, Cutting Board, Mixing Bowl, Wooden Spoon, Baking Sheet
The Magic of This Scones
The Simplicity of Ingredients
One of the things I love about baking scones is how you can create something so delicious with just a few simple ingredients. The combination of all-purpose flour, sugar, baking powder, butter, and cream creates a rich and tender pastry that melts in your mouth. You don’t need fancy ingredients to achieve that bakery-quality taste.
Versatility
What’s even more appealing about scones is their versatility! You can add your favorite flavors, whether it’s chocolate chips, berries, or nuts, to make them uniquely yours. This means you can enjoy them sweet or savory, depending on your mood or occasion.
Perfect for Any Occasion
Whether it’s a cozy afternoon tea, a festive brunch, or just because you feel like indulging, scones fit perfectly into any setting. Their delightful texture and taste make them a versatile choice, suitable for both casual and formal events.
Easy to Make
If you’re a novice baker, scones are a great recipe to start with. They’re forgiving, and the steps are straightforward. Even if you make mistakes, the end result is still rewarding!
Enjoying with Loved Ones
There’s nothing better than sharing delicious scones with family and friends. Watching their faces light up with delight when they take their first bite is truly fulfilling. It’s those moments that create lasting memories.
Making Your Kitchen Smell Amazing
Lastly, let’s not forget about the smell! Baking scones fills your kitchen with an irresistible aroma that draws everyone in. It’s hard to resist a kitchen that smells like freshly baked pastries!
Ingredient List for Scones

When it comes to making scones, each ingredient plays a crucial role in achieving that perfect texture and flavor. The combination of basic pantry staples creates a delightful pastry that can be enjoyed in numerous ways.
- 2 cups all-purpose flour – The foundation of your scones, providing structure.
- 3 Tbsp granulated sugar – Adds sweetness and helps create a lovely golden crust.
- 1 Tbsp baking powder – The leavening agent that makes your scones light and fluffy.
- 1/2 tsp fine sea salt – Enhances the flavors of all the ingredients.
- 1/2 cup unsalted butter, cold, diced – Provides richness and flakiness; make sure it’s cold for best results!
- 1 large egg, cold, lightly beaten – Helps bind the ingredients together.
- 1/2 cup heavy whipping cream, cold, plus 2 Tbsp to brush the tops – Keeps the scones moist and gives them a tender crumb.
- 1 tsp vanilla extract – Adds a lovely depth of flavor.
- 1 Tbsp coarse or raw sugar to sprinkle on top – For that extra crunch and sweetness.
- 2/3 cup powdered sugar – Used in the glaze for drizzling over the cooled scones.
- 1 to 1 1/2 Tbsp milk – Adjusts the glaze to the desired consistency.
- 1 tsp vanilla extract – For the glaze, enhancing the overall flavor.
The Process for Making Scones

Making scones is a delightful process that transforms simple ingredients into a beautiful treat. The steps are straightforward, and with each one, you’ll see how everything comes together. Let’s dive into the steps to create these delicious pastries!
- Preheat your oven to 400°F and line a baking sheet with parchment paper. This ensures that your scones bake evenly and don’t stick.
- In a large mixing bowl, whisk together the all-purpose flour, granulated sugar, baking powder, and fine sea salt. Whisking helps to aerate the dry ingredients, ensuring there are no lumps and everything is well combined.
- Add the cold, diced unsalted butter to the flour mixture. Using a pastry cutter, cut the butter into the flour until the mixture resembles pea-sized crumbs. This step is essential to creating flaky layers in your scones.
- If you choose to add any flavor ingredients, such as dried fruit or chocolate chips, gently stir them in at this stage. Before moving on, place the bowl in the refrigerator to chill while you prepare the liquid ingredients. This helps to keep the butter cold for flakier scones.
- In a separate small bowl, combine the heavy whipping cream, eggs, and vanilla extract. Beat with a fork until everything is well blended.
- Now, pour the cream mixture into the flour mixture and fold it together gently with a spatula just until it is moistened. Be careful not to over-mix; you want a bit of dry mixture visible to ensure tender scones.
- If your dough feels too dry, add another tablespoon of cream. Conversely, if it’s too moist, sprinkle in a little more flour. This step is all about achieving the right consistency.
- Transfer the dough onto a clean work surface and gently work it into a ball. Flatten the dough into about a 1-inch thick and 7-inch wide disk. Cut the disk into 8 equal wedges, making sure to cut straight down without sawing.
- Arrange the wedges on your lined baking sheet, keeping at least 1 inch apart. Brush the tops with the reserved heavy whipping cream and generously sprinkle with coarse sugar.
- Refrigerate the cut scones for 15 minutes before baking. This helps retain their shape while baking.
- Bake your scones for 18 to 22 minutes or until the tops are golden brown and they’re baked through in the center. Remove them from the oven and let them cool completely on a wire rack.
- For the glaze, in a small bowl, combine the powdered sugar, 1 Tbsp of milk, and another vanilla extract. Stir until you achieve a smooth, drizzling consistency. If it’s too thick, add a splash more milk.
- Once the scones are completely cool, drizzle the glaze over them using a spoon. Enjoy your freshly baked scones with your favorite beverages!
Things Worth Knowing
- Cold Ingredients: Ensure that your butter and cream are very cold. This is key for flaky scones.
- Don’t Overmix: Mix the dough until just combined to keep the texture light and airy.
- Chill the Dough: Chilling the dough before baking helps maintain the shape and allows for better rise.
- Check for Doneness: Look for a golden top and test with a toothpick to ensure the center is fully baked.
Recipe Tips about Scones

Making scones at home can be a rewarding experience, but like any baking endeavor, a few tips can make all the difference. Here are some ideas to ensure your scones turn out perfectly every time.
- Storage: Keep any leftover scones in an airtight container at room temperature for up to 2 days. They can also be refrigerated for up to a week.
- Freezing: You can freeze unbaked scones by placing them on a baking sheet until frozen solid, then transferring them to an airtight container. Bake from frozen, adding a few extra minutes to the baking time.
- Pairing: Scones are delicious with clotted cream and jam or fresh fruit. They also pair well with afternoon tea.
- Flavor Variations: Experiment with different mix-ins, such as dried cranberries, blueberries, or even chocolate chips to customize your scones.
- Serving Warm: For the best experience, serve your scones warm, straight from the oven or lightly reheated.
- Glazing: Drizzle the glaze over the scones only after they have cooled to avoid melting away.
Pairing Suggestions for Scones
When it comes to enjoying scones, the options are endless, making them a versatile treat for any occasion. Here are some delightful pairing suggestions:
- Traditional Tea: Serve scones with a steaming cup of tea for a classic pairing that never goes out of style.
- Fruit Preserves: Raspberry or strawberry jam complements the buttery flavor of scones beautifully.
- Clotted Cream: For an authentic experience, add a dollop of clotted cream on top of your scone.
- Seasonal Fruits: Fresh fruits like strawberries, blueberries, or raspberries are perfect accompaniments, adding freshness and color.
- Brunch Events: Incorporate scones in your brunch spreads alongside fresh salads and fruit salads.
- Gift Ideas: Package scones in a lovely box and give them as a thoughtful gift for friends or family.
FAQ
Conclusion
There’s nothing quite like the charm of freshly baked scones. They bring warmth, comfort, and a touch of elegance to any occasion. Whether you’re enjoying them for breakfast, brunch, or an afternoon tea, their delightful flavor will surely impress. I encourage you to try making scones at home; the process is simple, and the reward is absolutely delicious!

Scones
Equipment
- Whisk
- Blender
- Oven
- Chef's Knife
- Cutting Board
- Mixing Bowl
- Wooden Spoon
- Baking Sheet
Ingredients
- 2 cups all-purpose flour
- 3 Tbsp granulated sugar
- 1 Tbsp baking powder
- 1/2 tsp fine sea salt
- 1/2 cup unsalted butter, cold, diced 1 stick
- 1 large egg, cold, lightly beaten
- 1/2 cup heavy whipping cream, cold plus 2 Tbsp to brush the tops
- 1 tsp vanilla extract
- 1 Tbsp coarse/ raw sugar to sprinkle the top or sub with granulated sugar
- 2/3 cup powdered sugar
- 1 to 1 1/2 Tbsp milk
- 1 tsp vanilla extract
Instructions
- Preheat your oven to 400°F and line a baking sheet with parchment paper. This ensures that your scones bake evenly and don’t stick.
- In a large mixing bowl, whisk together the all-purpose flour, granulated sugar, baking powder, and fine sea salt. Whisking helps to aerate the dry ingredients, ensuring there are no lumps and everything is well combined.
- Add the cold, diced unsalted butter to the flour mixture. Using a pastry cutter, cut the butter into the flour until the mixture resembles pea-sized crumbs. This step is essential to creating flaky layers in your scones.
- If you choose to add any flavor ingredients, such as dried fruit or chocolate chips, gently stir them in at this stage. Before moving on, place the bowl in the refrigerator to chill while you prepare the liquid ingredients. This helps to keep the butter cold for flakier scones.
- In a separate small bowl, combine the heavy whipping cream, eggs, and vanilla extract. Beat with a fork until everything is well blended.
- Now, pour the cream mixture into the flour mixture and fold it together gently with a spatula just until it is moistened. Be careful not to over-mix; you want a bit of dry mixture visible to ensure tender scones.
- If your dough feels too dry, add another tablespoon of cream. Conversely, if it's too moist, sprinkle in a little more flour. This step is all about achieving the right consistency.
- Transfer the dough onto a clean work surface and gently work it into a ball. Flatten the dough into about a 1-inch thick and 7-inch wide disk. Cut the disk into 8 equal wedges, making sure to cut straight down without sawing.
- Arrange the wedges on your lined baking sheet, keeping at least 1 inch apart. Brush the tops with the reserved heavy whipping cream and generously sprinkle with coarse sugar.
- Refrigerate the cut scones for 15 minutes before baking. This helps retain their shape while baking.
- Bake your scones for 18 to 22 minutes or until the tops are golden brown and they’re baked through in the center. Remove them from the oven and let them cool completely on a wire rack.
- For the glaze, in a small bowl, combine the powdered sugar, 1 Tbsp of milk, and another vanilla extract. Stir until you achieve a smooth, drizzling consistency. If it’s too thick, add a splash more milk.
- Once the scones are completely cool, drizzle the glaze over them using a spoon. Enjoy your freshly baked scones with your favorite beverages!
Notes
- Tip 1: Keep any leftover scones in an airtight container at room temperature for up to 2 days. They can also be refrigerated for up to a week.
- Tip 2: You can freeze unbaked scones by placing them on a baking sheet until frozen solid, then transferring them to an airtight container. Bake from frozen, adding a few extra minutes to the baking time.
- Tip 3: Scones are delicious with clotted cream and jam or fresh fruit. They also pair well with afternoon tea.
- Tip 4: Experiment with different mix-ins, such as dried cranberries, blueberries, or even chocolate chips to customize your scones.
- Tip 5: For the best experience, serve your scones warm, straight from the oven or lightly reheated.