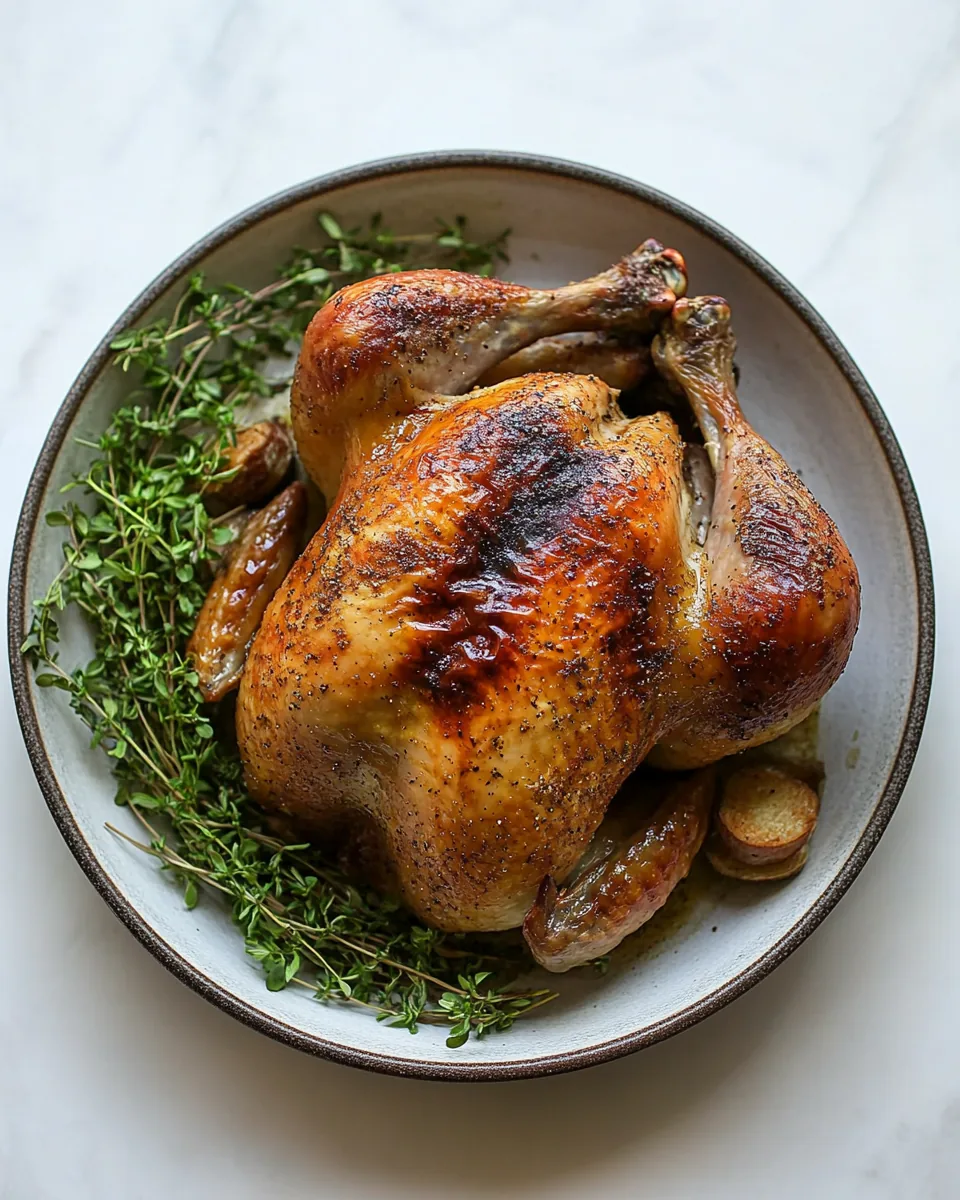
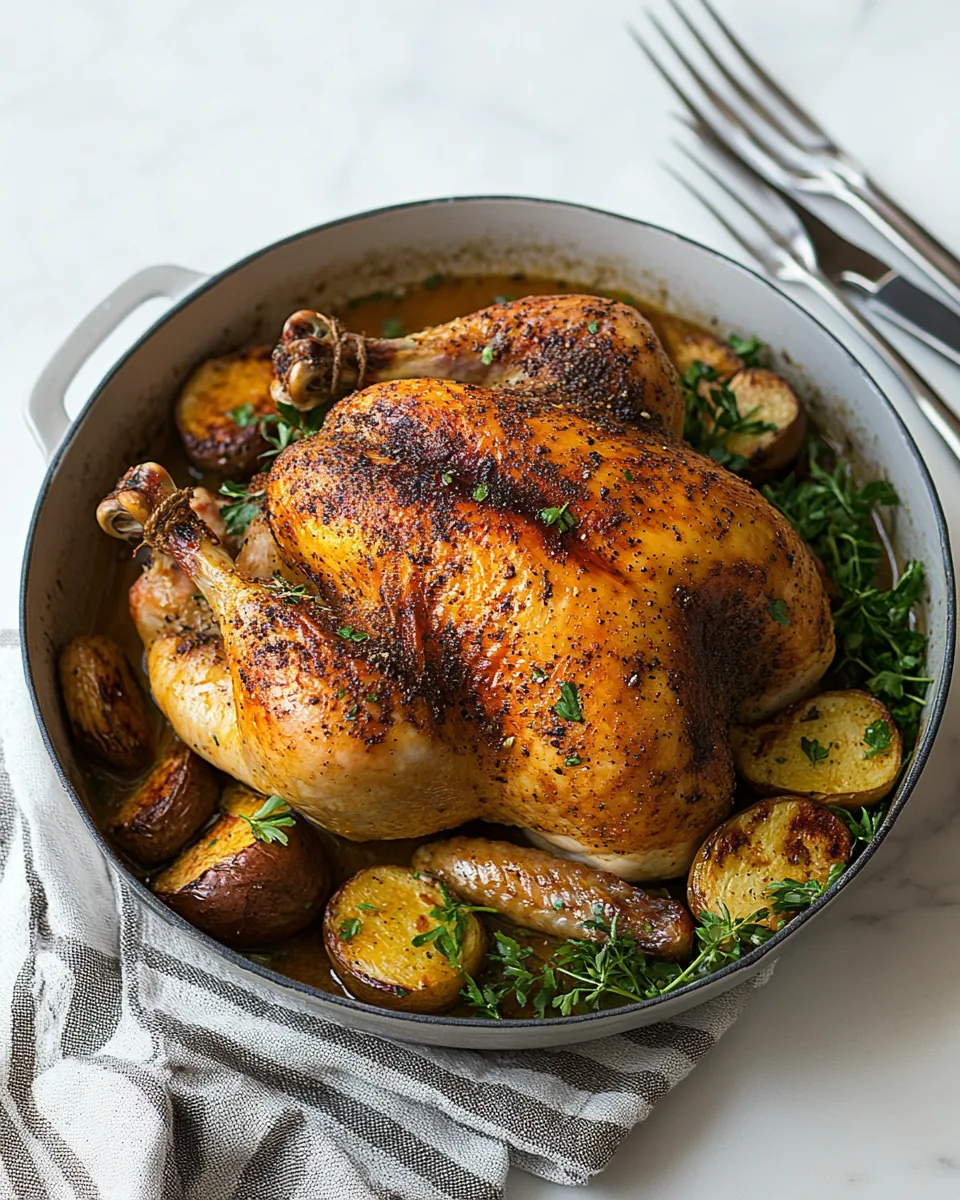
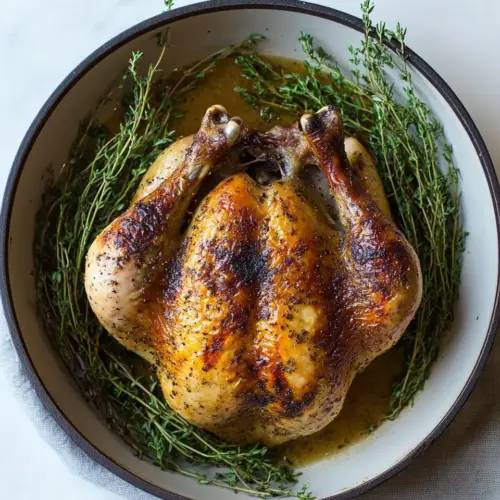
Roast Chicken
There’s something undeniably special about roasting a chicken, especially when you know you can make your own gravy to go along with it. The aroma of a perfectly roasted chicken fills the kitchen, transporting me back to family dinners where we’d gather around the table, sharing stories and laughter. Roast Chicken is a dish that brings comfort and warmth. It’s perfect for a weekend family meal or a special occasion, and the satisfaction of serving a beautifully golden-brown chicken is simply unbeatable.
Recipe Snapshot
2 hr
20 mins
100 mins
Medium
450 kcal
40 g
Keto, Gluten-Free
30 g
Skillet, Frying Pan, Whisk, Blender, Oven, Saucepan, Wooden Spoon, Mixing Bowl, Baking Sheet
Why This Roast Chicken Is a Winner
1. The Savor of Home Cooking
When you roast a chicken at home, you infuse it with love and care that store-bought just can’t replicate. The process of seasoning and preparing the chicken allows for personal touches, making it truly yours.
2. Perfect for Gatherings
There’s something about gathering around a roasted chicken that feels festive. It’s a dish that can easily serve a crowd, making it a go-to for family dinners, holidays, or simply a cozy night in with loved ones.
3. Versatile Flavor
A Roast Chicken can be flavored in countless ways, from classic herbs like thyme and rosemary to more adventurous spices. This versatility means you can tailor the dish to suit any palate, whether you prefer something traditional or with a twist.
4. Delicious Leftovers
After the main event, the leftovers are just as exciting. From chicken sandwiches to a flavorful chicken soup, you’ll find plenty of ways to repurpose your roast into new meals, stretching your culinary creativity (and budget).
5. Homemade Gravy
The homemade gravy that accompanies a Roast Chicken is the cherry on top. It’s simple to make and enhances the dish with its rich flavor, making every bite a joyful experience. Drizzling it over mashed potatoes or a side of veggies is an absolute must.
6. A Culinary Skill Builder
Learning to roast a chicken is a fundamental cooking skill that builds confidence in the kitchen. It teaches timing, seasoning, and how to achieve the perfect crispiness on the skin – all essential components of great cooking.
Key Ingredients for Roast Chicken

Every great dish starts with quality ingredients, and the Roast Chicken is no exception. The key players here are simple yet flavorful. With a whole chicken as the star, a blend of fresh herbs, and a few basic seasonings, you’ll create a meal that’s both comforting and satisfying. Quality ingredients not only enhance the taste but also make your cooking experience enjoyable.
- Whole chicken: The centerpiece of this dish, a whole chicken provides a juicy and flavorful meat that is perfect for roasting.
- Salt and black pepper: These staples enhance the natural flavors of the chicken, ensuring a well-seasoned dish.
- Garlic: Adds a delightful aroma and depth of flavor to the chicken, making it irresistible.
- Yellow onion: When roasted, onions caramelize, adding a subtle sweetness that complements the savory chicken.
- Fresh herbs: A mixture of thyme, rosemary, sage, and parsley brings fresh, vibrant flavors that elevate the dish.
- Butter: Rubbing butter over the chicken helps to achieve a crispy, golden skin while keeping the meat moist and tender.
How to Assemble Roast Chicken
Roasting a chicken is a straightforward process that yields impressive results. With each step, you’ll be building flavors and creating a dish that’s sure to impress. Whether it’s your first time or you’re a seasoned pro, follow these easy instructions for a perfectly roasted chicken.
- Preheat your oven to 425 degrees. This initial high temperature will help crisp the skin of the chicken.
- Trim off any excess fat from the chicken, particularly around the neck and cavity, ensuring a cleaner presentation and better cooking.
- Remove the giblets from the center of the chicken. You can discard them or save them for another recipe. Dab the outside of the chicken dry with paper towels to help it brown nicely.
- Rub a cast iron skillet with a little vegetable oil. Carefully place the chicken in the skillet, breast side facing upward.
- Season the inside of the cavity with salt and pepper, then stuff it with whole garlic cloves, wedges of yellow onion, and fresh herbs. This infuses the meat with flavor.
- Rub butter all over the outside of the chicken, focusing on the upper breast area. Season generously with salt and pepper.
- Using kitchen twine, tie the chicken‘s legs together and tuck the wing tips under the bird. This helps it cook evenly and retain moisture.
- Roast the chicken in the preheated oven until the internal temperature of the thigh reaches 165 degrees and the breast registers at least 160 degrees, about 1 and a half hours.
- Once cooked, transfer the chicken to a carving board or platter, tent it with foil, and let it rest for 10 to 15 minutes. This allows the juices to redistribute.
- While the chicken is resting, make your gravy. Remove any large pieces of skin left in the skillet and discard.
- In a mixing bowl or liquid measuring cup, whisk together 1/4 cup of the broth with cornstarch and set aside.
- Heat the skillet over medium-high heat, scraping up the browned bits from the bottom of the pan, and pour in 2 and 3/4 cups of chicken broth.
- Bring the mixture to a simmer. Whisk the cornstarch mixture again before pouring it into the skillet. Season with additional salt and pepper, if needed.
- Cook the gravy while whisking constantly until thickened, about 1 to 2 minutes. Finally, stir in some heavy cream and serve warm over the chicken and mashed potatoes.
Things Worth Knowing
- Check the Temperature: Always use a meat thermometer to ensure the chicken is cooked through. The thigh should reach 165 degrees.
- Resting Time: Allowing the chicken to rest before carving is crucial for juicy meat. It lets the juices settle back into the meat.
- Gravy Consistency: If your gravy is too thick, add more broth a little at a time until you reach your desired consistency.
- Flavor Variations: Feel free to experiment with different herbs and spices to customize the flavor of your Roast Chicken.
Helpful Notes about Roast Chicken
Roasting a chicken is an art, and like any art, it benefits from some helpful tips. Here are some key points to ensure your dish turns out perfectly every time.
- Storage: Leftover chicken can be stored in the refrigerator for up to 4 days. Keep it in an airtight container to maintain freshness.
- Freezing: You can freeze leftover chicken for up to 6 months. Make sure to wrap it tightly in foil or freezer bags.
- Pairing: This Roast Chicken pairs beautifully with roasted vegetables, mashed potatoes, or a fresh salad.
- Herb Variations: You can use dried herbs if fresh isn’t available, but fresh herbs will give you more flavor.
- Gravy Storage: Homemade gravy can be refrigerated for about 3 days or frozen for later use.
- Rest Before Carving: Don’t rush to carve the chicken right after taking it out of the oven. Let it rest to ensure juiciness.
Perfect Matches for Roast Chicken
When it comes to serving your Roast Chicken, there are endless possibilities. Here are some ideas to elevate your dining experience:
- Roasted Vegetables: Serve with a medley of seasonal roasted vegetables like carrots, potatoes, and Brussels sprouts. The caramelization adds a sweet touch.
- Mashed Potatoes: Creamy mashed potatoes are a classic side that perfectly complements the savory flavors of the chicken and gravy.
- Fresh Salad: A light, fresh salad with mixed greens, cherry tomatoes, and a vinaigrette provides a refreshing contrast to the richness of the chicken.
- Family Gatherings: This dish is perfect for holidays or family dinners, bringing everyone together around the table.
- Seasonal Pairings: In the fall, serve with roasted squash or pumpkin soup for a cozy meal.
- Cooking Tips: Consider making a large batch of Roast Chicken for meal prep. It’s great for lunches throughout the week.
FAQ
Conclusion
The Roast Chicken is truly a classic dish that never goes out of style. It’s hearty, comforting, and perfect for family gatherings or cozy dinners at home. I encourage you to try roasting a chicken for yourself; it’s easier than it seems and absolutely worth the effort. You’ll be rewarded with tender, flavorful meat and a delicious homemade gravy that takes the experience to the next level. Enjoy!
Roast Chicken
Equipment
- Skillet
- Frying Pan
- Whisk
- Blender
- Oven
- Saucepan
- Wooden Spoon
- Mixing Bowl
- Baking Sheet
Ingredients
- 1 whole Whole chicken
- to taste Salt and black pepper
- to taste Garlic
- 1 whole Yellow onion
- to taste Fresh herbs including thyme, rosemary, sage, parsley (buy the blend)
- 1/2 cup Butter
Instructions
- Preheat your oven to 425 degrees. This initial high temperature will help crisp the skin of the chicken.
- Trim off any excess fat from the chicken, particularly around the neck and cavity, ensuring a cleaner presentation and better cooking.
- Remove the giblets from the center of the chicken. You can discard them or save them for another recipe. Dab the outside of the chicken dry with paper towels to help it brown nicely.
- Rub a cast iron skillet with a little vegetable oil. Carefully place the chicken in the skillet, breast side facing upward.
- Season the inside of the cavity with salt and pepper, then stuff it with whole garlic cloves, wedges of yellow onion, and fresh herbs. This infuses the meat with flavor.
- Rub butter all over the outside of the chicken, focusing on the upper breast area. Season generously with salt and pepper.
- Using kitchen twine, tie the chicken's legs together and tuck the wing tips under the bird. This helps it cook evenly and retain moisture.
- Roast the chicken in the preheated oven until the internal temperature of the thigh reaches 165 degrees and the breast registers at least 160 degrees, about 1 and a half hours.
- Once cooked, transfer the chicken to a carving board or platter, tent it with foil, and let it rest for 10 to 15 minutes. This allows the juices to redistribute.
- While the chicken is resting, make your gravy. Remove any large pieces of skin left in the skillet and discard.
- In a mixing bowl or liquid measuring cup, whisk together 1/4 cup of the broth with cornstarch and set aside.
- Heat the skillet over medium-high heat, scraping up the browned bits from the bottom of the pan, and pour in 2 and 3/4 cups of chicken broth.
- Bring the mixture to a simmer. Whisk the cornstarch mixture again before pouring it into the skillet. Season with additional salt and pepper, if needed.
- Cook the gravy while whisking constantly until thickened, about 1 to 2 minutes. Finally, stir in some heavy cream and serve warm over the chicken and mashed potatoes.
Notes
- Tip 1: I like to buy the package of poultry herbs and parsley. So I usually use 1 - 2 large sprigs thyme, 1 sprig rosemary, 1 sprig sage and about 3 parsley sprigs. Use what you have or you can even omit the herbs all together. They just add light flavor.
- Tip 2: Nutrition is including fat and calories from chicken skin and fat. Unfortunately I'm unable to calculate the info without it if you aren't eating that portion.