Rice Krispie Pumpkin Treats
Every year, as the leaves start to turn and the air gets crisp, I find myself craving a fun and festive treat. That’s when I whip up my favorite seasonal delight, the Rice Krispie Pumpkin Treats. There’s something so nostalgic about this dish that brings me back to my childhood. I remember gathering around the kitchen table with friends and family, excitedly shaping these colorful treats into little pumpkins. These adorable desserts are not only perfect for Halloween parties but also make for a delightful snack throughout the fall season.
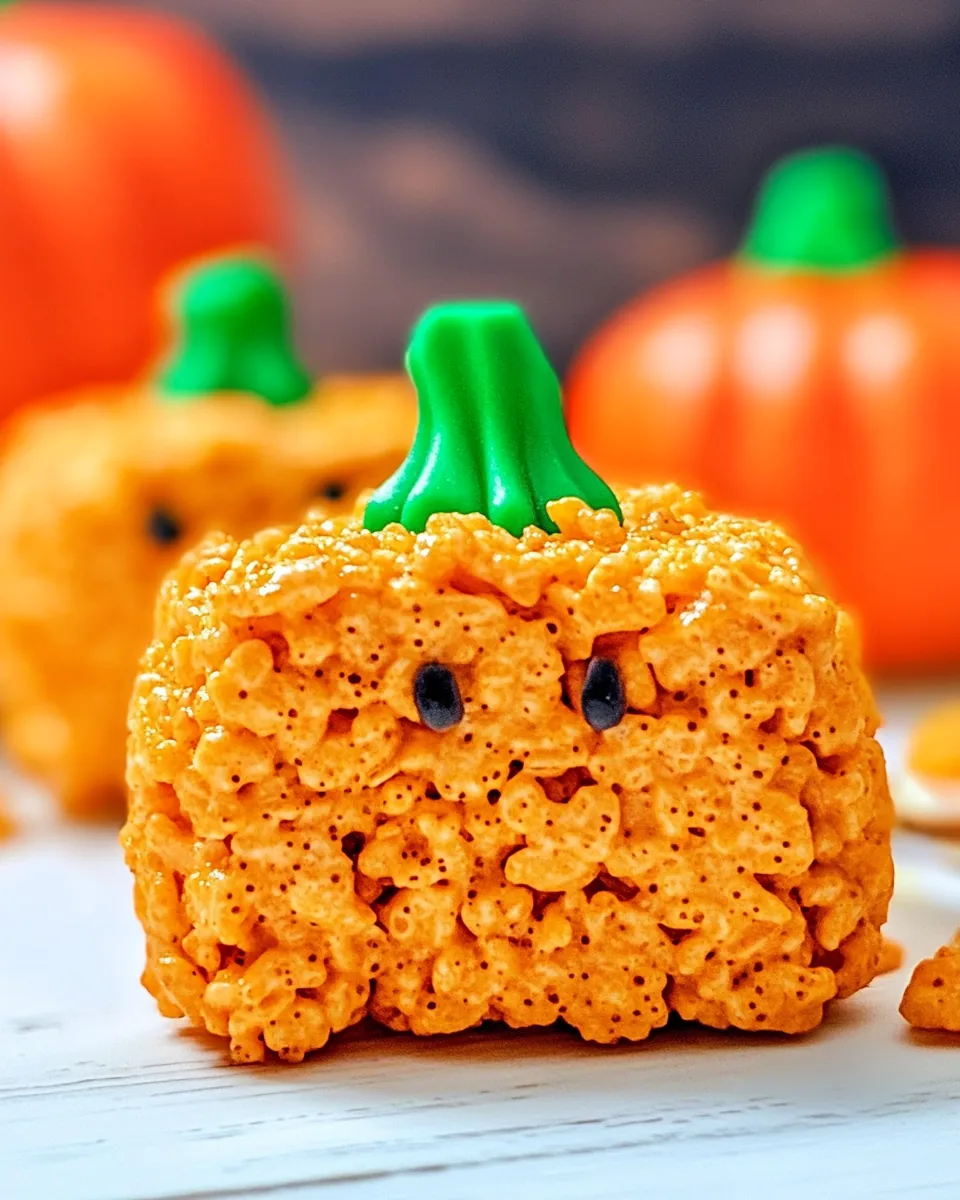
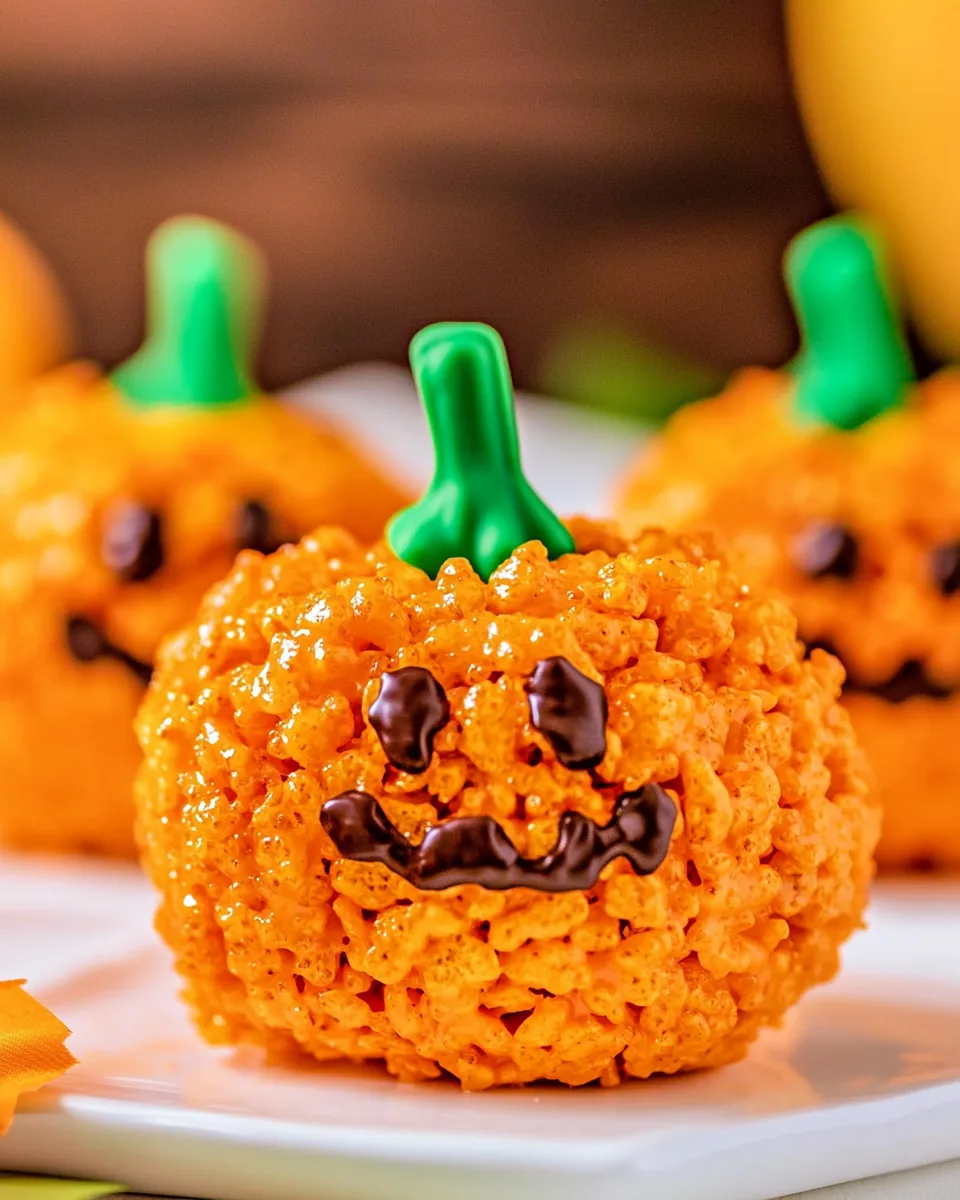
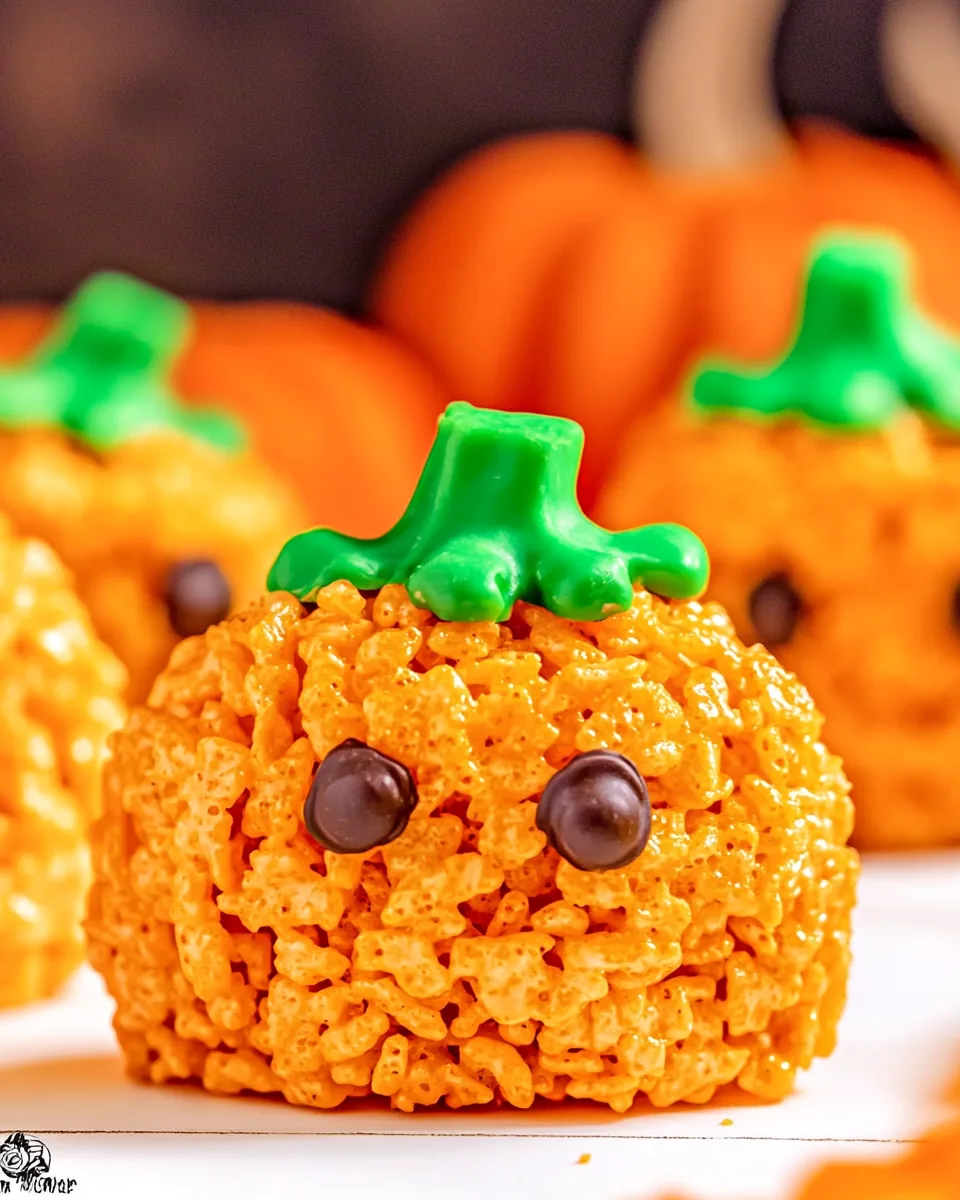
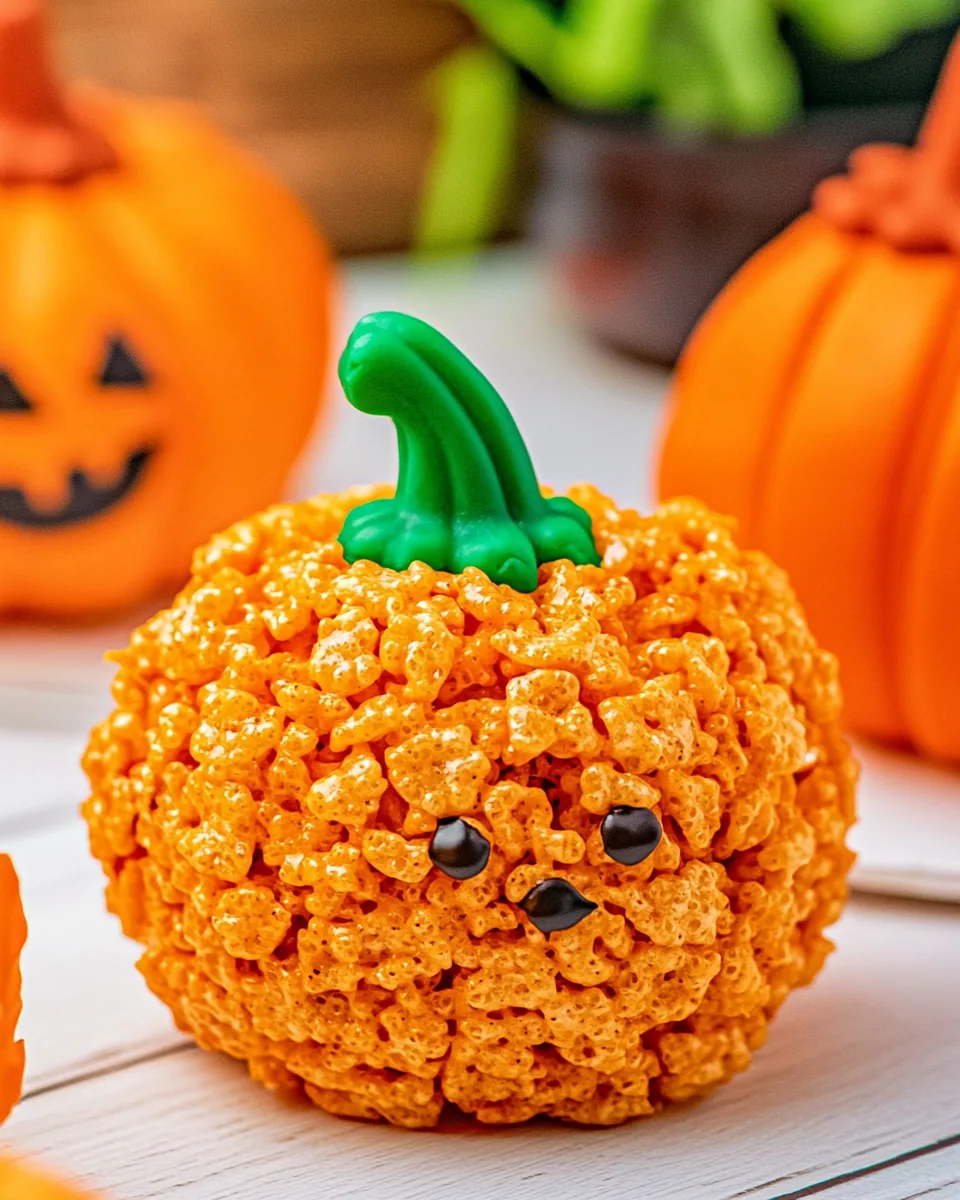
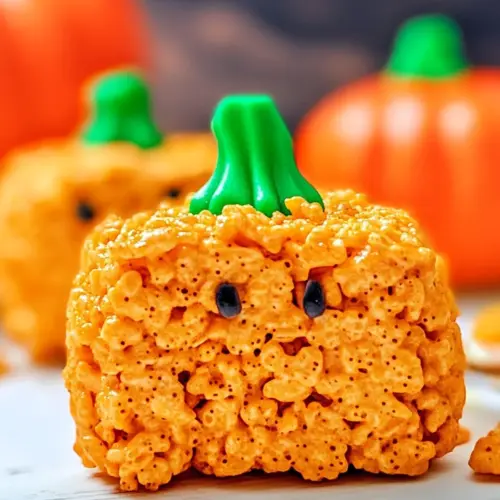
With their vibrant orange hue and sweet chocolate accents, Rice Krispie Pumpkin Treats bring a smile to everyone’s face. The combination of creamy butter, gooey marshmallow, and crunchy Rice Krispies creates a satisfying texture that’s both chewy and crispy. I love watching the kids get involved, rolling the mixture into pumpkin shapes, and decorating them with chocolate and M&Ms. It’s a fun, creative way to celebrate the season and make lasting memories.
This recipe is simple, making it easy to include the little ones in the kitchen. The best part is that it doesn’t require any complicated techniques or fancy equipment—just a few basic kitchen tools and ingredients! So, whether you’re hosting a Halloween bash, looking for a fun activity for the kids, or simply in need of a cozy fall treat, Rice Krispie Pumpkin Treats are the answer. Let’s get started!
Recipe Snapshot
15 mins
15 mins
0 mins
Medium
150 kcal
1 g
Gluten-Free, Low FODMAP
6 g
Wooden Spoon, Frying Pan, Whisk, Mixing Bowl
Why This Rice Krispie Pumpkin Treats Hits Different
Fun and Festive
One of the best reasons to love Rice Krispie Pumpkin Treats is their festive appearance. These treats are not just delicious; they’re adorable! Shaped like pumpkins and adorned with chocolate and candy leaves, they are sure to be a hit at any fall gathering.
Easy to Make
If you’re looking for a quick and straightforward recipe, look no further. With just a few ingredients and minimal steps, you can whip up a batch of these delightful treats in no time. It’s perfect for those last-minute party preparations or when you want to surprise your family with something special.
Kid-Friendly Activity
These treats are an excellent way to involve kids in the kitchen. They will love shaping the mixture into pumpkins and getting creative with decorating. It’s a fun activity that can inspire their creativity while also allowing you to spend quality time together.
Customizable
Another reason to adore these treats is their versatility. You can easily modify the decorations to suit any occasion. Whether it’s adding different colors of candy or creating variations for other holidays, the possibilities are endless!
Perfect for Sharing
Whether you need a treat for a school function or a potluck, Rice Krispie Pumpkin Treats are perfect for sharing. They transport easily, and everyone loves a sweet treat that’s as fun to look at as it is to eat.
Deliciously Sweet
Lastly, the flavor is undeniably satisfying. With the combination of sweet marshmallow, buttery richness, and the crunch of Rice Krispies, each bite is a delightful experience. It’s hard to resist going back for seconds!
Ingredients for Rice Krispie Pumpkin Treats
The ingredients in this treat come together to create a magical combination that bursts with flavor and texture. The star of the show, Rice Krispies, provides that perfect crunch we all love, while the butter and marshmallow creme give it the sweet, gooey foundation. Adding a splash of orange gel food coloring makes these treats visually appealing, enhancing their pumpkin-like appearance. Lastly, chocolate baking chunks and M&Ms add a fun twist and a bit of extra sweetness.
- 1/4 cup salted butter: This adds richness and helps in binding the other ingredients.
- 7 ounces marshmallow creme: The key ingredient for sweetness and gooeyness in these treats.
- orange gel food coloring: This gives the treats their vibrant pumpkin color, making them festive for Halloween.
- 5 cups Rice Krispies cereal: Provides the delightful crunch and forms the base of the treats.
- 1/2 heaping cup chocolate baking chunks: These will be used for decorating and adding a delicious chocolatey flavor.
- 12-14 green M&M candies: These act as the decorative leaves for the pumpkin treats.
Making This Rice Krispie Pumpkin Treats
Creating Rice Krispie Pumpkin Treats is as much about the experience as it is about the end result. Let me guide you through these fun steps! Start by preparing your workspace, which sets the tone for a delightful cooking session. The end product is worth every moment spent in the kitchen.
- Line a large sheet pan with parchment paper and set it aside. This will prevent the treats from sticking and make cleanup a breeze.
- In a large saucepan over medium heat, melt the salted butter. Be sure to watch it closely to prevent burning; you want it just melted and bubbly.
- Reduce the heat slightly and add the marshmallow fluff to the saucepan. Stir continuously over medium-low heat until the marshmallow fluff breaks down and combines into a smooth liquid, taking about one to two minutes. The mixture should be glossy and cohesive.
- Whisk in the orange gel food coloring until you achieve your desired vibrant hue. This is your moment to make these treats pop with color!
- Once combined, remove the saucepan from the heat. The marshmallow mixture should be warm but not boiling.
- Pour the Rice Krispies cereal into the saucepan. Gently stir until the cereal is fully coated with the marshmallow mixture. Be careful not to crush the cereal; you want the texture to remain crispy.
- Transfer the orange Rice Krispie mixture onto the prepared baking sheet. Spread it into an even, thin layer using a spatula. Allow it to set aside to cool for about twenty minutes.
- While the mixture cools, separate out 12 to 14 chocolate baking chunks to be used as the stems. Cut the M&Ms into halves for leaves.
- Once the Rice Krispie mixture has cooled enough to handle, gently scoop it into a large mixing bowl. Spray an ice cream scoop lightly with cooking spray to prevent sticking.
- Use the ice cream scoop to press the mixture into large balls, forming the pumpkin shapes. Roll each scoop into a smooth ball and place them back onto the parchment-lined baking sheet.
- Now for the fun part! Microwave the remaining chocolate baking chunks in a microwave-safe bowl for thirty seconds, stirring well. Continue heating in fifteen-second intervals until the chocolate is completely melted.
- Dip each chocolate baking chunk into the melted chocolate, and gently press it into the top of one of the rice krispie pumpkins. The chocolate adds a lovely touch and richness.
- Finally, place two green M&M halves next to the “stem” for leaves. Allow the pumpkins to set for another ten to twenty minutes before serving, letting everything firm up nicely.
Pro Tips and Tweaks
As you get ready to make your own batch of Rice Krispie Pumpkin Treats, here are some useful tips to make the process even smoother:
- Storage: You can store these in a Ziploc bag or airtight container and allow them to sit at room temperature for about two to three days. For longer preservation of softness, individually wrap them in plastic wrap. You can also freeze these for up to six months; just thaw them at room temperature when you’re ready to enjoy.
- Speed it Up: If it’s the day of your Halloween party and you need to make these faster, pop the hot pan of treats in the fridge for ten minutes before forming them into balls. Just don’t forget about them there, or they’ll become hard and uneven.
- Customize Your Colors: While orange is the traditional color for pumpkins, feel free to add other colors using different food coloring to suit your party theme.
- Experiment with Add-ins: Try adding nuts, dried fruit, or different kinds of candies to the mix for a fun twist on the classic recipe.
- Serving Options: These treats can be served individually wrapped for parties or arranged on a platter for a more formal presentation. They’re perfect for school events, Halloween parties, or just a cozy night in.
- Keep It Fun: Get the kids involved! This can be a delightful bonding experience, allowing them to express their creativity while whipping up these festive treats.
Perfect Pairings for Rice Krispie Pumpkin Treats
When it comes to serving Rice Krispie Pumpkin Treats, there are plenty of options to enhance your festive occasion:
- Cider or Hot Chocolate: Pair these treats with warm apple cider or hot chocolate to create a cozy fall atmosphere.
- Halloween Parties: They make a lovely addition to Halloween parties, complementing spooky decorations and other fun snacks.
- School Events: These vibrant treats are perfect for school functions, bringing a festive flair to any classroom celebration.
- Craft and Snack Time: Set up a crafting and snack station where kids can decorate their own treats with additional candies and toppings.
- Fall Gatherings: Serve them up at Thanksgiving or fall gatherings; they will be a hit with both kids and adults alike.
FAQ
Conclusion
In conclusion, Rice Krispie Pumpkin Treats are not only delightful in taste but also fun to create. These festive treats are perfect for any fall gathering and bring a spark of joy to everyone who tries them. I encourage you to gather your ingredients, invite your loved ones to join in on the fun, and whip up a batch of these treats tonight. It’s a recipe that’s sure to be cherished and remembered for years to come.
Rice Krispie Pumpkin Treats
Equipment
- Wooden Spoon
- Frying Pan
- Whisk
- Mixing Bowl
Ingredients
- 1/4 cup salted butter
- 7 ounces marshmallow creme
- orange gel food coloring
- 5 cups Rice Krispies cereal
- 1/2 heaping cup chocolate baking chunks divided
- 12-14 green M&M candies
Instructions
- Line a large sheet pan with parchment paper and set to the side. This will prevent the treats from sticking and make cleanup a breeze.
- In a large saucepan over medium heat, melt the salted butter. Be sure to watch it closely to prevent burning; you want it just melted and bubbly.
- Reduce the heat slightly and add the marshmallow fluff to the saucepan. Stir continuously over medium-low heat until the marshmallow fluff breaks down and combines into a smooth liquid, taking about one to two minutes. The mixture should be glossy and cohesive.
- Whisk in the orange gel food coloring until you achieve your desired vibrant hue. This is your moment to make these treats pop with color!
- Once combined, remove the saucepan from the heat. The marshmallow mixture should be warm but not boiling.
- Pour the Rice Krispies cereal into the saucepan. Gently stir until the cereal is fully coated with the marshmallow mixture. Be careful not to crush the cereal; you want the texture to remain crispy.
- Transfer the orange Rice Krispie mixture onto the prepared baking sheet. Spread it into an even, thin layer using a spatula. Allow it to set aside to cool for about twenty minutes.
- While the mixture cools, separate out 12 to 14 chocolate baking chunks to be used as the stems. Cut the M&Ms into halves for leaves.
- Once the Rice Krispie mixture has cooled enough to handle, gently scoop it into a large mixing bowl. Spray an ice cream scoop lightly with cooking spray to prevent sticking.
- Use the ice cream scoop to press the mixture into large balls, forming the pumpkin shapes. Roll each scoop into a smooth ball and place them back onto the parchment-lined baking sheet.
- Now for the fun part! Microwave the remaining chocolate baking chunks in a microwave-safe bowl for thirty seconds, stirring well. Continue heating in fifteen-second intervals until the chocolate is completely melted.
- Dip each chocolate baking chunk into the melted chocolate, and gently press it into the top of one of the rice krispie pumpkins. The chocolate adds a lovely touch and richness.
- Finally, place two green M&M halves next to the “stem” for leaves. Allow the pumpkins to set for another ten to twenty minutes before serving, letting everything firm up nicely.
Notes
- Storage: You can store these in a Ziploc bag or airtight container and allow them to sit at room temperature for about two to three days. For longer preservation of softness, individually wrap them in plastic wrap. You can also freeze these for up to six months; just thaw them at room temperature when you’re ready to enjoy.
- Speed it Up: If it’s the day of your Halloween party and you need to make these faster, pop the hot pan of treats in the fridge for ten minutes before forming them into balls. Just don’t forget about them there, or they’ll become hard and uneven.