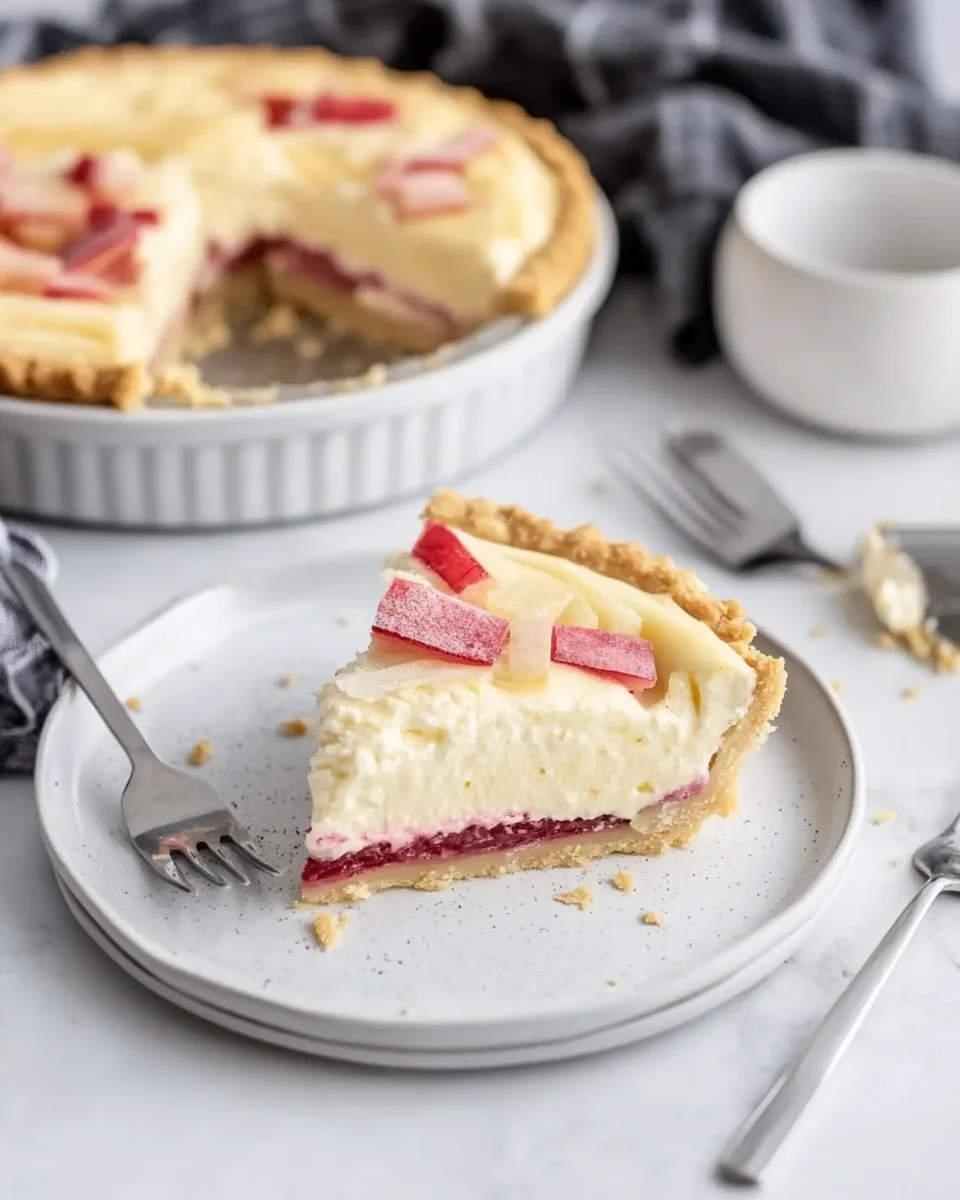
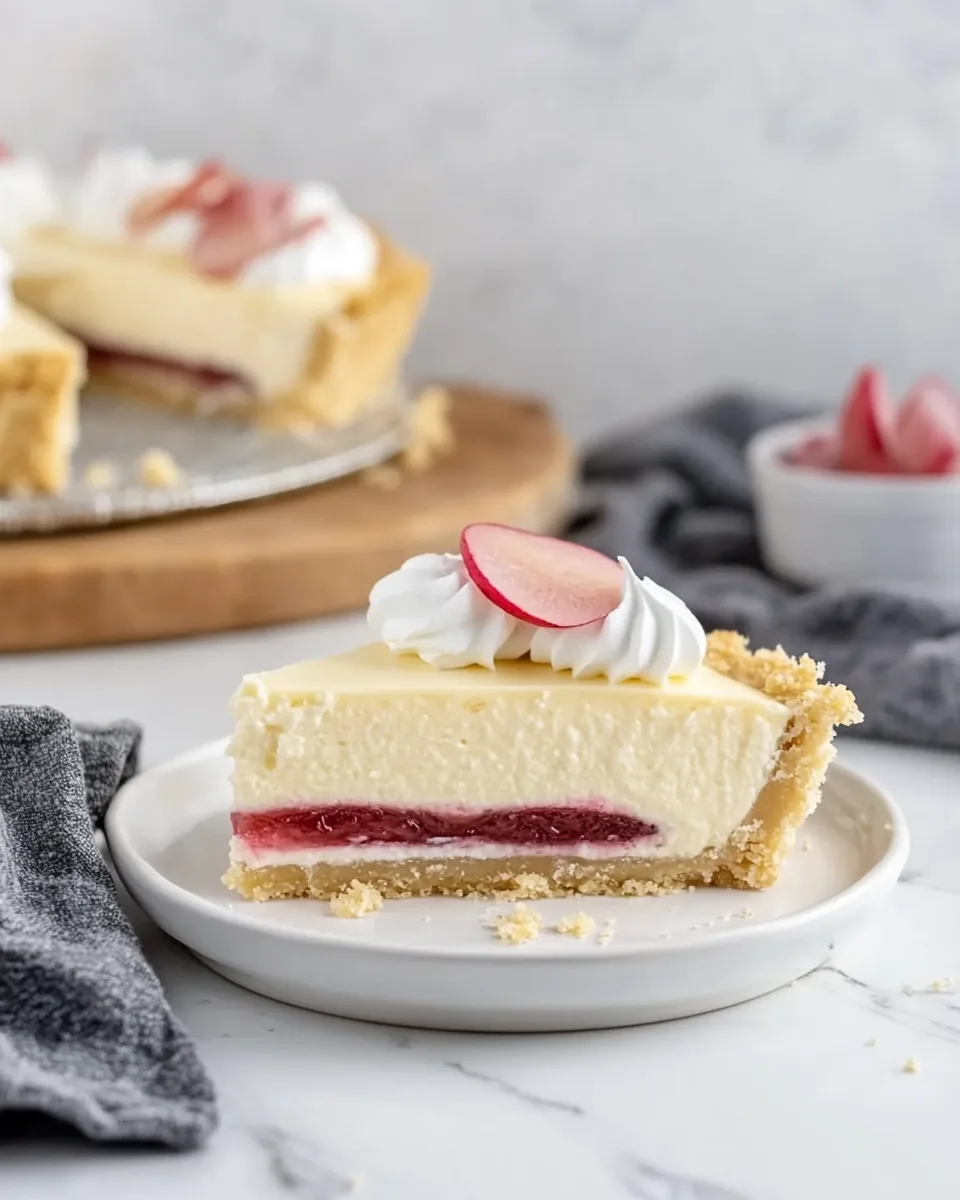
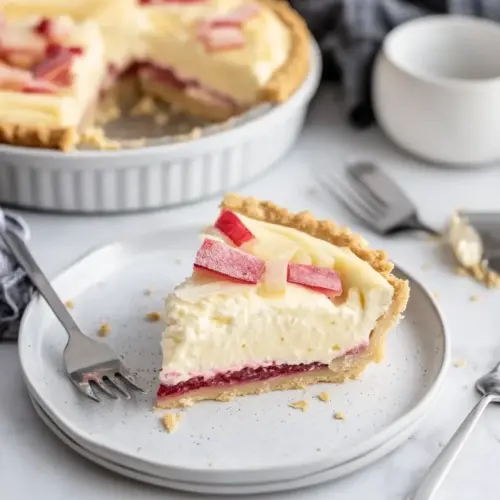
Rhubarb Cheesecake Pie
The Rhubarb Cheesecake Pie holds a special place in my heart as a dessert that beautifully blends tangy and sweet flavors. I remember the first time I tried it at a local bakery, the tartness of the rhubarb paired with the creamy cheesecake left me yearning for more. It evokes memories of springtime gatherings with family, where we savor this delightful treat after indulging in a hearty meal. Every bite is a reminder of the joy that a homemade pie can bring, especially when topped with a dollop of whipped cream. As I learned to make this pie, I was amazed at how simple ingredients could create such a sophisticated dessert. Whether it’s a special occasion or just a craving for something sweet, the Rhubarb Cheesecake Pie never disappoints!
Recipe Snapshot
1 hr 15 mins
20 mins
55 mins
Medium
320 kcal
5 g
Gluten-Free, Low FODMAP
16 g
Frying Pan, Blender, Oven, Chef’s Knife, Mixing Bowl, Wooden Spoon, Baking Sheet
Why This Rhubarb Cheesecake Pie Works
It’s a Unique Flavor Combination
The contrast between the tangy rhubarb and the sweet creaminess of the cheesecake is what makes this pie stand out. Unlike more common fruit pies, the flavors of the rhubarb bring a delightful twist that keeps everyone guessing and satisfied. It’s a perfect balance of tart and sweet, making it an unforgettable dessert experience.
Perfect for Spring Gatherings
As the weather warms up, this pie is a fantastic way to celebrate the arrival of spring. Fresh rhubarb is in season, and there’s nothing quite like serving a slice of this pie at a garden party or family celebration. It’s bright, colorful, and gives off a fresh vibe that complements any springtime occasion.
Versatile Serving Options
One of the things I love about the Rhubarb Cheesecake Pie is its versatility. You can serve it with whipped cream, a scoop of ice cream, or even drizzled with caramel sauce. Each option brings its own unique touch, allowing you to customize the dessert based on your mood or the preferences of your guests.
Make-Ahead Friendly
This pie is incredibly easy to make ahead of time. After preparing, it can be stored in the refrigerator for up to four days, which means you can bake it a day or two in advance. This makes it a brilliant choice for busy occasions where you want to impress without the last-minute rush.
A Family Recipe with a Story
This pie isn’t just a recipe; it’s a cherished family tradition. Inspired by my Aunt Patsy’s Strawberry Pie, it has evolved over the years. Each time I make it, I’m reminded of the love and laughter shared around the dinner table, making it more than just a dessert, but a memory maker.
Easy to Prepare
Even if you’re not an experienced baker, you’ll find the steps to create the Rhubarb Cheesecake Pie straightforward and manageable. With simple ingredients and techniques, you’ll impress family and friends with minimal effort.
What to Gather for Rhubarb Cheesecake Pie
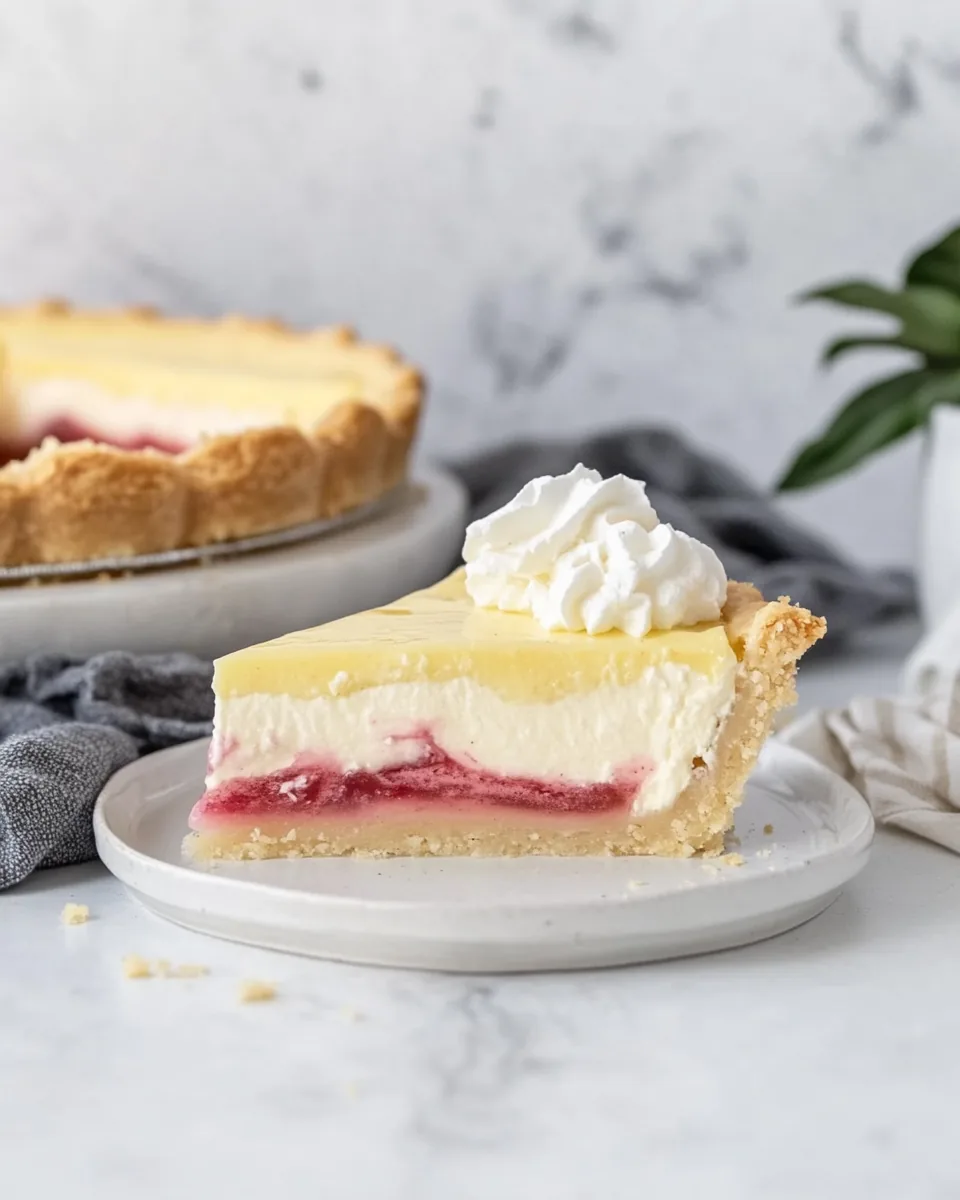
Before diving into making the Rhubarb Cheesecake Pie, it’s essential to understand the role each ingredient plays in creating this delicious dessert. The combination of flavors and textures is crucial for a well-balanced pie. Each component, from the buttery crust to the creamy filling, works together to create something truly special.
- 1¼ cups all-purpose flour: This is the foundation for the crust, providing structure and a flaky texture.
- ¼ cup sugar: Adds sweetness to the crust, enhancing its flavor.
- Pinch of salt: A crucial element that balances sweetness.
- ½ cup unsalted butter at room temperature: Brings richness and flavor to the crust.
- 2 cups chopped rhubarb: The star of the pie, giving it a delightful tartness.
- ⅓ cup sugar: Sweetens the rhubarb filling without overpowering its natural flavor.
- 1 tablespoon all-purpose flour: Helps to thicken the rhubarb filling.
- 12 ounces cream cheese at room temperature: Creates the creamy cheesecake layer.
- ½ cup sugar: Sweetens the cheesecake filling.
- 2 large eggs: Binds the cheesecake layer together.
- 1 teaspoon pure vanilla extract: Adds depth of flavor.
- ½ cup sour cream: Contributes to a creamy texture and a touch of tang.
- 1 tablespoon sugar: Sweetens the sour cream layer.
- ½ teaspoon pure vanilla extract: Enhances the flavor of the sour cream layer.
The Process for Making Rhubarb Cheesecake Pie
Making the Rhubarb Cheesecake Pie is a delightful experience that fills your kitchen with wonderful aromas. The process is straightforward, and with each step, you’ll see how the flavors and textures come together beautifully. Follow these steps closely to achieve the best results.
- For the crust: Preheat your oven to 325 degrees Fahrenheit. In a medium bowl, combine flour, sugar, and salt. Use a rigid pastry blender to cut in the butter until the mixture resembles coarse crumbs. Take your time to ensure it’s crumbly but well mixed. Press this mixture evenly into the bottom and up the sides of a 9-inch pie pan, aiming for uniform thickness. This ensures an even bake and a beautiful crust. Set aside while preparing the filling.
- For the rhubarb filling: In another medium bowl, stir together the chopped rhubarb, sugar, and flour. Spread this mixture evenly over the bottom of the prepared pie crust. Bake in the preheated oven for 15 minutes. When done, remove from the oven and set aside to cool slightly. This step softens the rhubarb and allows the flavors to meld.
- Increase the oven temperature: Raise the oven temperature to 350 degrees Fahrenheit as you prepare the cheesecake layer, ensuring it’s hot enough for the next bake.
- For the cheesecake layer: In a medium bowl, beat the cream cheese and sugar together until creamy, about 1 minute. It should be smooth and free of lumps. Add the eggs one at a time, mixing well after each addition. Finally, add the vanilla and mix just to combine. Spread the cream cheese mixture evenly over the hot rhubarb layer in the pie pan. You might notice some liquid from the rhubarb; that’s perfectly fine!
- Bake the cheesecake layer: Bake the pie at 350 degrees Fahrenheit for 25 minutes. The cheesecake should be slightly set but still have a little jiggle in the center. This helps to maintain that creamy texture.
- For the sour cream layer: While the cheesecake layer is baking, prepare the sour cream topping. In a small bowl, stir together the sour cream, sugar, and vanilla until smooth. Once the cheesecake layer is done baking, carefully spread the sour cream mixture over the center, leaving about ½ inch of the cheesecake layer exposed around the edges.
- Bake again: Put the pie back in the oven and bake for an additional 15 minutes. This final bake allows the sour cream layer to set and adds a lovely finishing touch.
- Cool the pie: Remove your pie from the oven and let it cool completely on a wire rack. This step is crucial for achieving the right texture. Once cooled, chill the pie in the refrigerator for at least 2 hours. This not only helps to set the layers but also allows the flavors to deepen.
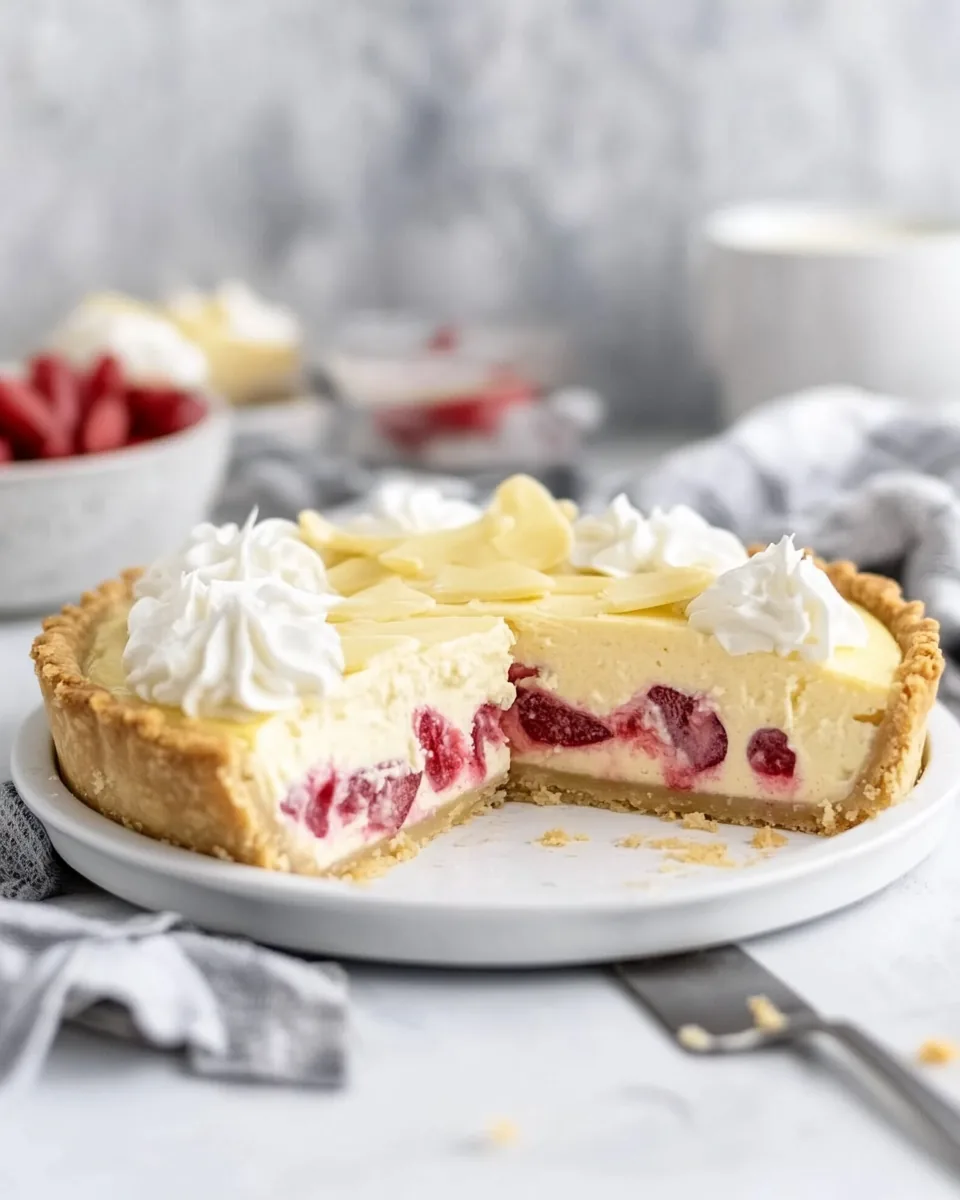
- Serve: When ready to serve, slice the pie and enjoy with a dollop of fluffy homemade whipped cream on top. The combination of cold cream and warm pie will surely elevate your dessert experience!
Things Worth Knowing
- Tip for a flaky crust: Make sure your butter is cold while preparing the crust. This helps to create a flaky texture.
- Watch the baking times: Overbaking the cheesecake can lead to a dry texture, so keep an eye on it.
- Rest the pie: Allowing the pie to cool completely before refrigerating ensures the layers set properly.
- Flavor variations: Feel free to experiment by adding a pinch of cinnamon or nutmeg to the rhubarb filling for an extra flavor boost.
Tips for Success
To ensure your Rhubarb Cheesecake Pie turns out perfectly, here are some tips that I’ve gathered through my own baking experiences.
- Storage: Store leftovers in the refrigerator for up to four days. Make sure to cover it well to maintain freshness.
- Freezing: You can freeze slices of the pie for up to three months. Just wrap them in plastic wrap and aluminum foil.
- Pairing: This pie goes wonderfully with a scoop of vanilla ice cream or a drizzle of caramel sauce.
- Serving Style: Serve chilled for a refreshingly cool dessert, especially on warm days.
- Creamy Topping: For an added touch, whip some heavy cream and sweeten it lightly to top your pie.
Serve This Rhubarb Cheesecake Pie With
- Fresh Fruit Salad: A light fruit salad pairs beautifully with the rich flavors of the pie, adding a refreshing contrast.
- Lightly Sweetened Tea: Enjoy this dessert with a cup of herbal or sweet tea for a delightful afternoon treat.
- Picnic Gatherings: This pie is fantastic for outdoor gatherings; slice it up and serve it in the sunshine.
- Spring Celebrations: Perfect for Easter or Mother’s Day, this pie adds a festive touch to any celebratory table.
- Frozen Yogurt: Serve slices of pie alongside creamy frozen yogurt for a unique dessert experience.
FAQ
Conclusion
The Rhubarb Cheesecake Pie is a delightful combination of flavors that brings a unique twist to traditional desserts. Its balance of tartness and creaminess makes it a favorite for any gathering or celebration. I encourage you to try making this pie for your next occasion—you won’t be disappointed. It’s not just a dessert; it’s a heartwarming experience that will create lasting memories around your table.
Rhubarb Cheesecake Pie
Equipment
- Frying Pan
- Blender
- Oven
- Chef's Knife
- Mixing Bowl
- Wooden Spoon
- Baking Sheet
Ingredients
- 1¼ cup All-Purpose Flour
- ¼ cup Sugar
- Pinch Salt
- ½ cup Unsalted Butter at room temperature
- 2 cups Chopped Rhubarb
- ⅓ cup Sugar
- 1 tablespoon All-Purpose Flour
- 12 ounces Cream Cheese at room temperature
- ½ cup Sugar
- 2 large Eggs
- 1 teaspoon Pure Vanilla Extract
- ½ cup Sour Cream
- 1 tablespoon Sugar
- ½ teaspoon Pure Vanilla Extract
Instructions
- For the crust: Preheat your oven to 325 degrees Fahrenheit. In a medium bowl, combine flour, sugar, and salt. Use a rigid pastry blender to cut in the butter until the mixture resembles coarse crumbs. Take your time to ensure it’s crumbly but well mixed. Press this mixture evenly into the bottom and up the sides of a 9-inch pie pan, aiming for uniform thickness. This ensures an even bake and a beautiful crust. Set aside while preparing the filling.
- For the rhubarb filling: In another medium bowl, stir together the chopped rhubarb, sugar, and flour. Spread this mixture evenly over the bottom of the prepared pie crust. Bake in the preheated oven for 15 minutes. When done, remove from the oven and set aside to cool slightly. This step softens the rhubarb and allows the flavors to meld.
- Increase the oven temperature: Raise the oven temperature to 350 degrees Fahrenheit as you prepare the cheesecake layer, ensuring it’s hot enough for the next bake.
- For the cheesecake layer: In a medium bowl, beat the cream cheese and sugar together until creamy, about 1 minute. It should be smooth and free of lumps. Add the eggs one at a time, mixing well after each addition. Finally, add the vanilla and mix just to combine. Spread the cream cheese mixture evenly over the hot rhubarb layer in the pie pan. You might notice some liquid from the rhubarb; that’s perfectly fine!
- Bake the cheesecake layer: Bake the pie at 350 degrees Fahrenheit for 25 minutes. The cheesecake should be slightly set but still have a little jiggle in the center. This helps to maintain that creamy texture.
- For the sour cream layer: While the cheesecake layer is baking, prepare the sour cream topping. In a small bowl, stir together the sour cream, sugar, and vanilla until smooth. Once the cheesecake layer is done baking, carefully spread the sour cream mixture over the center, leaving about ½ inch of the cheesecake layer exposed around the edges.
- Bake again: Put the pie back in the oven and bake for an additional 15 minutes. This final bake allows the sour cream layer to set and adds a lovely finishing touch.
- Cool the pie: Remove your pie from the oven and let it cool completely on a wire rack. This step is crucial for achieving the right texture. Once cooled, chill the pie in the refrigerator for at least 2 hours. This not only helps to set the layers but also allows the flavors to deepen.
- Serve: When ready to serve, slice the pie and enjoy with a dollop of fluffy homemade whipped cream on top. The combination of cold cream and warm pie will surely elevate your dessert experience!
Notes
- Storage: Store leftovers in the refrigerator for up to four days. Make sure to cover it well to maintain freshness.
- Freezing: You can freeze slices of the pie for up to three months. Just wrap them in plastic wrap and aluminum foil.
- Pairing: This pie goes wonderfully with a scoop of vanilla ice cream or a drizzle of caramel sauce.
- Serving Style: Serve chilled for a refreshingly cool dessert, especially on warm days.
- Creamy Topping: For an added touch, whip some heavy cream and sweeten it lightly to top your pie.