Red Velvet Cupcakes
There’s something truly magical about Red Velvet Cupcakes. Every time I prepare them, I’m transported back to the first time I took a bite of one. The rich, velvety flavor combined with the sweet cream cheese frosting creates a symphony of tastes that make any occasion feel special. These cupcakes aren’t just a treat; they’re a celebration of love, joy, and creativity. I remember making them for a friend’s birthday, and the look on her face when she saw those beautiful red treats—it was priceless! The vibrant color, the soft texture, and that irresistible frosting make Red Velvet Cupcakes perfect for Valentine’s Day or any day you want to spread a little joy. They remind me of the little moments in life that we should cherish and celebrate, whether it’s a birthday, an anniversary, or simply a cozy evening at home. So, gather your ingredients, and let’s create some sweet memories together!
Recipe Snapshot
40 mins
20 mins
20 mins
Medium
240 kcal
3 g
Whole30, Vegan, Gluten-Free
12 g
Frying Pan, Whisk, Oven, Mixing Bowl, Baking Sheet
Why This Red Velvet Cupcakes Hits Different
Perfect for Any Occasion
What I love most about Red Velvet Cupcakes is their versatility. While they’re especially popular for occasions like Valentine’s Day, they can easily fit in at birthday parties, weddings, or even a casual gathering. No matter when you serve them, these cupcakes always steal the show.
Unique Flavor Profile
The combination of cocoa powder and buttermilk in Red Velvet Cupcakes gives them a unique flavor that’s both rich and slightly tangy. It’s this distinct taste that sets them apart from traditional chocolate cupcakes. When you bite into one, you’ll experience that perfect balance of sweetness and depth.
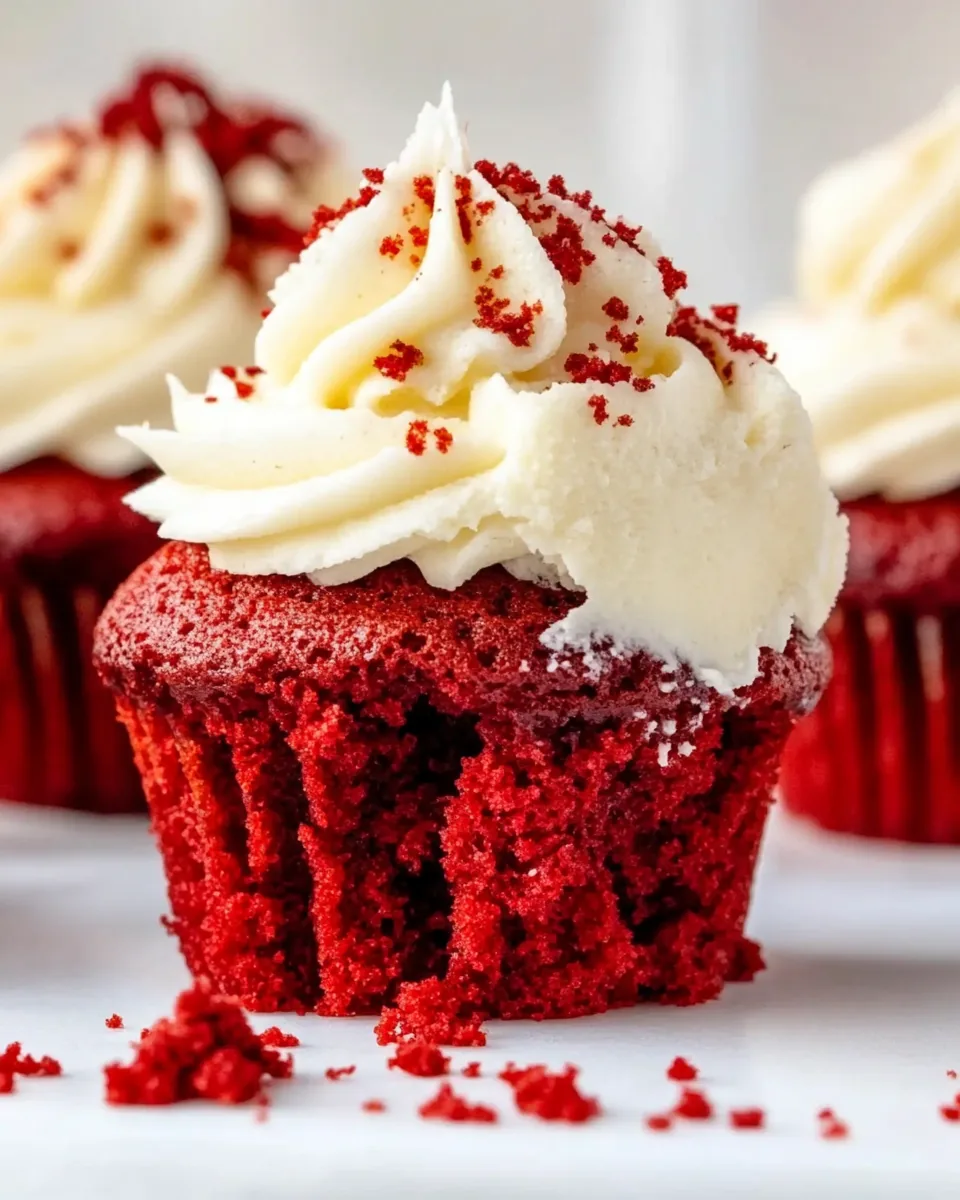
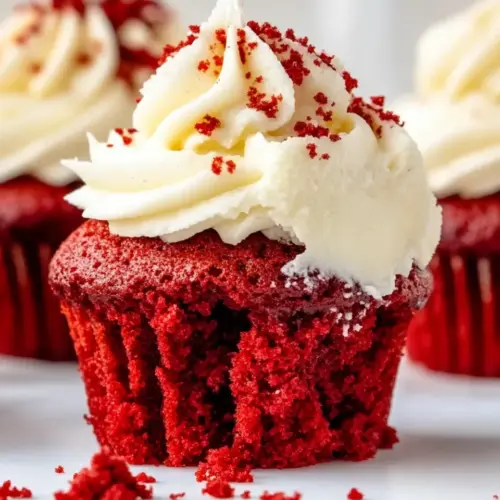
Visual Appeal
Let’s not forget the stunning appearance! The vibrant red color contrasted with the white cream cheese frosting makes these cupcakes not just delicious but also a feast for the eyes. They’re the perfect treat to impress your guests and bring a pop of color to your dessert table.
Easy to Make
Don’t be intimidated by the beautiful presentation. Making Red Velvet Cupcakes from scratch is surprisingly straightforward. With just a few simple steps, you’ll have a batch of cupcakes that look and taste gourmet!
Great for Baking with Kids
This recipe is also fantastic for involving your little ones in the kitchen. Kids love the vibrant color and the chance to help decorate with frosting. It’s a fun way to teach them about baking while creating lasting memories.
FAQ
Conclusion
In conclusion, Red Velvet Cupcakes are a delightful treat that brings joy to any occasion. Their rich flavor and stunning appearance make them a favorite among dessert lovers. I encourage you to try making these cupcakes, whether for a special event or simply to satisfy your sweet tooth. You won’t be disappointed!
Red Velvet Cupcakes
Equipment
- Frying Pan
- Whisk
- Oven
- Mixing Bowl
- Baking Sheet
Ingredients
- ⅓ cup unsalted butter room temperature
- 1 cup granulated sugar
- 2 large eggs room temperature
- 1½ tablespoons unsweetened cocoa powder
- 3 teaspoons water
- 1 teaspoon red gel food coloring
- 2 teaspoons vanilla extract
- ¾ cup buttermilk
- 1¾ cups all-purpose flour
- ½ teaspoon salt
- ½ teaspoon baking soda
- 2 teaspoons white vinegar
- 8 ounces cream cheese full fat, block style, room temperature
- 6 tablespoons unsalted butter room temperature
- 4 cups powdered sugar sifted
- 1 teaspoon vanilla extract
- pinch salt
Instructions
- Preheat the oven to 350°F. Line a muffin pan with 12 cupcake liners.
- In the mixing bowl of a stand mixer with the paddle attachment fitted, add the butter and sugar. Beat until light and fluffy, about 3 minutes.
- Add the eggs one at a time and beat until fully incorporated. Scrape down the bowl as needed.
- In a small bowl, whisk together the cocoa powder, water, red food coloring, and vanilla extract until smooth.
- Add the cocoa mixture to the beaten butter, eggs, and sugar. Beat until all ingredients are fully incorporated.
- Turn the mixer to its lowest speed and add ⅓ of the buttermilk followed by ⅓ of the flour. Repeat until all the buttermilk and flour have been used up.
- Add the salt, baking soda, and white vinegar to the cake batter and beat to combine. Do not overmix.
- Fill the cupcake liners ¾ full. Bake for 20 minutes, or until the tops spring back when touched and a toothpick inserted comes out clean. Leave the cupcakes to cool for a few minutes in the pan before transferring them to a wire rack to cool completely.
- Trim the tops of the cupcakes with a serrated knife and blitz into crumbs for decorating later.
- In a bowl of a stand mixer fitted with the paddle attachment, add the cream cheese and butter. Beat on medium speed until creamy, scraping down the bowl as needed.
- Switch to the whisk attachment. Add the sifted powdered sugar, vanilla extract, and salt to the mixing bowl. Beat slowly until combined, then increase speed and beat for 2 minutes until smooth.
- Transfer the cream cheese frosting to a piping bag fitted with a star nozzle. Pipe swirls on top of each cupcake and decorate with crumbs.
- Serve and enjoy!
Notes
- Make Ahead: The cupcakes can be made several days ahead and stored in the fridge (up to 5 days) or the freezer (up to 1 month). The frosting can be made up to 5 days in advance.
- Cupcake Storage: Store in the fridge for up to 5 days, wrapped in plastic wrap or in an airtight container.
- Frosting Storage: The frosting can also be stored in an airtight container in the fridge for up to 5 days; bring it to room temperature before using.
- Freezing: Wrap cooled cupcakes tightly with plastic wrap and place in a freezer bag for up to 1 month. Thaw at room temperature before frosting.