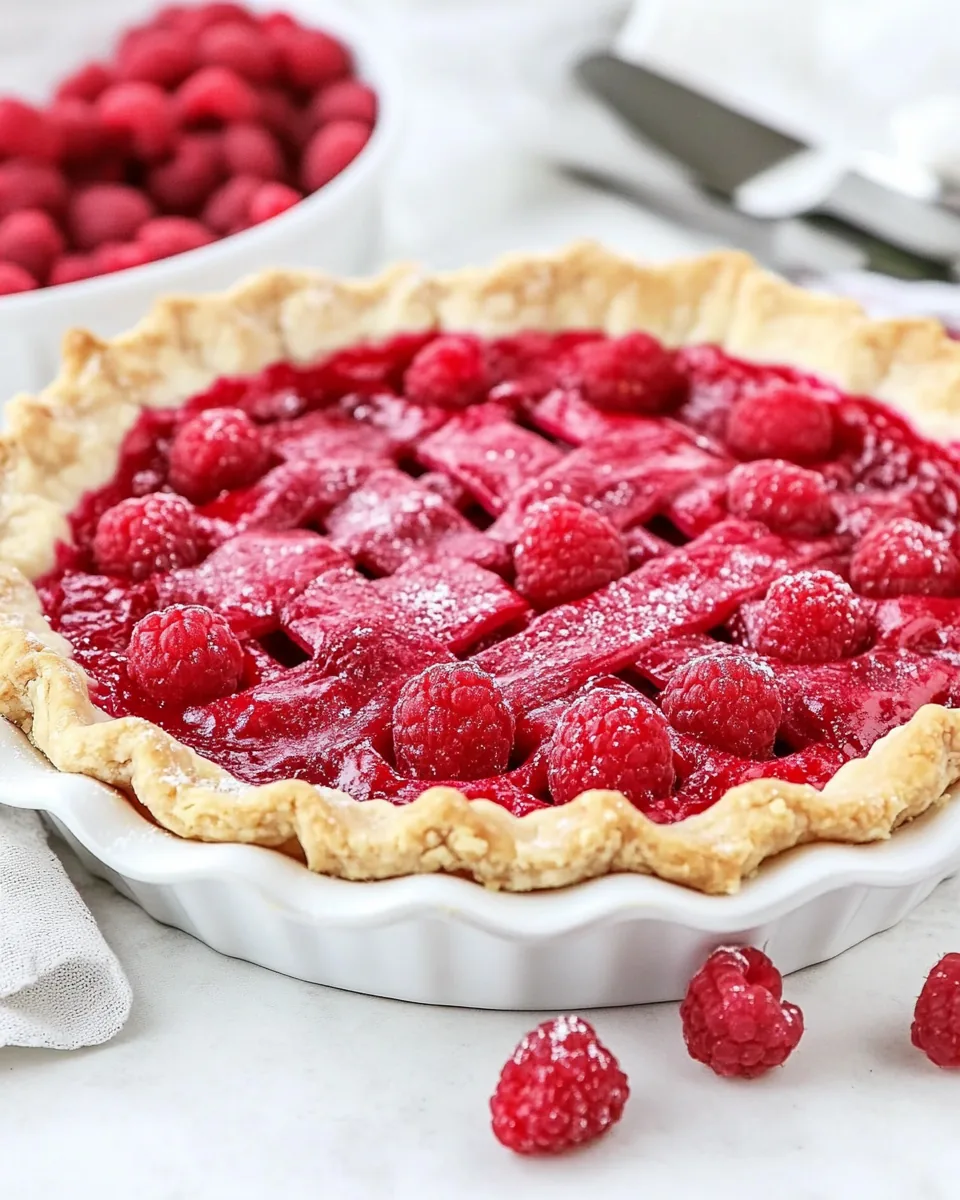
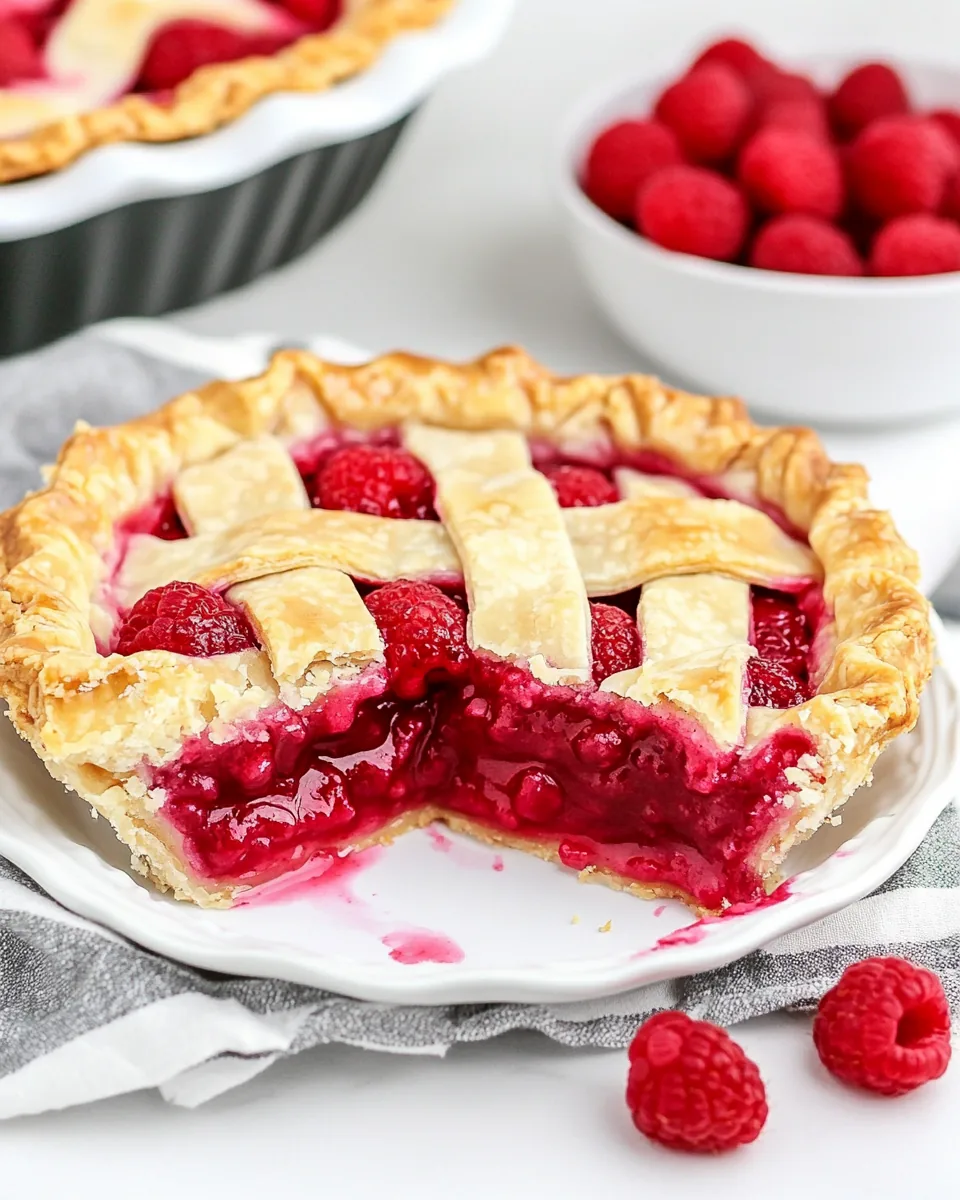
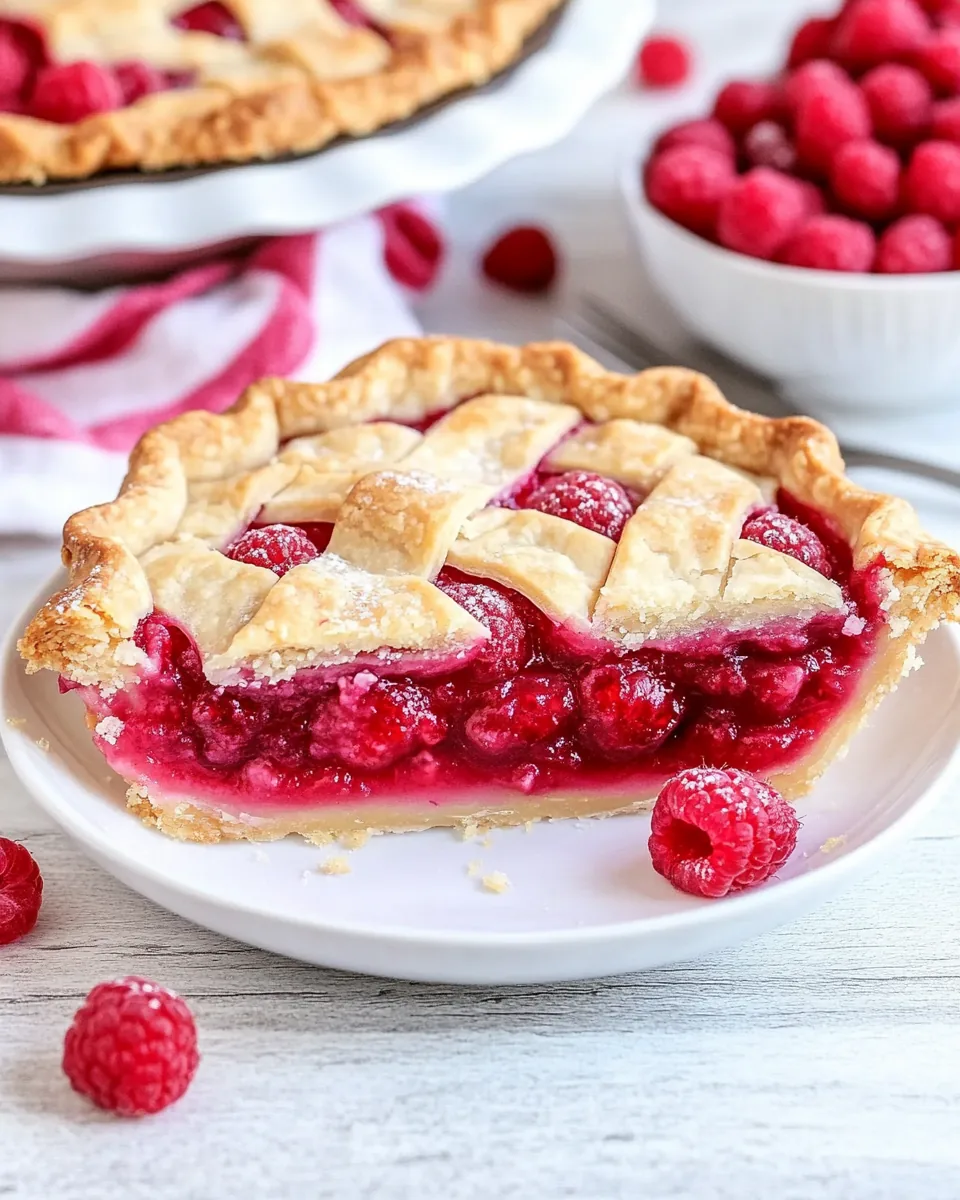
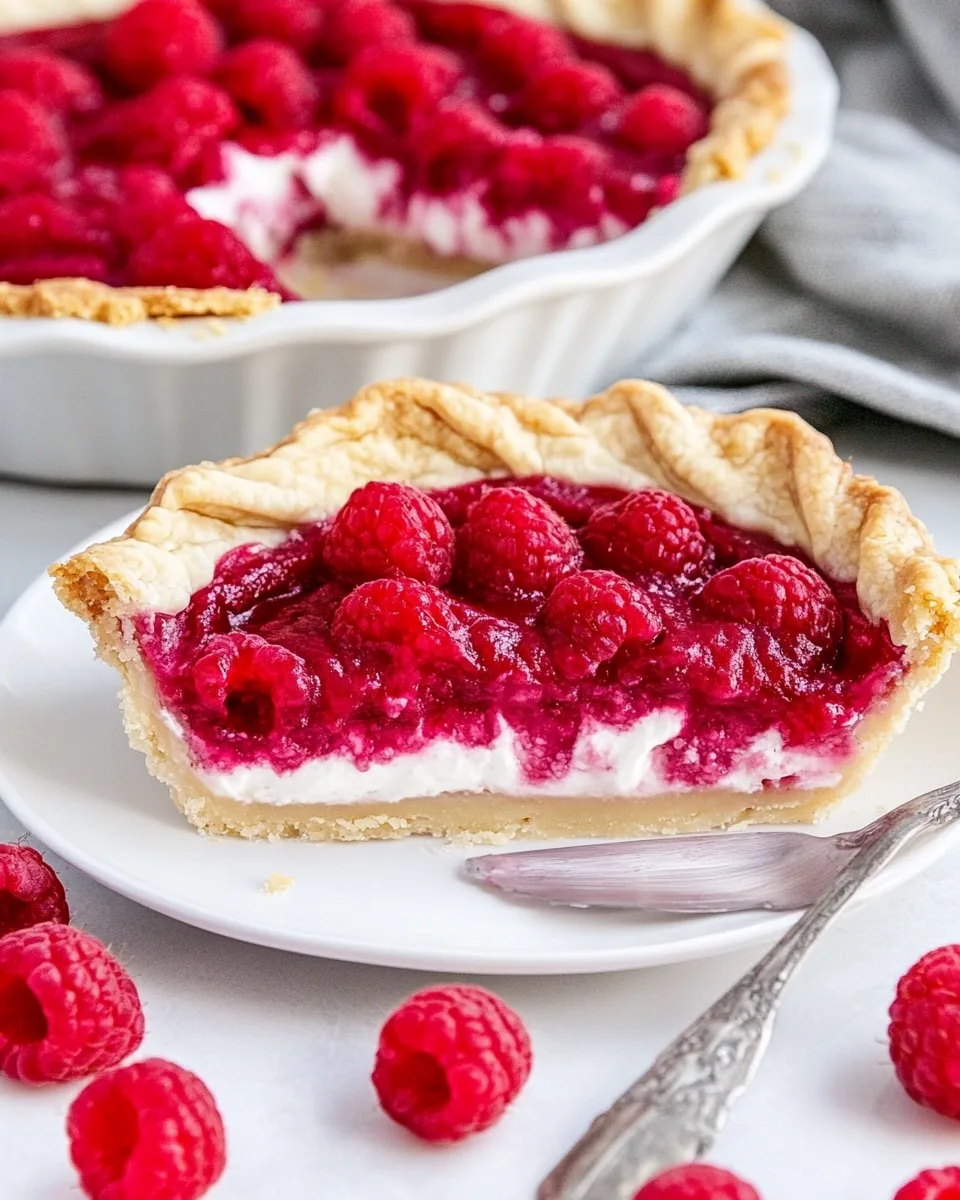
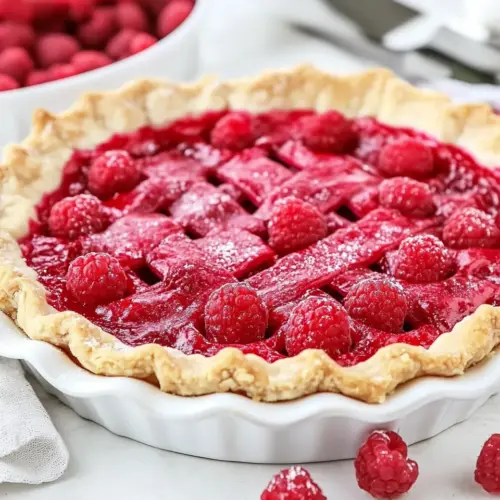
Raspberry Pie
Every time summer rolls around, I find myself craving a slice of Raspberry Pie. It takes me back to hot afternoons spent in the kitchen with my grandmother, who taught me the art of pie-making. We would gather fresh raspberries from the garden, their vibrant color bursting with sweetness. I remember the thrill of mixing them with sugar and a splash of lemon juice, creating a fragrant filling that seemed to dance in the air. It was more than just a dessert; it was a celebration of summer’s bounty, a reminder of love and tradition. The crisp, flaky crust cradles that luscious filling perfectly, making each bite a symphony of flavors. There’s something magical about sharing a homemade pie with friends and family, and I can’t help but smile when I see their faces light up with joy. This Raspberry Pie is not just a recipe; it’s a memory waiting to be made.
Recipe Snapshot
1 hr 10 mins
20 mins
50 mins
Medium
300 kcal
2 g
Gluten-Free, Low FODMAP
10 g
Wooden Spoon, Oven, Baking Sheet
The Appeal of This Raspberry Pie
Freshness is Key
One of the things I absolutely adore about this Raspberry Pie is the use of fresh or frozen raspberries. They add a burst of flavor that’s simply unmatched. When you bite into a piece, the juicy raspberries release their sweet-tart goodness, making each slice an experience. If you can, opt for fresh raspberries when they’re in season; they elevate the pie to another level.
A Flaky Crust
The crust plays a crucial role in this recipe. A well-made pie crust should be flaky and buttery, providing a perfect contrast to the soft filling. I often prepare my crust from scratch using all-butter for that rich flavor. However, if you’re short on time, a store-bought pie crust can work just as well! The goal is to have that delightful crunch when you take your first bite.
Perfectly Balanced Sweetness
Finding the right balance of sweetness is essential in any pie. With this Raspberry Pie, I use just the right amount of granulated sugar to enhance the natural sweetness of the raspberries without overshadowing their tartness. A touch of lemon juice brightens the flavors and gives the filling a refreshing zing that makes it truly irresistible.
Versatile Toppings
Whether you prefer a classic lattice top or a crumble topping, this Raspberry Pie can adapt to your preferences. I love the texture contrast that a crumble topping brings, with its buttery goodness and crunch. If you want to impress your guests, try cutting shapes out of the top crust with cookie cutters before baking!
Easy to Prepare
This pie is surprisingly easy to prepare, making it a fantastic option for both beginner bakers and seasoned pros. The steps are straightforward, allowing you to enjoy the process without stress. Plus, your house will smell heavenly as it bakes!
Family Tradition
Finally, this Raspberry Pie holds a special place in my heart because it’s a family tradition. Every summer, I make it as a way to carry on my grandmother’s legacy. It’s a delightful way to bring loved ones together, and I cherish the moments spent around the table, sharing stories and laughter, all while enjoying a slice of homemade pie.
Ingredients Overview for Raspberry Pie
The ingredients for this Raspberry Pie are simple yet effective. Each element has a role, harmonizing to create a delightful dessert that showcases the vibrant flavor of raspberries. Fresh or frozen, the raspberries steal the show, while the buttery crust provides the perfect framework. Let’s explore these key players:
- All Butter Pie Crust: The foundation of any great pie, a buttery and flaky crust is essential for encasing the sweet raspberry filling.
- Fresh or Thawed Frozen Raspberries: Bursting with flavor, these juicy gems are the star of the show, delivering that sweet-tart essence.
- Granulated Sugar: Adds sweetness and helps balance the tartness of the raspberries.
- Lemon Juice: A splash of acidity enhances the flavor, brightening the overall taste of the pie.
- Cornstarch: Acts as a thickening agent, ensuring that your pie has a perfect consistency and holds together when sliced.
- Crumble Topping: Optional but highly recommended, it adds a delightful crunch to the top of the pie.
Directions for Raspberry Pie
Making a Raspberry Pie is a rewarding experience that fills your kitchen with the delightful aroma of baking pastries. Let’s walk through the steps together to create a perfect pie.
- Preheat your oven to 425°F (220°C). This initial high temperature helps create a crispy crust.
- Prepare your pie crust. Place one pie crust in the bottom of a 9-inch pie plate and crimp the edges as desired for a beautiful presentation.
- In a large mixing bowl, carefully stir together the fresh raspberries, granulated sugar, lemon juice, and cornstarch. The cornstarch will help thicken the juices released by the raspberries while they bake.
- Pour the raspberry mixture into the prepared pie plate, spreading it evenly.
- Now, it’s time to top the pie! You can either create a lattice crust or simply cover it with another pie crust. If you go for a double crust, be sure to cut holes in the top to vent during baking. If you feel creative, use cookie cutters to cut shapes out of the crust and place them on top.
- If you’re using a crumble topping, sprinkle it generously over the top of the pie for added texture.
- To prevent the edges from burning, place a pie shield around the edge of the pie. This will allow the filling to cook evenly without over-baking the crust.
- Place the pie on a cookie sheet to catch any drips during baking. This step helps keep your oven clean!
- Bake in the preheated oven for 10 minutes at 425°F, then reduce the temperature to 350°F (175°C) and bake for an additional 30 to 40 minutes. You’ll know it’s done when the crust is golden brown and the filling is bubbling.
- Once baked, remove the pie from the oven and let it cool. This waiting period allows the filling to set properly.
- Slice, serve, and enjoy your homemade Raspberry Pie with a scoop of vanilla ice cream or a dollop of whipped cream!
Things Worth Knowing
- Fresh vs. Frozen: Fresh raspberries provide a brighter flavor, but frozen raspberries work well too! Just thaw and drain excess liquid before using.
- Pie Shield: If you don’t have a pie shield, you can make one out of aluminum foil to protect the edges from browning too quickly.
- Cooling Time: Allow the pie to cool for at least two hours before slicing. This helps the filling set for cleaner slices.
- Serving Tip: This pie is absolutely delicious served warm or cold. Pair it with whipped cream or ice cream for a delightful treat!
Recipe Tips about Raspberry Pie
Making the perfect Raspberry Pie can be a delightful journey. Here are some tips to help you create a memorable dessert:
- Storage: Keep any leftovers covered in the refrigerator. It will stay fresh for up to three days, but trust me, it’s best enjoyed within the first couple of days.
- Freezing: You can freeze unbaked pie for up to three months. Just wrap it tightly in plastic wrap and aluminum foil. When ready to bake, simply add a few extra minutes to the cooking time.
- Pairing: This pie pairs beautifully with vanilla ice cream or a dollop of fresh whipped cream. The creaminess complements the tartness of the raspberries.
- Variations: Feel free to mix in other berries like blueberries or blackberries for a mixed berry pie. The flavor combinations can be fantastic!
- Crust Options: If you’re in a hurry, store-bought crusts work perfectly. Just be sure to check the label for quality ingredients.
- Serving Size: This recipe yields about 12 servings, perfect for gatherings or special occasions. Share the joy!
Serving This Raspberry Pie
When it comes to serving your Raspberry Pie, there are endless possibilities to enhance the presentation and enjoyment:
- Ideal Occasions: This pie is perfect for summer picnics, barbecues, or holiday gatherings. It’s light enough for a refreshing dessert on a warm day.
- Garnishing: Consider garnishing with fresh mint leaves or a sprinkle of powdered sugar on top to add a beautiful touch.
- Accompanying Beverages: Serve with sweet tea, lemonade, or even a glass of sparkling water for a refreshing pairing.
- Serving Temperature: Whether served warm or cold, this pie is delightful. Warm slices are comforting, while cold slices are refreshing.
- Seasonal Variations: For autumn gatherings, add a sprinkle of cinnamon to your raspberry filling for a cozy twist!
- Leftover Storage: If you have any leftovers, store them in the fridge covered. They can be enjoyed within a few days but are best fresh.
FAQ
Conclusion
The Raspberry Pie is truly a special dessert that captures the essence of summer with its vibrant flavors and comforting textures. With its simple yet delightful combination of fresh raspberries and a buttery crust, it’s sure to become a family favorite. I encourage you to try making this pie for your next gathering or just for a sweet treat at home. It’s a wonderful way to create lasting memories while indulging in a delicious homemade dessert.
Raspberry Pie
Equipment
- Wooden Spoon
- Oven
- Baking Sheet
Ingredients
- 1 recipe All Butter Pie Crust
- 5 cups Fresh or Thawed Frozen Raspberries (661g or approx 1.5 lb)
- ⅔ cup Granulated Sugar (134g)
- 1 tablespoon Lemon Juice (15ml)
- 4 tablespoons Cornstarch (32g)
- 1 recipe Crumble Topping
Instructions
- Preheat your oven to 425°F (220°C). This initial high temperature helps create a crispy crust.
- Prepare your pie crust. Place one pie crust in the bottom of a 9-inch pie plate and crimp the edges as desired for a beautiful presentation.
- In a large mixing bowl, carefully stir together the fresh raspberries, granulated sugar, lemon juice, and cornstarch. The cornstarch will help thicken the juices released by the raspberries while they bake.
- Pour the raspberry mixture into the prepared pie plate, spreading it evenly.
- Now, it’s time to top the pie! You can either create a lattice crust or simply cover it with another pie crust. If you go for a double crust, be sure to cut holes in the top to vent during baking. If you feel creative, use cookie cutters to cut shapes out of the crust and place them on top.
- If you're using a crumble topping, sprinkle it generously over the top of the pie for added texture.
- To prevent the edges from burning, place a pie shield around the edge of the pie. This will allow the filling to cook evenly without over-baking the crust.
- Place the pie on a cookie sheet to catch any drips during baking. This step helps keep your oven clean!
- Bake in the preheated oven for 10 minutes at 425°F, then reduce the temperature to 350°F (175°C) and bake for an additional 30 to 40 minutes. You’ll know it’s done when the crust is golden brown and the filling is bubbling.
- Once baked, remove the pie from the oven and let it cool. This waiting period allows the filling to set properly.
- Slice, serve, and enjoy your homemade Raspberry Pie with a scoop of vanilla ice cream or a dollop of whipped cream!
Notes
- Tip 1: Keep any leftovers covered in the refrigerator. It will stay fresh for up to three days, but trust me, it’s best enjoyed within the first couple of days.
- Tip 2: You can freeze unbaked pie for up to three months. Just wrap it tightly in plastic wrap and aluminum foil. When ready to bake, simply add a few extra minutes to the cooking time.
- Tip 3: This pie pairs beautifully with vanilla ice cream or a dollop of fresh whipped cream. The creaminess complements the tartness of the raspberries.
- Tip 4: Feel free to mix in other berries like blueberries or blackberries for a mixed berry pie. The flavor combinations can be fantastic!
- Tip 5: If you’re in a hurry, store-bought crusts work perfectly. Just be sure to check the label for quality ingredients.