Rainbow Jello
There’s something so nostalgic about a vibrant dessert that takes us back to childhood, and that’s exactly what Rainbow Jello does for me. I remember being at birthday parties, my eyes lighting up at the sight of those colorful layers, each promising a burst of fruity flavor. It instantly became a favorite of mine, and now, I love making it for family gatherings and special occasions. The best part? It’s visually stunning and surprisingly easy to make! You can impress your guests and bring a smile to children’s faces with just a bit of patience and creativity.
Recipe Snapshot
30 mins
30 mins
0 mins
Medium
120 kcal
1 g
Gluten-Free
1 g
Wooden Spoon, Food Processor, Frying Pan, Mixing Bowl
Why You Need This Rainbow Jello
Visually Stunning
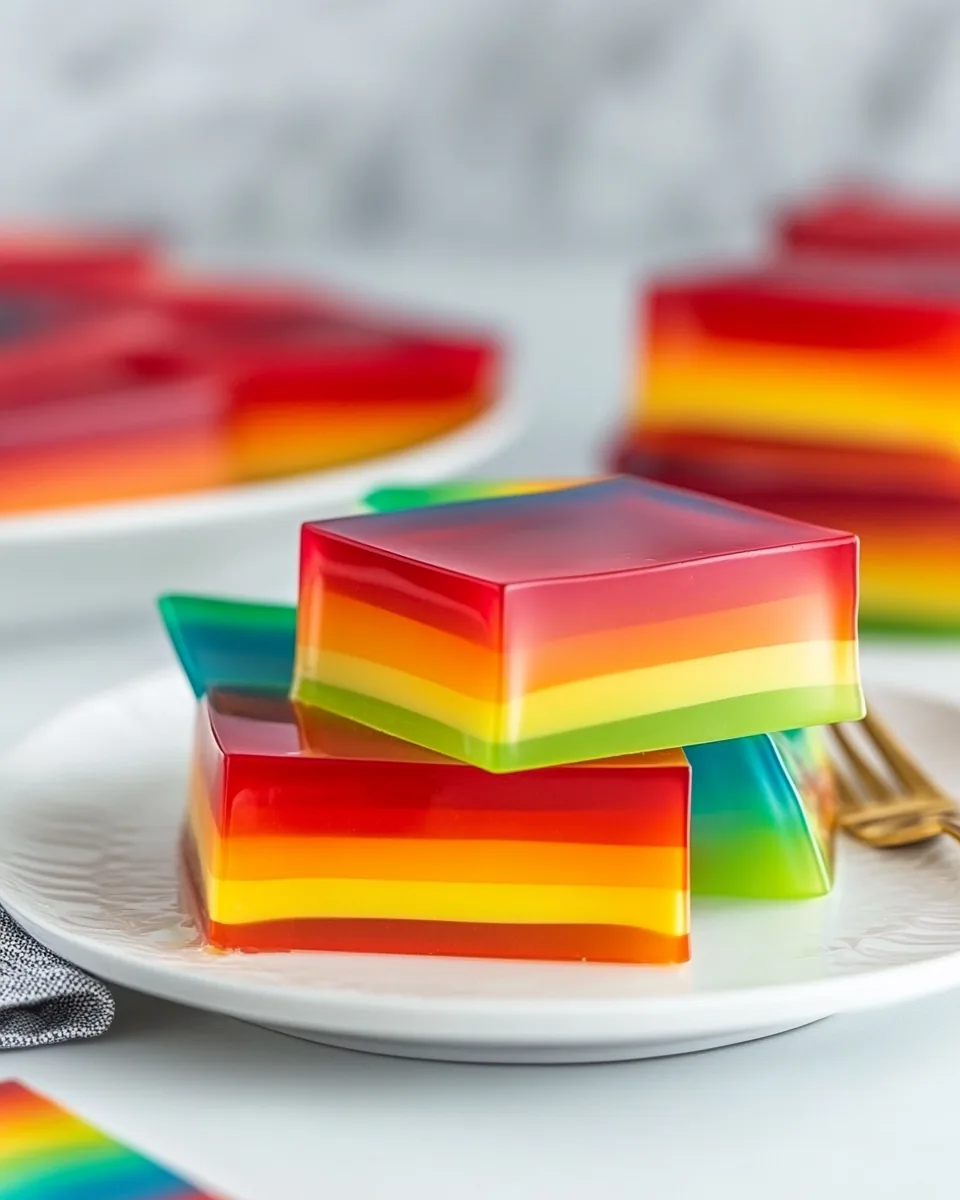
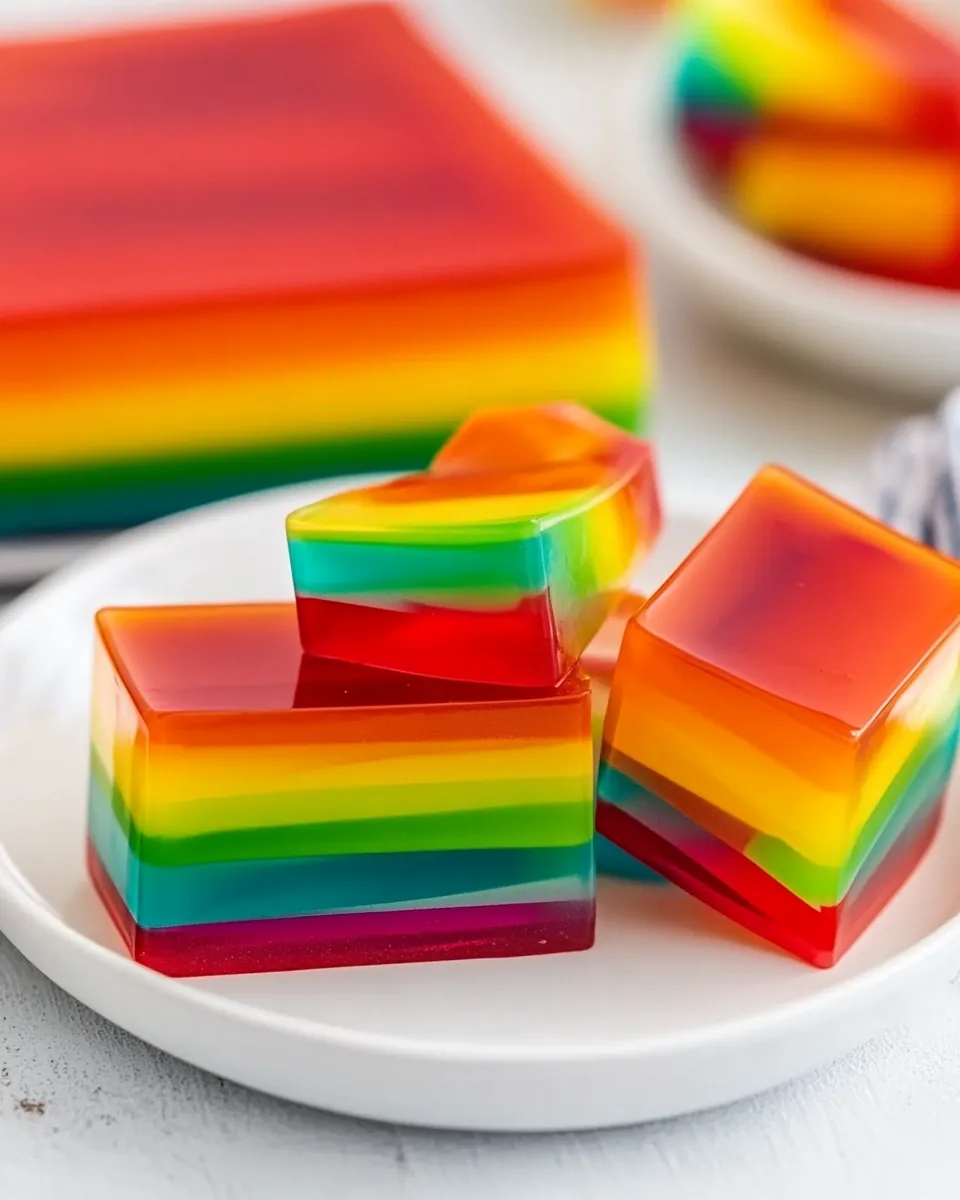
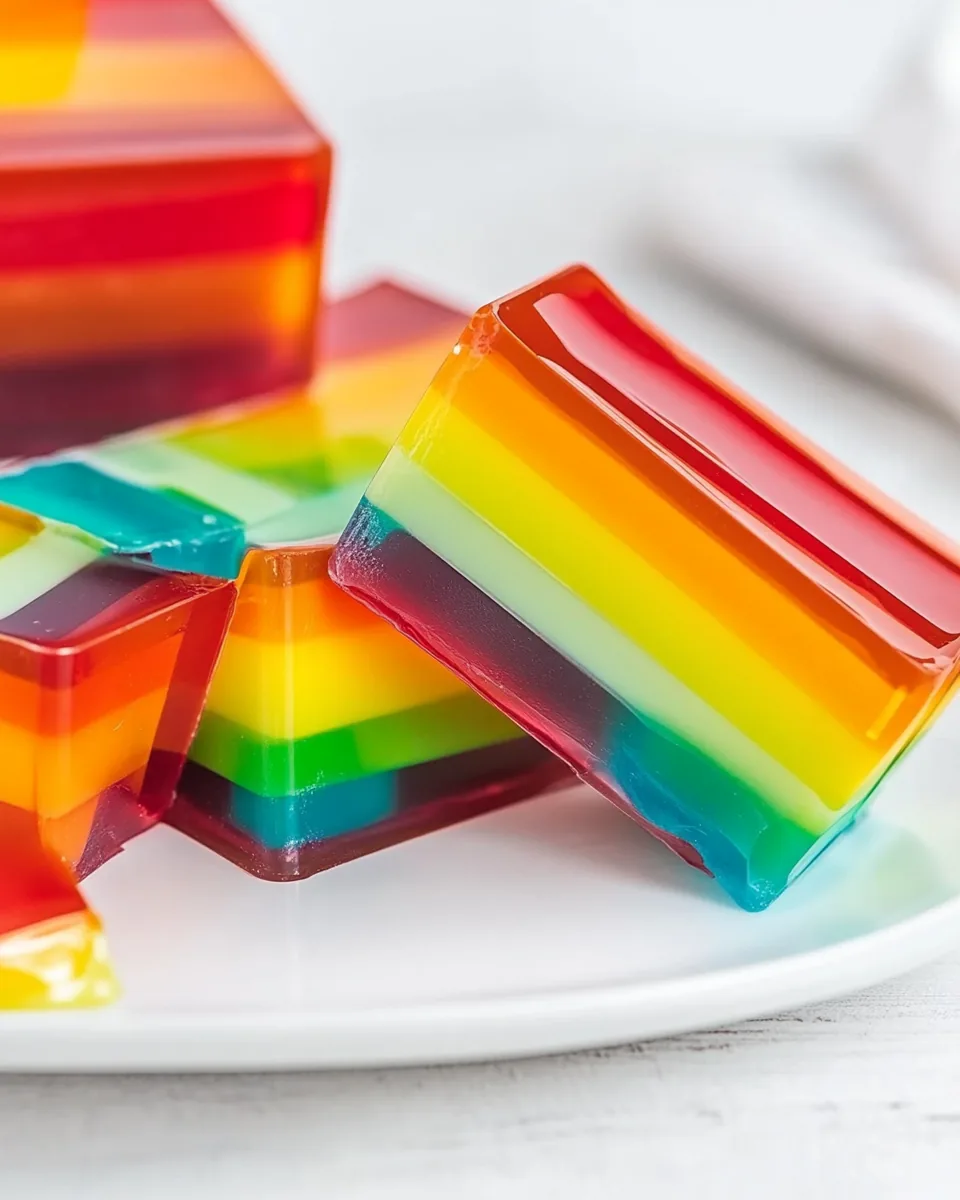
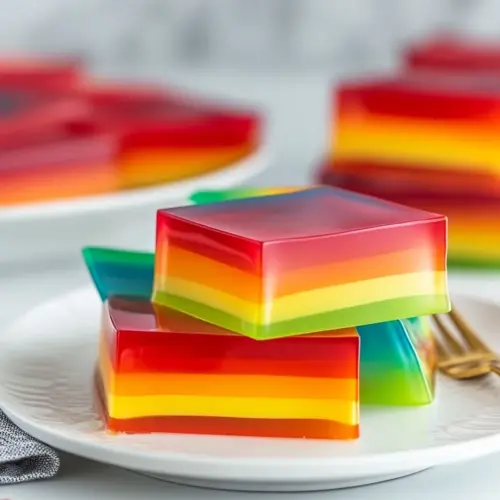
One of the first things that draws people to Rainbow Jello is its vibrant colors. Each layer represents a different flavor, creating a beautiful gradient that makes it a feast for the eyes. It’s perfect for celebrations like birthdays or summer picnics, where it can serve as a centerpiece on the dessert table.
Easy to Customize
Rainbow Jello is incredibly versatile. You can play around with flavors and colors, making it your own. Whether you prefer citrusy notes or berries, there’s a flavor combo out there for everyone. Plus, you can adjust the layers for different occasions, making it suitable for everything from casual get-togethers to more formal events.
A Family Favorite
This recipe is one that families can enjoy together. Kids love the fun of eating pretty colors, and it’s a great way to get them involved in the kitchen. I love having my children help with the layering process, stirring the jello, and pouring it into the dish—it turns into a mini cooking lesson that’s both enjoyable and educational!
Light and Refreshing
On warm days, nothing beats the light, refreshing taste of Rainbow Jello. It’s a fantastic dessert option that feels indulgent without being too heavy. Unlike other desserts, it doesn’t leave you feeling sluggish afterward, making it ideal for summer gatherings where you want something fun yet satisfying.
Perfect for Any Occasion
Whether it’s a family reunion, a birthday party, or simply a sunny afternoon, Rainbow Jello fits right in. It’s not just a dessert; it’s a conversation starter and a delightful treat that can transport you to simpler times.
Main Ingredients for Rainbow Jello
The ingredients for Rainbow Jello are simple and readily available, yet they combine to create something magical. Each element serves a purpose, contributing to the flavor, texture, and appearance of the dish. The vibrant colored jello layers bring a taste of nostalgia, while the sweetened condensed milk adds a creamy texture that perfectly contrasts with the fruity jello. Here’s a look at the key players:
- Flavored Jello: Typically, you’ll use six packs of your favorite flavors, like cherry, orange, lemon, lime, berry blue, and grape to create those stunning layers.
- Sweetened Condensed Milk: This provides a rich, creamy layer that complements the fruity jello layers and gives the dessert its signature look.
- Unflavored Gelatin: Used to help set the sweetened condensed milk layer, ensuring it has a firm consistency that holds up against the jello layers.
- Water: Essential for dissolving the jello and gelatin, making it the foundation of the entire recipe.
Directions for Rainbow Jello
Making Rainbow Jello is a beautiful process that adds excitement to any gathering. By layering the different jello flavors with the creamy layers, you’ll create a stunning dessert that everyone will love. Here’s how to do it step by step:
- Start by lightly greasing a 9×13-inch glass baking dish with a neutral oil like butter or avocado oil. This will help the jello come out easily later.
- For your first layer, take one package of your chosen flavored Jello and half a packet of unflavored gelatin (about 1 ½ teaspoons) in a small bowl. Add 1 cup of hot water and stir until fully dissolved. Avoid stirring too hard to prevent bubbles. Let it cool to room temperature.
- While your first jello layer cools, take a medium bowl and add ¼ cup of cool water. Sprinkle a full packet of unflavored gelatin (about 3 teaspoons) over the water and allow it to absorb for 1 minute without stirring.
- After a minute, mix in ¾ cup of hot water and stir until the gelatin is fully dissolved. Then, add in ½ can of sweetened condensed milk and set it aside—this will be one of your white layers.
- Now, pour your cooled flavored Jello into the prepared glass pan, making sure it covers the entire bottom. Tilt the pan if necessary to ensure even coverage. Chill it in the refrigerator for 20 minutes to set.
- While that layer is setting, prepare the next flavored layer of jello by repeating the same steps as before. This allows it to cool while the first layer firms up.
- After the initial jello layer has set, gently pour ¾ cup of your white mixture on top. To minimize bubbles, use a silicone spatula or spoon to pour it over gently. Leave the baking dish in the fridge and pour the layer from there. Chill for another 20 minutes.
- Continue this process, alternating between the flavored jello and the white layers. Remember to make a new batch of the white layer whenever you need it. Each layer should cool in the fridge for at least 20 minutes before adding the next.
- Finish the layering with a red flavored jello layer on top. Once all layers are set, take the dish out of the fridge.
- Cut the Rainbow Jello into cubes and serve them chilled. Enjoy the delightful layers of color and flavor!
Things Worth Knowing
- Layering Technique: To create distinct layers, ensure each layer cools completely before adding the next one. This prevents the colors from bleeding into one another.
- Stir Gently: When mixing your jello, stir gently to avoid creating bubbles, which can mar the smooth appearance of the layers.
- Chilling Time: Don’t rush the chilling time. Each layer needs sufficient time to set before you add the next to maintain the layer integrity.
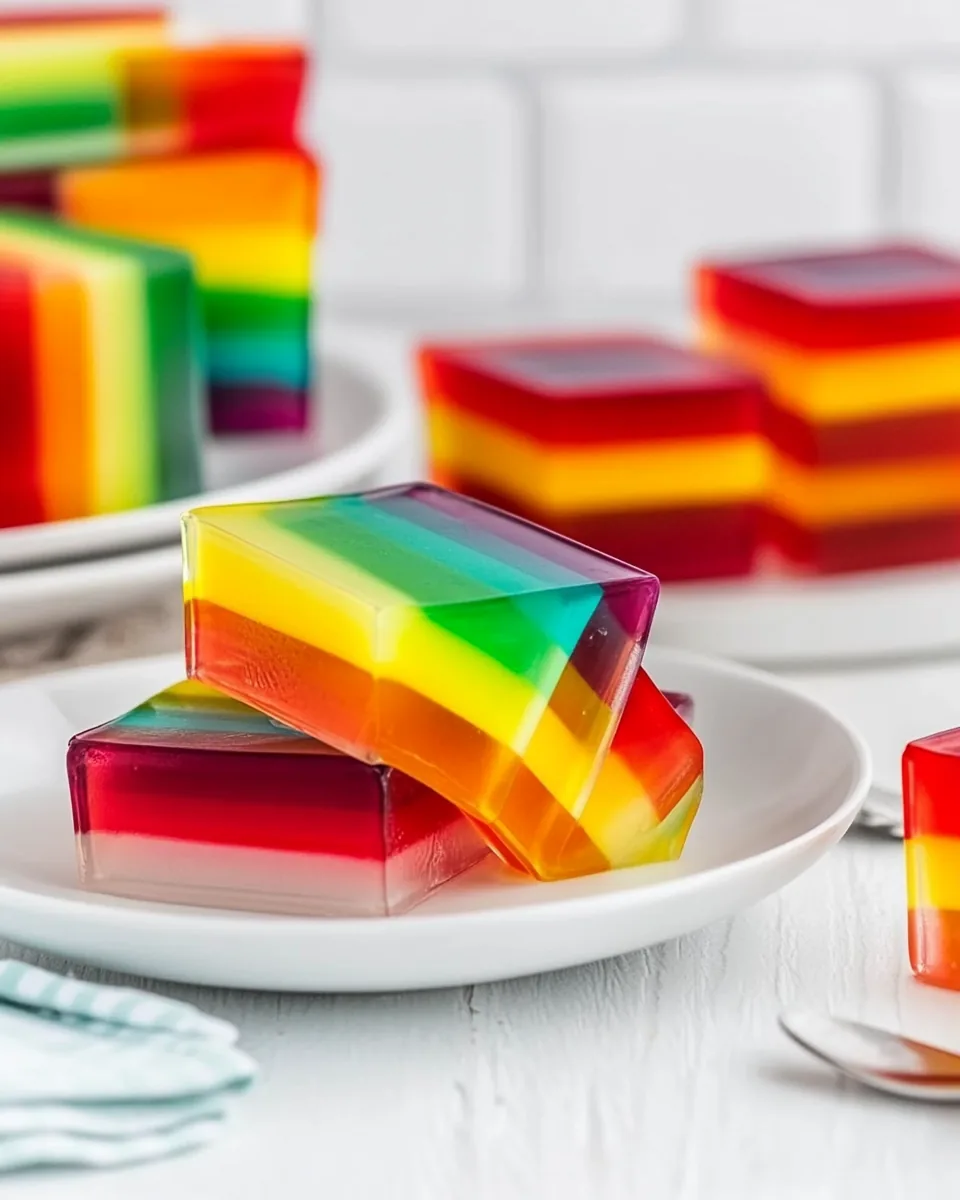
- Use a Glass Dish: A glass baking dish not only looks great but allows you to see the beautiful layers from the side.
Customization Ideas
There’s so much fun to be had while customizing Rainbow Jello to suit your tastes! Here are some ideas to inspire you:
- Flavors: Experiment with different flavors of jello. Try tropical flavors like passionfruit or coconut, or use all berry flavors for a cohesive theme.
- Layering: Add more layers for a more intricate look! You can also vary the thickness of each layer for more visual interest.
- Add Fruits: Incorporate fresh fruits between layers for added texture and flavor. Strawberries, blueberries, or kiwi would make delightful additions.
- Garnishing: Top your finished dish with whipped cream or a sprinkle of colorful sprinkles to add a festive touch.
- Serving Style: Instead of cutting into squares, consider serving the Rainbow Jello in individual cups for parties or gatherings.
Side Dish Ideas for Rainbow Jello
When it comes to serving Rainbow Jello, there are many fun options to pair it with. Here’s how to elevate your dessert experience:
- Light Salads: Pair with refreshing salads like a citrusy green salad or a fruit salad to complement the sweetness of the jello.
- BBQ Parties: Rainbow Jello is a fantastic finish to backyard barbecues. Serve it alongside grilled meats and veggies for a cheerful ending.
- Picnic Treat: Bring Rainbow Jello along for a picnic; it’s portable and can be served right out of the dish, making it a practical and fun option.
- Birthday Parties: This dessert is a showstopper for kids’ birthday parties. Serve it with cupcakes or ice cream for a dessert table that delights.
- Holiday Gatherings: Rainbow Jello fits perfectly on the holiday dessert table, adding a pop of color during festive seasons.
FAQ
Conclusion
Rainbow Jello stands out as a fun, colorful, and delicious dessert that evokes nostalgia while appealing to all ages. Its combination of fruity flavors and creamy layers creates a delightful treat perfect for any occasion. I encourage you to try making it for your next gathering; it’s sure to impress!
Rainbow Jello
Equipment
- Wooden Spoon
- Food Processor
- Frying Pan
- Mixing Bowl
Ingredients
- 6 (3-ounce) packages Flavored Jello Various flavors like cherry, orange, lemon, lime, berry blue, and grape are great choices.
- 1 ½ (14-ounce) cans Sweetened Condensed Milk Provides a rich, creamy texture that balances out the fruity layers.
- 6 packets Unflavored Gelatin Used to set the creamy layers for the jello dessert.
- 9 cups Water Essential for dissolving both the jello and gelatin.
Instructions
- Lightly grease a 9×13-inch glass baking dish with something neutral tasting like butter, avocado oil, or cooking spray and set aside.
- For your first layer, add your flavored jello and half of a packet of unflavored gelatin (about 1 ½ teaspoons) to a small bowl or container and stir in 1 cup of hot water. Stir until the jello and gelatin dissolve fully, being careful not to stir too hard and create a lot of bubbles. Set aside to cool to room temperature while you make the white layer.
- Add ¼ cup of cool water to a medium bowl then sprinkle a full packet of gelatin (about 3 teaspoons) on top and allow the gelatin to absorb the water for 1 minute. Do not stir.
- Once done, mix in ¾ cup of hot water and stir to allow the gelatin to dissolve fully before adding in ½ can of sweetened condensed milk. Set aside. This will be 2 of your white layers.
- Now that your first layer of flavored jello is cooled, gently pour it in your prepared glass pan. You may have to tilt the pan a bit to make sure the jello covers the whole surface. Then carefully place it on a flat shelf in your fridge to set for 20 minutes.
- While that sets, you can prepare your next flavored jello by following the same steps and method as for your first layer, that way it’s cooled down to room temp by the time you’re ready for it.
- Once your first layer has set, gently pour in ¾ cup of your white mixture on top, using a silicone spatula or spoon to pour over to help minimize bubbles. I would recommend leaving your baking dish in the fridge and pouring your layer from there. Let chill for 20 minutes.
- Repeat your layers, making a new batch of the white layer anytime you need it (you will have to make it 2 more times) and make sure you give it enough time to cool so it doesn’t cause the other jello layers to bleed into it. Let each layer cool in the fridge for 20 minutes before adding another, alternating between a flavored jello and your white layer. You should finish with red as your last layer.
- Cut into cubes and serve!
Notes
- Storage: Store leftovers in an airtight container in the fridge to maintain freshness.
- Freezing: It's not recommended to freeze, as the texture may change upon thawing.
- Pairing: Serve with whipped cream or fresh fruit for added texture and flavor.
- Experiment: Don’t hesitate to use different flavors or colors to create your unique version!
- Presentation: For a fun twist, try serving in individual cups for parties.