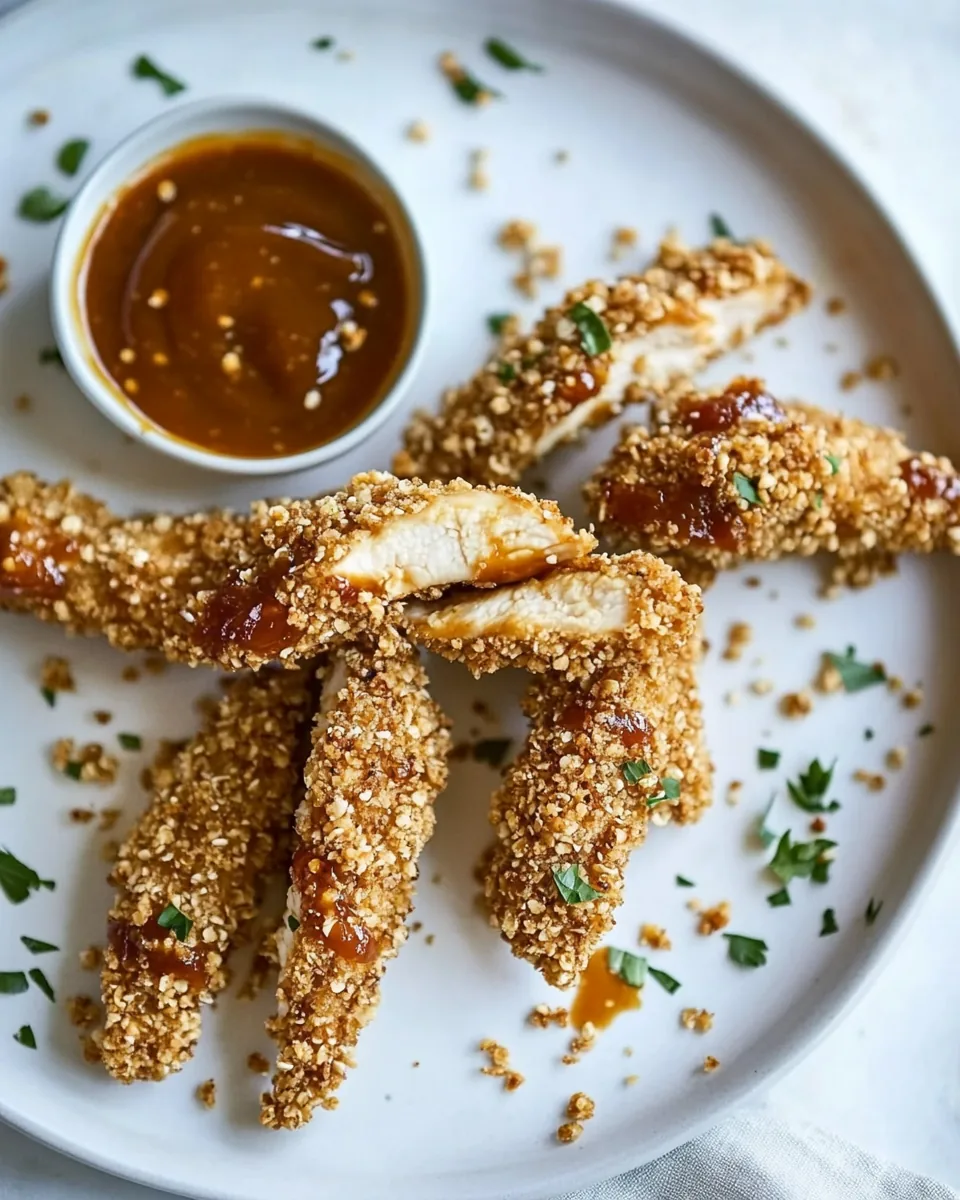
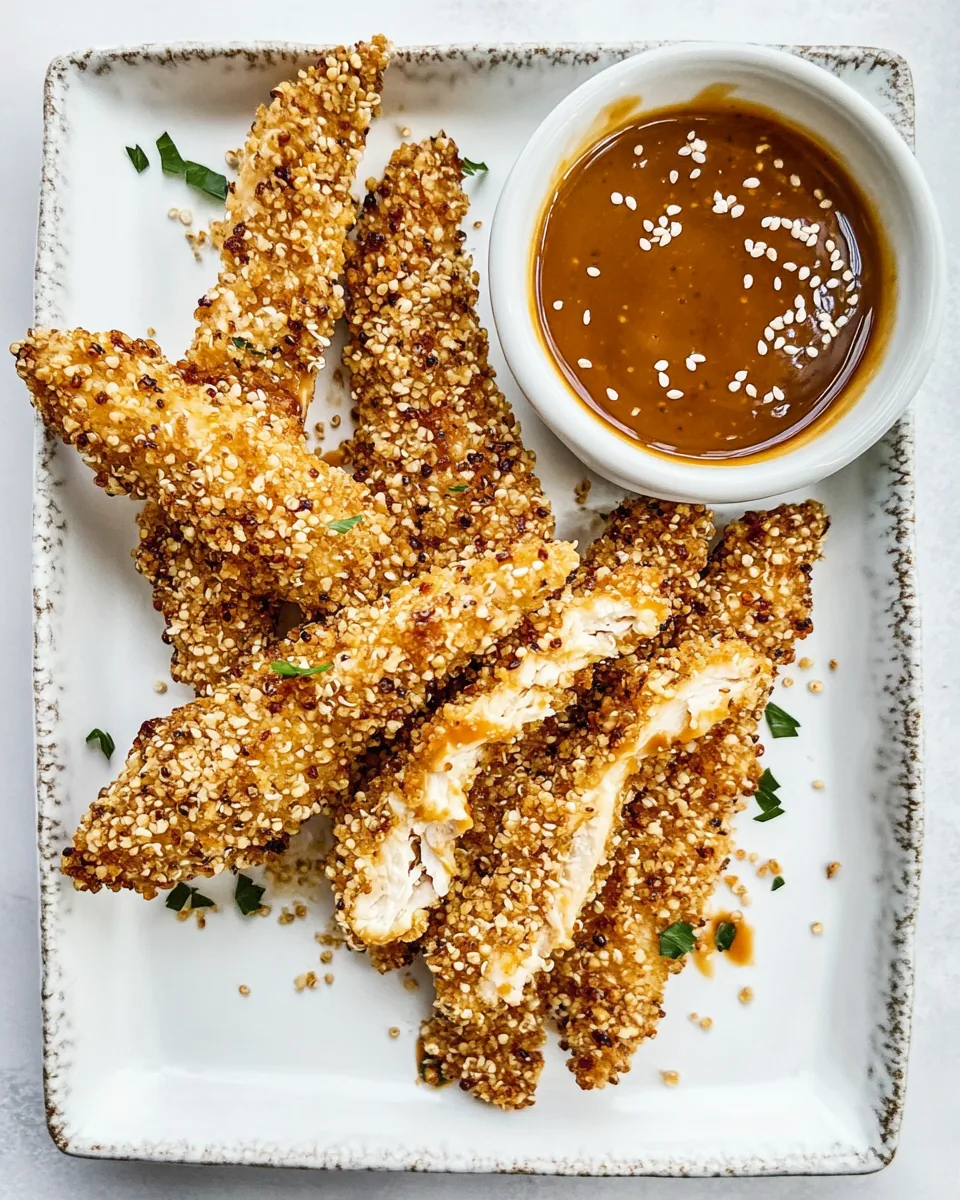
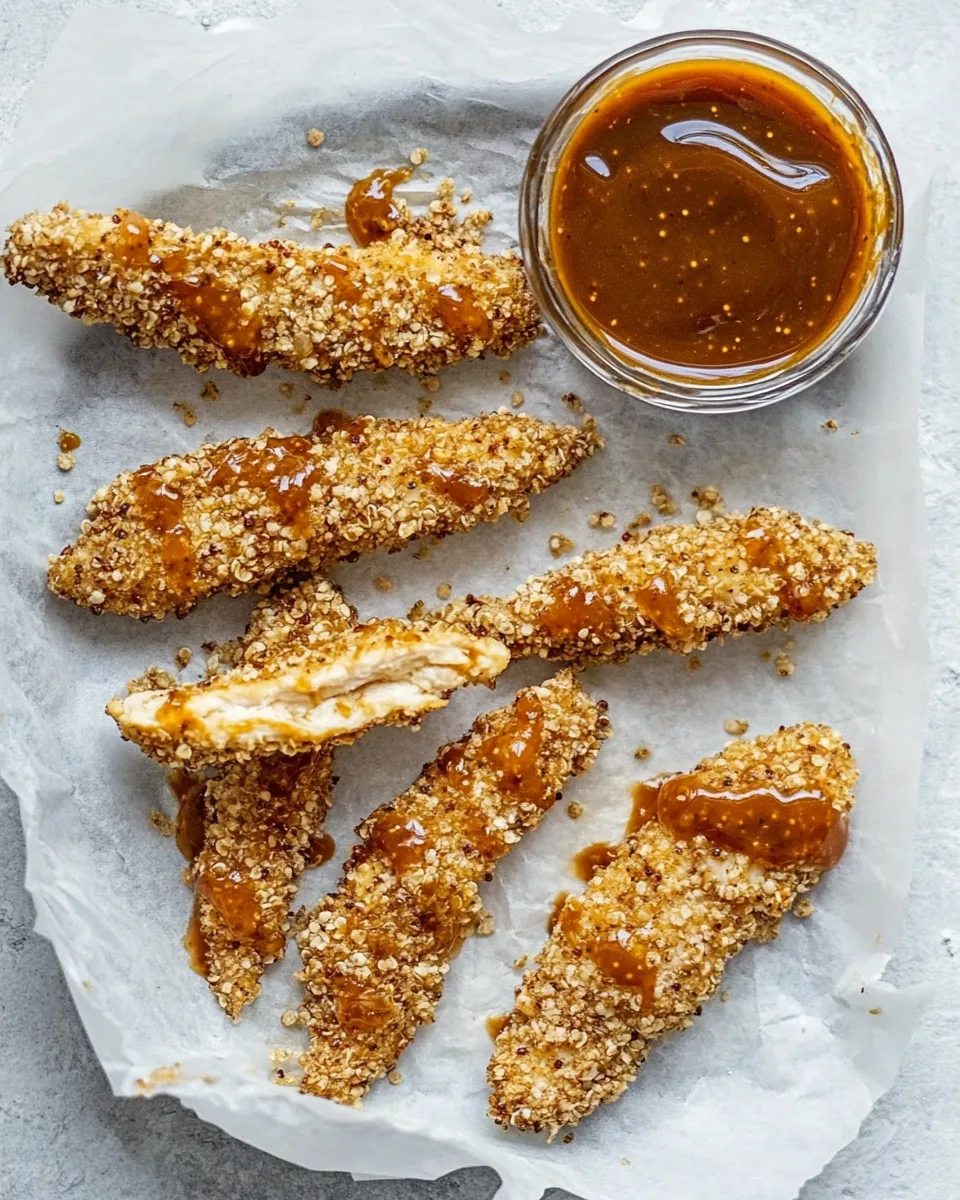
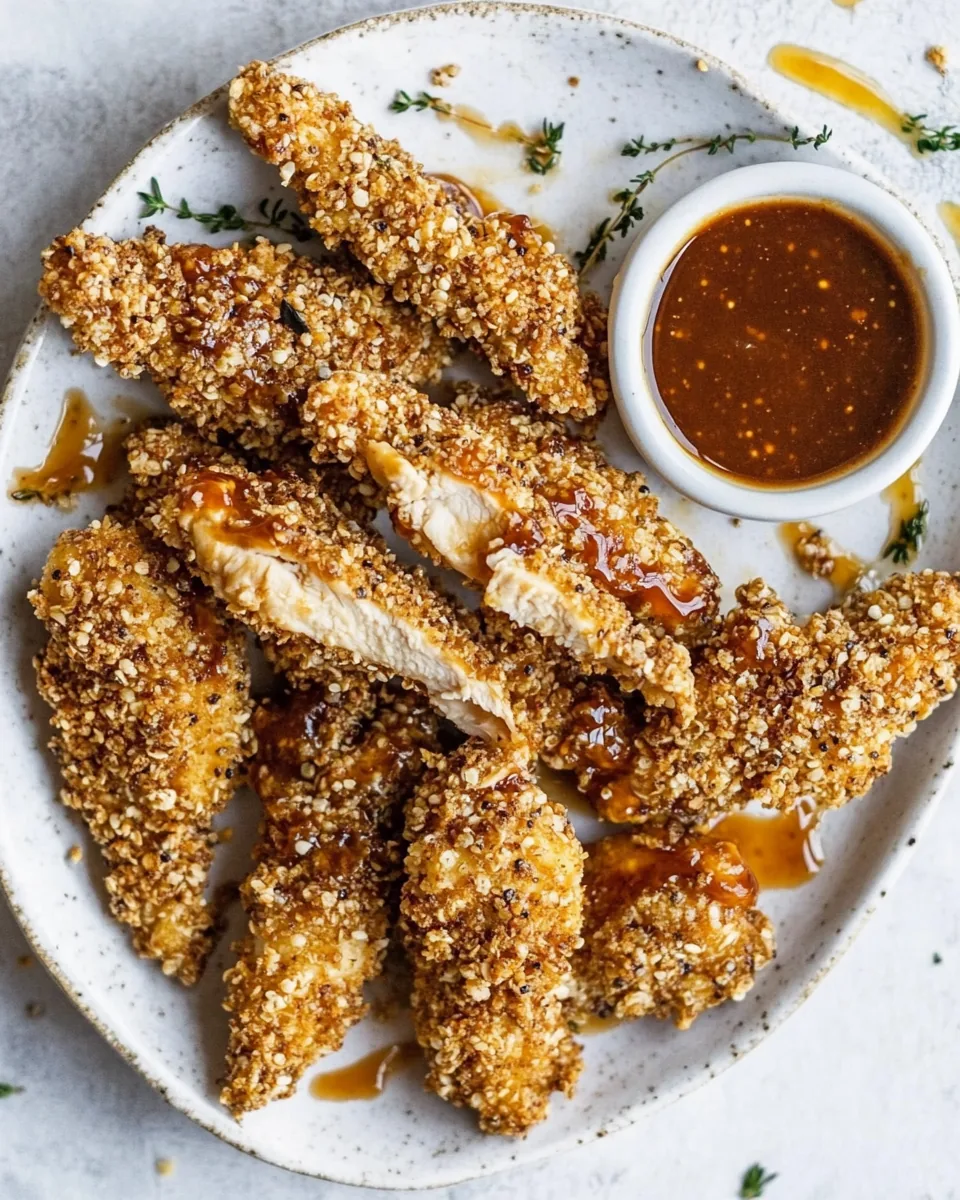
Quinoa Crusted Chicken Strips
There’s something incredibly satisfying about biting into a crispy, flavorful piece of chicken, especially when it’s coated with wholesome ingredients. The Quinoa Crusted Chicken Strips have become my go-to dish for a quick weeknight dinner or a fun family gathering. It’s not just a meal; it’s a way to indulge without guilt. When I first stumbled upon this recipe, I was intrigued by the idea of using quinoa as a crust. I thought, why not elevate the classic chicken strip? It quickly became a favorite in my home, and I’m excited to share it with you. Imagine serving these golden, crunchy strips alongside your favorite dipping sauce; it’s comfort food redefined.
Recipe Snapshot
1 hr 10 mins
20 mins
50 mins
Medium
350 kcal
30 g
Gluten-Free, Low FODMAP
10 g
Frying Pan, Blender, Food Processor, Oven, Wooden Spoon, Mixing Bowl, Baking Sheet
The Charm of This Quinoa Crusted Chicken Strips
A Healthier Alternative
The Quinoa Crusted Chicken Strips bring together flavors and nutrition in a way that traditional fried chicken cannot. By using quinoa for the coating, you’re not just adding a crunch; you’re packing in protein, fiber, and essential nutrients. It’s a dish that satisfies your cravings while also being mindful of your health, making it perfect for everyone, from kids to adults.
Versatile Flavor Profile
What I love about this recipe is how adaptable it is. You can easily play with the spices or add your favorite seasonings. The combination of dijon mustard, honey, and BBQ sauce for the coating creates a delightful balance of sweetness and tanginess that appeals to everyone. You can customize it to fit any taste preference!
A Family-Friendly Dish
This is one of those recipes that brings everyone together. My kids love the fun of dipping the chicken strips, while I appreciate knowing they’re eating something wholesome. The Quinoa Crusted Chicken Strips are great for lunchboxes or as a quick dinner option. Trust me, it’s hard to eat just one!
Perfect for Meal Prep
If you’re someone who enjoys meal prepping, this recipe is a fantastic choice. The chicken strips can be made ahead of time, stored in the refrigerator, and reheated when needed. They maintain their crispiness and flavor, making them ideal for a busy week ahead.
Impressive Presentation
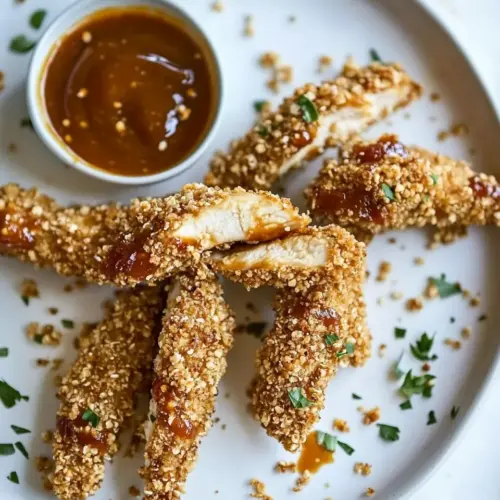
Not only do the Quinoa Crusted Chicken Strips taste amazing, but they also look beautiful on the plate. The golden-brown crust and the vibrant colors from the garnishes make it a dish that’s visually appealing. Serve them with a side of fresh salad or your favorite veggies for a complete meal.
What Goes Into Quinoa Crusted Chicken Strips
When crafting the perfect Quinoa Crusted Chicken Strips, the quality of ingredients makes all the difference. Each component works harmoniously to create a delicious and nutritious dish. From the protein-packed quinoa to the tender chicken, every element has a role to play in this delightful recipe.
- 2 cups cooked quinoa: This serves as the base for the crispy coating, providing a nutty flavor and a healthy dose of protein.
- 1 1/2 pounds boneless skinless chicken tenders, cut into strips: The star of the dish, these tender pieces soak up flavor beautifully.
- 1/2 cup low-fat buttermilk: This helps to keep the chicken moist while allowing the coating to adhere perfectly.
- 1/2 cup Panko bread crumbs: Added for extra crunch and texture, it gives the strips a delightful crispiness.
- 1 teaspoon fresh black pepper: A key seasoning that adds a little kick to the dish.
- 1 teaspoon seasoned salt: Essential for enhancing all the flavors.
- 1/3 cup dijon mustard: Provides a tangy zest and helps the coating stick to the chicken.
- 1/4 cup honey: A touch of sweetness that balances the flavors beautifully.
- 3 tablespoons of your favorite BBQ sauce: Adds depth and a smoky flavor to the overall dish.
- 1/2 a lime, juiced: The acidity brightens the flavors and enhances the overall experience.
Step by Step Instructions for Quinoa Crusted Chicken Strips
Making Quinoa Crusted Chicken Strips is a delightful experience. With just a few simple steps, you can create a dish that will impress your family or guests. Let’s dive into the process!
Start by preparing the BBQ honey mustard sauce. In a medium-sized bowl, combine the dijon mustard, honey, BBQ sauce, and the juice of half a lime. Mix it well to ensure the ingredients are fully blended together. This sauce will add a delicious flavor to your chicken and can also be used as a dip later.
Preheat your oven to 350 degrees Fahrenheit. While the oven heats up, line a baking sheet with parchment paper or a Silpat mat. This prevents the chicken from sticking and makes for easy cleanup.
Spread the cooked quinoa evenly on the prepared baking sheet. Bake in the preheated oven for about 20 to 25 minutes or until the quinoa is toasted, golden brown, and crispy. Keep an eye on it to avoid burning.
Once toasted, remove the quinoa from the oven and let it cool. Transfer all but 1/3 cup of the quinoa to a food processor or high-powered blender. Process the quinoa for about 1 to 2 minutes until half is ground into a fine flour and the rest remains in small pieces. This will create a wonderful crust for the chicken.
Now, increase the oven temperature to 475 degrees Fahrenheit. Line another baking sheet with foil, then spray or brush it lightly with olive oil. This step is crucial for ensuring the chicken gets that perfect crispy finish.
In a large bowl, combine the processed quinoa, reserved quinoa, Panko bread crumbs, fresh black pepper, and seasoned salt. Stir everything together until well mixed. This mixture will form the crunchy coating for your chicken strips.
In a separate bowl, combine the buttermilk and 1/4 cup of the prepared BBQ honey mustard sauce. Add the chicken strips into the mixture and toss them well to ensure each piece is fully coated. This will infuse the chicken with flavor and help the crust stick.
Now it’s time to coat the chicken! Remove each piece from the buttermilk, allowing excess to drip off, and dredge it through the quinoa crumb mixture. Press gently to ensure a good coating sticks on each side. Place the coated chicken strips on the prepared baking sheet, making sure not to overcrowd the pan. If necessary, use a second baking sheet.
Lightly spray the chicken strips with cooking spray or a mist of olive oil. This will help them achieve a golden brown crust. Bake in the oven for 10 to 12 minutes, then gently flip the strips using kitchen tongs and spray the other side.
Continue baking for another 10 to 12 minutes or until the chicken is cooked through and the crust is crispy. Once done, remove them from the oven and serve hot with the remaining BBQ honey mustard sauce on the side. Garnish with fresh cilantro or parsley and a lemon wedge for that extra zest if desired.
Things Worth Knowing
- Cooking at High Temperature: Baking the chicken at a high temperature ensures the crust gets crispy while keeping the chicken juicy.
- Space on the Baking Sheet: Make sure to give the chicken strips enough space on the baking sheet. This promotes even cooking and crispiness.
- Checking for Doneness: Use a meat thermometer to ensure the chicken reaches an internal temperature of 165 degrees Fahrenheit.
- Quinoa Variations: Feel free to experiment with colored quinoa (red or black) for a colorful presentation.
Recipe Variations about Quinoa Crusted Chicken Strips
Exploring variations of the Quinoa Crusted Chicken Strips can turn this delightful dish into something new and exciting every time. Here are some tips to create your own spin on this recipe.
- Spice it Up: Add your favorite spices to the quinoa crumb mixture for an extra kick. Consider using paprika, cayenne pepper, or garlic powder.
- Herb Infusion: Include fresh herbs such as basil or oregano in the coating for a burst of flavor. They’ll enhance the dish’s aroma and taste.
- Different Proteins: Try using tofu or eggplant as alternatives to chicken for a vegetarian option. Both provide a fantastic texture and flavor with the quinoa crust.
- Gluten-Free Option: Ensure the Panko bread crumbs are gluten-free if you need to cater to gluten allergies. This dish can easily be made for everyone.
- Serving Styles: Serve with a variety of dips—such as ranch, garlic aioli, or a spicy salsa—to make your meal interactive and fun.
- Make it a Salad: Serve the chicken strips on a bed of mixed greens with diced vegetables for a refreshing take. Drizzle with a light vinaigrette.
- Batch Cooking: Make a large batch and freeze some for later. They reheat beautifully in the oven, maintaining their crispy texture.
How to Enjoy Quinoa Crusted Chicken Strips
Enjoying Quinoa Crusted Chicken Strips is all about how you serve them. Here are some ideas to enhance your dining experience:
- Classic Dipping: Serve with your favorite dipping sauces like BBQ, ranch, or honey mustard for a flavorful experience.
- Side Dish Pairings: Pair with roasted vegetables, a fresh garden salad, or sweet potato fries to create a well-rounded meal.
- Casual Lunch: These strips make a great addition to lunchboxes. Serve them cold with a side of fresh fruit or a small salad.
- Fun Gatherings: Perfect for parties or game days, serve them on a platter with assorted dips for guests to enjoy.
- Storage Tips: Store any leftovers in an airtight container in the fridge for up to three days. Reheat in the oven to maintain crispiness.
- Seasonal Variations: Add seasonal ingredients, such as avocado or citrus fruits, to salads to keep the flavors fresh and vibrant throughout the year.
- Meal Prep Ideal: These strips are great for meal prep! Bake ahead of time and pack them in meal prep containers for quick lunches throughout the week.
FAQ
Conclusion
The Quinoa Crusted Chicken Strips are truly a game-changer in the world of comfort food. They offer a healthy twist without sacrificing flavor or texture. I encourage you to give this recipe a try and discover how delightful this dish can be. Whether you enjoy them at a casual family dinner or as a fun party appetizer, you won’t be disappointed!
Quinoa Crusted Chicken Strips
Equipment
- Frying Pan
- Blender
- Food Processor
- Oven
- Wooden Spoon
- Mixing Bowl
- Baking Sheet
Ingredients
- 2 cups cooked quinoa
- 1.5 pounds boneless skinless chicken tenders cut into strips
- 0.5 cup low-fat buttermilk
- 0.5 cup Panko bread crumbs use gluten-free if needed
- 1 teaspoon fresh black pepper
- 1 teaspoon seasoned salt
- 0.33 cup dijon mustard
- 0.25 cup honey
- 3 tablespoons your favorite BBQ Sauce
- 0.5 a lime juiced
Instructions
- Start by preparing the BBQ honey mustard sauce. In a medium-sized bowl, combine the dijon mustard, honey, BBQ sauce, and the juice of half a lime. Mix it well to ensure the ingredients are fully blended together. This sauce will add a delicious flavor to your chicken and can also be used as a dip later.
- Preheat your oven to 350 degrees Fahrenheit. While the oven heats up, line a baking sheet with parchment paper or a Silpat mat. This prevents the chicken from sticking and makes for easy cleanup.
- Spread the cooked quinoa evenly on the prepared baking sheet. Bake in the preheated oven for about 20 to 25 minutes or until the quinoa is toasted, golden brown, and crispy. Keep an eye on it to avoid burning.
- Once toasted, remove the quinoa from the oven and let it cool. Transfer all but 1/3 cup of the quinoa to a food processor or high-powered blender. Process the quinoa for about 1 to 2 minutes until half is ground into a fine flour and the rest remains in small pieces. This will create a wonderful crust for the chicken.
- Now, increase the oven temperature to 475 degrees Fahrenheit. Line another baking sheet with foil, then spray or brush it lightly with olive oil. This step is crucial for ensuring the chicken gets that perfect crispy finish.
- In a large bowl, combine the processed quinoa, reserved quinoa, Panko bread crumbs, fresh black pepper, and seasoned salt. Stir everything together until well mixed. This mixture will form the crunchy coating for your chicken strips.
- In a separate bowl, combine the buttermilk and 1/4 cup of the prepared BBQ honey mustard sauce. Add the chicken strips into the mixture and toss them well to ensure each piece is fully coated. This will infuse the chicken with flavor and help the crust stick.
- Now it’s time to coat the chicken! Remove each piece from the buttermilk, allowing excess to drip off, and dredge it through the quinoa crumb mixture. Press gently to ensure a good coating sticks on each side. Place the coated chicken strips on the prepared baking sheet, making sure not to overcrowd the pan. If necessary, use a second baking sheet.
- Lightly spray the chicken strips with cooking spray or a mist of olive oil. This will help them achieve a golden brown crust. Bake in the oven for 10 to 12 minutes, then gently flip the strips using kitchen tongs and spray the other side.
- Continue baking for another 10 to 12 minutes or until the chicken is cooked through and the crust is crispy. Once done, remove them from the oven and serve hot with the remaining BBQ honey mustard sauce on the side. Garnish with fresh cilantro or parsley and a lemon wedge for that extra zest if desired.