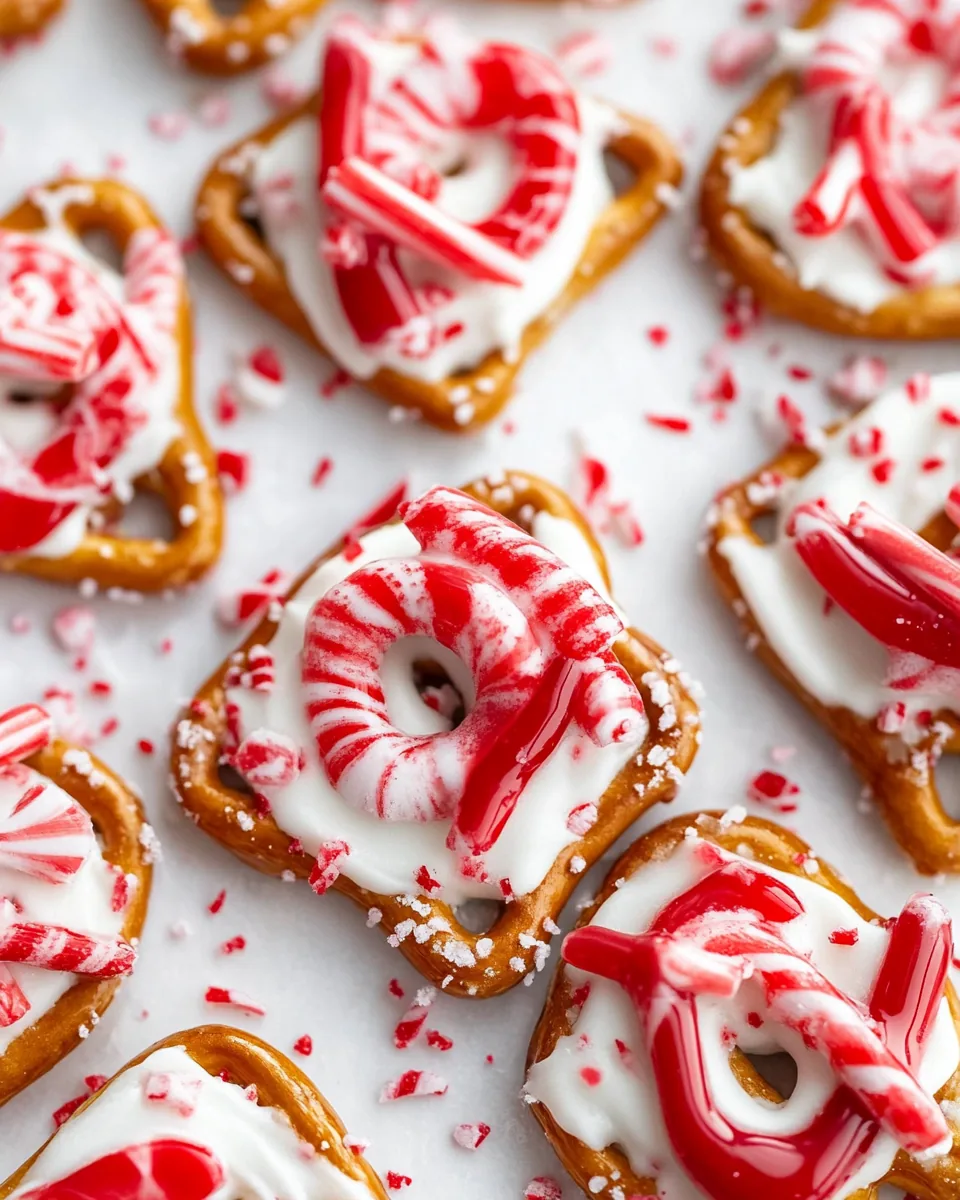
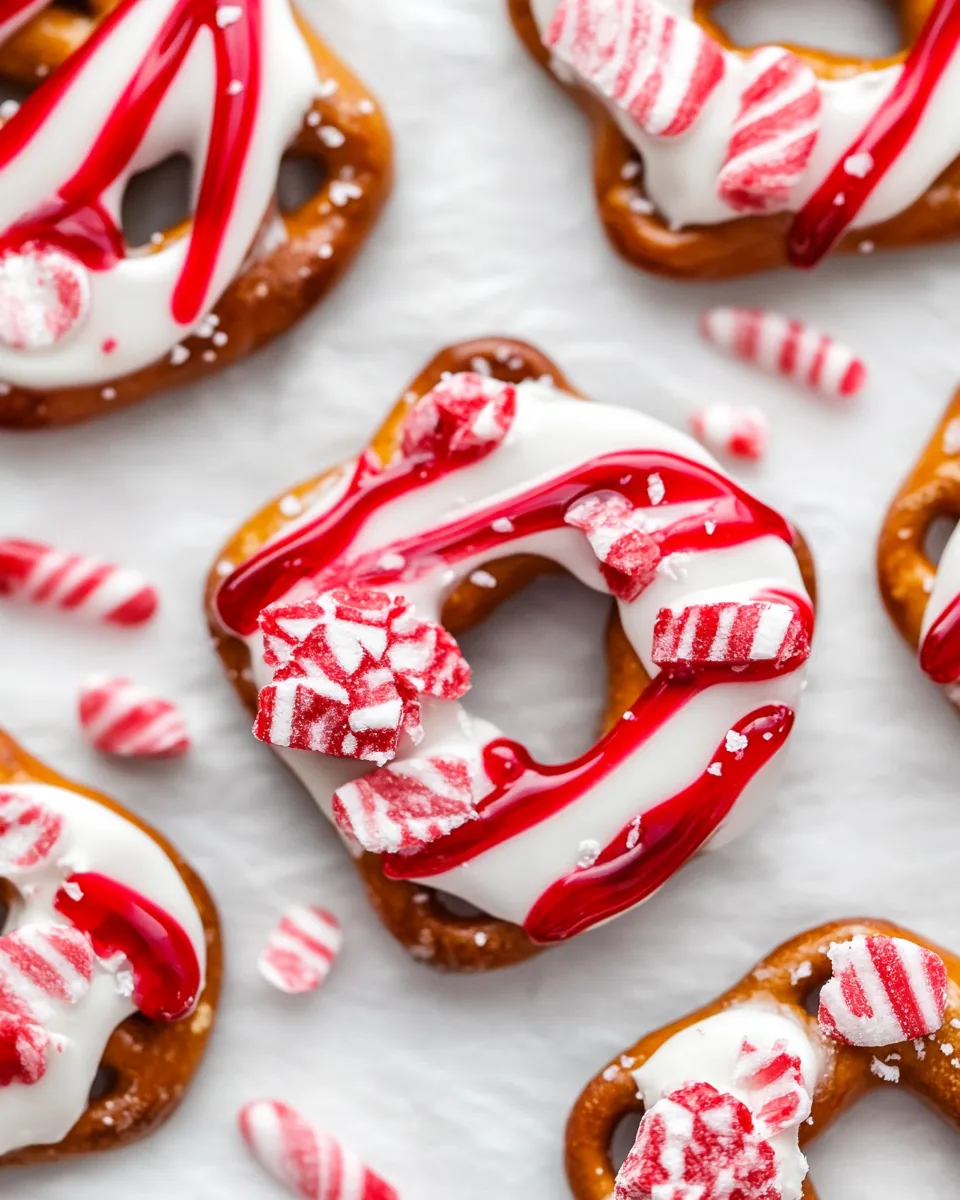
Peppermint Bark Pretzels
The holidays just wouldn’t feel complete without my favorite treat: Peppermint Bark Pretzels. Every year, as the chill settles in, I find myself craving this delightful combination of sweet and salty. These little bites of joy have become a holiday tradition in my family, and I can’t resist the way they brighten up our gatherings. The crunch of the pretzel, the creaminess of the chocolate, and the cool burst of peppermint come together in a way that’s simply irresistible.
It all started a few Christmases ago when I decided to make something special for my friends. I wanted to create a treat that was not only delicious but also visually appealing. That’s when I stumbled upon the idea of using pretzels as a base for a sweet treat, and the Peppermint Bark Pretzels were born! The laughter and joy around the kitchen while making these have become some of my favorite memories. There’s something magical about spending time with loved ones, mixing ingredients, and waiting for that delicious aroma to fill the air.
Every year, I experiment a little with the recipe, adding different toppings or adjusting the chocolate, but the core remains the same. People adore them, and they disappear faster than I can make them! Whether I’m serving them at parties, giving them as gifts, or simply indulging on a cozy night in, these Peppermint Bark Pretzels are always the hit of the season. I encourage you to give them a try; once you do, they’ll likely become a cherished part of your holiday traditions too!
Recipe Snapshot
14 mins
10 mins
4 mins
Medium
150 kcal
1 g
Keto, Paleo, Whole30
7 g
Sheet pan (15″ x 10″)
What’s Great About This Peppermint Bark Pretzels
Deliciously Unique Experience
When I first made Peppermint Bark Pretzels, I was amazed at how they combined two worlds: crunchy and creamy, sweet and salty. Each bite offers a delightful contrast that keeps you coming back for more. You can’t help but smile with every taste!
Perfect for Sharing
This treat is perfect for sharing with friends and family. The bite-sized pieces make it easy to enjoy while mingling, and they’re visually appealing—great for holiday gatherings. Plus, who wouldn’t want to receive a gift of homemade treats?
Quick and Easy to Make
With minimal prep and cooking time, these treats fit perfectly into a busy holiday schedule. Even if you’re not a seasoned baker, you can easily whip these up in no time!
Customizable Fun
One of the best aspects of Peppermint Bark Pretzels is how easily you can customize them to suit your tastes. Add nuts, drizzle some caramel, or swap out the chocolate for your favorite flavor. You can make each batch unique!
Kid-Friendly Activity
Making these pretzels can be a fun activity for kids. They love to help unwrap the candies and sprinkle the toppings. It’s a great way to create lasting memories together!
Indulgent Flavor
The combination of chocolate and peppermint is a classic. It brings back memories of cozy winter nights, and the flavor is just right for the season. You’ll find that the rich chocolate paired with refreshing peppermint is truly indulgent.
What Goes Into Peppermint Bark Pretzels
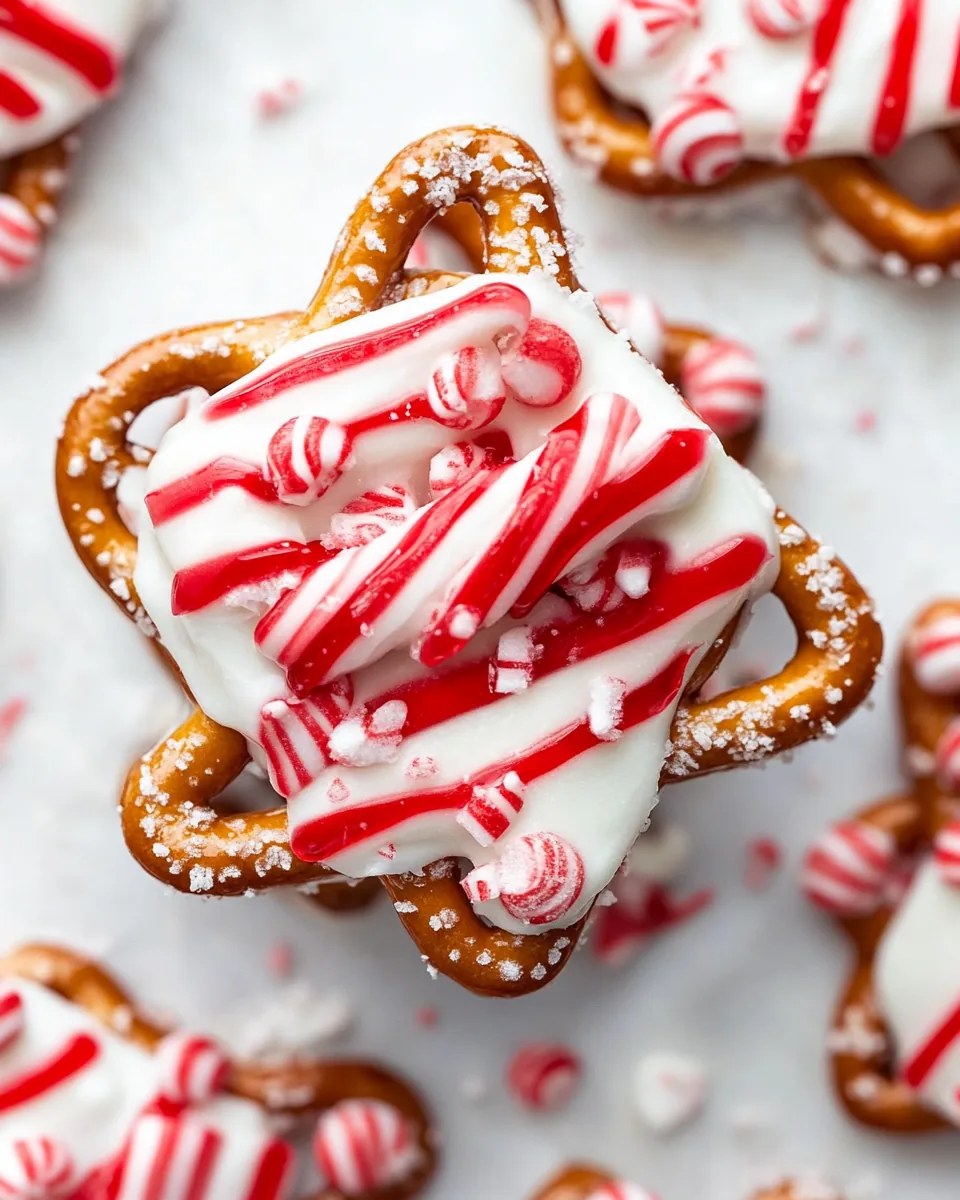
Creating Peppermint Bark Pretzels involves a few key ingredients that harmonize beautifully. The base of crispy pretzels works so well with the sweet toppings, while the peppermint adds a festive twist. Each ingredient serves a purpose and contributes to the overall joy of this treat.
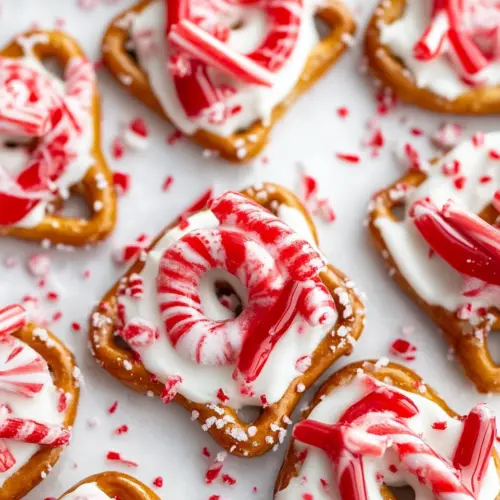
- 30 pretzel snaps: These provide a crunchy texture that forms the perfect base for the sweet toppings, creating a delightful contrast.
- 30 candy cane kisses: The smooth chocolate flavor combined with peppermint is what makes these the star of the show.
- 30 M&M’s: These add a pop of color and extra sweetness, making every bite exciting!
- 1 candy cane: Finely crushed for an optional sprinkle on top that enhances both flavor and presentation.
Cooking Method for Peppermint Bark Pretzels
Making Peppermint Bark Pretzels is an enjoyable process that takes just a little time, but the results are absolutely worth it. Let’s dive into the steps and see how easy it is to create this delicious treat!
- Preheat your oven to 250°F. This temperature is perfect for melting the chocolate without burning it. Make sure your oven is fully preheated to ensure even cooking.
- Line a large sheet pan (or two smaller pans) with a silicone baking mat or parchment paper. This will prevent the pretzels from sticking and make for easy cleanup later.
- Place the pretzels in a single layer on the lined sheet. Try to space them out so they’re not overlapping; this will help them bake evenly.
- Take one unwrapped Candy Cane Kiss and place it on top of each pretzel. Make sure to press it gently so it sticks to the pretzel.
- Carefully place the sheet in the oven and bake for about 2 to 4 minutes. You want the chocolate to be soft but not fully melted. Keep a close eye on them!
- Remove the tray from the oven. While the chocolate is still soft, immediately press an M&M into each softened kiss. This adds a fun burst of color and additional flavor.
- If you’d like, sprinkle crushed candy cane over the chocolate while it’s still warm. This will add a festive touch and extra crunch.
- Let the pretzels cool at room temperature for around 1 hour. This step is crucial for allowing the chocolate to firm up.
- For a quicker set, you can place the tray in the fridge. I love how they taste when chilled—they’re refreshing!
Things Worth Knowing
Things Worth Knowing
- Oven Temperature: It’s essential to monitor your oven’s temperature closely. If it’s too hot, the chocolate may burn, so stick to a gentle heat.
- Layering: Make sure to layer the pretzels and toppings properly for a balanced flavor in each bite.
- Storage: Store any leftovers in an airtight container at room temperature for up to a week, or in the fridge for a firmer texture.
- Gift-Worthy: These make great gifts! Consider packaging them in festive bags or boxes for friends and family.
- Experiment: Don’t hesitate to try different chocolates or toppings. White chocolate, dark chocolate, or even drizzles can add a unique twist!
Change It Up

With Peppermint Bark Pretzels, the options are nearly endless! You can easily adapt this recipe to suit your preferences or occasions. Here are some fun ideas to mix things up:
- Storage: Place leftovers in an airtight container, and they’ll stay fresh for up to a week.
- Freezing: You can freeze these pretzels! Just ensure they are in a sealed container to avoid freezer burn.
- Pairing: Serve these delightful treats alongside hot cocoa or coffee for a cozy treat.
- Holiday Colors: Use colored M&M’s or sprinkles to match other holiday decorations for parties.
- Flavors: Switch up the flavor of the kisses—try almond or caramel for a different twist!
How to Serve Peppermint Bark Pretzels
When it comes to serving Peppermint Bark Pretzels, the presentation can be just as fun as the taste. Here are some ideas:
- Party Platters: Create a colorful platter filled with these pretzels alongside other holiday treats. It makes for a stunning display!
- Gift Giving: Package them in festive boxes or jars. They make charming gifts for friends, neighbors, or teachers during the holiday season.
- Snack Bowls: Serve them in a decorative bowl at your holiday gatherings. They’re easy to grab and enjoy while mingling!
- Seasonal Decor: Use them as part of your holiday table decor. They add a sweet touch to any festive meal.
- Kids’ Events: These are perfect for school parties or holiday events; kids love them!
- Storage Tips: If you have any left over, store them in an airtight container at room temperature, or keep them in the fridge for a firmer texture. They taste great chilled!
FAQ
Conclusion
In summary, Peppermint Bark Pretzels are a festive and delightful treat that everyone can enjoy. They bring a touch of sweetness and holiday spirit to any gathering, making them a must-try for the season. I encourage you to whip up a batch and share them with your loved ones—you won’t regret it!
Peppermint Bark Pretzels
Equipment
- Sheet pan (15" x 10")
Ingredients
- 30 pretzel snaps
- 30 candy cane kisses unwrapped; Hershey’s makes these
- 30 M&M’s
- 1 candy cane finely crushed, optional
Instructions
- 1. Preheat your oven to 250°F. This temperature is perfect for melting the chocolate without burning it. Make sure your oven is fully preheated to ensure even cooking.
- 2. Line a large sheet pan (or two smaller pans) with a silicone baking mat or parchment paper. This will prevent the pretzels from sticking and make for easy cleanup later.
- 3. Place the pretzels in a single layer on the lined sheet. Try to space them out so they’re not overlapping; this will help them bake evenly.
- 4. Take one unwrapped Candy Cane Kiss and place it on top of each pretzel. Make sure to press it gently so it sticks to the pretzel.
- 5. Carefully place the sheet in the oven and bake for about 2 to 4 minutes. You want the chocolate to be soft but not fully melted. Keep a close eye on them!
- 6. Remove the tray from the oven. While the chocolate is still soft, immediately press an M&M into each softened kiss. This adds a fun burst of color and additional flavor.
- 7. If you'd like, sprinkle crushed candy cane over the chocolate while it’s still warm. This will add a festive touch and extra crunch.
- 8. Let the pretzels cool at room temperature for around 1 hour. This step is crucial for allowing the chocolate to firm up.
- 9. For a quicker set, you can place the tray in the fridge. I love how they taste when chilled—they're refreshing!
Notes
- To crush candy canes evenly: Use a mini food processor or a blender. Alternatively, place the candy cane(s) in a heavy-duty plastic bag, remove the air, and crush with a rolling pin or meat mallet until finely crumbled.
- If the chocolate crumbles: The oven may be too hot, or the chocolate was baked too long. To test, bake one pretzel first. If it crumbles, reduce the baking time. Avoid using convection settings.
- Storage: Place pretzels in an airtight container at room temperature for up to a week, or keep in the fridge for a slightly firmer texture.