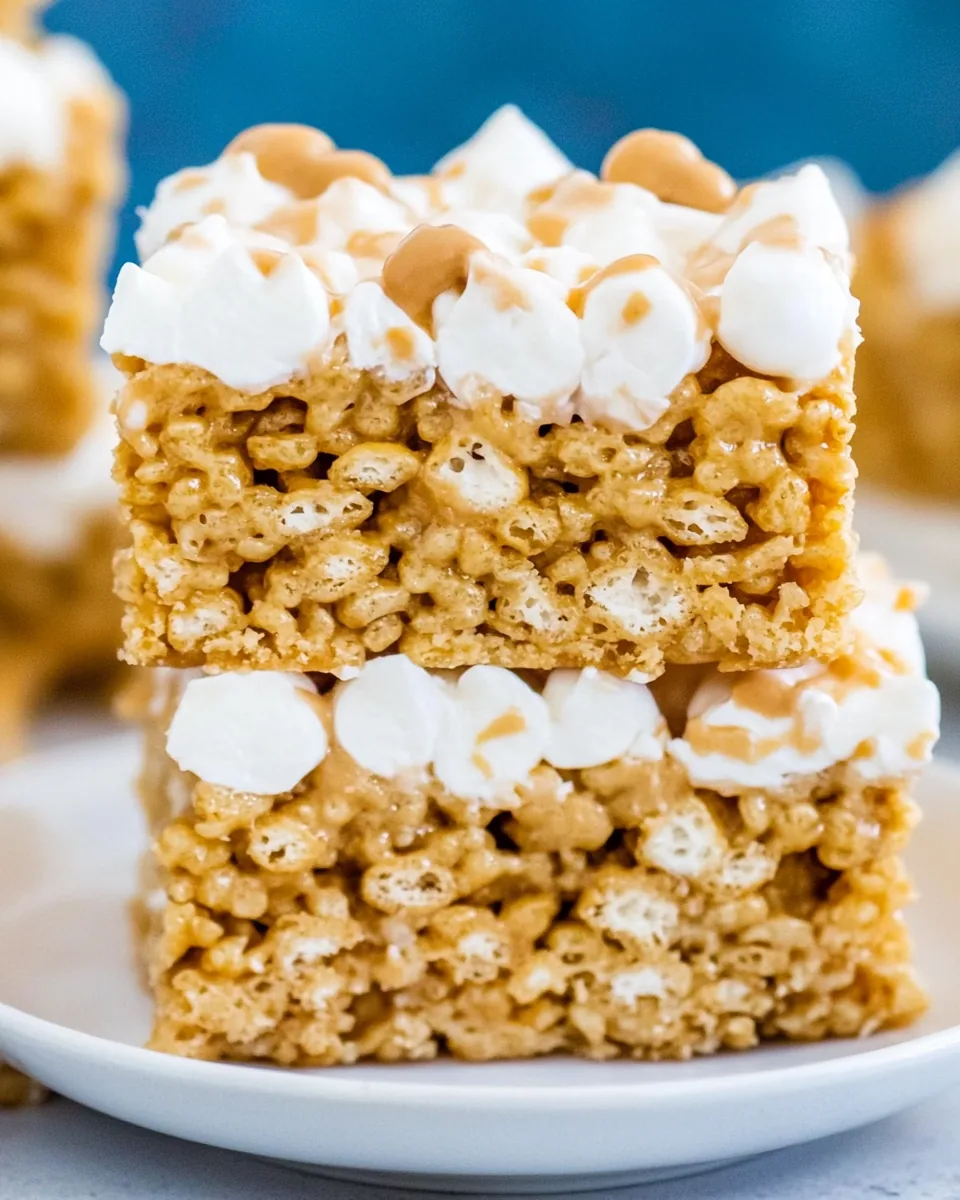
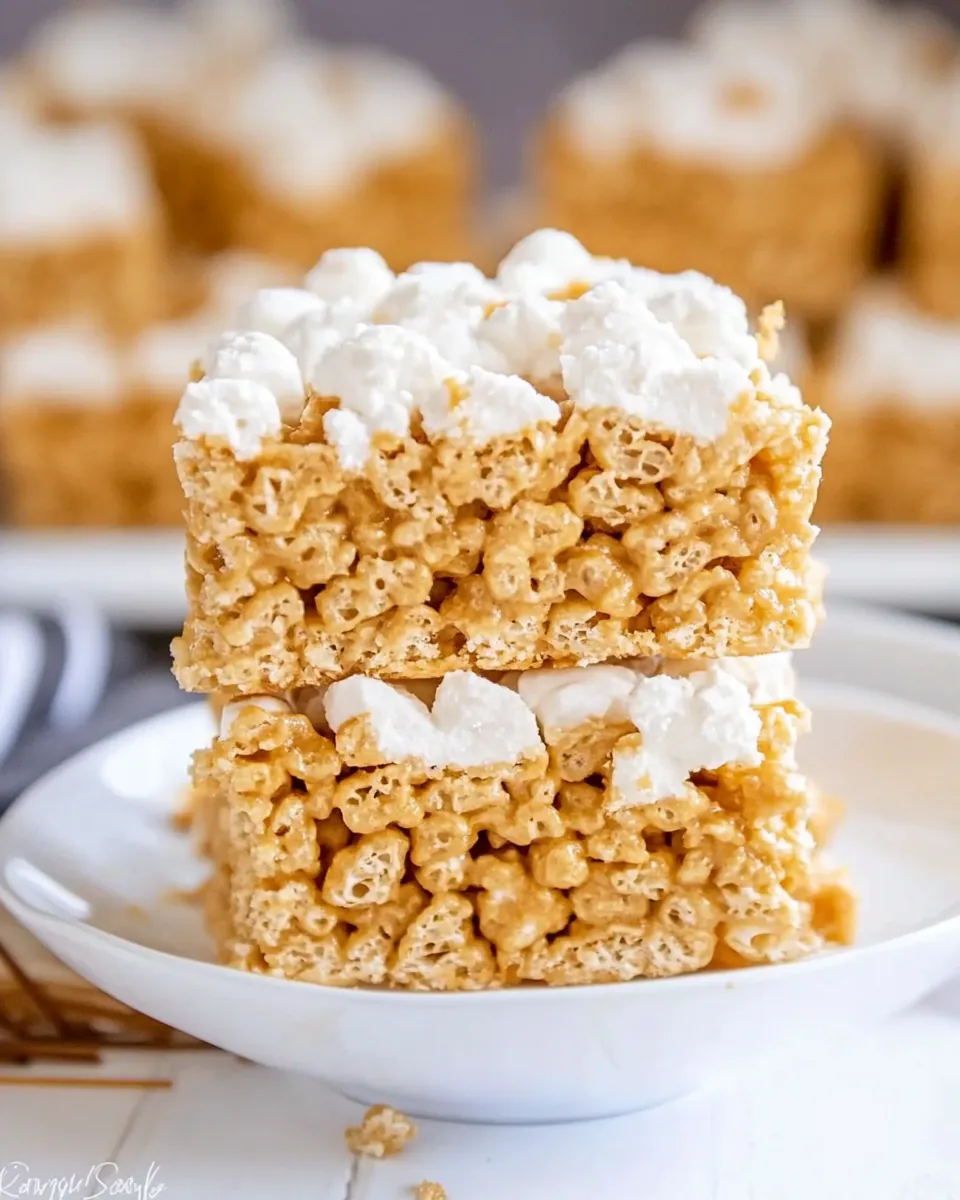
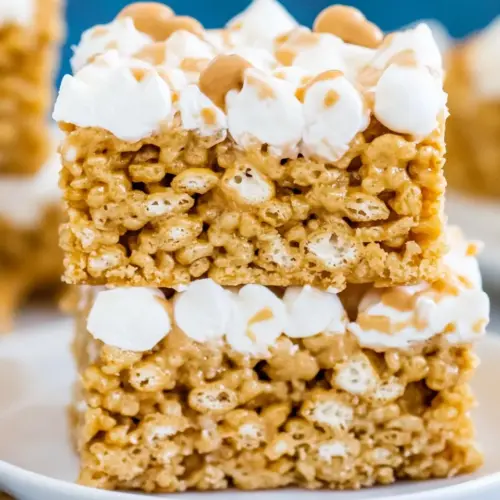
Peanut Butter Rice Krispie Treats
As a child, I remember running home from school, the sweet aroma of fresh treats filling the air. That excitement would build until I’d reach the kitchen, where the beloved Peanut Butter Rice Krispie Treats awaited me. These nostalgic bites are not just a dessert; they’re a memory-maker, perfect for sharing with friends or enjoying after a long day. With their crunchy texture and rich, creamy flavor, they always brought smiles to our faces. Now, as an adult, I find myself making these delightful treats for my family, passing on the joy and deliciousness that I cherished in my childhood. It’s amazing how a simple recipe can evoke such powerful memories and create new ones!
Recipe Snapshot
20 mins
10 mins
10 mins
Medium
150 kcal
2 g
Keto, Gluten-Free, Low FODMAP
7 g
Frying Pan, Oven, Saucepan, Chef’s Knife, Mixing Bowl, Wooden Spoon
When it comes to desserts, there’s something truly special about Peanut Butter Rice Krispie Treats. They are easy to whip up and can be tailored to suit everyone’s preferences. The combination of melted butter, smooth peanut butter, and sweet marshmallows creates an irresistible treat that’s hard to resist. Each square is a delicious, chewy masterpiece, making it a favorite for both kids and adults alike. Let’s dive deeper into why this recipe is so loved!
Why This Peanut Butter Rice Krispie Treats Shines
Easy to Make
One of the main reasons I adore Peanut Butter Rice Krispie Treats is how simple the recipe is. With just a few ingredients, you can create something magical in no time. The process is straightforward, allowing even novice bakers to enjoy success. There’s nothing quite like seeing the joy on your family’s faces as they taste something homemade.
Versatile and Customizable
You can easily make Peanut Butter Rice Krispie Treats your own! Feel free to mix in your favorite additions like nuts, dried fruits, or even a drizzle of caramel. Want to make them a bit healthier? Swap out some of the cereal for granola or add a sprinkle of chia seeds. The possibilities are endless!
Perfect for Any Occasion
These treats are not just for kids. They make an excellent addition to any gathering, whether it’s a birthday party, a picnic, or a casual get-together. People of all ages can enjoy these delightful squares, making them a wonderful dessert option for any occasion.
Great for Meal Prep
Another reason I love making Peanut Butter Rice Krispie Treats is their convenience. They store well and can be made ahead of time. Just keep them in an airtight container, and they’ll stay fresh for days. Having a sweet treat readily available is always a plus!
A Nostalgic Experience
For many of us, these treats evoke precious childhood memories. The crunchy, chewy texture paired with the creamy peanut butter brings back moments of laughter and fun. Making Peanut Butter Rice Krispie Treats is a fantastic way to reconnect with those fond memories while creating new ones with loved ones.
Peanut Butter Rice Krispie Treats Shopping List

When crafting the perfect Peanut Butter Rice Krispie Treats, it’s essential to choose quality ingredients that complement each other beautifully. The combination of butter, peanut butter, and marshmallows creates a harmonious blend of flavors and textures. Each ingredient plays a crucial role in achieving that signature chewy and crispy experience. Below is a list of the key players in this delightful recipe.
- Salted Butter: 4 tablespoons, or opt for unsalted butter with a pinch of salt. This rich ingredient adds the necessary fat and flavor.
- Creamy Peanut Butter: ½ cup, the star of the show! Its smooth texture and nutty taste elevate the treats.
- Mini Marshmallows: 8 cups (16 ounces), divided. These sweet puffs help bind everything together, creating that gooey consistency.
- Pure Vanilla Extract: 1 teaspoon, adding depth and enhancing the flavors.
- Crispy Rice Cereal: 6 cups, the crunchy base of the treats. Make sure to use a gluten-free option if necessary.
- Semi-Sweet Chocolate Chips: 1 cup, or you can use chopped chocolate for a decadent topping.
- Avocado or Vegetable Oil: 1 teaspoon, helps to achieve a smooth melted chocolate layer.
Cooking Instructions for Peanut Butter Rice Krispie Treats

Making Peanut Butter Rice Krispie Treats is a fun and engaging process that brings back all those warm memories. Follow these easy steps to create your own batch of these delicious treats!
- Start by lining a 9×9-inch square baking pan with parchment paper or aluminum foil. Generously grease it with cooking spray or butter to ensure easy removal later.
- In a large, heavy-bottomed saucepan or Dutch oven, melt the butter and peanut butter together over low heat. Keep an eye on it, stirring gently until fully melted and combined.
- Set aside 1 cup of mini marshmallows and add the remaining 7 cups to the melted mixture. Stir over low to medium-low heat until just melted. It’s perfectly fine if a few marshmallows remain unmelted; they add a delightful texture.
- Remove the saucepan from the heat. Stir in the vanilla extract along with salt if you used unsalted butter. This will enhance the flavor profile significantly.
- Next, add the crispy rice cereal and the reserved 1 cup of marshmallows. Using a spatula, gently stir until the cereal is evenly coated with the mixture.
- Transfer the mixture to the prepared baking dish. Use your fingers to gently press down the mixture, filling the pan without packing it too tightly. This allows the treats to maintain their lightness.
- In a microwave-safe bowl, place the chocolate chips. Microwave at 50% power for 30 seconds. Stir, then continue microwaving in 15-second intervals until nearly melted. Be careful to avoid overheating.
- Add the oil to the melted chocolate and stir until fully combined and smooth. If you prefer, you can also melt the chocolate using a heat-proof bowl over a simmering saucepan of water.
- Pour the melted chocolate over the top of the cereal treats. Use a spatula to spread it into an even layer. This chocolate layer is the cherry on top!
- Finally, let your creation cool at room temperature until firm, which should take at least 2 hours. Once set, cut into squares and enjoy!
Things Worth Knowing
- Ingredient Quality: Use high-quality peanut butter for the best flavor. Natural peanut butter is a great option!
- Heat Control: When melting the butter and peanut butter, ensure the heat is low to prevent burning and separation.
- Even Mixing: Stir your cereal mixture gently to avoid breaking the rice cereal pieces, keeping that crispy texture intact.
- Cooling Time: Patience is key! Allow the treats to cool completely before cutting for cleaner edges.
Substitutions and Tips
Creating the perfect Peanut Butter Rice Krispie Treats can be tailored to your preferences. Here are some tips to enhance your experience and make your treats even more delightful.
- Storage: Store leftovers in an airtight container at room temperature to maintain freshness.
- Freezing: You can freeze these treats for up to 3 months. Just wrap them tightly to prevent freezer burn.
- Pairing: Serve with a glass of milk or alongside your favorite desserts for a sweet spread.
- Chocolate Layer: If you prefer just the peanut butter flavor, feel free to skip the chocolate layer!
- Cutting Tips: Use a brisket knife for clean cuts, especially since the treats are quite thick.
Best Served With
When it comes to enjoying your Peanut Butter Rice Krispie Treats, there are plenty of delightful options to consider. Here are some serving suggestions:
- With Milk: A classic pairing! Enjoy these treats with a tall glass of cold milk for a satisfying snack.
- Picnic Treats: Perfect for outdoor gatherings! Pack them along with fresh fruits and sandwiches for a delightful picnic.
- Birthday Parties: These treats make a fun addition to birthday celebrations, sure to please both kids and adults alike.
- After-School Snack: Keep a batch ready for kids returning home from school; they provide a quick energy boost!
- Movie Night: Serve them as a sweet treat during a cozy family movie night, paired with popcorn for a fun twist!
FAQ
Conclusion
The Peanut Butter Rice Krispie Treats are truly a nostalgic treat that brings back cherished memories while creating new ones. Their delightful combination of flavors and textures makes them irresistible to anyone who tries them. I encourage you to whip up a batch and share them with friends and family. There’s nothing quite like enjoying a homemade sweet treat together, creating connections and joy in every bite!
Peanut Butter Rice Krispie Treats
Equipment
- Frying Pan
- Oven
- Saucepan
- Chef's Knife
- Mixing Bowl
- Wooden Spoon
Ingredients
- 4 tablespoons Salted Butter OR use unsalted butter plus ¼ teaspoon salt
- ½ cup Creamy Peanut Butter
- 8 cups Mini Marshmallows (preferably Kraft Jet Puffed), divided
- 1 teaspoon Pure Vanilla Extract
- 6 cups Crispy Rice Cereal (Be sure to use a brand that is gluten free.)
- 1 cup Semi-Sweet Chocolate Chips or 8 oz. chopped chocolate
- 1 teaspoon Avocado or Vegetable Oil
Instructions
- Line a 9×9-inch square baking pan with parchment paper or aluminum foil and grease it generously with cooking spray or butter.
- In a large, heavy-bottomed saucepan or Dutch oven, melt the butter and peanut butter over low heat. Set aside 1 cup of the marshmallows, and add the remaining 7 cups to the melted butter. Stir over low to medium-low heat until just melted (it’s fine if a few unmelted marshmallows remain).
- Remove from the heat and stir in the vanilla extract (plus the salt if you use unsalted butter).
- Add the cereal and reserved 1 cup of marshmallows and gently stir with a spatula until the cereal is evenly coated.
- Transfer the mixture to the prepared baking dish and gently press down with your fingers to spread it out and fill the pan, but do not pack it down tightly.
- Place the chocolate in a microwave-safe bowl and microwave at 50% power for 30 seconds. Stir, and continue to microwave in 15-second intervals until nearly melted. Add the oil and stir until fully melted.
- Pour the melted chocolate over the top of the cereal treats and spread it into an even layer.
- Let cool at room temperature until firm, at least 2 hours. Cut into squares and enjoy.