Peanut Butter Pie
There’s nothing quite like a homemade Peanut Butter Pie to satisfy your sweet tooth. I remember the first time I made this dish for my family. It was during a warm summer afternoon, and the kitchen was filled with laughter and the irresistible aroma of melting chocolate. As I layered the rich, creamy filling onto the cookie crust, I couldn’t help but feel a wave of nostalgia wash over me. This recipe isn’t just food; it’s a celebration of love, family, and the joy of sharing something delicious. When you slice into that perfectly chilled pie, the moment is pure bliss. Each bite is a harmonious blend of flavors, and I promise, it’ll have everyone clamoring for seconds. The best part? It’s incredibly easy to make and requires no baking. Trust me, once you try this Peanut Butter Pie, it’ll become a staple in your dessert rotation!
Recipe Snapshot
30 mins
20 mins
10 mins
Medium
440 kcal
7 g
Keto, Gluten-Free, Low FODMAP
33 g
KitchenAid stand mixer, 9-inch Springform Pan, Silicone Spatula Set
What We Adore About This Peanut Butter Pie
Rich and Creamy Flavor
One of the standout features of this Peanut Butter Pie is its rich and creamy texture. The combination of smooth cream cheese and creamy peanut butter creates a filling that is both satisfying and indulgent. Each mouthful melts in your mouth, making it hard to resist just one slice.
No-Bake Convenience
In a world where time is often scarce, this no-bake pie is a lifesaver. You can whip it up quickly without needing to turn on the oven, making it perfect for those hot summer days when you want a dessert that’s delicious but doesn’t heat up the kitchen.
Versatile Toppings
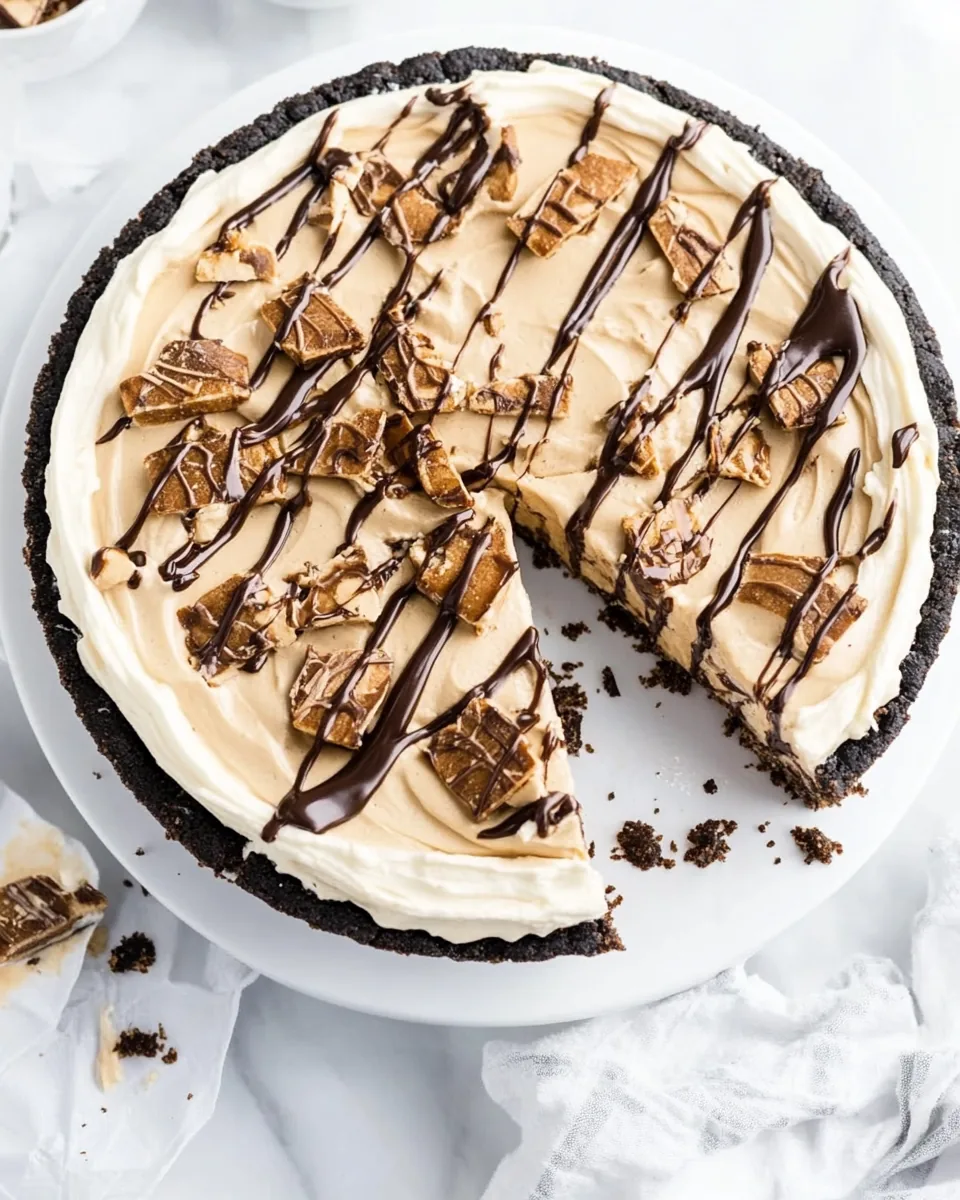
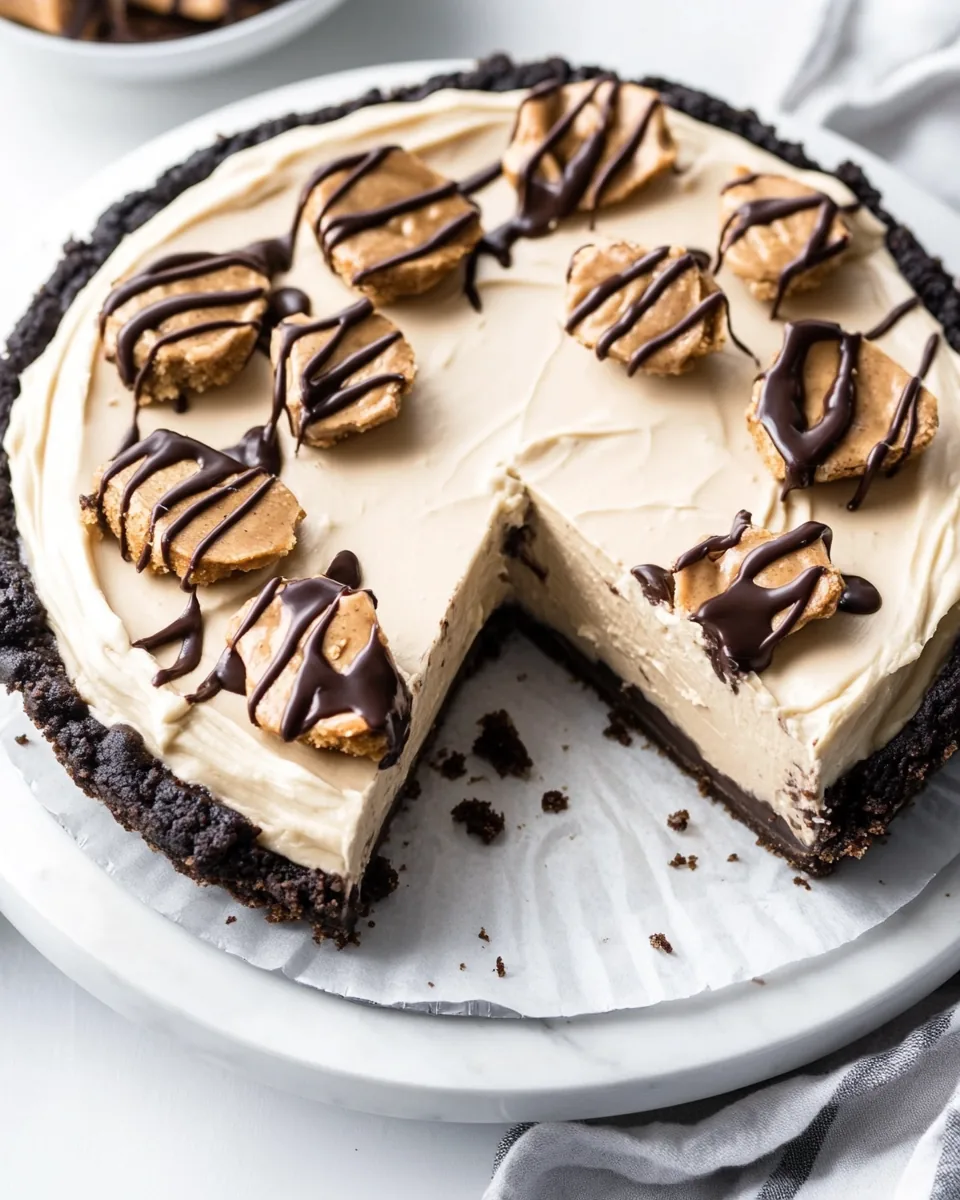
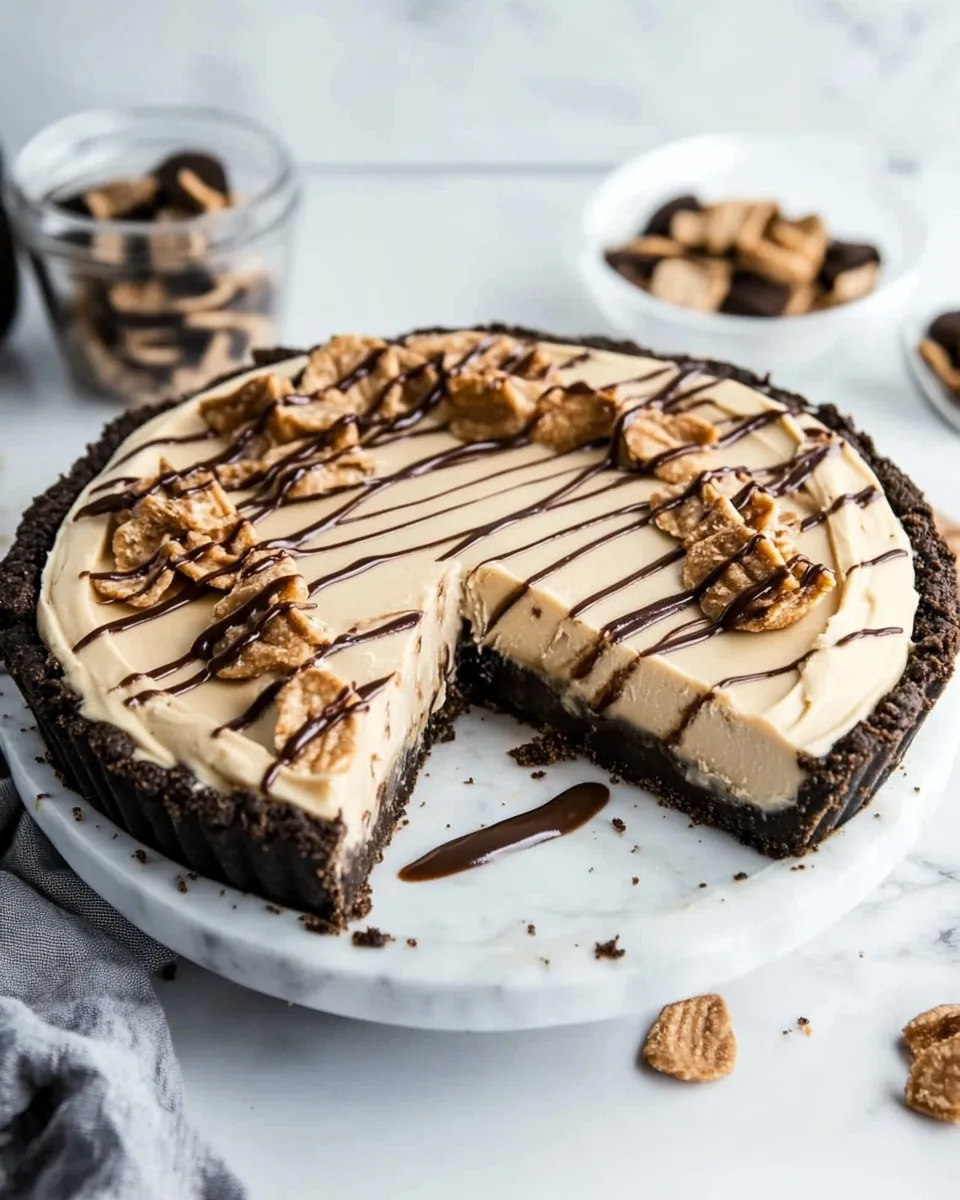
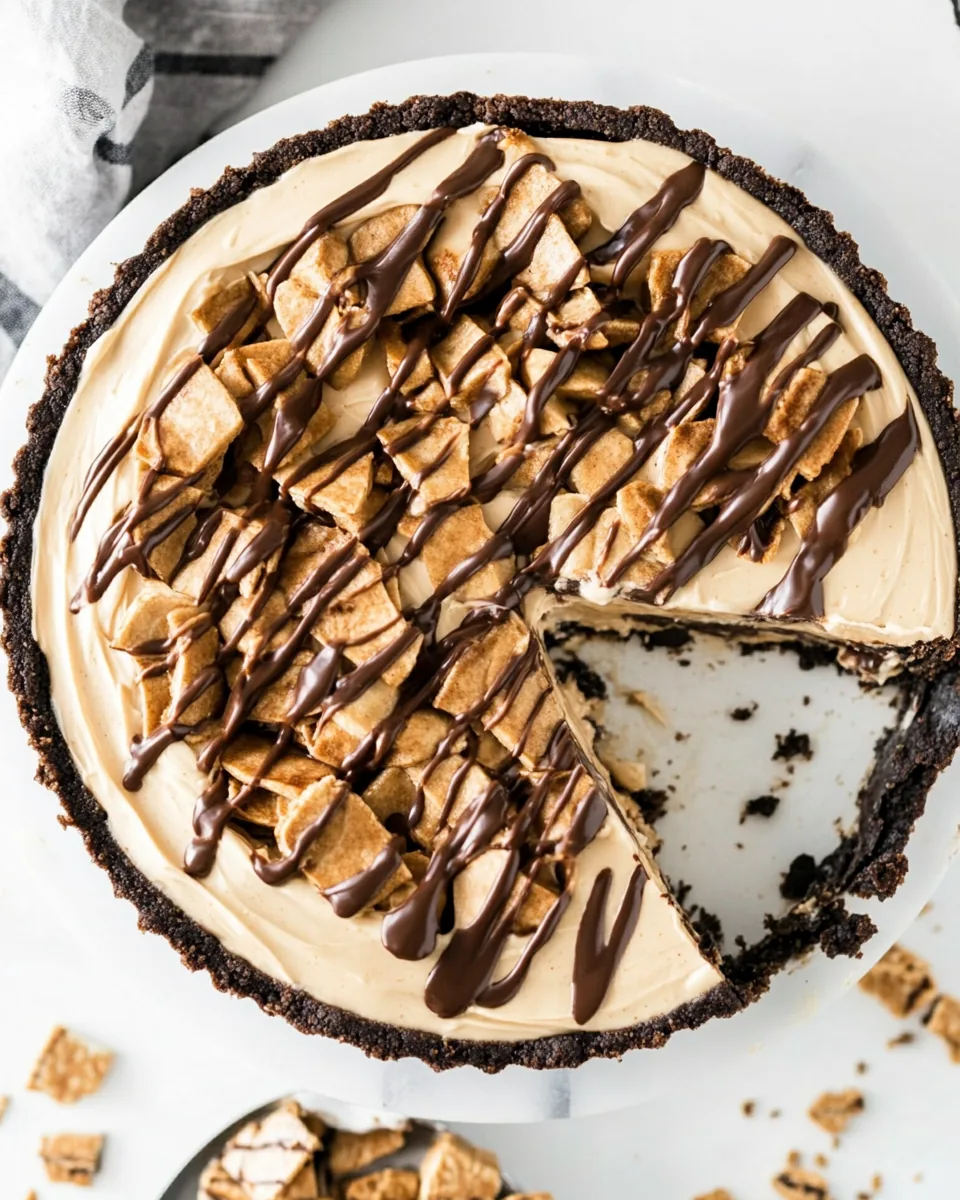
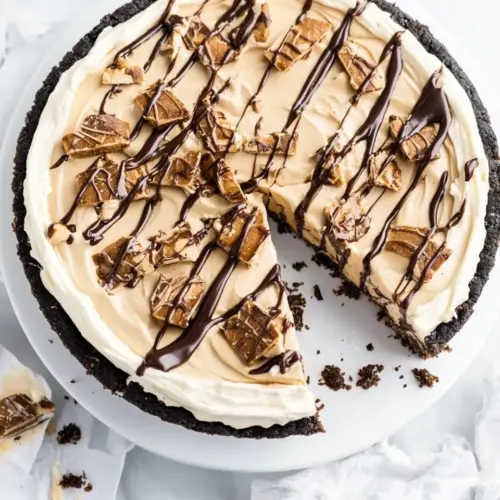
The toppings for this pie are where you can really get creative. Whether you prefer a simple dollop of whipped cream or want to go all out with mini peanut butter cups and a drizzle of chocolate sauce, the options are endless. They not only add flavor but also a beautiful presentation that will impress your guests.
Perfect for Any Occasion
This Peanut Butter Pie is suitable for any occasion, be it a birthday, holiday, or just a casual family gathering. Its universal appeal means it caters to both kids and adults, making it the ultimate crowd-pleaser.
Easy to Make Ahead
Another reason to love this pie is that you can make it a day in advance. Simply prepare it the night before, let it chill in the refrigerator, and it’s ready to serve when you need it. This makes hosting a breeze!
Allergy-Friendly Option
Lastly, this dessert is easily adaptable for various dietary needs. With a few simple substitutions, you can make it gluten-free or dairy-free, making it inclusive for guests with different dietary requirements.
Ingredients Overview for Peanut Butter Pie
When it comes to creating the perfect Peanut Butter Pie, each ingredient plays a vital role in ensuring a delicious outcome. The combination of the crunchy chocolate crust and the creamy filling creates a delightful contrast that’s hard to resist. Key players like Oreo cookies for the crust bring sweetness and depth, while heavy cream adds that luscious texture we all crave. Together, they form a harmonious blend that elevates this dessert to legendary status.
- 20 whole Oreo cookies, crushed in a food processor until they form fine crumbs: These cookies provide a rich, chocolatey base that perfectly contrasts the creamy filling.
- 3 tablespoons unsalted butter, melted: The melted butter binds the cookie crumbs together, forming a solid crust.
- 1 cup heavy cream: This rich cream is whipped to perfection, adding a light and airy texture to the pie.
- 8 ounces cream cheese, room temperature: Cream cheese adds a tangy richness that balances the sweetness of the pie.
- 1 cup creamy peanut butter: The star of the show, this ingredient imparts that beloved peanut flavor.
- 1 cup powdered sugar, sifted: Powdered sugar sweetens the filling and helps it attain a smooth consistency.
- 2 teaspoons pure vanilla extract: Vanilla enhances the overall flavor profile, making it more inviting.
- Additional whipped cream for topping (optional): A dollop on top adds an extra touch of indulgence.
- Mini peanut butter cups (optional): These can be used as a fun and decorative topping.
- Chocolate sauce (optional): A drizzle of chocolate sauce elevates the dessert to new heights.
Directions for Peanut Butter Pie
Creating this delicious Peanut Butter Pie is easier than you might think. Follow these simple steps, and you will have a stunning dessert that’s sure to impress. Let’s get started!
Preheat the oven to 350°F. This is an essential first step, as you want your crust to bake evenly.
In a large bowl, mix together the Oreo crumbs and melted butter. Use a fork or your fingers to ensure all the crumbs are well-coated. This mixture should have a consistency that can hold together when pressed.
Next, press the crumb mixture into the bottom and up the sides of a 9-inch springform pan. Make sure the crust is even and compact to hold the filling later.
Bake the crust for 10 minutes. The heat will help to set it nicely, giving you a sturdy base for your pie. Once done, remove it from the oven and allow it to cool completely on a wire rack.
While the crust cools, it’s time to whip the cream. In a stand mixer fitted with the whisk attachment, whisk the heavy cream at high speed until it forms stiff peaks. This process is crucial, as it will add lightness to the pie filling.
Once whipped, transfer the cream to another large bowl and set it aside. Be careful not to deflate it.
Now, change the whisk attachment to the paddle attachment. In the same mixer bowl, beat the cream cheese and creamy peanut butter at medium-high speed for 2 minutes. This mixture should be smooth and creamy, without lumps.
Next, add in the powdered sugar and vanilla extract. Beat for an additional 2 minutes, until everything is well combined and fluffy.
Now comes the fun part. Using a rubber spatula, fold the whipped cream into the peanut butter mixture until no streaks remain. This step is all about gently incorporating the two mixtures to maintain that fluffy texture.
Spoon the filling into the cooled cookie crust. Spread it evenly, smoothing out the top. Cover the pie with plastic wrap and refrigerate for at least 4 hours. This chilling time allows the flavors to meld beautifully and the pie to set.
Just before serving, top the pie with whipped cream, mini peanut butter cups, and a drizzle of chocolate sauce if desired. This finishing touch adds an extra layer of delight!
Things Worth Knowing
- Cooling Time: Ensure the pie has enough time to chill in the refrigerator; this step is crucial for achieving the right consistency.
- Ingredient Temperature: Use room temperature cream cheese to make it easier to blend. Cold cream cheese can result in lumps.
- Whipping Cream: When whipping heavy cream, ensure your bowl and beaters are cold for best results.
- Serving Tips: For a perfect slice, use a sharp knife and wipe it clean between cuts to keep the slices neat.
Pro Tips and Tweaks
If you’re looking to enhance your Peanut Butter Pie experience, here are some pro tips to keep in mind:
- Storage: To store leftovers, cover the pie tightly with plastic wrap and refrigerate. It can last up to 2 days.
- Freezing: You can freeze this pie for up to 2 months. Just ensure it’s well-wrapped to prevent freezer burn.
- Pairing: Serve with a side of fresh fruit like strawberries or bananas to balance the richness of the pie.
- Chocolate Crust Option: For an extra chocolatey twist, consider using chocolate Oreos instead of regular ones for the crust.
- Peanut Butter Variations: Try different types of peanut butter, like crunchy or flavored ones, to switch up the texture and taste.
Serving Ideas for Peanut Butter Pie
Serving your Peanut Butter Pie can be as fun as making it! Here are some ideas:
- Ideal for Gatherings: This pie is perfect for gatherings, whether it’s a family picnic, potluck, or birthday party. Its appealing look and taste will make it a hit.
- Pair with Coffee: For an evening dessert, serve slices alongside a hot cup of coffee or even a scoop of vanilla ice cream. The flavors complement each other beautifully.
- Seasonal Treat: While this pie is great year-round, consider making it for special occasions like Thanksgiving or summer barbecues to impress guests.
- Leftover Magic: If you have any leftovers, crumble some over yogurt for a delightful breakfast treat or snack.
- Presentation Matters: For an elegant presentation, serve slices on dessert plates garnished with additional whipped cream and a sprinkle of crushed peanuts.
FAQ
Conclusion
In summary, this Peanut Butter Pie is not just a dessert; it’s an experience filled with flavor, nostalgia, and joy. It captures the essence of comfort food and brings people together over something sweet and satisfying. I encourage you to try making it yourself. It’s easier than you think and sure to impress anyone lucky enough to share a slice with you. So, gather your ingredients and get ready to create a dessert that’s bound to become a favorite!
Peanut Butter Pie
Equipment
- KitchenAid stand mixer
- 9-inch Springform Pan
- Silicone Spatula Set
Ingredients
- 20 whole Oreo cookies crushed in a food processor until they form fine crumbs
- 3 tablespoons unsalted butter melted
- 1 cup heavy cream
- 8 ounces cream cheese room temperature
- 1 cup creamy peanut butter
- 1 cup powdered sugar sifted
- 2 teaspoons pure vanilla extract
- whipped cream for topping (optional)
- mini peanut butter cups optional
- chocolate sauce optional
Instructions
- Preheat oven to 350°F.
- Mix together the Oreo crumbs and melted butter. Press the crumbs into the bottom and 1 inch up the sides of a 9-inch springform pan.
- Bake for 10 minutes and cool completely on a wire rack.
- In a stand mixer fitted with the whisk attachment, whisk the cream at high speed until it forms stiff peaks. Transfer the whipped cream to another large bowl and set aside.
- Change the whisk attachment to the paddle attachment and beat the cream cheese and peanut butter at medium-high speed for 2 minutes.
- Add in powdered sugar and vanilla and beat an additional 2 minutes.
- Use a rubber spatula to fold the whipped cream into the peanut butter mixture until combined and no streaks remain.
- Spoon the filling into the cooled cookie crust, cover and refrigerate for at least 4 hours.
- Just before serving top with whipped cream, mini peanut butter cups and chocolate sauce.
Notes
- Tip 1: If you run out of powdered sugar, you can easily make your own with regular sugar.
- Tip 2: Store covered in the refrigerator for up to 2 days.