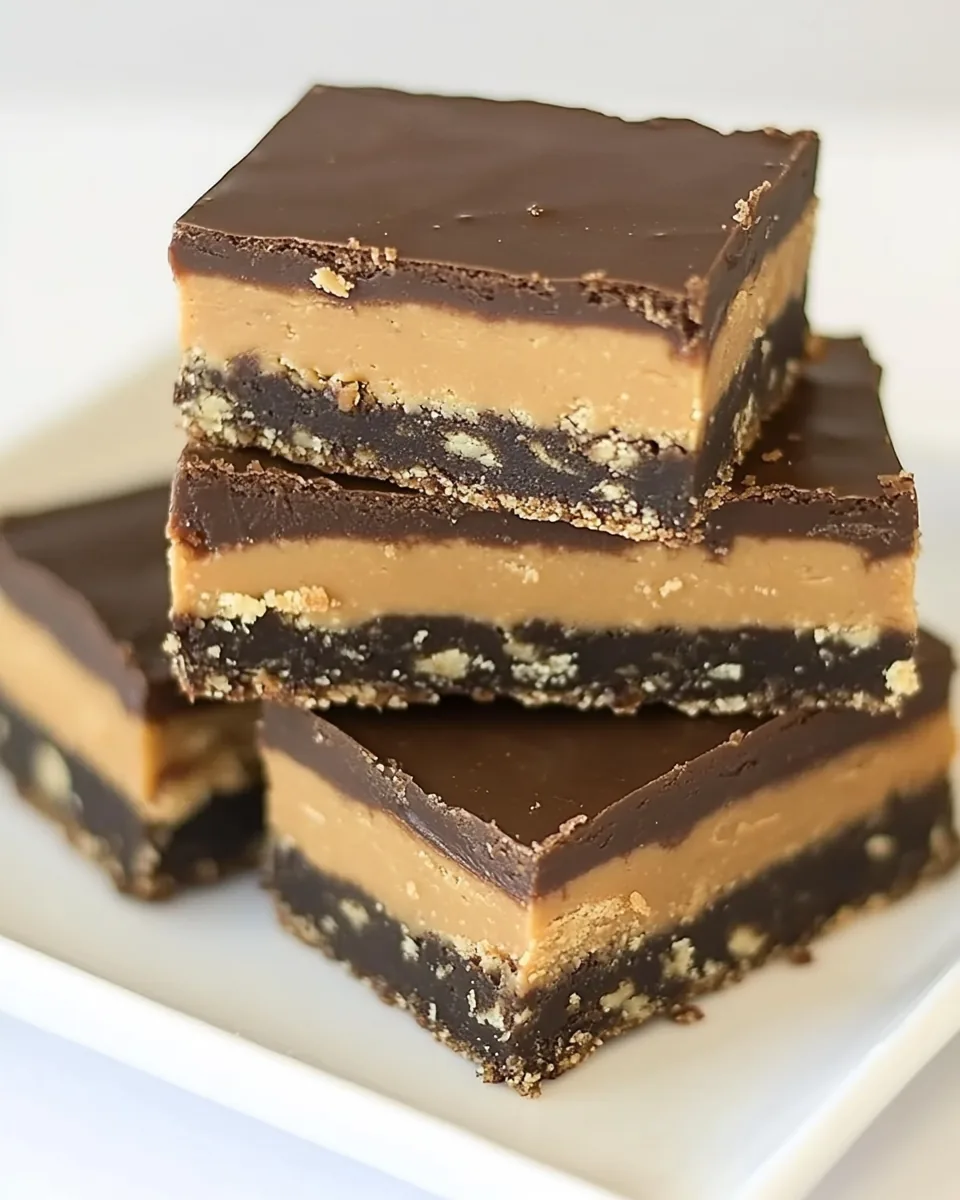
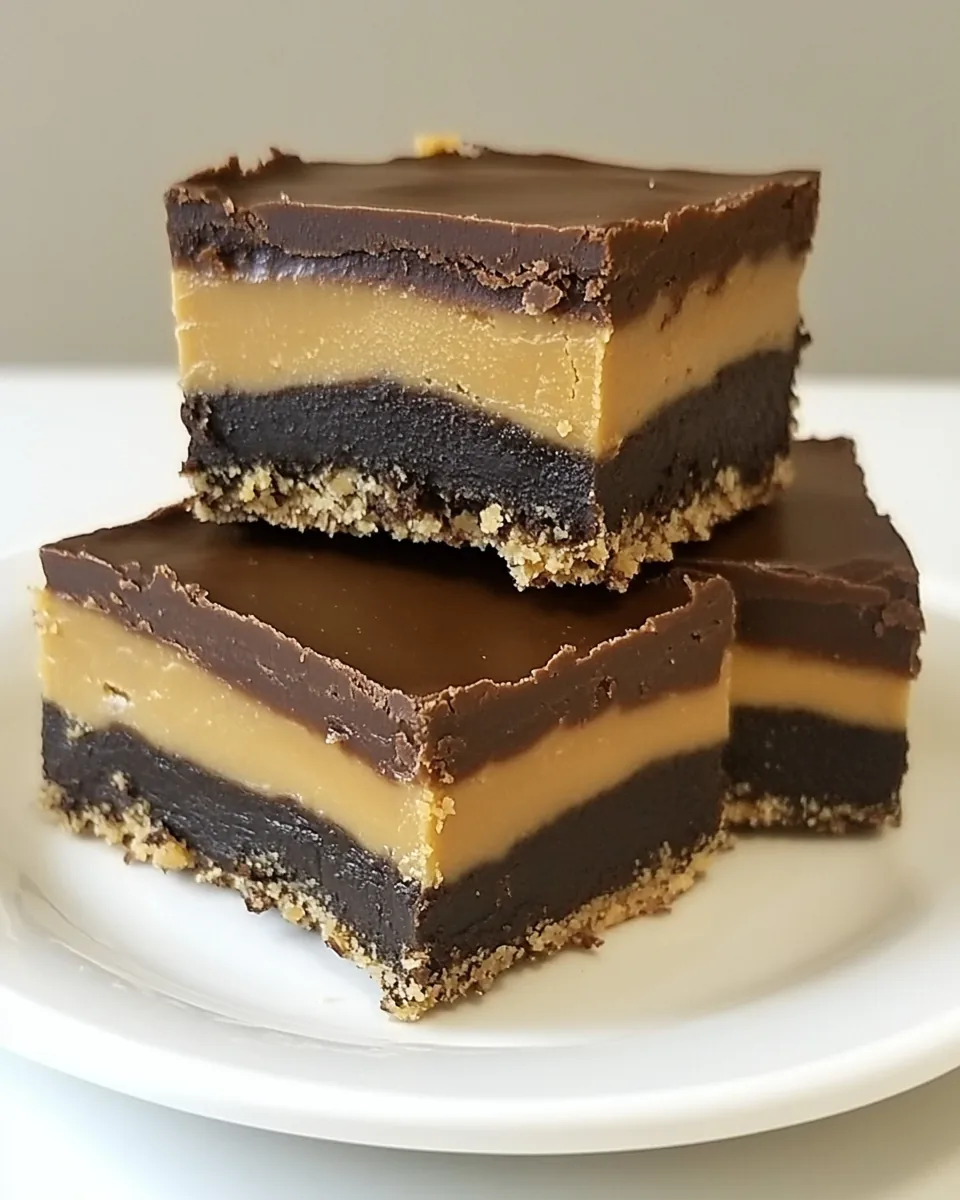
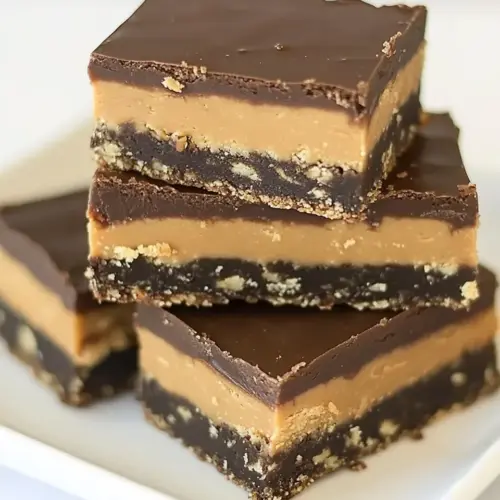
Peanut Butter Nanaimo Bars
When I think about sweet treats that bring back fond memories, Peanut Butter Nanaimo Bars always come to mind. Growing up, my kitchen was filled with the delightful aroma of baked goods, and these deliciously layered bars were a staple. The combination of creamy peanut butter, rich chocolate, and a crunchy base made them my all-time favorite. I remember the first time I helped my mom mix the graham cracker crumbs and coconut, and I was instantly hooked. Each layer of the Nanaimo Bars offers a unique texture and flavor, making them irresistible. Whether it’s a family gathering, a potluck, or simply a cozy night in, these bars have a way of bringing people together.
Whenever I bite into a Peanut Butter Nanaimo Bar, I’m transported back to those carefree days. It’s a recipe that’s been passed down through generations, and I can’t help but feel a sense of nostalgia as I prepare them. The first layer, a buttery base, is so simple yet satisfying. Then comes the creamy peanut butter filling that’s both sweet and slightly salty, perfectly balanced with the chocolate topping. These bars are not just a dessert; they’re a piece of my childhood that I love to share with friends and family.
Making Peanut Butter Nanaimo Bars is a delightful experience that’s filled with love and laughter. With each step, from mixing the ingredients to cutting them into perfect squares, I feel a connection to my roots and the joy that baking brings. I can’t wait for you to try this recipe and create your own sweet memories!
Recipe Snapshot
30 mins
15 mins
15 mins
Medium
250 kcal
4 g
Gluten-Free, Low FODMAP
12 g
Frying Pan, Whisk, Food Processor, Oven, Large Pot, Chef’s Knife, Mixing Bowl, Wooden Spoon, Baking Sheet
Why This Peanut Butter Nanaimo Bars Works
There’s something undeniably special about Peanut Butter Nanaimo Bars. Here are a few reasons why this recipe stands out:
1. Versatility
One of the best things about Peanut Butter Nanaimo Bars is their versatility. You can enjoy them as a dessert, a sweet snack, or even as a special treat during gatherings. They’re perfect for any occasion!
2. Easy to Make
This recipe is incredibly easy to follow. Even if you’re a baking novice, the step-by-step instructions will guide you through the process, ensuring your bars turn out perfect every time.
3. Layers of Flavor
The combination of flavors in Peanut Butter Nanaimo Bars is truly irresistible. The buttery crumb base, creamy peanut butter filling, and rich chocolate topping create a harmonious blend that keeps you coming back for more.
4. Family Favorite
These bars have a way of becoming a family favorite. They’ve been enjoyed by my family for years, and I’m sure they’ll become a beloved treat in yours too.
5. No Baking Required
What’s even better? You don’t need to turn on the oven for this recipe! The Peanut Butter Nanaimo Bars set perfectly in the refrigerator, making them a hassle-free treat.
6. Customizable
Feel free to experiment! You can add different toppings or even swap out ingredients to suit your taste. The possibilities are endless, and that’s what makes this recipe so fun.
Peanut Butter Nanaimo Bars Ingredients
Creating the perfect Peanut Butter Nanaimo Bars starts with understanding the key ingredients that work together to create a harmonious blend of flavors and textures. The combination of rich butter, sweet coconut, and creamy peanut butter forms the foundation of this delightful treat. Let’s explore these ingredients and their roles in making these bars truly special.
- ¾ cup (170.25g) unsalted butter, melted: The base of the bars, providing richness and moisture.
- ½ cup (100g) granulated sugar: Adds sweetness and helps the bars hold together.
- 2 eggs: Binds the ingredients and adds structure.
- 2½ cups (210g) graham cracker crumbs: The crunchy base that gives the bars their texture.
- ¾ cup (67.5g) shredded sweetened coconut: Adds a delightful chewiness and flavor.
- ⅓ cup (28.67g) cocoa powder: Enhances the chocolate flavor in the base.
- 1¼ cups (322.5g) creamy peanut butter: The star of the show, providing creaminess and nutty flavor.
- ⅓ cup (75.67g) unsalted butter: Used in the filling for added richness.
- 3 cups (360g) powdered sugar: Sweetens the filling and gives it a smooth texture.
- ⅓ cup (81.33ml) milk: Helps to achieve the right consistency in the filling.
- 8 ounces (226.8g) semisweet chocolate, finely chopped: The decadent topping that completes the bars.
- 2 tablespoons unsalted butter: Used in the chocolate topping for a glossy finish.
How to Assemble Peanut Butter Nanaimo Bars

Assembling Peanut Butter Nanaimo Bars is an enjoyable process that fills your kitchen with delicious aromas. Follow along as I guide you through each step to make these scrumptious bars. Getting your hands in the mix is part of the fun!
- Preheat your oven to 350 degrees F (175 degrees C). Grease a 9×13-inch baking pan and line it with parchment paper, leaving some overhang for easy removal later.
- In a large mixing bowl, combine the melted unsalted butter, granulated sugar, and eggs. Use a whisk to blend everything together until smooth and fluffy.
- Next, add the graham cracker crumbs, shredded sweetened coconut, and cocoa powder to the bowl. With a large wooden spoon, stir until all the ingredients are well combined. The mixture should be slightly sticky.
- Transfer the mixture into the prepared baking pan. With damp fingers or the back of a spoon, press the mixture evenly into the bottom of the pan to create a solid base.
- Bake the base in your preheated oven for about 12 to 15 minutes, or until it’s firm and no longer shiny. The top should have a slight golden hue. Once done, remove it from the oven and let it cool on a wire rack.
- While the base is cooling, prepare the filling. In a microwave-safe bowl, combine the creamy peanut butter and unsalted butter. Microwave in short increments, stirring in between, until the mixture is smooth and fully melted.
- Gradually add the powdered sugar, one cup at a time, mixing well after each addition. Alternate with the milk, ensuring the filling is creamy and free of lumps.
- Spread the peanut butter filling evenly over the cooled base. Smooth the top with a spatula and refrigerate for about one hour, or until firm.
- As the filling sets, prepare the topping. Melt the semisweet chocolate and the remaining unsalted butter using a double boiler or in the microwave, stirring until smooth.
- Once melted, pour the chocolate mixture over the chilled peanut butter filling, spreading it evenly to cover the entire surface. Let it set at room temperature, or if you’re in a hurry, pop it in the fridge.
- Once the chocolate is set, use the parchment overhang to lift the bars out of the pan. Cut them into squares for serving. Enjoy your delicious Peanut Butter Nanaimo Bars!
Things Worth Knowing
- Cooling Time: Be sure to let the bars cool completely before cutting them. This helps in achieving clean cuts and perfect squares.
- Layering: Take your time with each layer, ensuring they are evenly spread and well-set before adding the next for the best results.
- Storage: These bars can be stored in an airtight container at room temperature for up to a week or in the refrigerator for extended freshness.
- Customization: Feel free to try different types of chocolate or add nuts to the base for added texture and flavor.
Tips for Success

To ensure that your Peanut Butter Nanaimo Bars turn out perfectly every time, consider these useful tips:
- Storage: Store leftover bars in an airtight container at room temperature. If you prefer them chilled, keep them in the fridge for a refreshing snack.
- Freezing: You can freeze these bars cut into squares. Just wrap them tightly in plastic wrap and place them in a freezer-safe container. They can last up to three months in the freezer.
- Pairing: These bars pair wonderfully with a cup of coffee or tea. They also make a delicious dessert after a light dinner.
- Presentation: For a beautiful presentation, drizzle melted chocolate over the bars before serving. It adds a touch of elegance!
- Serving Size: Cut the bars into small squares for easier serving. They’re rich, so smaller pieces go a long way.
Great Combinations for Peanut Butter Nanaimo Bars
There are so many wonderful ways to enjoy Peanut Butter Nanaimo Bars. Here are some ideas for serving:
- Casual Gatherings: These bars are perfect for potlucks or casual get-togethers, offering a sweet treat that everyone will love.
- Holiday Celebrations: They make a fantastic addition to holiday dessert tables, adding a unique flavor to the mix.
- Picnics: Pack them for a picnic as they are easy to transport and don’t require refrigeration for a short while.
- Ice Cream Topping: Crumble them over vanilla ice cream for a simple yet delicious dessert.
- Seasonal Occasions: From summer barbecues to winter holiday parties, these bars fit right in any season!
FAQ
Conclusion
The Peanut Butter Nanaimo Bars are a delightful combination of textures and flavors that will surely satisfy your sweet cravings. Their rich, buttery base, delectable peanut filling, and luscious chocolate topping create a truly indulgent treat. I encourage you to try making these bars yourself; they’re fun to prepare and perfect for sharing with loved ones. Trust me, once you take that first bite, you’ll understand why they hold a special place in many hearts. Enjoy your baking adventure!
Peanut Butter Nanaimo Bars
Equipment
- Frying Pan
- Whisk
- Food Processor
- Oven
- Large Pot
- Chef's Knife
- Mixing Bowl
- Wooden Spoon
- Baking Sheet
Ingredients
- ¾ cup unsalted butter melted
- ½ cup granulated sugar
- 2 eggs
- 2½ cups graham cracker crumbs
- ¾ cup shredded sweetened coconut
- ⅓ cup cocoa powder
- 1¼ cups creamy peanut butter
- ⅓ cup unsalted butter
- 3 cups powdered sugar
- ⅓ cup milk
- 8 ounces semisweet chocolate finely chopped
- 2 tablespoons unsalted butter
Instructions
- Preheat your oven to 350 degrees F (175 degrees C). Grease a 9x13-inch baking pan and line it with parchment paper, leaving some overhang for easy removal later.
- In a large mixing bowl, combine the melted unsalted butter, granulated sugar, and eggs. Use a whisk to blend everything together until smooth and fluffy.
- Next, add the graham cracker crumbs, shredded sweetened coconut, and cocoa powder to the bowl. With a large wooden spoon, stir until all the ingredients are well combined. The mixture should be slightly sticky.
- Transfer the mixture into the prepared baking pan. With damp fingers or the back of a spoon, press the mixture evenly into the bottom of the pan to create a solid base.
- Bake the base in your preheated oven for about 12 to 15 minutes, or until it’s firm and no longer shiny. The top should have a slight golden hue. Once done, remove it from the oven and let it cool on a wire rack.
- While the base is cooling, prepare the filling. In a microwave-safe bowl, combine the creamy peanut butter and unsalted butter. Microwave in short increments, stirring in between, until the mixture is smooth and fully melted.
- Gradually add the powdered sugar, one cup at a time, mixing well after each addition. Alternate with the milk, ensuring the filling is creamy and free of lumps.
- Spread the peanut butter filling evenly over the cooled base. Smooth the top with a spatula and refrigerate for about one hour, or until firm.
- As the filling sets, prepare the topping. Melt the semisweet chocolate and the remaining unsalted butter using a double boiler or in the microwave, stirring until smooth.
- Once melted, pour the chocolate mixture over the chilled peanut butter filling, spreading it evenly to cover the entire surface. Let it set at room temperature, or if you’re in a hurry, pop it in the fridge.
- Once the chocolate is set, use the parchment overhang to lift the bars out of the pan. Cut them into squares for serving. Enjoy your delicious Peanut Butter Nanaimo Bars!