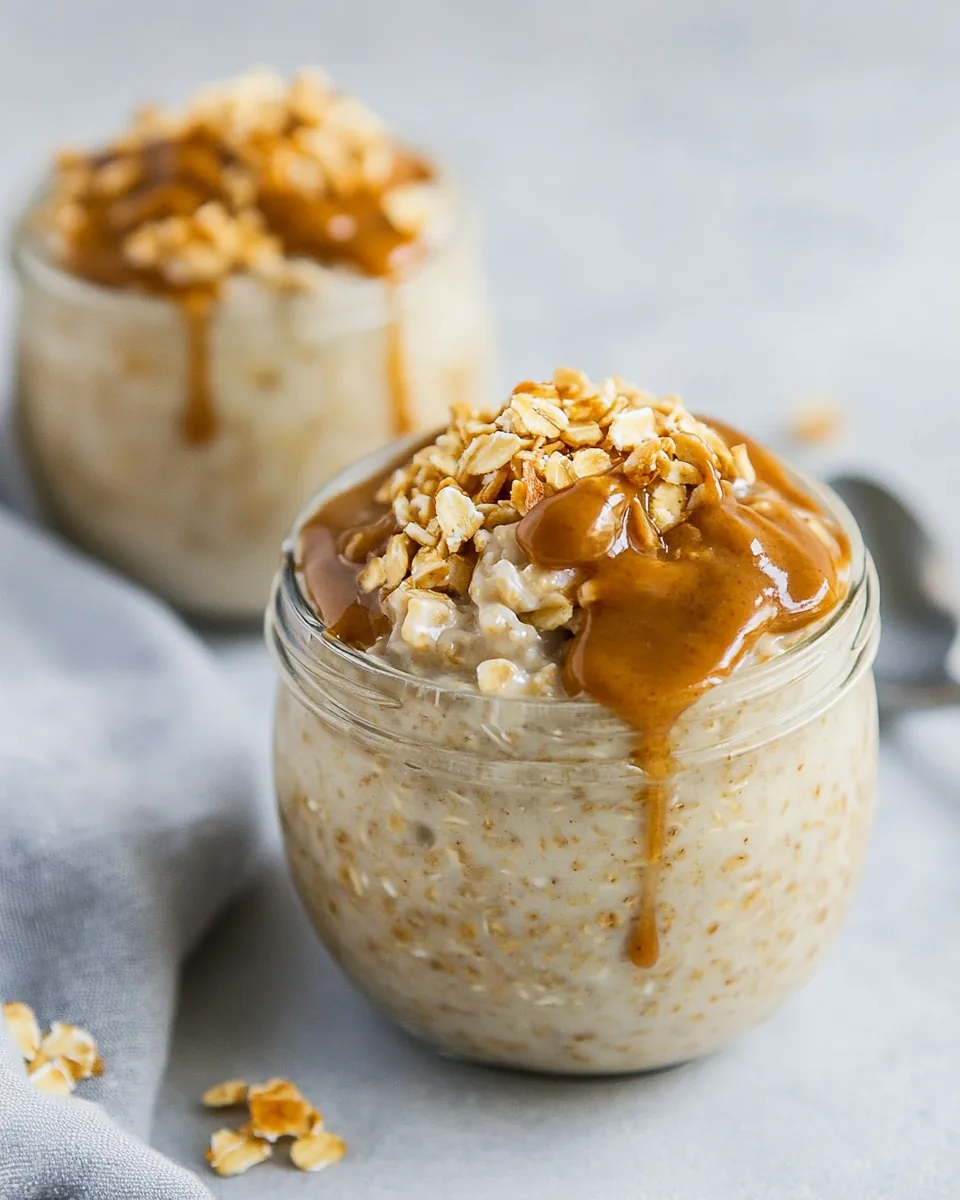
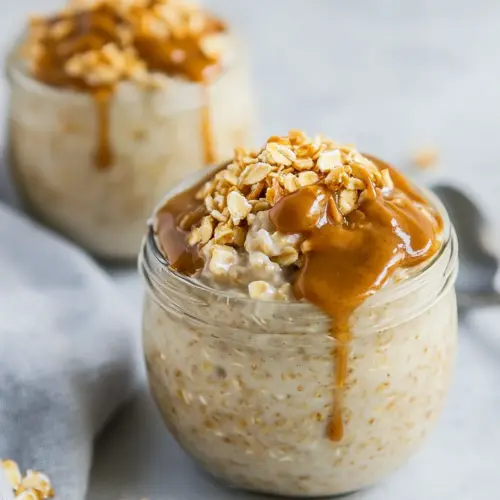
Peanut Butter Cheesecake Overnight Oats
There’s something truly special about starting your day with a bowl of Peanut Butter Cheesecake Overnight Oats. It’s not just a breakfast; it’s a delightful experience! I remember the first time I made these oats. It was a busy morning, and I wanted something quick yet satisfying. I grabbed my favorite ingredients and started mixing. The creamy texture of the cream cheese and peanut butter combined with the wholesome rolled oats was nothing short of magical. The best part? You can prepare this the night before, and it’s ready for you when you wake up! Just grab a jar from the fridge, and you’re set for a delicious morning. It’s like having dessert for breakfast, without the guilt.
Recipe Snapshot
5 mins
5 mins
0 mins
Easy
320 kcal
12 g
Gluten-Free, Low FODMAP
14 g
Wooden Spoon, Mixing Bowl
Every single bite of Peanut Butter Cheesecake Overnight Oats bursts with flavors that remind you of your favorite cheesecake, but in a healthy and satisfying form. It’s a recipe I turn to when I know I’ll have a busy day; it fuels me without weighing me down. The addition of maple syrup adds just the right amount of sweetness, and I often find myself swirling in extra peanut butter right before I dig in. Plus, it’s a great way to use up any leftover cream cheese you might have! This recipe is all about convenience, taste, and that creamy texture we all love.
Recipe Snapshot
5 mins
5 mins
0 mins
Easy
320 kcal
12 g
Gluten-Free, Low FODMAP
14 g
Wooden Spoon, Mixing Bowl
Why This Peanut Butter Cheesecake Overnight Oats Works
Convenience at Its Best
One of the best things about this recipe is its convenience. You can prepare it in just a few minutes the night before, making it perfect for busy mornings. No more rushing around trying to whip up breakfast while juggling everything else!
Flexibility with Ingredients
Another reason I adore the Peanut Butter Cheesecake Overnight Oats is the flexibility with ingredients. You can easily swap out or add various flavors and toppings to suit your taste. Whether you prefer almond milk, coconut milk, or even yogurt, it works beautifully.
Healthy Yet Indulgent
This recipe combines healthy ingredients like rolled oats and peanut butter with a hint of indulgence from the cream cheese. It feels like a treat but packs a nutritional punch, keeping you full and satisfied.
Perfect for Meal Prep
Since these oats can be stored in the fridge for up to five days, you can easily meal prep for the week. Make several jars at once, and you’ll always have a quick breakfast option on hand.
Kid-Friendly and Fun
Kids love this recipe too! It’s a fantastic way to get them excited about breakfast, and they can even help in the kitchen. Let them mix in their favorite fruits or toppings!
Ingredient List for Peanut Butter Cheesecake Overnight Oats
When it comes to making Peanut Butter Cheesecake Overnight Oats, the ingredients truly shine. Each component plays a role in creating a wholesome and satisfying meal. The star players, like rolled oats and peanut butter, provide a delicious base, while cream cheese adds that creamy texture we crave. Let’s dive into the ingredient list!
- 1/2 cup rolled oats, regular or gluten-free – These oats are the heart of the dish, providing fiber and a chewy texture.
- 1/2 cup milk of choice – Whether you choose dairy or plant-based, this will help blend all the ingredients together.
- 1 tablespoon cream cheese – This adds a rich and creamy flavor, making the oats taste indulgent.
- 1 tablespoon peanut butter – A must for that nutty flavor, it also brings protein to the table!
- 1/2 teaspoon vanilla extract – For a hint of sweetness and aromatic flavor.
- 2 teaspoons maple syrup, separated – Sweeten your oats to your liking; it’s a natural sweetener!
- A pinch of sea salt – A little salt enhances all the flavors in this dish.
The Method for Peanut Butter Cheesecake Overnight Oats
Making Peanut Butter Cheesecake Overnight Oats is straightforward and fun! You’ll love the simplicity of combining ingredients to create a delicious breakfast. Let’s walk through the steps together, and you’ll have a tasty treat ready to go in no time.
- In a small bowl, combine peanut butter, cream cheese, and 1 teaspoon of maple syrup. Start by mixing the cream cheese and peanut butter together until they form a smooth paste. You should see a creamy texture without any lumps. The maple syrup will add sweetness and help blend the ingredients together.
- In another bowl, add in the remaining ingredients: rolled oats, milk, vanilla extract, and a pinch of sea salt. Stir well, ensuring everything is combined. The oats should be thoroughly coated in the liquid, absorbing flavors.
- Now, it’s time to swirl in that delicious peanut butter mixture from step one. Use a spoon to gently fold it into the oats, creating swirls of creamy goodness. Don’t worry if it isn’t perfectly mixed; those swirls are what make it fun!
- Cover your bowl or transfer the mixture into individual jars for easy storage. Ensure it’s sealed to keep everything fresh. This is an important step to keep moisture in and flavors intact.
- Refrigerate for at least 4 hours, or overnight if possible. The longer it sits, the more the oats will absorb the liquid, resulting in a creamy, cheesecake-like consistency. You’ll be amazed at how the oats transform!
- When ready to serve, you can warm it up if desired. Heat gently in the microwave for about 30 seconds, but remember, it’s delicious cold too! Adding an extra drizzle of peanut butter on top before serving makes it even better!
Things Worth Knowing
- Texture Matters: The oats need enough time to soak up the liquid, so don’t rush the refrigeration process.
- Custom Swirls: Feel free to mix in fruits, nuts, or chocolate chips for an extra layer of flavor and texture.
- Watch for Sweetness: Everyone’s taste for sweetness varies. Adjust the maple syrup according to your preference.
- Easy Cleanup: Use disposable jars for easy transport and cleanup, especially if you’re on the go!
Customization Ideas
One of the wonderful aspects of Peanut Butter Cheesecake Overnight Oats is how easily it can be customized. Whether you want to add more flavors or tweak the ingredients, the possibilities are endless. Here are some ideas to get your creativity flowing!
- Storage: Store leftovers in an airtight container in the fridge. It can last up to five days!
- Freezing: You can freeze portions for a quick breakfast option later. Just thaw in the refrigerator overnight.
- Pairing: Serve with fresh fruits like bananas or berries for added nutrition and flavor.
- Variations: Swap out the peanut butter for almond or cashew butter for a different taste sensation.
- Sweetness Levels: Experiment with other sweeteners like agave nectar or date syrup if you prefer a different flavor profile.
How to Enjoy Peanut Butter Cheesecake Overnight Oats
Enjoying your Peanut Butter Cheesecake Overnight Oats can be a delightful experience, and there are various ways to serve this treat. Here are some ideas to help you savor every bite!
- Breakfast on the Go: These oats are perfect for busy mornings. You can grab a jar and head out the door!
- Lazy Weekends: Take your time to enjoy this delicious dish with a cup of coffee on a leisurely Saturday morning.
- Meal Prep Friendly: Making several jars at once ensures you have breakfast sorted for the week ahead, saving you time and stress.
- Perfect for Any Occasion: These oats work well for brunch, family gatherings, or even as a mid-afternoon snack.
- Creative Toppings: Top with sliced bananas, nuts, or a sprinkle of cinnamon before digging in!
- Seasonal Pairings: In the fall, add a pinch of pumpkin spice for a seasonal twist!
FAQ
Conclusion
The Peanut Butter Cheesecake Overnight Oats is a delightful way to start your day, offering a creamy texture and a boost of energy. I encourage you to try making it yourself; it’s a fun and easy breakfast you’ll want to repeat. With just a few ingredients and minimal effort, you can indulge in a dish that feels like dessert while nourishing your body. Give it a go, and I guarantee you’ll love every bite!
Peanut Butter Cheesecake Overnight Oats
Equipment
- Wooden Spoon
- Mixing Bowl
Ingredients
- 1/2 cup rolled oats regular or gluten-free
- 1/2 cup milk of choice
- 1 tablespoon cream cheese
- 1 tablespoon peanut butter
- 1/2 teaspoon vanilla extract
- 2 teaspoons maple syrup separated
- sea salt pinch
Instructions
- In a small bowl, combine peanut butter, cream cheese, and 1 teaspoon of maple syrup. Start by mixing the cream cheese and peanut butter together until they form a smooth paste. You should see a creamy texture without any lumps. The maple syrup will add sweetness and help blend the ingredients together.
- In another bowl, add in the remaining ingredients: rolled oats, milk, vanilla extract, and a pinch of sea salt. Stir well, ensuring everything is combined. The oats should be thoroughly coated in the liquid, absorbing flavors.
- Now, it’s time to swirl in that delicious peanut butter mixture from step one. Use a spoon to gently fold it into the oats, creating swirls of creamy goodness. Don’t worry if it isn’t perfectly mixed; those swirls are what make it fun!
- Cover your bowl or transfer the mixture into individual jars for easy storage. Ensure it’s sealed to keep everything fresh. This is an important step to keep moisture in and flavors intact.
- Refrigerate for at least 4 hours, or overnight if possible. The longer it sits, the more the oats will absorb the liquid, resulting in a creamy, cheesecake-like consistency. You’ll be amazed at how the oats transform!
- When ready to serve, you can warm it up if desired. Heat gently in the microwave for about 30 seconds, but remember, it’s delicious cold too! Adding an extra drizzle of peanut butter on top before serving makes it even better!
Notes
- Tip 1: As long as you store these oats in an airtight container, you do not need a special jar. No need to use a mason jar or anything fancy; you can make these in any container that can be sealed.
- Tip 2: You can make several of these at one time. These can be stored in the refrigerator for up to five days. Make up to five at a time, and you will be prepped and ready for breakfast on the go this week!
- Tip 3: Sweeten to your own taste before serving. Everyone has differing tastes for sweetness. You can wait until serving to sweeten if you are unsure whether it will be too sweet for you.