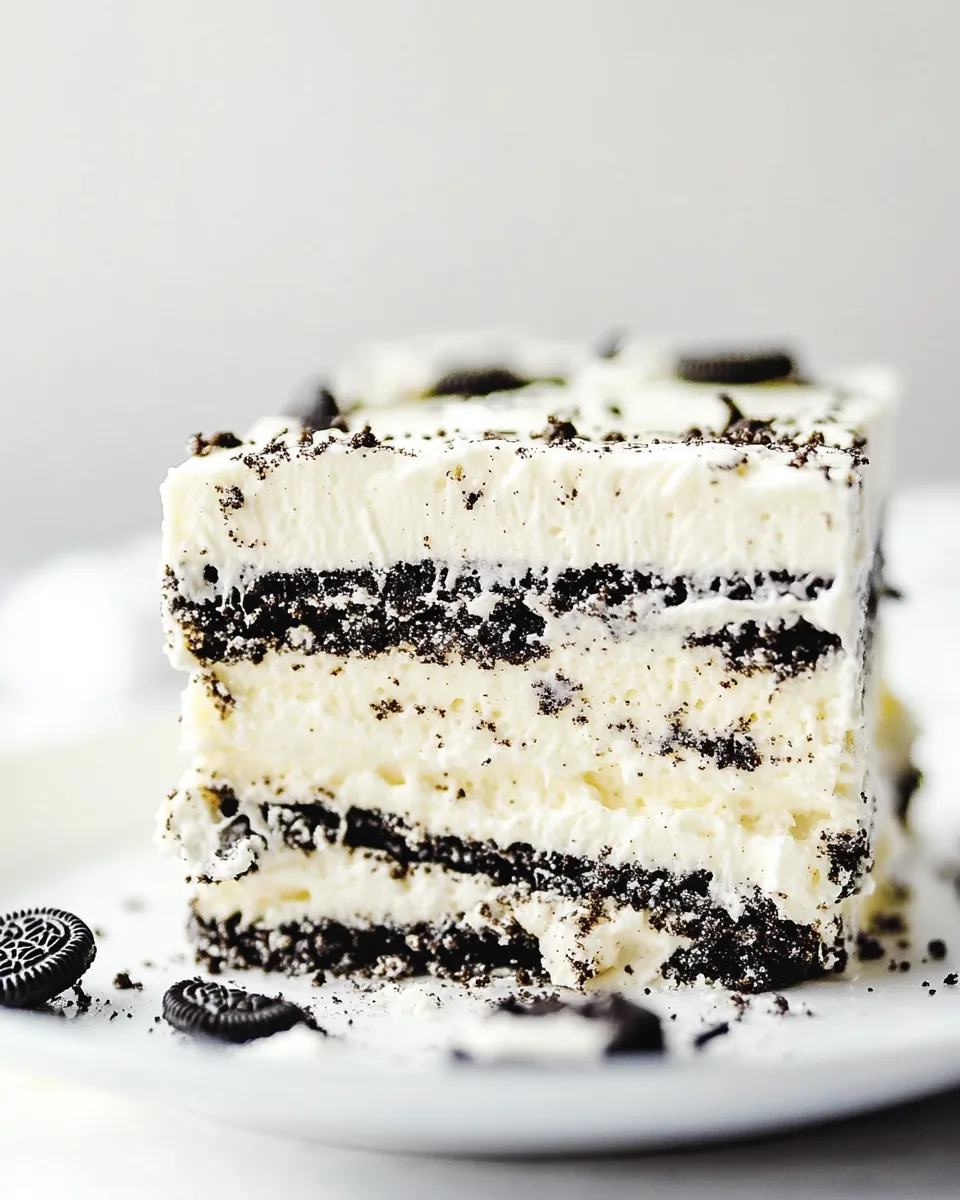
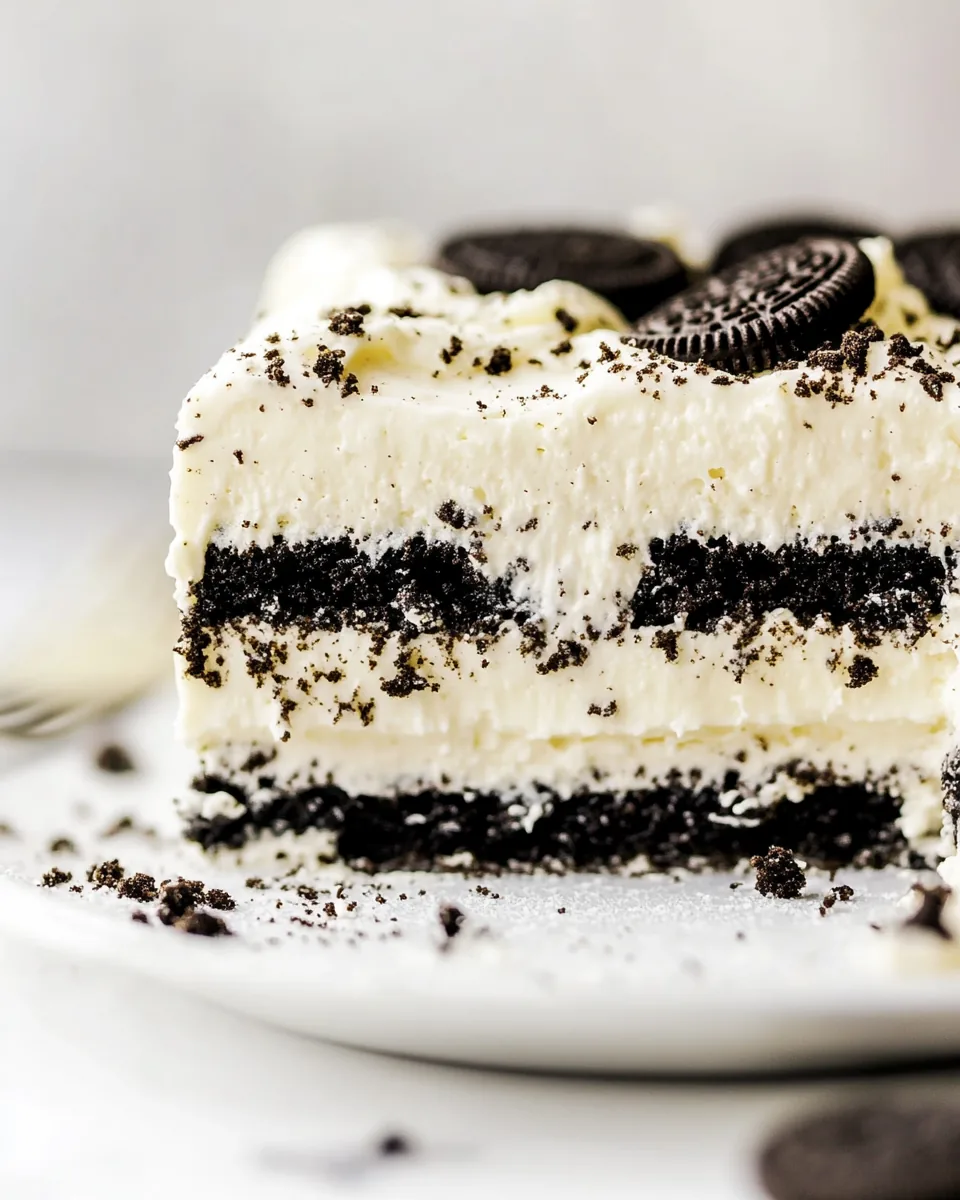
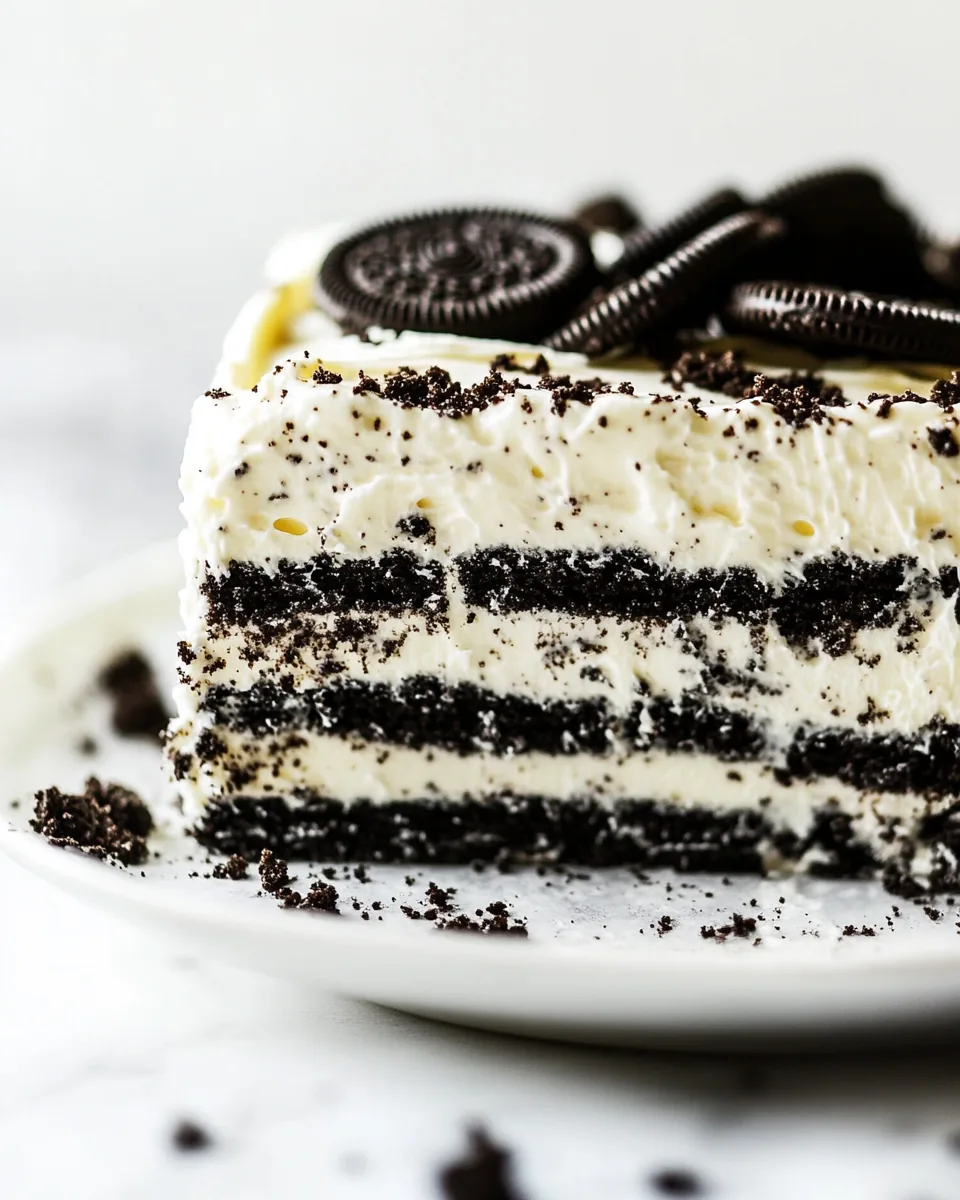
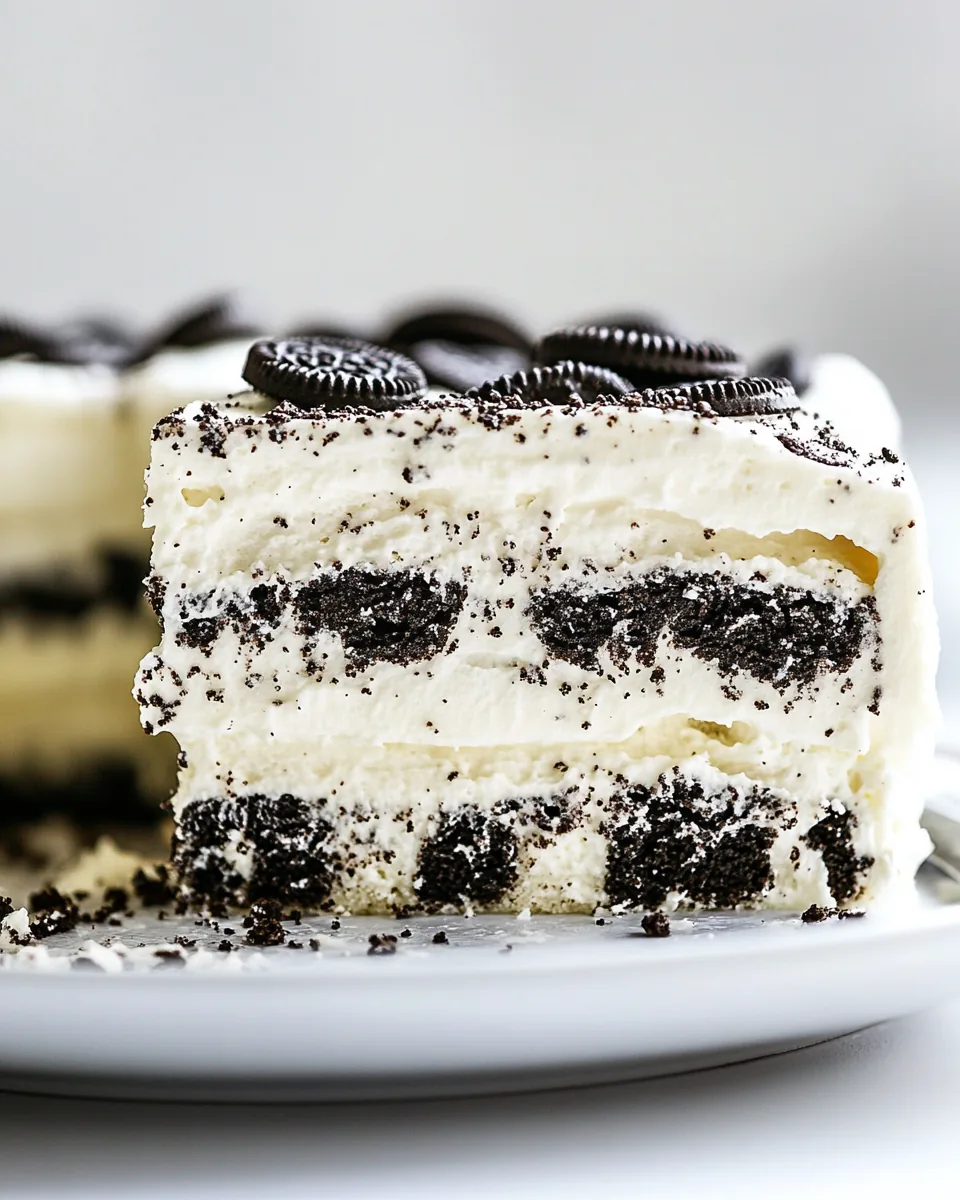
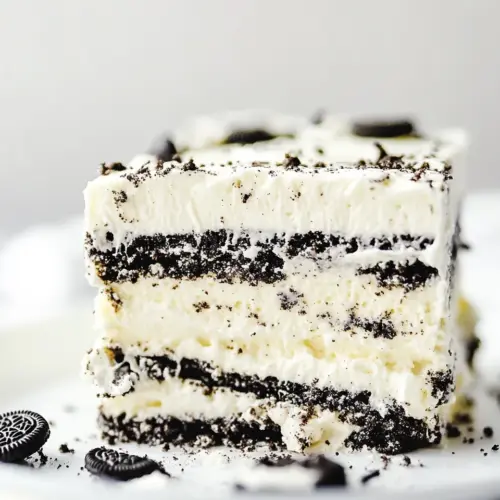
Oreo Icebox Cake
Whenever I think of summer gatherings, one dessert stands out above all else: Oreo Icebox Cake. It’s that time of year when the sun shines bright, and the days are long, perfect for enjoying sweet treats with family and friends. I remember the first time I made this light, creamy cake; it was for a backyard barbecue where everyone was raving about how delicious and indulgent it was. The layers of chocolatey Oreo cookies combined with the fluffy whipped topping had everyone coming back for seconds, and soon after, I became the unofficial dessert-maker of our summer gatherings. This cake not only satisfies the sweet tooth but it also transports you back to those warm days filled with laughter and joy.
Recipe Snapshot
30 mins
30 mins
0 mins
Medium
320 kcal
4 g
Keto, Paleo, Whole30
15 g
8 x 8-inch baking pan
The Best Thing About This Oreo Icebox Cake
It’s Super Easy to Make
One of the things I love most about Oreo Icebox Cake is how incredibly easy it is to put together. You don’t need any complicated baking skills or fancy kitchen gadgets. With just a handful of ingredients, you can whip up something that looks and tastes like you spent hours in the kitchen. It’s a true crowd-pleaser with minimal effort, making it perfect for those impromptu summer parties.
Perfect for Any Occasion
This cake isn’t just for summer barbecues; it’s versatile enough for any celebration. Whether it’s a birthday party, family reunion, or just a cozy dessert night at home, Oreo Icebox Cake fits right in. You’ll find that it’s a delightful treat that appeals to both kids and adults alike, making you the star of any gathering.
Chilled to Perfection
Because this cake needs to chill in the fridge for several hours, it’s the ideal dessert to make ahead of time. There’s nothing better than being able to prepare dessert early and simply pull it out when guests arrive. The waiting period allows the cookies to soften, melding beautifully with the creamy layers, which is what makes this cake so special.
Customization Galore
While the classic Oreo Icebox Cake is incredible on its own, you can easily customize it to suit your taste. Want to add a little zing? Toss in some crushed mint candies or top it with fresh berries. The possibilities are endless, and experimenting with flavors can lead to some delightful surprises that will keep your guests talking.
The Nostalgia Factor
There’s something about Oreo Icebox Cake that brings back memories of childhood. Many of us grew up with Oreo cookies, and this dessert evokes a sense of nostalgia that is hard to resist. It’s a sweet reminder of simpler times, hot summer days, and carefree moments shared with loved ones.
Ingredients Required for Oreo Icebox Cake
The ingredients for Oreo Icebox Cake are simple and classic, making this dessert a true delight. It combines the rich, chocolatey flavors of Oreo cookies with a creamy filling that is both light and satisfying. Each component plays a vital role in creating that perfect balance of sweetness and texture.
- 2 (24-ounce) packages Oreo cookies (party-size package) – A staple of any dessert lover, these cookies add a rich chocolate flavor and texture to the cake.
- 2 (3.4-ounce) packages instant vanilla pudding mix – This is essential for achieving that silky-smooth filling.
- 3-1/4 cups whole milk (divided) – It helps bring everything together, creating a luscious texture.
- 18-ounce container frozen whipped topping (thawed, divided) – This adds a light, fluffy texture that complements the dense cookies perfectly.
Instructions for Oreo Icebox Cake
Making Oreo Icebox Cake is a delightful experience that fills your kitchen with sweet aromas. The steps are simple, yet the result is a stunning dessert that will impress everyone who tastes it. Let’s dive into the process!
- Line your 8 x 8-inch baking pan with parchment paper, ensuring there’s an overhang. This will make it easier to lift the cake out later. This initial step is crucial for a clean release.
- Scoop out 1 heaping cup of whipped topping from the container and set it aside for later. This will be used as a final layer on the cake.
- In a mixing bowl, add both packages of instant vanilla pudding mix. While whisking, gradually pour in 2-1/4 cups of milk. It’s essential to whisk constantly so that the pudding thickens properly.
- Continue to whisk for 1 to 2 minutes until the mixture is smooth. The consistency should be thick yet creamy, perfect for layering.
- Gently fold in the remaining whipped topping until it’s well combined. You want to keep it light and fluffy, so be gentle here.
- In a shallow bowl, pour the last 1 cup of milk. Dip each Oreo cookie in the milk, ensuring both sides are soaked but not overly soggy.
- Arrange a single layer of the milk-soaked Oreo cookies at the bottom of the prepared baking pan. If needed, break some cookies to fit them perfectly.
- Spread half of the pudding mixture over the layer of cookies, creating an even layer. This step is crucial for balancing the flavors.
- Add another layer of milk-soaked cookies on top, followed by the rest of the pudding mixture. Finish with a final layer of cookies to create a beautiful cake.
- Spread the reserved whipped topping over the top layer of cookies. This adds a lovely finishing touch.
- Cover the pan and refrigerate for at least 8 hours, or ideally overnight. This chilling time allows the cookies to soften, creating the cake’s signature texture.
- Once ready to serve, lift the cake out of the pan using the parchment overhang. Cut it into squares using a sharp knife, wiping the blade between cuts for clean edges. For an extra touch, you can garnish with some crumbled Oreo cookies on top.
Things Worth Knowing
- Chilling is Key: The longer the cake chills, the better it tastes. Overnight is best for the flavors to meld.
- Layer Carefully: Ensure each layer is even for a beautiful presentation when slicing.
- Whipped Topping: Regular whipped topping provides the best texture. Avoid lighter versions that may turn watery.
- Cookie Variations: Feel free to experiment with other cookie brands to create unique flavors.
Ways to Customize
When it comes to making Oreo Icebox Cake, the customization options are limitless. Here are some ideas to make it your own:
- Mix in Berries: Adding fresh strawberries or raspberries can give the cake a refreshing twist.
- Chocolate Drizzle: A drizzle of chocolate syrup over the top can add an extra layer of flavor.
- Nutty Crunch: Consider adding crushed nuts between the layers for added texture.
- Minty Fresh: Use mint Oreos instead of regular ones for a refreshing flavor.
- Different Puddings: Experiment with chocolate or butterscotch pudding for a different taste.
- Layer of Fruit: Add a layer of sliced bananas or apples for a fruity kick.
- Serving with Ice Cream: Pair slices of cake with a scoop of ice cream for an indulgent dessert.
Serving Options for Oreo Icebox Cake
When it comes to serving Oreo Icebox Cake, the presentation can elevate the experience. Here are some ideas:
- Classic Slice: Serve slices on individual plates with a garnish of crumbled cookies on top for an attractive look.
- Family Style: Place the whole cake on a serving platter and let guests serve themselves. This creates a welcoming atmosphere.
- Garnished with Fruit: Add slices of fresh fruit around the cake for a pop of color.
- Ice Cream Pairing: Offering vanilla or chocolate ice cream on the side complements the cake beautifully.
- Seasonal Decorations: For holidays, decorate with themed sprinkles or edible glitter for festive flair.
- Picnic Treat: Pack slices in individual containers for an easy dessert option during outdoor gatherings.
- Storage Tip: Keep leftovers in the refrigerator covered for optimal freshness. It’s best enjoyed within 2 to 3 days.
FAQ
Conclusion
The Oreo Icebox Cake is truly a remarkable dessert that combines rich flavors with a delightful texture. Its simplicity and versatility make it a favorite among friends and family. I encourage you to give this recipe a try; you won’t be disappointed. It’s a fun and engaging way to create lasting memories, especially during the summer months. So gather your ingredients and make this delightful treat tonight!
Oreo Icebox Cake
Equipment
- 8 x 8-inch baking pan
Ingredients
- 2 packages Oreo cookies party-size package
- 2 packages instant vanilla pudding mix
- 3-1/4 cups whole milk divided
- 18 ounce frozen whipped topping thawed, divided
Instructions
- Line your 8 x 8-inch baking pan with parchment paper, ensuring there's an overhang. This will make it easier to lift the cake out later. This initial step is crucial for a clean release.
- Scoop out 1 heaping cup of whipped topping from the container and set it aside for later. This will be used as a final layer on the cake.
- In a mixing bowl, add both packages of instant vanilla pudding mix. While whisking, gradually pour in 2-1/4 cups of milk. It’s essential to whisk constantly so that the pudding thickens properly.
- Continue to whisk for 1 to 2 minutes until the mixture is smooth. The consistency should be thick yet creamy, perfect for layering.
- Gently fold in the remaining whipped topping until it's well combined. You want to keep it light and fluffy, so be gentle here.
- In a shallow bowl, pour the last 1 cup of milk. Dip each Oreo cookie in the milk, ensuring both sides are soaked but not overly soggy.
- Arrange a single layer of the milk-soaked Oreo cookies at the bottom of the prepared baking pan. If needed, break some cookies to fit them perfectly.
- Spread half of the pudding mixture over the layer of cookies, creating an even layer. This step is crucial for balancing the flavors.
- Add another layer of milk-soaked cookies on top, followed by the rest of the pudding mixture. Finish with a final layer of cookies to create a beautiful cake.
- Spread the reserved whipped topping over the top layer of cookies. This adds a lovely finishing touch.
- Cover the pan and refrigerate for at least 8 hours, or ideally overnight. This chilling time allows the cookies to soften, creating the cake's signature texture.
- Once ready to serve, lift the cake out of the pan using the parchment overhang. Cut it into squares using a sharp knife, wiping the blade between cuts for clean edges. For an extra touch, you can garnish with some crumbled Oreo cookies on top.
Notes
- Tip 1: You’ll need nearly two full party-size Oreo packages. You’ll likely have some left over, but it’s better to have extra than not enough.
- Tip 2: Use two boxes of regular instant pudding mix, not sugar-free, low-fat, or cook-and-serve. Make sure they’re the small 3.4-ounce boxes.
- Tip 3: Regular Cool Whip® gives the best texture. Light or sugar-free versions can turn watery.
- Tip 4: Warm a sharp knife under hot water, dry it off, and slice for clean edges.
- Tip 5: Keep the cake covered in the fridge. It’s best within 2 to 3 days. After that, it may start to get watery. Freezing is not recommended.