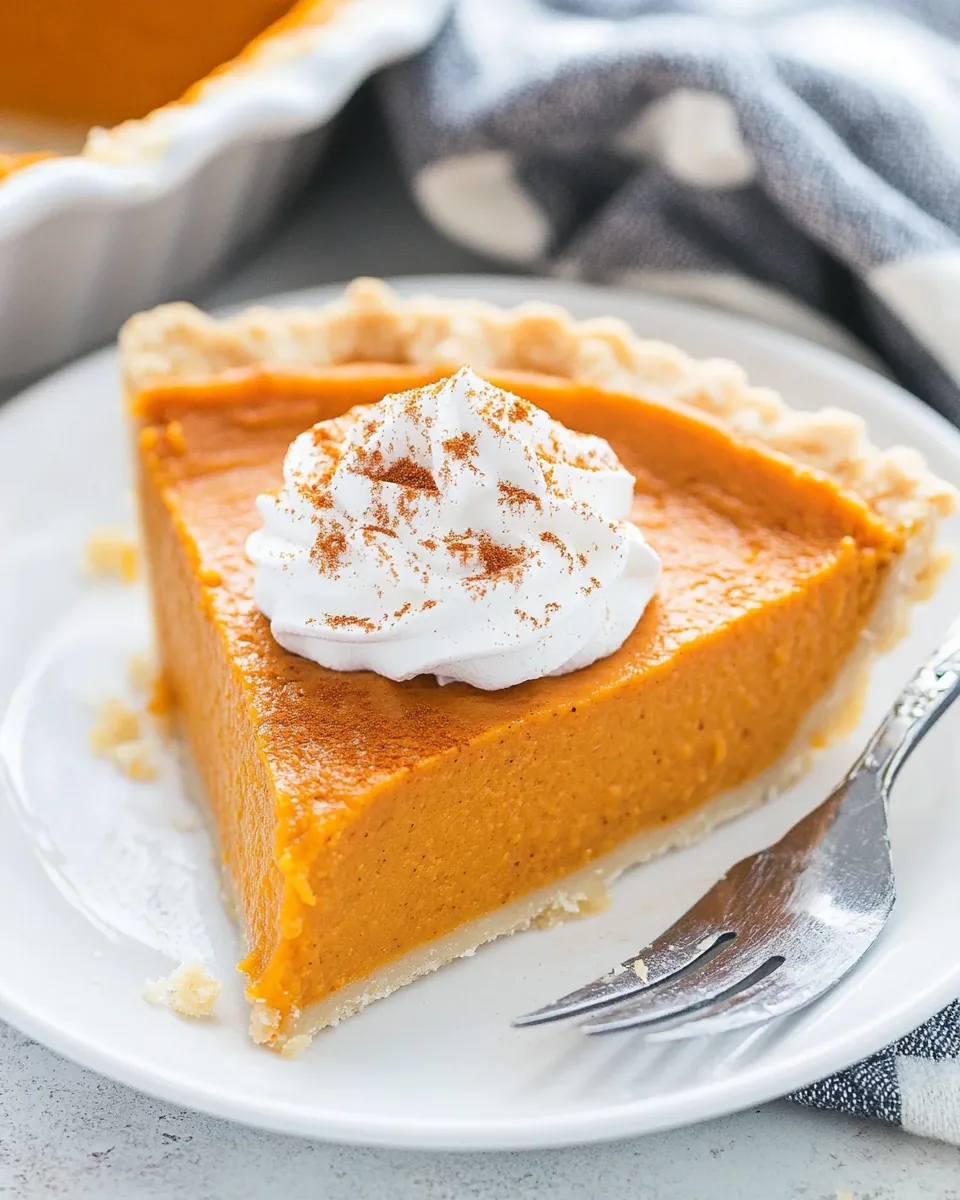
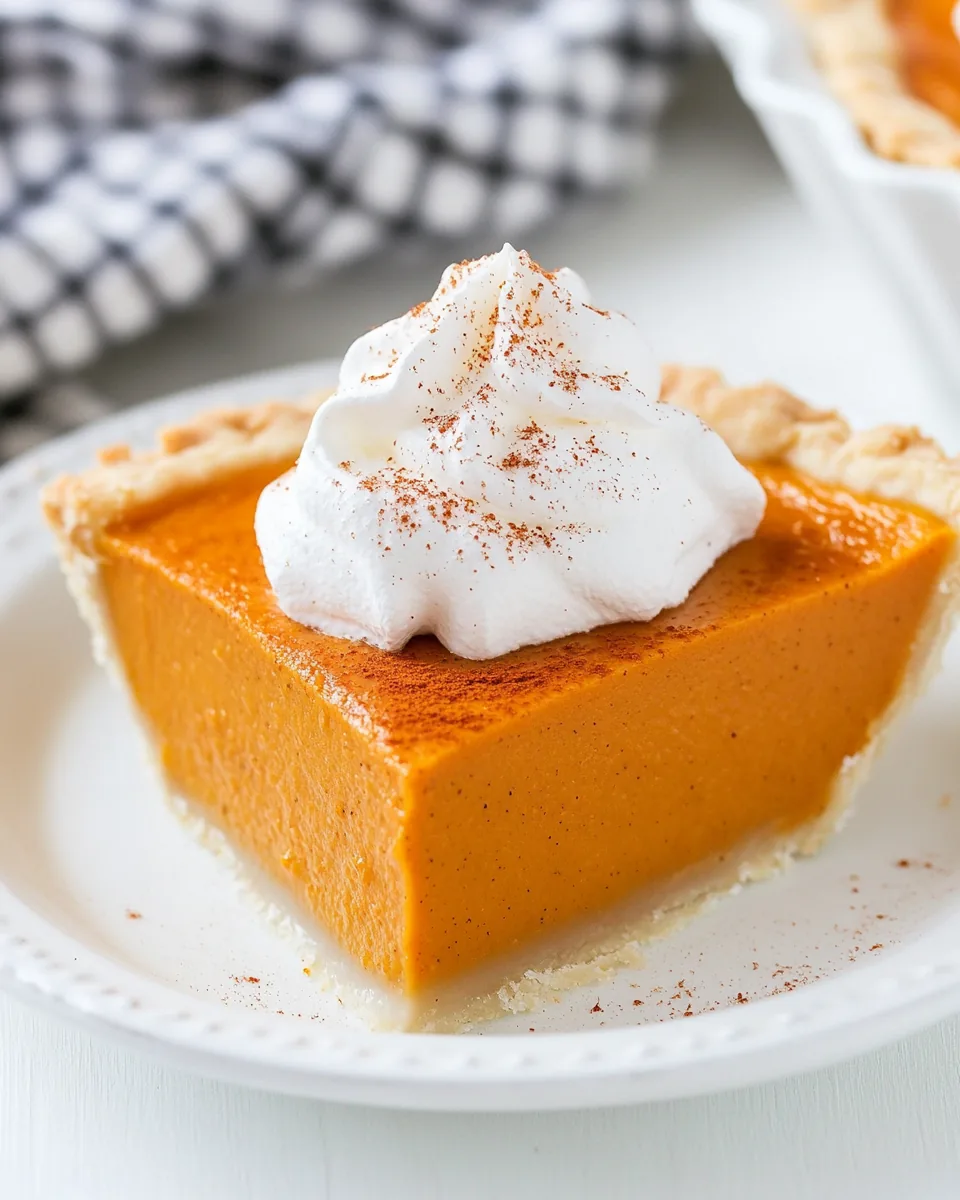
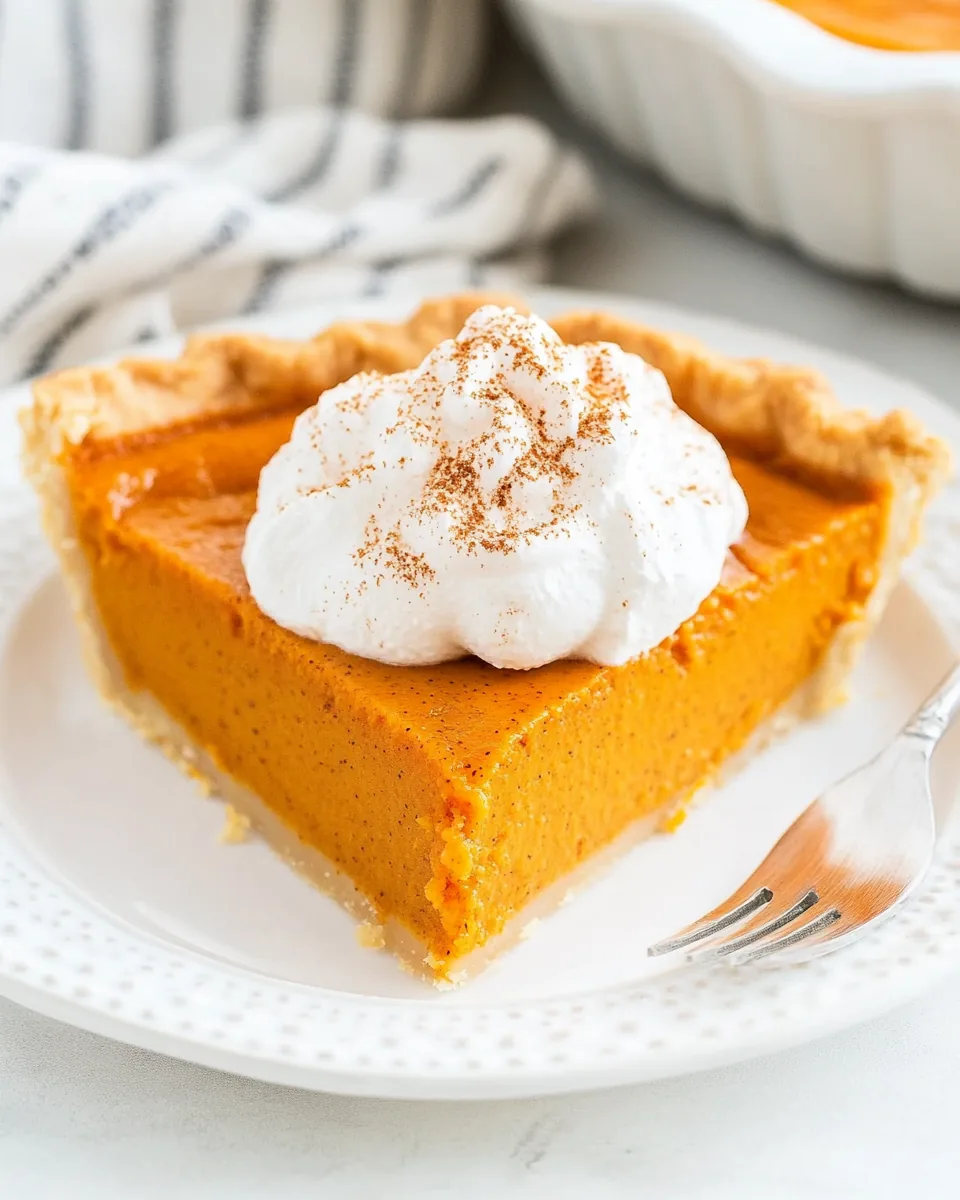
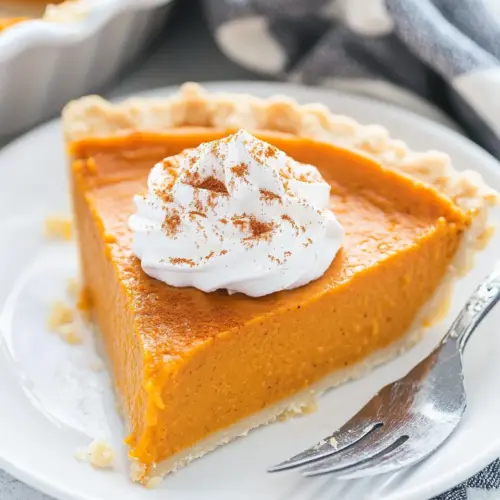
No Bake Pumpkin Pie
There’s something so comforting about a No Bake Pumpkin Pie, isn’t there? I remember the first time I made this delightful dessert for Thanksgiving. The aroma of spices wafted through my home, making it feel so cozy and filled with love. It became a family tradition to whip up this easy yet impressive pie that requires no baking, making it perfect for busy holidays. The creamy, spiced pumpkin filling nestled in a crisp graham cracker crust is not just a treat; it’s a memory maker. Every bite takes me back to laughter-filled gatherings and heartfelt conversations around the table. What’s better is that this pie is incredibly simple to make, allowing you to spend less time in the kitchen and more time with loved ones. Armed with just a few ingredients, you can create a dish that will have everyone asking for seconds. Trust me; once you make this No Bake Pumpkin Pie, it will become a staple in your dessert repertoire.
Recipe Snapshot
17 mins
7 mins
10 mins
Medium
250 kcal
4 g
Gluten-Free, Low FODMAP
10 g
Wooden Spoon, Frying Pan, Mixing Bowl
What’s Great About This No Bake Pumpkin Pie
Easy to Prepare
One of the best things about this No Bake Pumpkin Pie is how simple it is to prepare. You don’t need to worry about turning on the oven or timing the baking process. Just mix the ingredients and let the fridge do the hard work for you. It’s a fantastic option for those who want to enjoy a homemade dessert without the stress of baking.
Perfect for Fall
The flavors of this pie are synonymous with fall. The combination of aromatic spices like cinnamon, ginger, and nutmeg creates a warm, inviting flavor profile that we all crave during this season. It’s the ideal treat to serve at Thanksgiving or any fall gathering, bringing a taste of autumn to your table.
Crowd-Pleasing Dessert
Whether you’re hosting a large family dinner or a small gathering with friends, this No Bake Pumpkin Pie is sure to impress. Its creamy texture and rich flavors attract dessert lovers of all ages. Everyone will be raving about this dessert long after the meal is over, and you’ll feel proud to share it.
Customizable
You can easily customize this pie to suit your tastes. Want to add a swirl of whipped cream on top for extra creaminess? Go for it! You could even sprinkle some chocolate shavings or nuts for added texture. This flexibility allows you to get creative and make the pie uniquely yours.
Make-Ahead Friendly
This pie can be made well in advance, making it a fantastic option if you’re looking to reduce the stress of holiday cooking. Just prepare it a day or even a few days ahead of time. It will be waiting for you in the fridge, perfectly set and ready to serve.
Key Ingredients for No Bake Pumpkin Pie

The ingredients in this No Bake Pumpkin Pie work together to create a harmonious balance of flavors and textures. The star of the show, of course, is the pumpkin puree, which provides a smooth and creamy texture while being packed with nutrients. Sweetened condensed milk adds the perfect amount of sweetness, enhancing the rich flavor of the pumpkin. The spices like ground cinnamon, ground ginger, and ground nutmeg infuse warmth and depth, making each bite a cozy experience. Lastly, the graham cracker crust adds a crunchy contrast to the creamy filling, making this dessert a well-balanced delight.
- Unflavored Gelatin: This ingredient helps to set the pie and gives it a nice structure without the need for baking. It ensures that your pie holds its shape when sliced.
- Ground Cinnamon: A staple in pumpkin recipes, cinnamon brings warmth and sweetness to the filling, enhancing the overall flavor.
- Ground Ginger: Adding a touch of spice, ginger complements the cinnamon and gives the pie a delightful kick.
- Ground Nutmeg: Just a pinch of nutmeg adds depth and complexity to the flavor profile, rounding out the seasonal spices beautifully.
- Salt: A little salt balances the sweetness and enhances the other flavors, making the pie more delicious.
- Sweetened Condensed Milk: This rich and creamy ingredient sweetens the filling and gives it a velvety texture that melts in your mouth.
- Eggs: The eggs provide richness and help bind the filling together, ensuring it sets perfectly in the crust.
- Pumpkin Puree: The main ingredient, pumpkin puree, offers a smooth base flavor that captures the essence of fall.
- Prepared Graham Cracker Crust: The graham cracker crust adds just the right amount of crunch and sweetness, making it the perfect vehicle for the creamy filling.
Making This No Bake Pumpkin Pie
Making this No Bake Pumpkin Pie is as easy as pie, literally! You’ll love how quickly everything comes together. Let me guide you through the steps so you can create your own masterpiece to share with friends and family.
- Start by gathering all your ingredients. You’ll need unflavored gelatin, ground cinnamon, ground ginger, ground nutmeg, salt, sweetened condensed milk, eggs, pumpkin puree, and a prepared graham cracker crust. This will make the process smooth and efficient.
- In a heavy saucepan, combine the gelatin, ground cinnamon, ground ginger, ground nutmeg, salt, sweetened condensed milk, and the eggs. Mix well until everything is fully combined. The mixture should look smooth and creamy at this stage.
- Let this mixture stand for 1 minute. This allows the gelatin to bloom, which is essential for achieving the right texture in your pie.
- Place the saucepan on the burner over medium-low heat. Stir the mixture constantly for about 10 minutes. You want the gelatin to dissolve completely and the mixture to thicken slightly. You should notice a change in consistency as it heats.
- Once the mixture has thickened, remove it from the heat. Take a moment to appreciate the heavenly aroma; it’s truly inviting!
- Now, stir in the pumpkin puree until it is fully incorporated. This step will give your filling its signature flavor and vibrant color.
- After mixing, it’s time to pour this delightful mixture into your prepared graham cracker crust. Make sure to spread it evenly for beautiful slices later on.
- Cover the pie with plastic wrap and place it in the refrigerator. You’ll want it to chill for at least 3 to 4 hours, but overnight is even better if you can wait!
- When you’re ready to serve, remove the pie from the fridge. You can top it with some whipped cream or even a sprinkle of cinnamon for an extra touch.
Things Worth Knowing
Things Worth Knowing
- Using the right gelatin is crucial for the pie to set correctly. Make sure it’s unflavored and check the package for instructions on blooming.
- Letting the mixture rest after combining the ingredients helps the gelatin activate, resulting in a firmer, more stable pie.
- For best results, chill the pie for at least 3 hours but overnight is ideal to ensure it sets perfectly.
- Be careful not to overheat the mixture while dissolving the gelatin; high heat can break it down and affect the texture.
Ways to Customize
Get creative with your No Bake Pumpkin Pie! Here are some fantastic ways to tailor it to your tastes:
- Add a Creamy Topping: Whip up some heavy cream to add a luscious topping on your pie. A dollop of whipped cream can take your dessert to the next level.
- Incorporate Chocolate: If you’re a chocolate lover, consider adding chocolate shavings or a drizzle of chocolate sauce for a rich contrast to the pumpkin flavor.
- Experiment with the Spice Level: If you enjoy a bit more heat, feel free to increase the amount of ground ginger or cinnamon to suit your palate.
- Try Different Crusts: While a graham cracker crust is traditional, feel free to experiment with a cookie crust or even a nut crust for a gluten-free alternative.
- Make Mini Pies: Use muffin tins to create individual-sized versions of this pie. They’re perfect for parties and are super cute!
- Add Nuts: Sprinkle some crushed pecans or walnuts on top for an added crunch that complements the creamy filling.
Serving This No Bake Pumpkin Pie
When it comes to serving your No Bake Pumpkin Pie, there are plenty of options to consider. Here’s how to make the most of this delightful dessert:
- Chill Before Serving: Always make sure your pie is well-chilled before serving. This ensures that it holds its shape when sliced and enhances the flavors.
- Pair with Whipped Cream: A classic pairing, whipped cream adds a light and airy texture that complements the dense filling beautifully.
- Serve at Gatherings: This pie is perfect for holiday gatherings, such as Thanksgiving and Christmas, making it a festive favorite.
- Enjoy with Coffee: Pair your pie with a hot cup of coffee or tea for a comforting dessert experience that warms you from the inside out.
- Store Properly: Make sure to keep any leftovers covered in the refrigerator to maintain freshness. It can stay good for up to four days.
- Consider Seasonal Fruit: Fresh fruit like cranberries or pomegranates can be a great garnish, adding a pop of color and tartness to balance the sweetness.
FAQ
Conclusion
This No Bake Pumpkin Pie is truly a delightful dessert that captures the essence of fall in every bite. Its creamy texture and warm spices make it a standout at any gathering. I encourage you to try making this pie for your next celebration—your friends and family will love it!
No Bake Pumpkin Pie
Equipment
- Wooden Spoon
- Frying Pan
- Mixing Bowl
Ingredients
- 1 .25-ounce package Unflavored Gelatin
- 1 teaspoon Ground Cinnamon
- ½ teaspoon Ground Ginger
- ½ teaspoon Ground Nutmeg
- ½ teaspoon Salt
- 1 14-ounce can Sweetened Condensed Milk
- 2 eggs Beaten Eggs
- 1 15-ounce can Pumpkin Puree
- 1 9-inch Prepared Graham Cracker Crust
Instructions
- Start by gathering all your ingredients. You'll need unflavored gelatin, ground cinnamon, ground ginger, ground nutmeg, salt, sweetened condensed milk, eggs, pumpkin puree, and a prepared graham cracker crust. This will make the process smooth and efficient.
- In a heavy saucepan, combine the gelatin, ground cinnamon, ground ginger, ground nutmeg, salt, sweetened condensed milk, and the eggs. Mix well until everything is fully combined. The mixture should look smooth and creamy at this stage.
- Let this mixture stand for 1 minute. This allows the gelatin to bloom, which is essential for achieving the right texture in your pie.
- Place the saucepan on the burner over medium-low heat. Stir the mixture constantly for about 10 minutes. You want the gelatin to dissolve completely and the mixture to thicken slightly. You should notice a change in consistency as it heats.
- Once the mixture has thickened, remove it from the heat. Take a moment to appreciate the heavenly aroma; it’s truly inviting!
- Now, stir in the pumpkin puree until it is fully incorporated. This step will give your filling its signature flavor and vibrant color.
- After mixing, it’s time to pour this delightful mixture into your prepared graham cracker crust. Make sure to spread it evenly for beautiful slices later on.
- Cover the pie with plastic wrap and place it in the refrigerator. You’ll want it to chill for at least 3 to 4 hours, but overnight is even better if you can wait!
- When you're ready to serve, remove the pie from the fridge. You can top it with some whipped cream or even a sprinkle of cinnamon for an extra touch.