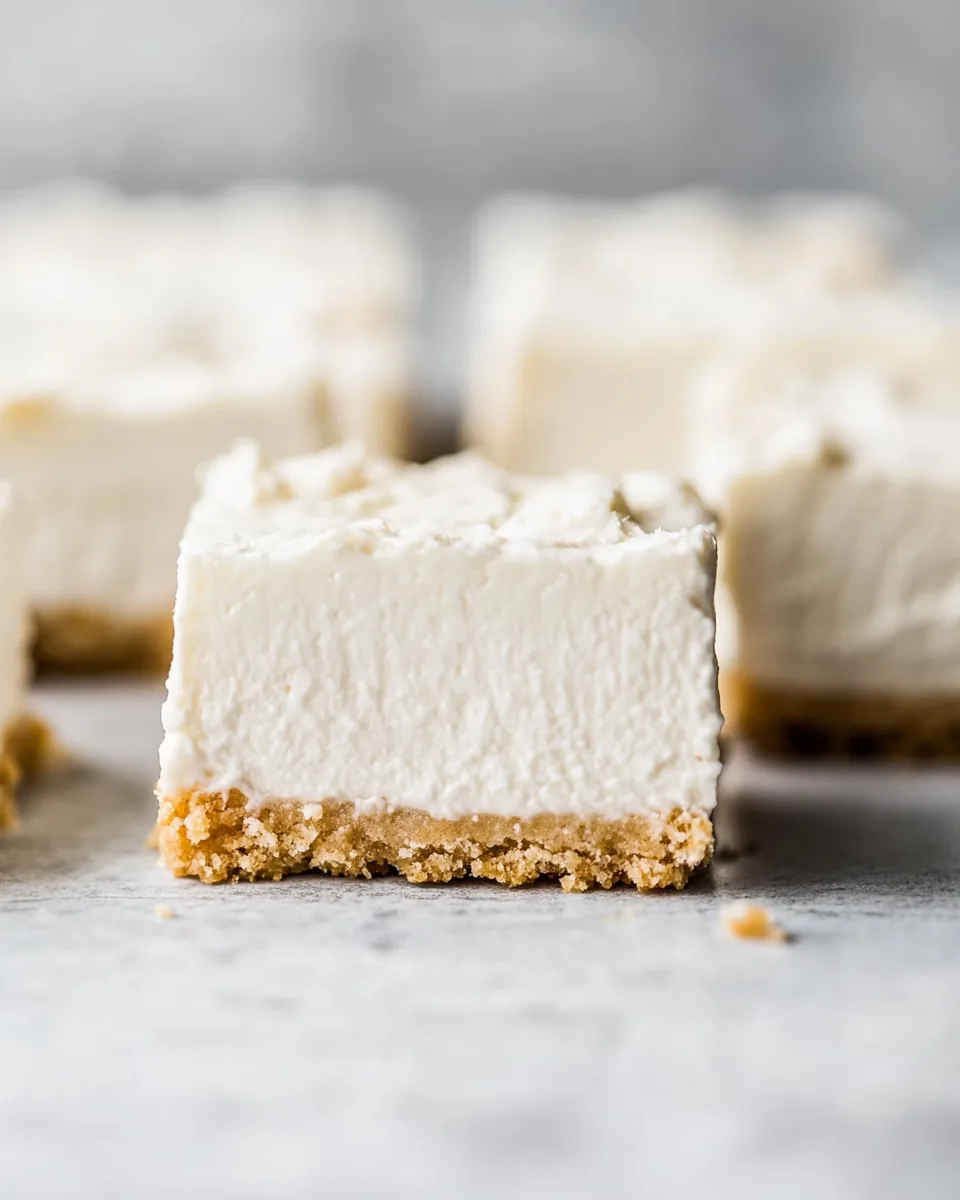
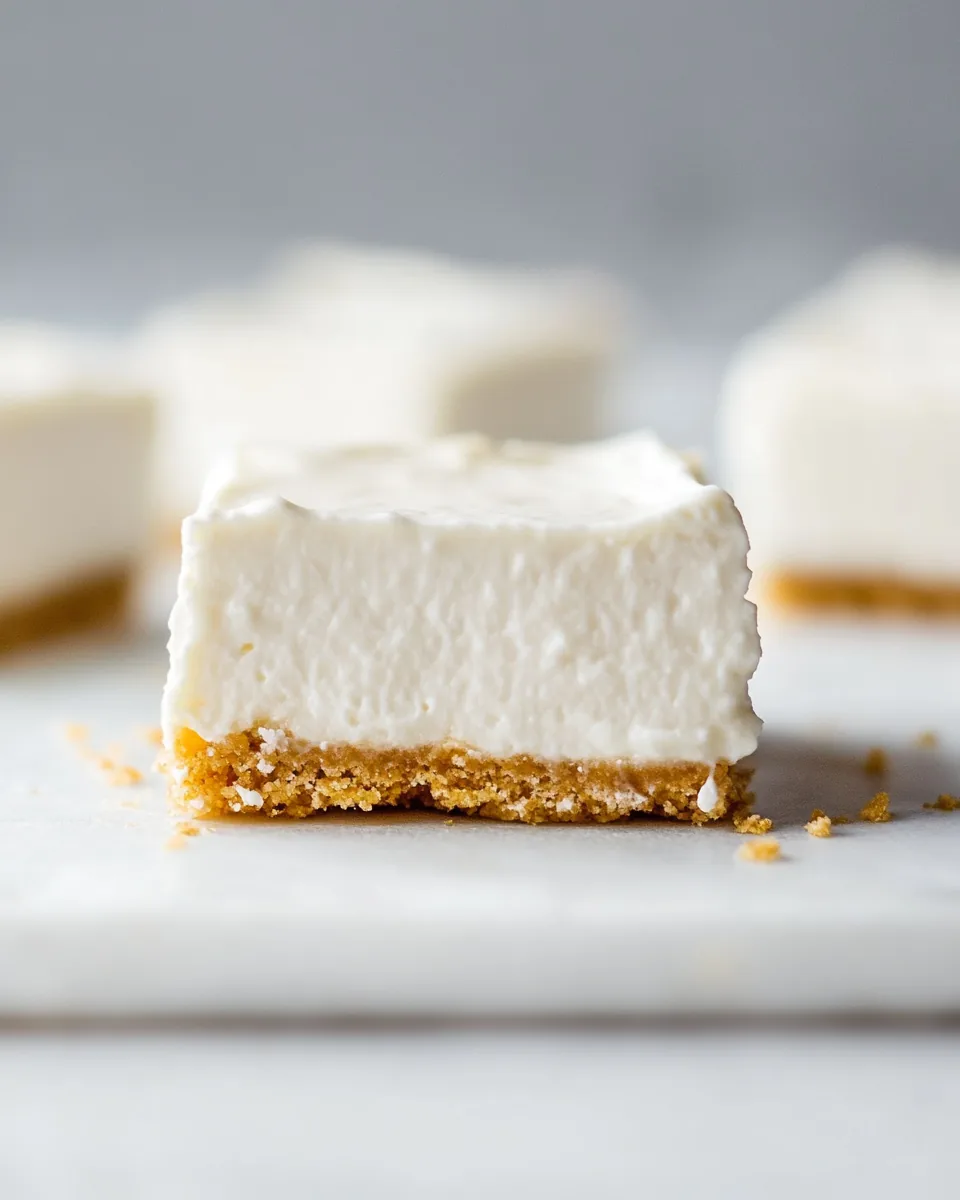
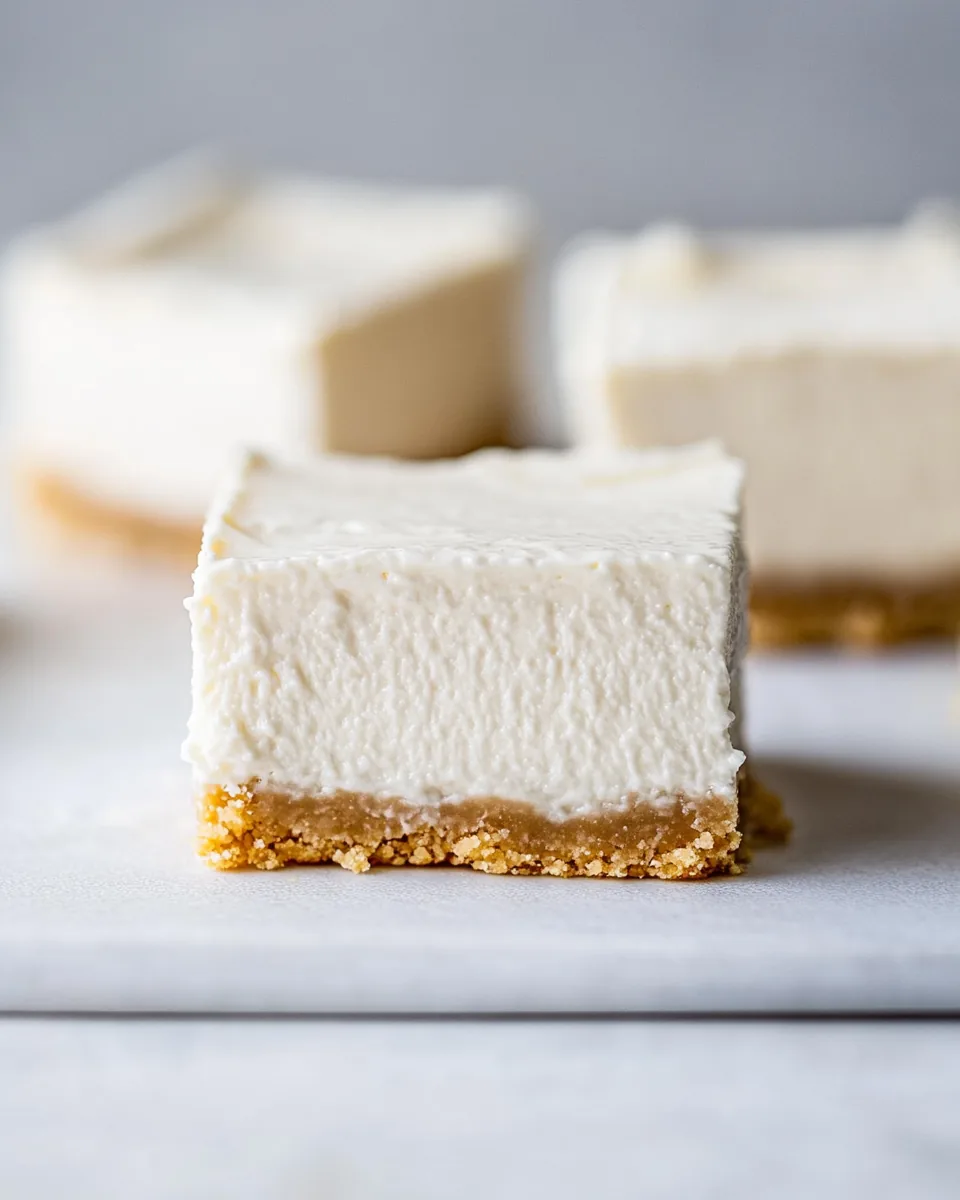
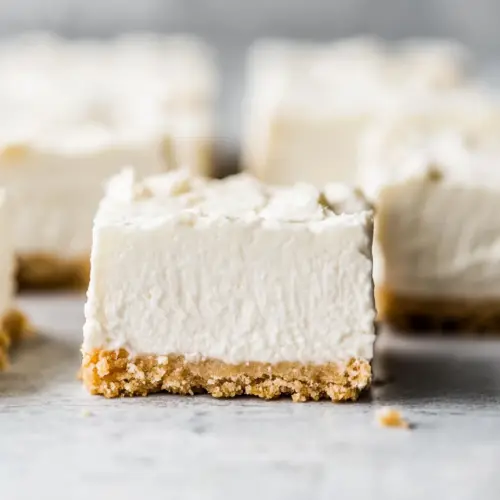
No Bake Cheesecake Bars
Whenever I think of indulgent desserts, I can’t help but reminisce about the first time I made No Bake Cheesecake Bars. It was a sunny afternoon, and I wanted to create something special for my family. As I gathered the ingredients, the excitement bubbled inside me. The best part? There’s no baking required, which meant I could enjoy the delightful, creamy goodness without hovering over a hot oven. The lightness of the cheesecake pairs perfectly with the rich graham cracker crust, making it a hit at any gathering. Since that day, No Bake Cheesecake Bars have been my go-to dessert for celebratory occasions, summer picnics, and just because! Each bite is a little piece of heaven, and the simplicity of making them adds to their charm. This recipe is perfect for those moments when you want to impress but don’t want to spend hours in the kitchen.
Recipe Snapshot
4 hr 10 mins
10 mins
240 mins
Hard
250 kcal
4 g
Gluten-Free, Low FODMAP
15 g
8×8 inch pan, Mixing Bowls, Electric Mixer
Why This No Bake Cheesecake Bars Is So Good
Easy to Make
One of the reasons I love No Bake Cheesecake Bars is how straightforward they are to prepare. With just a few simple steps, you can whip up a stunning dessert that looks and tastes incredible. It’s as easy as mixing, pouring, and chilling!
Perfect for Any Occasion
Whether it’s a birthday party, a family gathering, or simply a quiet evening at home, these bars are adaptable. You can customize them with your favorite toppings like fresh berries, chocolate shavings, or a drizzle of caramel sauce.
Rich and Creamy Texture
The cream cheese base combined with heavy cream creates a luscious texture that’s oh-so-satisfying. It melts in your mouth, and the graham cracker crust adds a delightful crunch that contrasts beautifully with the smooth filling.
No Need for an Oven
Given how hot things can get in the kitchen during summer, the fact that this recipe doesn’t require any baking is a major plus. You can prepare these bars without heating up your home, making it a fantastic dessert for those warm days.
Great for Leftovers
If you manage to have any leftovers, they keep well in the fridge for several days. Each day, the flavors meld together, making them even more delicious over time.
Kid-Friendly Fun
This recipe is perfect for involving kids in the kitchen! They can help crush the graham crackers, mix the filling, and even decorate the bars. It’s a great way to make memories while teaching them some cooking skills.
What You Need for No Bake Cheesecake Bars
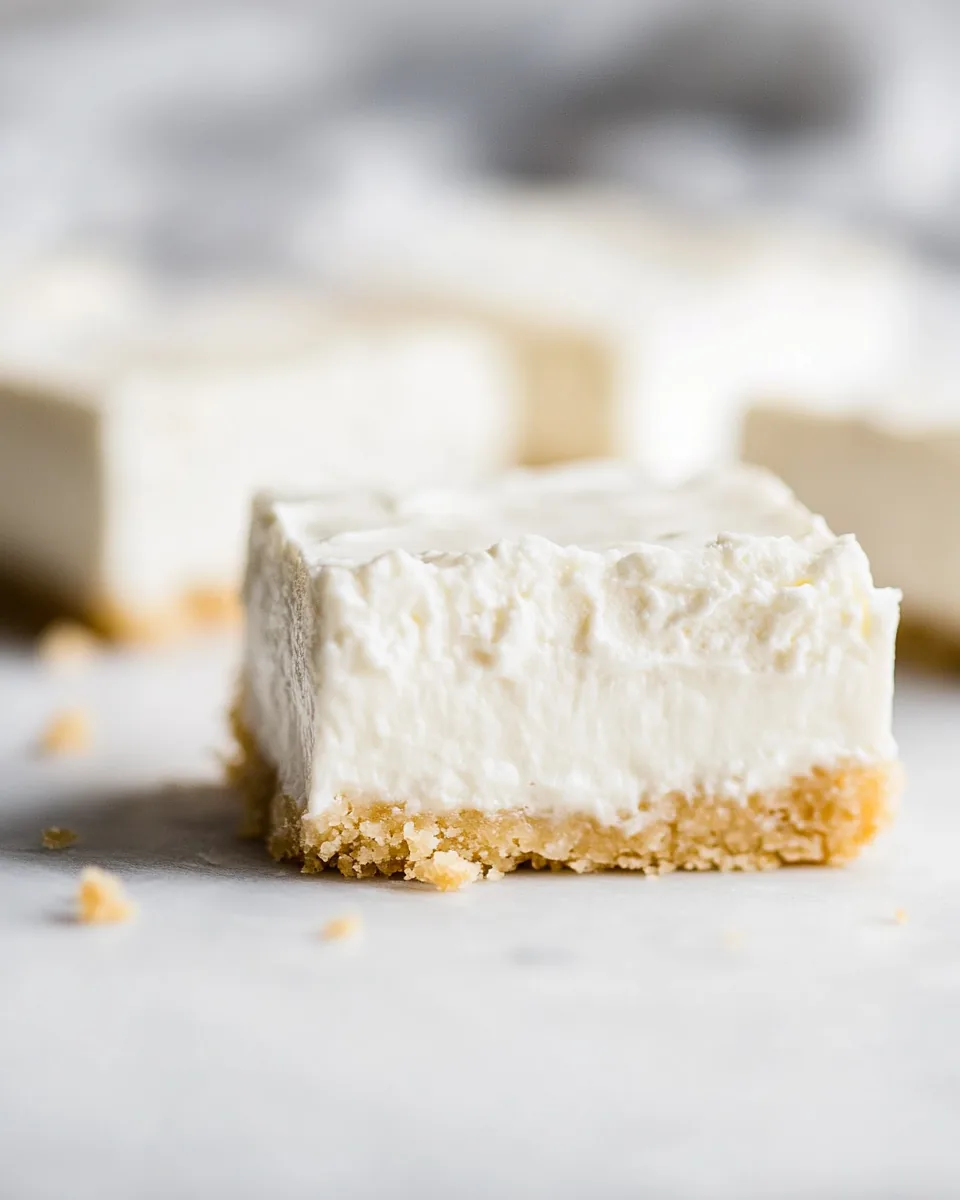
Gathering the right ingredients is the first step to making delicious No Bake Cheesecake Bars. Each ingredient plays a vital role in creating that perfect balance of creamy and crunchy. The key players here include cream cheese for richness, heavy whipping cream for fluffiness, and graham cracker crumbs for that iconic crust. Together, they create a dessert that’s not only delightful but also deeply satisfying.
- 1 1/2 cups graham cracker crumbs: This forms the base of your cheesecake bars, providing a crunchy contrast to the creamy filling.
- 2 tablespoons brown sugar: Adds a touch of sweetness and depth to the crust.
- 6 tablespoons unsalted butter, melted: Binds the crust ingredients together while adding richness.
- 16 ounces cream cheese: The heart of the cheesecake, bringing creamy texture and tangy flavor.
- 1/2 cup granulated sugar: Sweetens the filling, balancing the tang from the cream cheese.
- 1/4 cup sour cream: Adds a slight tang and enhances the creaminess of the filling.
- 1 teaspoon vanilla: Infuses the cheesecake mixture with a warm, sweet aroma.
- 1 teaspoon lemon juice, optional: Brightens the flavor profile, giving a fresh note to the bars.
- 1 cup heavy whipping cream: Whipped into soft peaks, it lightens the filling and adds volume.
Putting Together No Bake Cheesecake Bars
Making No Bake Cheesecake Bars is a delightful process that combines simple steps with satisfying results. Let’s dive into the instructions that will guide you through creating this irresistible dessert.
- In a small bowl, combine graham cracker crumbs, brown sugar, and melted butter. Stir until well combined and the mixture resembles wet sand. This step is crucial for achieving a firm crust that holds its shape.
- Press the crust mixture into the bottom of an 8 or 9-inch square pan or glass pie plate. Use your fingers or the bottom of a measuring cup to pack it in tightly. This ensures that the crust will hold together once it sets.
- Refrigerate the crust while you prepare the filling. This chilling time strengthens the crust and prevents it from crumbling when you cut the bars.
- In a large bowl, beat together cream cheese and granulated sugar using a hand or stand mixer. Scrape down the sides of the bowl to ensure everything is well mixed. This step is essential for a creamy filling without lumps.
- Once smooth and creamy, gently whisk in sour cream, vanilla, and lemon juice until combined. The addition of sour cream is key to achieving that rich cheesecake flavor.
- In a separate bowl, whip the heavy whipping cream until soft peaks form. This adds a lightness to the filling, making it airy yet rich.
- Fold the whipped cream into the cream cheese mixture in 3 to 4 increments. Be gentle during this process to maintain the fluffy texture of the whipped cream.
- Once fully combined, pour the cheesecake filling into the prepared crust. Smooth the top using a spatula, ensuring an even surface.
- Cover the pan with plastic wrap and refrigerate for at least 8 to 12 hours, or until fully set and cold. Patience is key here; letting it chill overnight is the best way to ensure the bars hold their shape.
- To serve, loosen the edges with a knife, slice into squares, and wipe the knife after each cut for clean edges. Top with whipped cream or fresh berries if desired. Enjoy the delightful contrast of the crust and creamy filling!
Things Worth Knowing
- This cheesecake bars recipe can be customized with different toppings such as chocolate ganache or fruit compote to suit your preferences.
- Make sure the cream cheese is at room temperature before mixing. This helps create a smoother filling.
- Allowing the heavy whipping cream to reach soft peaks before folding in is essential for lightness.
- For best results, refrigerate for the full 12 hours to allow the flavors to meld and the bars to set properly.
Change It Up
There are countless ways to mix things up with No Bake Cheesecake Bars. Whether you want to switch flavors or customize toppings, here are some ideas to inspire your creativity!
- Fruit Toppings: You can top your bars with fresh fruit such as strawberries, blueberries, or raspberries for a refreshing touch.
- Chocolate Drizzle: Drizzle melted chocolate over the top for an added indulgence. This pairs wonderfully with the creamy filling.
- Flavored Cream Cheese: Try using flavored cream cheese options, like strawberry or chocolate, to add a twist to your bars.
- Nut Crust: Experiment with a nut-based crust by using ground almonds or walnuts instead of graham cracker crumbs.
- Mini Bars: Make mini versions in a muffin tin for individual servings that are perfect for parties!
- Spices: Add a pinch of cinnamon or nutmeg to the filling for a warm, cozy flavor that adds depth.
- Layering: For a fun presentation, consider layering different flavors of cheesecake in the same pan.
What to Serve Alongside No Bake Cheesecake Bars
When it comes to serving No Bake Cheesecake Bars, the options are as delightful as the bars themselves! Here are some ideas to elevate your serving experience:
- Fresh Fruit: Serve alongside slices of fresh fruit like strawberries, kiwi, or mango, which contrast beautifully with the creaminess of the cheesecake.
- Complementary Desserts: Pair with lighter desserts like sorbet or fruit tarts for a balanced dessert table.
- Affogato: For a unique twist, serve with a scoop of vanilla ice cream topped with hot espresso for a delicious affogato experience.
- Cheese Platter: Create a dessert cheese platter with various cheeses, nuts, and dried fruits for an elegant touch.
- Seasonal Events: These bars are perfect for summer barbecues and family gatherings, providing a refreshing end to any meal.
- Picnic Treat: Pack them for a picnic! They transport well and can be enjoyed anywhere.
- Drinks: Pair with iced tea or lemonade for a refreshing beverage option that complements the sweetness of the bars.
FAQ
Conclusion
The No Bake Cheesecake Bars are truly a delightful treat that brings joy to any occasion. Their creamy texture combined with a crunchy crust makes for a perfect dessert experience. I encourage you to try this recipe for your next gathering or simply to satisfy your sweet tooth. You won’t regret it, and I’m sure everyone will be asking for seconds!
No Bake Cheesecake Bars
Equipment
- 8×8-inch Pan
- Mixing Bowls
- Electric Mixer
Ingredients
- 1.5 cup Graham cracker crumbs
- 2 tablespoons Brown sugar
- 6 tablespoons Unsalted butter melted
- 16 ounces Cream cheese at room temperature
- 0.5 cup Granulated sugar
- 0.25 cup Sour cream
- 1 teaspoon Vanilla
- 1 teaspoon Lemon juice optional
- 1 cup Heavy whipping cream
Instructions
- In a small bowl, combine graham cracker crumbs, brown sugar, and melted butter. Stir until well combined and the mixture resembles wet sand.
- Press the crust mixture into the bottom of an 8 or 9-inch square pan or glass pie plate and refrigerate.
- In a large bowl, beat together cream cheese and granulated sugar using a hand or stand mixer. Scrape down the sides of the bowl to ensure everything is well mixed.
- Gently whisk in sour cream, vanilla, and lemon juice until combined.
- In a separate bowl, whip the heavy whipping cream until soft peaks form.
- Fold the whipped cream into the cream cheese mixture in 3 to 4 increments.
- Pour the cheesecake filling into the prepared crust and smooth the top.
- Cover the pan with plastic wrap and refrigerate for at least 8 to 12 hours, or until fully set and cold.
- To serve, loosen the edges with a knife, slice into squares, and wipe the knife after each cut. Top with whipped cream or fresh berries if desired.
Notes
- Storage: These bars can be stored in the refrigerator for up to 5 days.
- Freezing: You can freeze the cheesecake bars for up to one month; just thaw in the refrigerator before serving.
- Pairing: These bars pair perfectly with fresh fruit or a dollop of whipped cream.
- Customization: Feel free to experiment with different toppings or flavors to suit your taste.
- Presentation: For an elegant touch, serve with a sprinkle of powdered sugar on top.