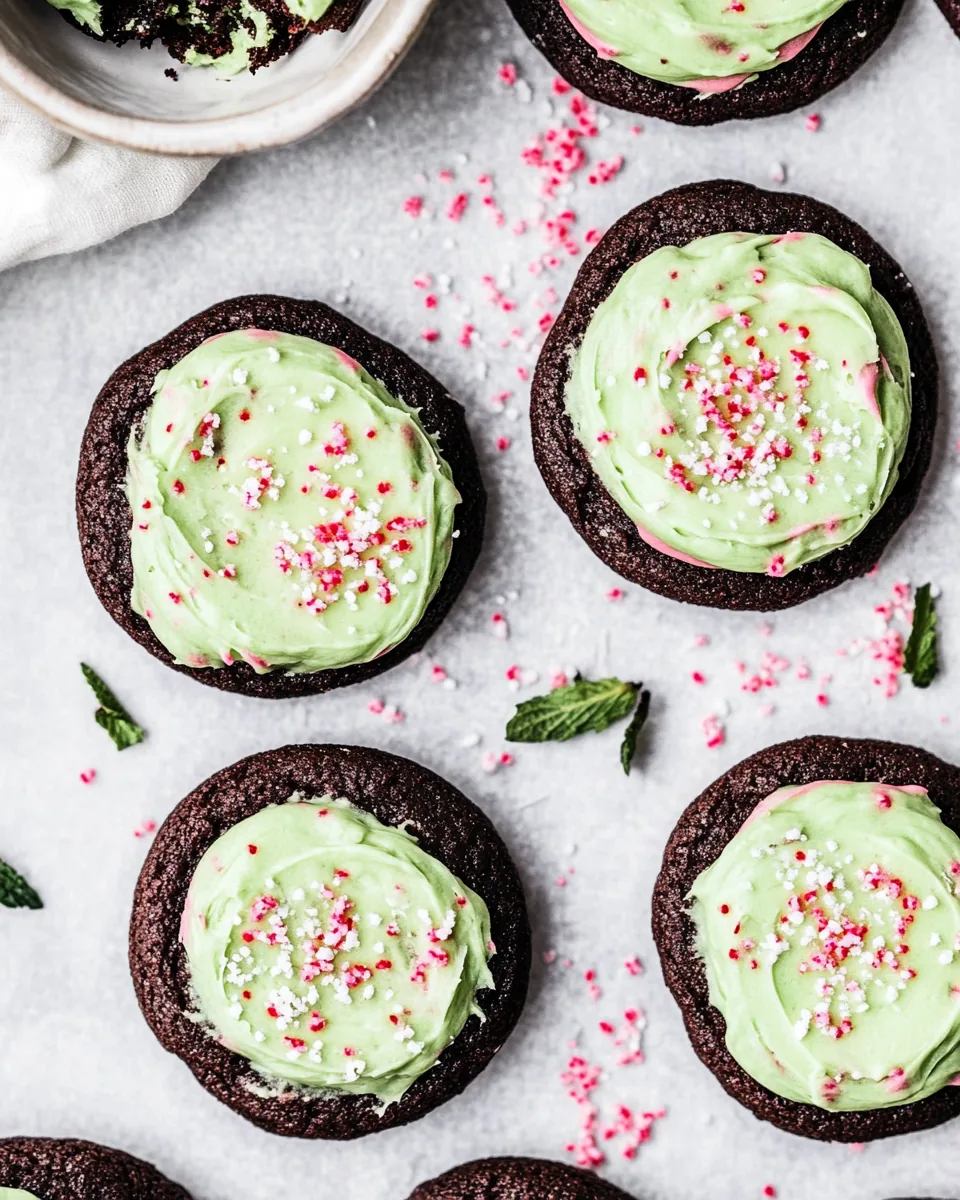
Mint Chocolate Cookies
The holiday season comes with an array of delightful aromas wafting through the kitchen, but nothing quite compares to the joy of baking Mint Chocolate Cookies. I remember the first time I made these scrumptious treats with my family. It was a chilly winter evening, and we decided to fill the kitchen with the sweet scent of chocolate and mint. We gathered around the kitchen counter, measuring out flour and cocoa powder, laughter bubbling as we mixed the ingredients together. Each scoop of dough was a promise of the delicious cookies that would soon fill our home.
As the cookies baked, the warm, minty aroma enveloped us, inviting everyone to come closer and sneak a taste. The best part? The mint frosting that transformed these cookies into a festive delight. With crushed candy canes sprinkled on top, they became the perfect addition to our holiday gatherings. Every bite took me back to those cozy moments, and I can’t wait to share this recipe with you so you can create your own cherished memories with Mint Chocolate Cookies.
Recipe Snapshot
45 mins
35 mins
10 mins
Medium
150 kcal
2g g
Vegan, Gluten-Free, AIP
7g g
Frying Pan, Whisk, Oven, Chef’s Knife, Mixing Bowl, Baking Sheet
The Charm of This Mint Chocolate Cookies
Festive Flavor Combination
There’s something magical about the combination of mint and chocolate. Together, they create a taste that’s both refreshing and indulgent. This pairing is especially beloved during the winter season, making Mint Chocolate Cookies a perfect treat for holiday gatherings.
Perfect for Sharing
These cookies are a great way to spread joy among friends and family. Whether you’re hosting a holiday party or just want to bring a smile to someone’s face, sharing a batch of Mint Chocolate Cookies is a heartfelt gesture that’s sure to be appreciated.
Customizable Fun
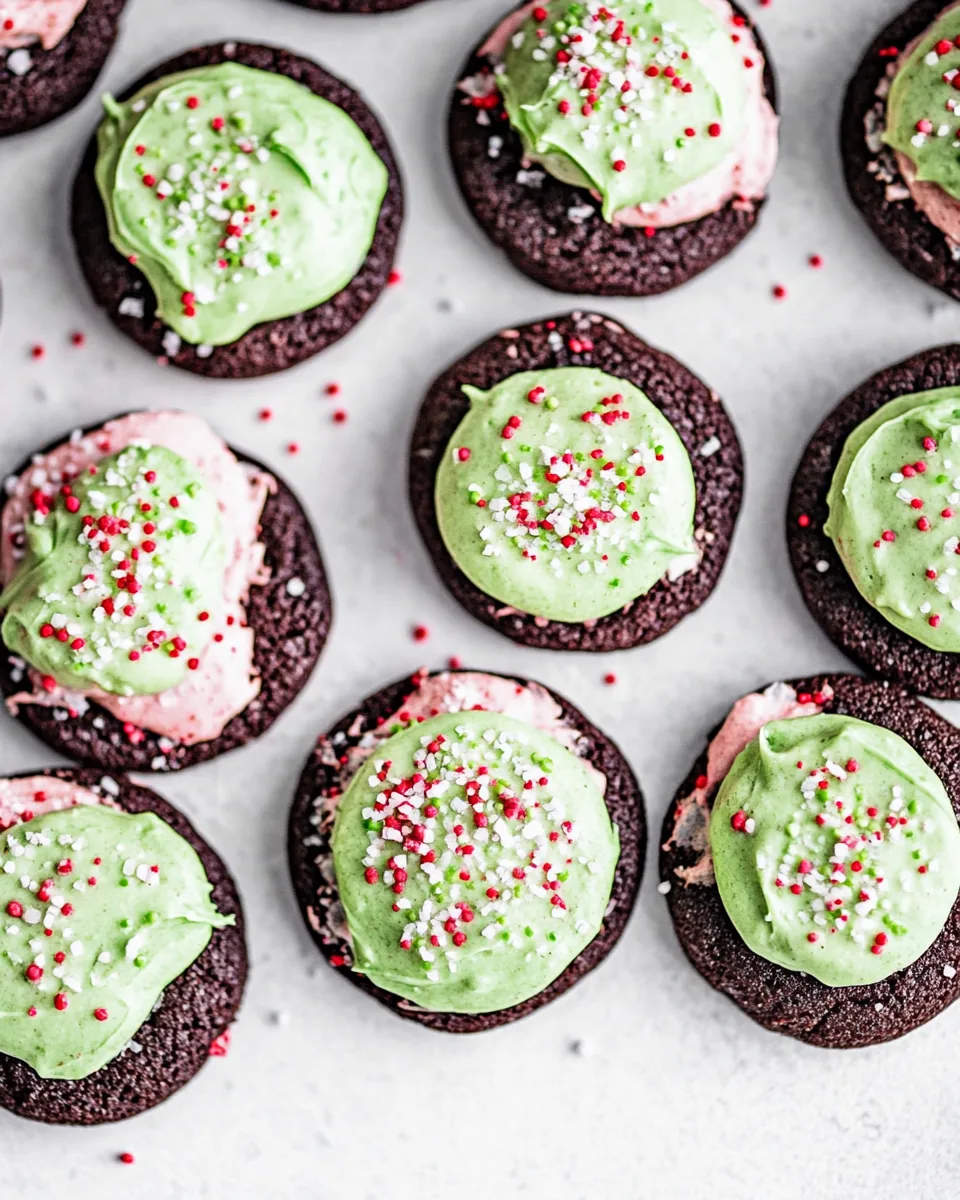
You can easily customize your Mint Chocolate Cookies by experimenting with different toppings. Consider adding crushed candy canes, colorful sprinkles, or even chocolate chips to make them uniquely yours. This recipe is as versatile as it is delicious!
Easy to Make
Even if you’re new to baking, you’ll find that making these cookies is a straightforward process. The steps are simple and allow for creativity, making it a fun activity for bakers of all levels.
Great for Any Occasion
While Mint Chocolate Cookies shine during the holiday season, they’re delightful year-round. Whether it’s a summer BBQ or a cozy winter night, these cookies can brighten any occasion.
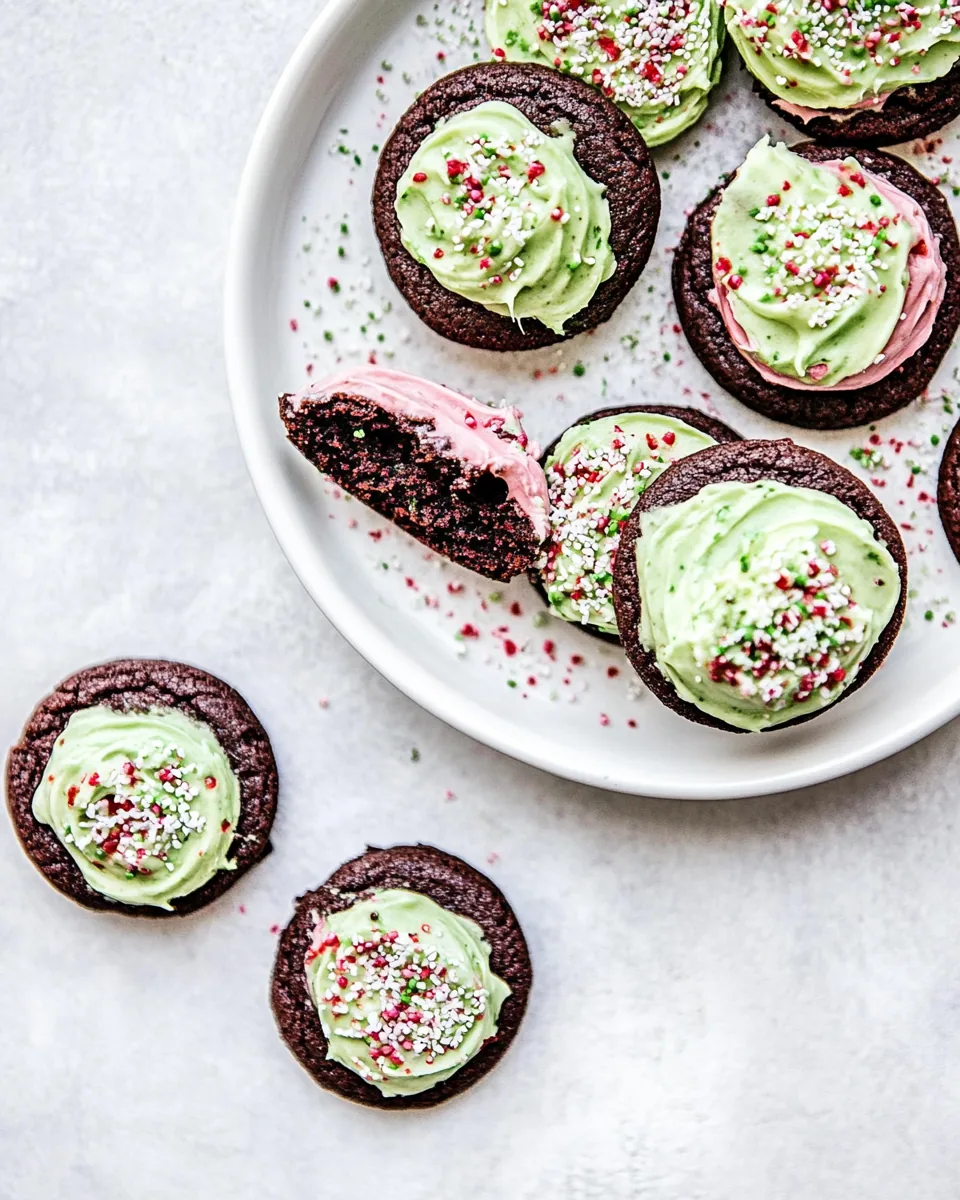
Delightful Presentation
With their vibrant colors and festive decorations, Mint Chocolate Cookies are visually appealing as well as tasty. They make an excellent addition to dessert tables and are perfect for gifting.
Ingredients for Mint Chocolate Cookies
The ingredients for Mint Chocolate Cookies come together beautifully to create a rich, flavorful cookie. Each component plays a vital role in achieving that perfect balance between sweetness and minty freshness. You’ll appreciate how the combination of dry and wet ingredients melds to produce a delectable cookie dough that bakes into something truly special.
- All-purpose flour: 2 cups – The foundation of our cookie dough, providing structure and texture.
- Unsweetened cocoa powder: ? cup – Adds rich chocolate flavor to the cookies.
- Baking soda: 1 teaspoon – Helps the cookies rise and become fluffy.
- Salt: ¼ teaspoon – Enhances the flavors, balancing the sweetness.
- Butter: 1 cup, at room temperature – Adds richness and helps create a soft texture.
- Brown sugar: 1 cup, packed – Provides moisture and a deeper sweetness.
- Granulated sugar: ¾ cup – Contributes to sweetness and texture.
- Egg: 1 – Binds the ingredients together and adds moisture.
- Vanilla extract: ½ teaspoon – Adds a warm, aromatic flavor to the cookies.
- Peppermint extract: ¼ teaspoon – Infuses the cookies with a minty freshness.
- Butter: ¾ cup, at room temperature (for frosting) – Essential for creamy texture in frosting.
- Powdered sugar: 1 ½ to 2 cups – Sweetens the frosting and creates its fluffy consistency.
- Peppermint extract: ½ teaspoon (for frosting) – Enhances the mint flavor in the frosting.
- Milk: 1 to 2 tablespoons – Adjusts the consistency of the frosting.
- Natural green food dye: to color the frosting – Adds a festive touch.
- Natural red food dye: to color the frosting – Adds more color for decoration.
- Crushed candy canes: for topping – Provides a crunchy texture and festive flavor.
- Chopped Andes mints: for topping – Adds an extra layer of chocolate and mint flavor.
- Red & green sprinkles: for topping – Make the cookies visually appealing and festive.
How to Cook Mint Chocolate Cookies
Making Mint Chocolate Cookies is a fun and rewarding process. With just a few simple steps, you’ll create delicious cookies that are sure to impress. Let’s dive into the details!
- Preheat your oven to 350 degrees F. This is an essential step to ensure your cookies bake evenly. While the oven heats, line a large baking pan with parchment paper to prevent sticking.
- In a large bowl, whisk together the flour, cocoa powder, baking soda, and salt. Mixing these dry ingredients first helps ensure that the baking soda is evenly distributed throughout the batter.
- In the bowl of an electric mixer, cream together the butter and sugars until the mixture is light and fluffy, about 1 to 2 minutes. This process incorporates air into the dough, making for a soft and tender cookie.
- Add in the egg, vanilla extract, and peppermint extract to the creamy butter mixture. Beat until everything is well combined and smooth, which should take about 30 seconds.
- Gradually add the dry ingredients to the wet mixture, mixing on medium-low speed until just combined. Be careful not to overmix, as this can lead to tough cookies.
- Cover the dough and chill it in the refrigerator for 30 minutes. Chilling the dough firms it up, making it easier to scoop and shape.
- After the dough has chilled, use a cookie scoop to grab about 2 tablespoons of dough. Roll it into balls and place them on the prepared cookie sheet, leaving at least 2 inches between each ball to allow for spreading.
- Bake the cookies in the preheated oven for 10 to 12 minutes. Look for edges that are set and may begin to crack. This ensures a perfect texture that’s crisp on the outside and chewy on the inside.
- Once baked, remove the cookies from the oven and let them cool on the baking sheet for 5 to 10 minutes before transferring them to a wire rack. This step allows them to set and harden at the edges.
- After the cookies have cooled completely, it’s time to frost them. In the bowl of an electric mixer, add the softened butter and powdered sugar and beat on high for about 1 minute. The frosting should be fluffy and creamy.
- Add the remaining peppermint extract and 1 tablespoon of milk to the frosting. Beat slowly at first, then increase to medium-high speed until creamy. If you want a creamier frosting, add another teaspoon of milk and mix again.
- To make colored frosting, divide the frosting into two separate bowls. Add a few drops of green food coloring to one bowl and red to the other. Whisk until the colors are well incorporated.
- Frost the cookies and sprinkle with your choice of toppings: crushed candy canes, chopped Andes mints, or festive sprinkles!
- Enjoy your homemade Mint Chocolate Cookies!
Things Worth Knowing
- Chilling the Dough: Chilling the cookie dough is essential for achieving the right texture. It helps prevent the cookies from spreading too much while baking, resulting in a thicker, chewier cookie.
- Room Temperature Ingredients: Using room temperature butter and eggs helps create a better emulsion, resulting in a smoother batter and better texture.
- Measuring Flour: Be sure to spoon and level your flour instead of scooping directly from the bag to avoid packing it down, which can lead to dry cookies.
- Keeping Cookies Fresh: Store baked cookies in an airtight container at room temperature to keep them fresh and soft.
Make It Your Own

Every baker has their own unique touch! Here are some suggestions for customizing your Mint Chocolate Cookies:
- Storage: Keep your cookies in an airtight container at room temperature for up to one week to maintain freshness.
- Freezing: You can freeze unbaked cookie dough for up to three months. Just scoop the dough onto a baking sheet, freeze until firm, and then transfer to a freezer bag.
- Variations: Experiment with different toppings like nuts or chocolate chips for added texture and flavor.
- Gluten-Free Option: Substitute regular all-purpose flour with gluten-free measure-for-measure flour for a gluten-free version.
- Dairy-Free Option: Use vegan butter and a dairy-free milk alternative in the frosting for a dairy-free treat.
- Flavor Enhancements: Add a teaspoon of espresso powder to intensify the chocolate flavor.
What to Serve With Mint Chocolate Cookies
When it comes to serving Mint Chocolate Cookies, the possibilities are endless!
- Holiday Platter: Include these cookies on a festive dessert platter alongside other holiday treats like brownies and cupcakes for a delightful dessert spread.
- After-Dinner Treat: Serve with a cup of warm cocoa or peppermint tea for a cozy end to a winter meal.
- Picnic Delight: Pack these cookies for a summer picnic; they’re a hit with friends and family alike!
- Gift Giving: Place them in a decorative box or tin to make a thoughtful homemade gift for friends and neighbors.
- Seasonal Events: Perfect for holiday parties, birthdays, or any gathering where you want to impress.
- School Functions: These cookies are a great addition to bake sales or classroom treats, as they’re always a favorite among kids.
FAQ
Conclusion
Making Mint Chocolate Cookies is a wonderful way to create joy in your kitchen. These cookies not only represent the festive spirit of the season but also offer a delightful treat that’s perfect for any occasion. I truly encourage you to try making them yourself. You’ll find that the combination of mint and chocolate brings an irresistible flavor that everyone will love!
Mint Chocolate Cookies
Equipment
- Frying Pan
- Whisk
- Oven
- Chef's Knife
- Mixing Bowl
- Baking Sheet
Ingredients
- 2 cups All-purpose flour
- ? cup Unsweetened cocoa powder
- 1 teaspoon Baking soda
- ¼ teaspoon Salt
- 1 cup Butter, at room temperature
- 1 cup Brown sugar, packed
- ¾ cup Granulated sugar
- 1 Egg
- ½ teaspoon Vanilla extract
- ¼ teaspoon Peppermint extract
- ¾ cup Butter, at room temperature (for frosting)
- 1 ½ to 2 cups Powdered sugar
- ½ teaspoon Peppermint extract (for frosting)
- 1 to 2 tablespoons Milk
- Natural green food dye to color the frosting
- Natural red food dye to color the frosting
- Crushed candy canes for topping
- Chopped Andes mints for topping
- Red & green sprinkles for topping
Instructions
- Preheat your oven to 350 degrees F. This is an essential step to ensure your cookies bake evenly. While the oven heats, line a large baking pan with parchment paper to prevent sticking.
- In a large bowl, whisk together the flour, cocoa powder, baking soda, and salt. Mixing these dry ingredients first helps ensure that the baking soda is evenly distributed throughout the batter.
- In the bowl of an electric mixer, cream together the butter and sugars until the mixture is light and fluffy, about 1 to 2 minutes. This process incorporates air into the dough, making for a soft and tender cookie.
- Add in the egg, vanilla extract, and peppermint extract to the creamy butter mixture. Beat until everything is well combined and smooth, which should take about 30 seconds.
- Gradually add the dry ingredients to the wet mixture, mixing on medium-low speed until just combined. Be careful not to overmix, as this can lead to tough cookies.
- Cover the dough and chill it in the refrigerator for 30 minutes. Chilling the cookie dough is essential for achieving the right texture. It helps prevent the cookies from spreading too much while baking, resulting in a thicker, chewier cookie.
- After the dough has chilled, use a cookie scoop to grab about 2 tablespoons of dough. Roll it into balls and place them on the prepared cookie sheet, leaving at least 2 inches between each ball to allow for spreading.
- Bake the cookies in the preheated oven for 10 to 12 minutes. Look for edges that are set and may begin to crack. This ensures a perfect texture that’s crisp on the outside and chewy on the inside.
- Once baked, remove the cookies from the oven and let them cool on the baking sheet for 5 to 10 minutes before transferring them to a wire rack. This step allows them to set and harden at the edges.
- After the cookies have cooled completely, it’s time to frost them. In the bowl of an electric mixer, add the softened butter and powdered sugar and beat on high for about 1 minute. The frosting should be fluffy and creamy.
- Add the remaining peppermint extract and 1 tablespoon of milk to the frosting. Beat slowly at first, then increase to medium-high speed until creamy. If you want a creamier frosting, add another teaspoon of milk and mix again.
- To make colored frosting, divide the frosting into two separate bowls. Add a few drops of green food coloring to one bowl and red to the other. Whisk until the colors are well incorporated.
- Frost the cookies and sprinkle with your choice of toppings: crushed candy canes, chopped Andes mints, or festive sprinkles!
- Enjoy your homemade Mint Chocolate Cookies!