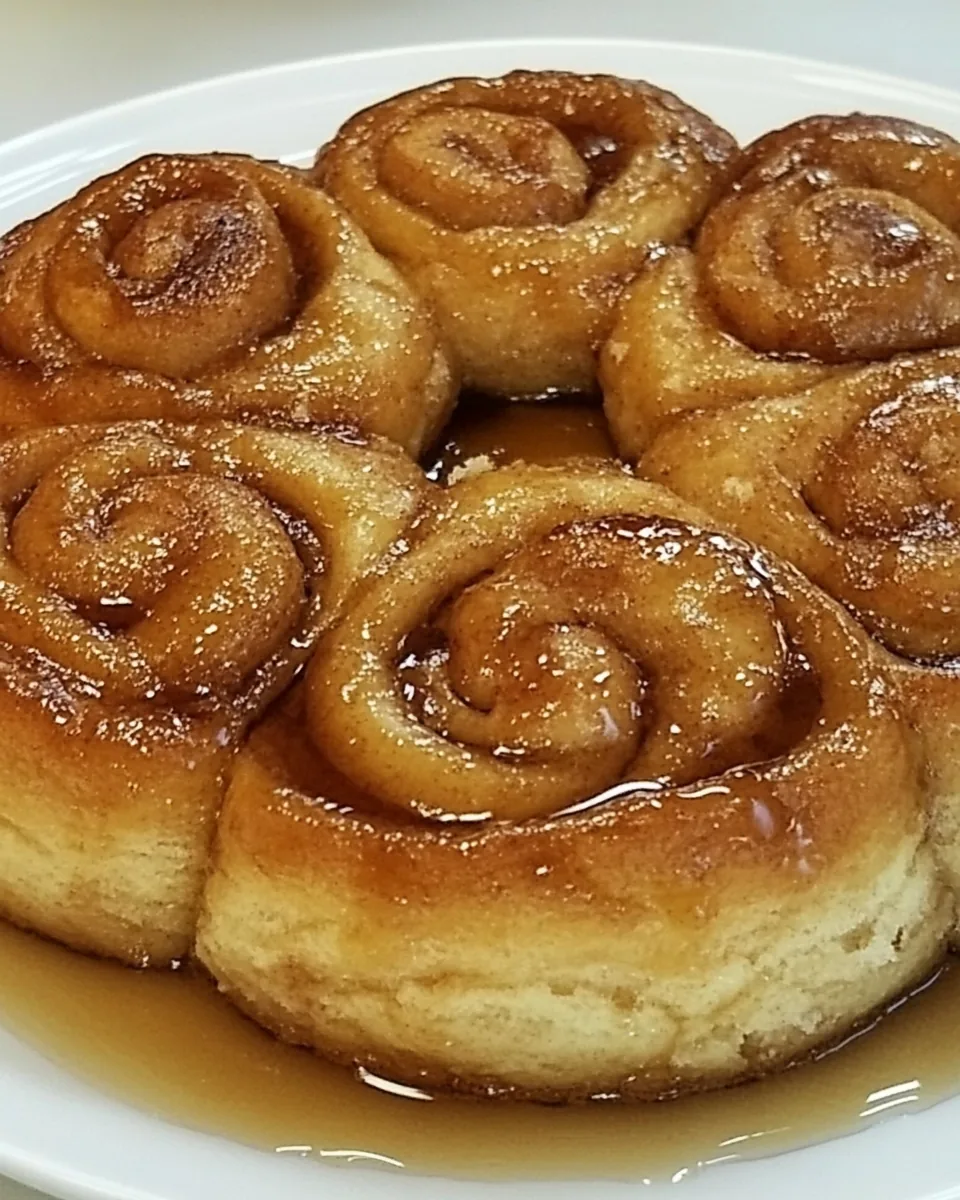
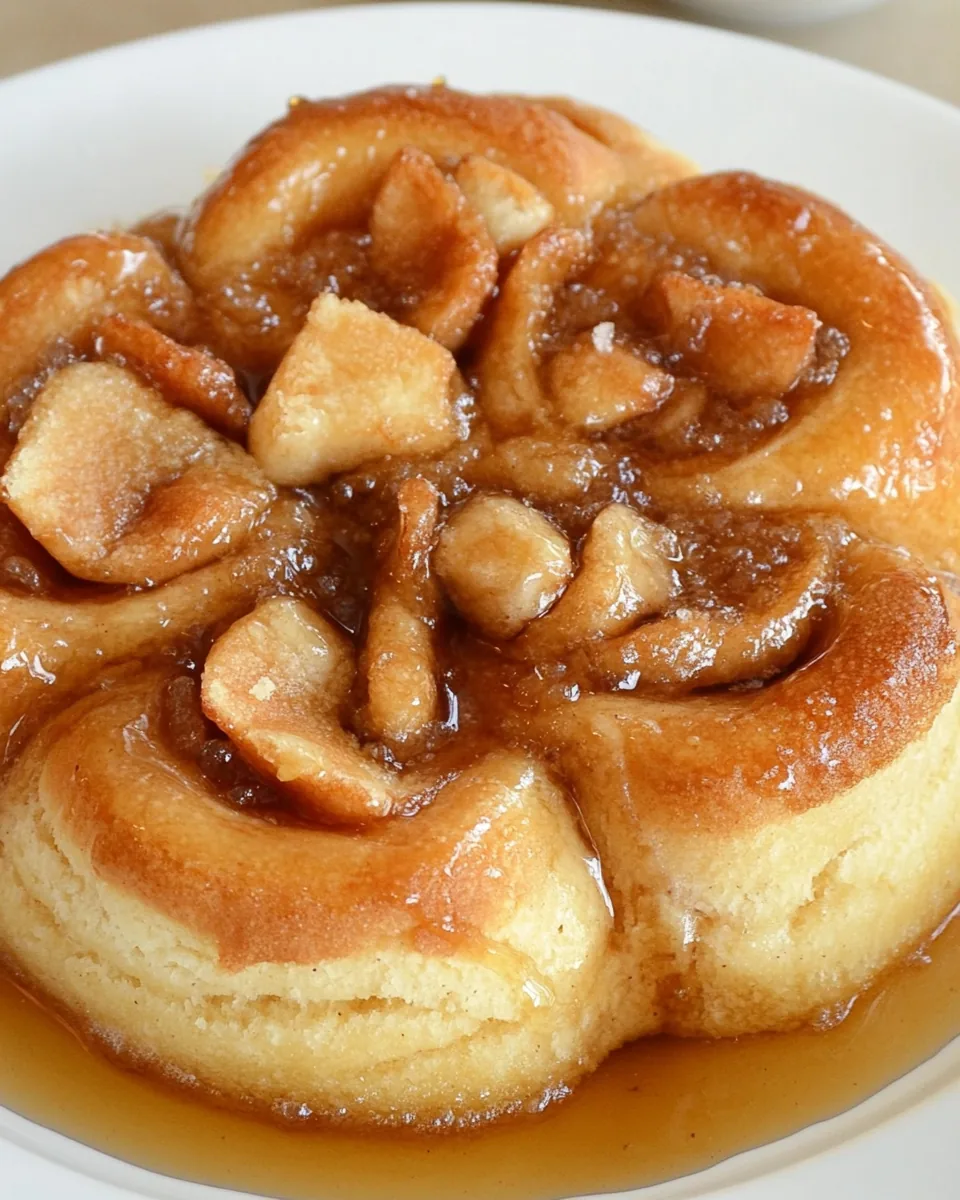
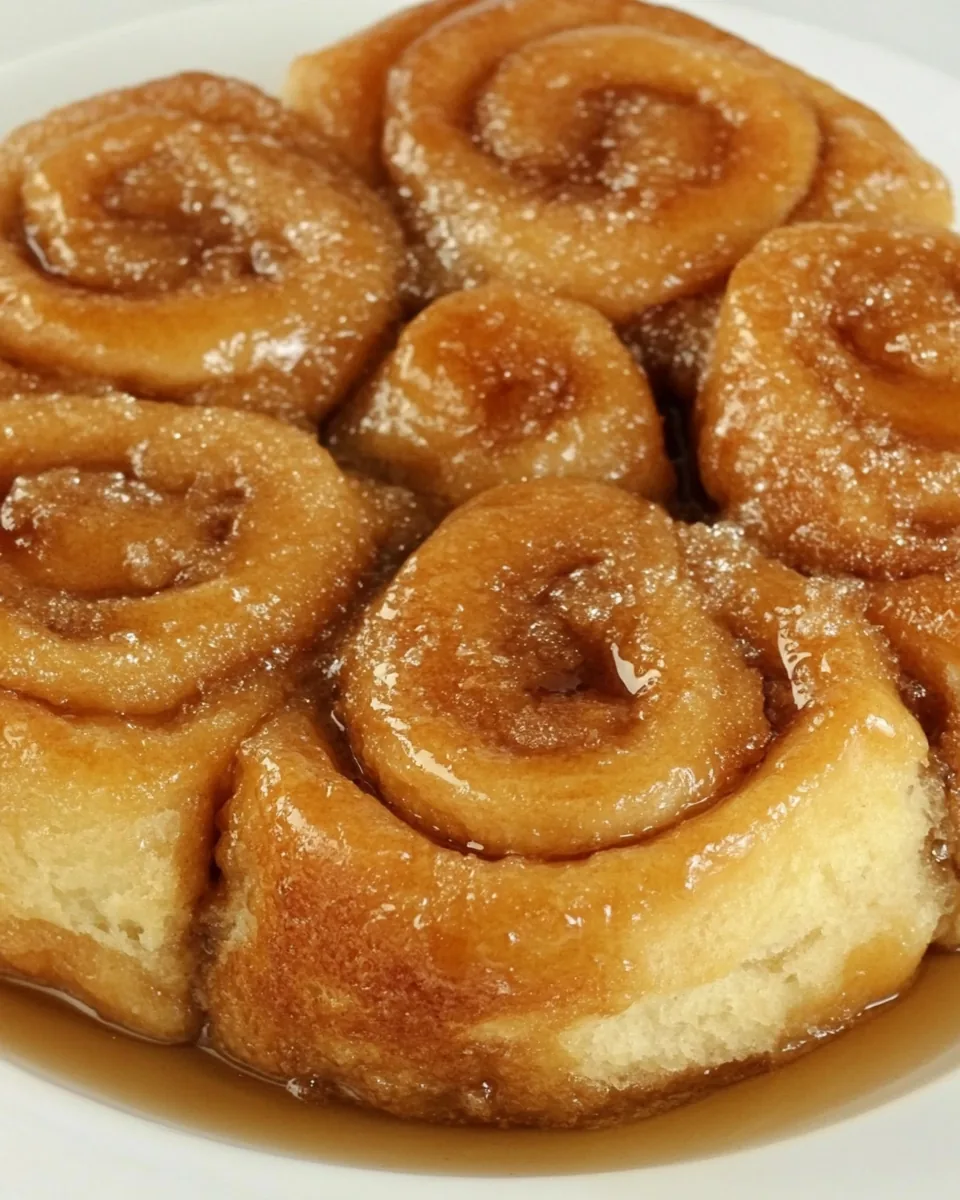
Maple Syrup Sticky Buns
There’s something magical about the smell of fresh-baked Maple Syrup Sticky Buns wafting through the house. It takes me back to my childhood, where weekend mornings were filled with the sweet aroma of dough rising and the anticipation of a warm, gooey treat. My family had a special tradition of enjoying these delightful buns together, often topped with a drizzle of maple syrup that made them even more irresistible. I remember gathering around the table, the chatter of laughter, and the satisfaction of pulling apart those warm, sticky pieces, each bite melting in our mouths. Whether it was a lazy Sunday brunch or a holiday gathering, Maple Syrup Sticky Buns were always the star of the show, bringing everyone together to share in the joy and comfort of good food.
Recipe Snapshot
30 mins
0 mins
30 mins
Medium
250 kcal
5 g
Gluten-Free, Low FODMAP
10 g
Frying Pan, Oven, Wooden Spoon, Mixing Bowl, Baking Sheet
Why This Maple Syrup Sticky Buns Shines
They’re Irresistibly Sweet
One of the first things that draws you to Maple Syrup Sticky Buns is their irresistible sweetness. The combination of rich, buttery dough and the caramelized glaze creates a flavor explosion that’s hard to resist. Every bite is a perfect blend of sweetness that isn’t overpowering, making them ideal for breakfast or dessert.
Perfect for Any Occasion
These sticky buns are incredibly versatile and fit for any occasion. Whether you’re hosting a brunch, celebrating a holiday, or simply want a special treat to brighten your day, Maple Syrup Sticky Buns never disappoint. They elevate any gathering and make it feel extra special.
Made with Love
There’s something about making Maple Syrup Sticky Buns that brings a sense of joy. The process of mixing, kneading, and watching the dough rise is therapeutic. It’s a labor of love that allows you to pour your heart into each step, resulting in a batch of sticky buns that’s not just delicious but also made with care.
Fun to Make
Making these buns can be a fun experience! Get the kids involved in rolling the dough or sprinkling the cinnamon sugar. It becomes a family activity, filled with laughter and creativity. Plus, everyone loves the reward of indulging in these treats afterward!
Excellent Leftovers
If you’re lucky enough to have any leftovers, they taste just as good the next day. Simply reheat them for that fresh-baked flavor, and they will still be soft and gooey. They also freeze well, so you can enjoy them at a later time, making them a great make-ahead option for busy mornings.
Healthier Options Available
If you’re looking for a healthier alternative, you can easily adapt the recipe. Use whole wheat flour or reduce the sugar without sacrificing flavor. This way, you can indulge without the guilt, making Maple Syrup Sticky Buns a treat you can enjoy more often!
What’s In This Maple Syrup Sticky Buns
When it comes to Maple Syrup Sticky Buns, the ingredients play a crucial role in creating that soft, sticky texture we all love. Each ingredient works harmoniously to build flavor and consistency. The key players include flour for structure, yeast for that delightful rise, and of course, maple syrup for that signature sweetness. Together, they create a taste that’s comforting and nostalgic.
- 1 cup warm water (105-115º): This serves as the base for activating the yeast, ensuring your buns rise to fluffy perfection.
- 4 teaspoons dry yeast: Essential for fermentation, the yeast makes the dough rise, giving it that light and airy texture.
- ⅔ cup sugar: Adds sweetness to the dough and helps with browning the buns during baking.
- ½ cup butter (one stick), at room temperature: Provides rich flavor and moisture, making the buns tender and delicious.
- ½ cup nonfat dried milk powder: Enhances the dough’s richness and contributes to a soft texture without adding extra liquid.
- 1 teaspoon salt: Balances the sweetness and strengthens the dough structure.
- 2 eggs: Act as a binding agent, enriching the dough and contributing to its overall texture.
- 4 ¼ cups flour plus more for dusting work surfaces: The main ingredient that gives structure to the buns. The right amount will keep them soft yet sturdy.
Putting Together Maple Syrup Sticky Buns
Making Maple Syrup Sticky Buns is a delightful process that combines simple ingredients into a warm, comforting treat. Let’s dive into the steps that will lead you to your own batch of heavenly buns!
- Start by mixing the warm water, yeast, and a pinch of sugar in a small bowl. Allow it to sit for about 5 minutes until it becomes foamy. This shows that your yeast is active and ready to go.
- In a stand mixer fitted with the paddle attachment, combine the remaining sugar, butter, milk powder, and salt. Beat until well combined, ensuring that the butter is fully incorporated for a creamy mixture.
- Add the eggs, one at a time, mixing well after each addition. This will create a rich, cohesive batter.
- Stir in the yeast mixture that you set aside earlier, followed by 3 cups of the flour, one cup at a time. Make sure to scrape down the sides of the bowl as needed to keep everything blended.
- Gradually mix in the final cup of flour and let the mixer run for about 5 minutes. The dough will be sticky, which is great for achieving that fluffy texture.
- Butter a large bowl and add the dough, turning it so that the exterior is coated with butter. This prevents sticking as it rises.
- Cover the bowl with plastic wrap and let the dough rise in a warm area until it doubles in size, which should take about 2 and a half hours. You can also use a warm oven to speed up the process.
- While waiting, prepare the glaze by beating together brown sugar, ½ cup of butter, maple syrup, corn syrup, and water until well combined. Divide this glaze between two greased 9-inch cake pans.
- In a separate bowl, mix together cinnamon and sugar. Set this aside for later use.
- Once the dough has risen, punch it down and divide it in half. Roll each half into a 9 x 12-inch rectangle on a lightly floured surface. Spread each rectangle with the remaining butter, dividing it equally, and then sprinkle each with half of the cinnamon sugar mixture.
- Starting from the long side, roll each rectangle tightly into a log. Cut one log into 12 even pieces and place them cut side down into one of the prepared pans. Repeat with the second log, ensuring even placement in the pan.
- Cover with plastic wrap and let the buns rise in a warm area until they double in size again, about an hour.
- Preheat your oven to 375º and prepare to bake! Once fully risen, bake the buns until golden brown, about 30 minutes. If they start browning too quickly, you can lower the temperature to 325º for the last 10 minutes to ensure even cooking.
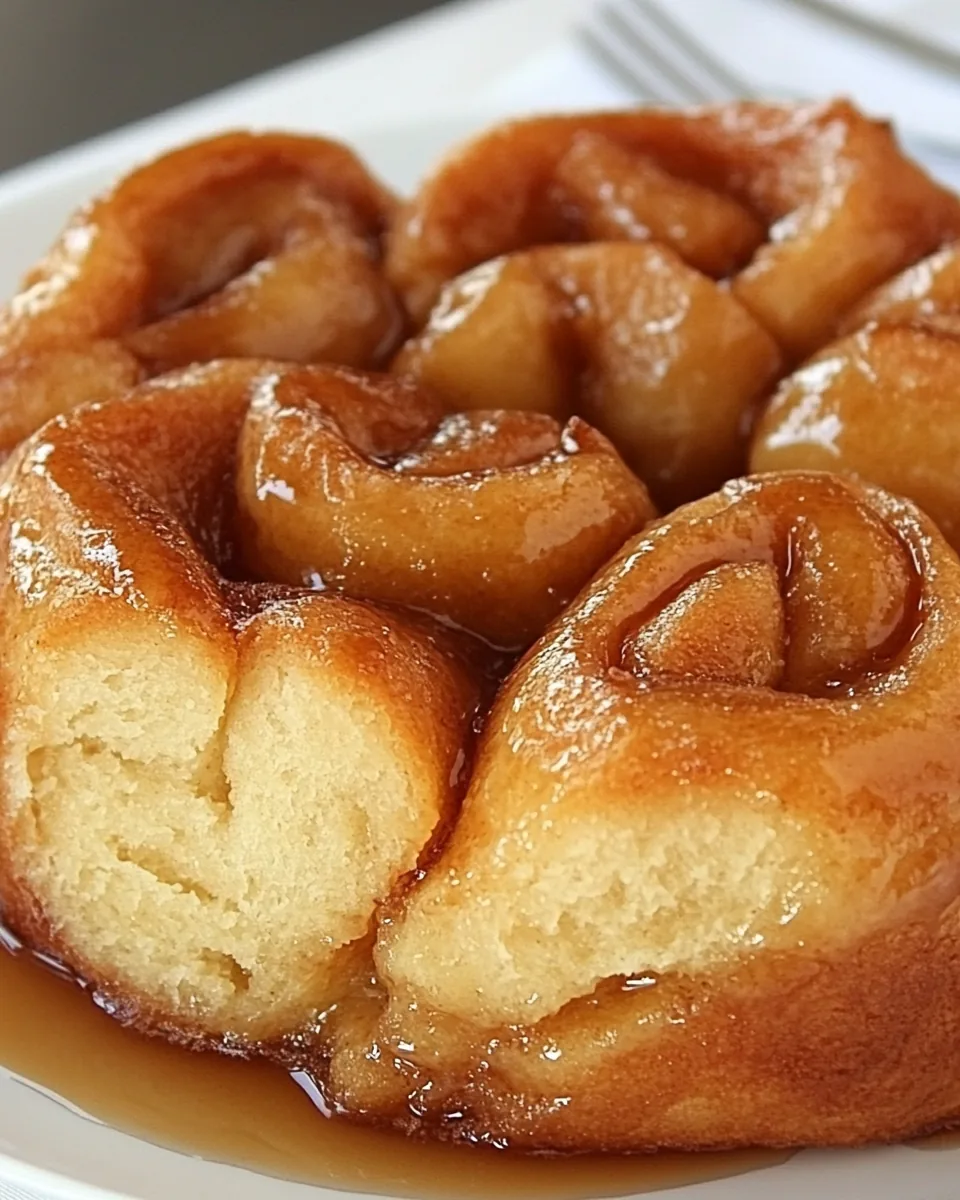
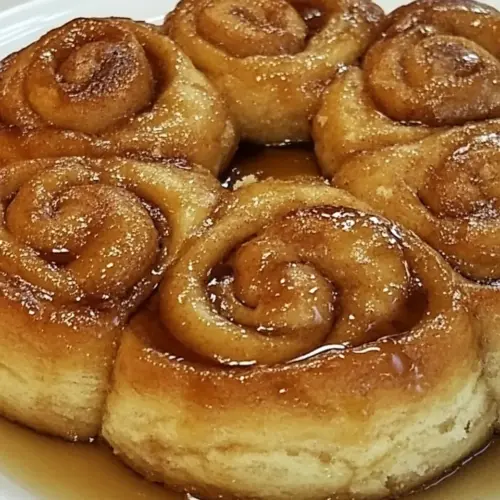
- After baking, run a knife around the perimeter of the pans and carefully invert them onto serving dishes. Allow them to cool for about 30 minutes before serving, letting the glaze soak in.
Things Worth Knowing
- Yeast Temperature: Ensure that your warm water is at the correct temperature (105-115º) to activate the yeast. Too hot or too cold can hinder rising.
- Kneading: Kneading for about 5 minutes develops gluten, which gives the dough its structure and chewiness. If you knead by hand, be patient and thorough.
- Rising Time: The dough needs time to rise, so find a warm spot to encourage fermentation. This can significantly affect the texture of the buns.
- Glazing: When glazing, ensure the buns are still warm to absorb the glaze better, making them extra sticky and sweet.
- Storage: Store any leftovers in an airtight container at room temperature for 2 to 3 days, or in the fridge for up to a week.
How to Switch It Up
If you’re looking to add a personal touch to your Maple Syrup Sticky Buns, here are some tips to consider:
- Storage: Store leftovers in an airtight container. They taste delicious even the next day!
- Freezing: You can freeze the baked buns for up to a month. Just reheat them in the oven before serving for that fresh-baked taste.
- Pairing: Serve your Maple Syrup Sticky Buns with a side of fresh fruit or a dollop of whipped cream for an added touch.
- Flavor Variations: Feel free to mix in chopped nuts or dried fruit into the filling for extra texture and flavor.
- Toppings: Consider drizzling with chocolate or adding cream cheese frosting on top for a decadent twist!
How to Enjoy Maple Syrup Sticky Buns
- For Breakfast: Enjoy these buns fresh out of the oven with a hot cup of coffee or tea for a cozy morning treat.
- Brunch Parties: Perfect as a centerpiece for brunch gatherings, they’ll impress your guests and keep everyone satisfied.
- Snack Time: Ideal for an afternoon snack, these sticky buns are great on their own or with a smear of butter.
- Holiday Celebrations: Bring these to family gatherings during the holidays; they’re sure to be a hit!
- Storage Tips: Keep uneaten buns wrapped in foil or in a sealed container to maintain their freshness.
- Seasonal Pairing: Serve with a side of spiced apple cider for a fall-inspired experience.
FAQ
Conclusion
The Maple Syrup Sticky Buns are not just a treat; they are a warm embrace in the form of food. They bring people together, create memories, and fill your home with delightful fragrances. I encourage you to gather your loved ones and make this recipe a part of your family tradition. It’s a delicious way to share love and joy through the art of baking.
Maple Syrup Sticky Buns
Equipment
- Frying Pan
- Oven
- Wooden Spoon
- Mixing Bowl
- Baking Sheet
Ingredients
- 1 cup warm water (105-115º)
- 4 teaspoons dry yeast
- ⅔ cup sugar
- ½ cup butter (one stick), at room temperature
- ½ cup nonfat dried milk powder
- 1 teaspoon salt
- 2 eggs
- 4 ¼ cups flour plus more for dusting work surfaces
Instructions
- Start by mixing the warm water, yeast, and a pinch of sugar in a small bowl. Allow it to sit for about 5 minutes until it becomes foamy. This shows that your yeast is active and ready to go.
- In a stand mixer fitted with the paddle attachment, combine the remaining sugar, butter, milk powder, and salt. Beat until well combined, ensuring that the butter is fully incorporated for a creamy mixture.
- Add the eggs, one at a time, mixing well after each addition. This will create a rich, cohesive batter.
- Stir in the yeast mixture that you set aside earlier, followed by 3 cups of the flour, one cup at a time. Make sure to scrape down the sides of the bowl as needed to keep everything blended.
- Gradually mix in the final cup of flour and let the mixer run for about 5 minutes. The dough will be sticky, which is great for achieving that fluffy texture.
- Butter a large bowl and add the dough, turning it so that the exterior is coated with butter. This prevents sticking as it rises.
- Cover the bowl with plastic wrap and let the dough rise in a warm area until it doubles in size, which should take about 2 and a half hours. You can also use a warm oven to speed up the process.
- While waiting, prepare the glaze by beating together brown sugar, ½ cup of butter, maple syrup, corn syrup, and water until well combined. Divide this glaze between two greased 9-inch cake pans.
- In a separate bowl, mix together cinnamon and sugar. Set this aside for later use.
- Once the dough has risen, punch it down and divide it in half. Roll each half into a 9 x 12-inch rectangle on a lightly floured surface. Spread each rectangle with the remaining butter, dividing it equally, and then sprinkle each with half of the cinnamon sugar mixture.
- Starting from the long side, roll each rectangle tightly into a log. Cut one log into 12 even pieces and place them cut side down into one of the prepared pans. Repeat with the second log, ensuring even placement in the pan.
- Cover with plastic wrap and let the buns rise in a warm area until they double in size again, about an hour.
- Preheat your oven to 375º and prepare to bake! Once fully risen, bake the buns until golden brown, about 30 minutes. If they start browning too quickly, you can lower the temperature to 325º for the last 10 minutes to ensure even cooking.
- After baking, run a knife around the perimeter of the pans and carefully invert them onto serving dishes. Allow them to cool for about 30 minutes before serving, letting the glaze soak in.