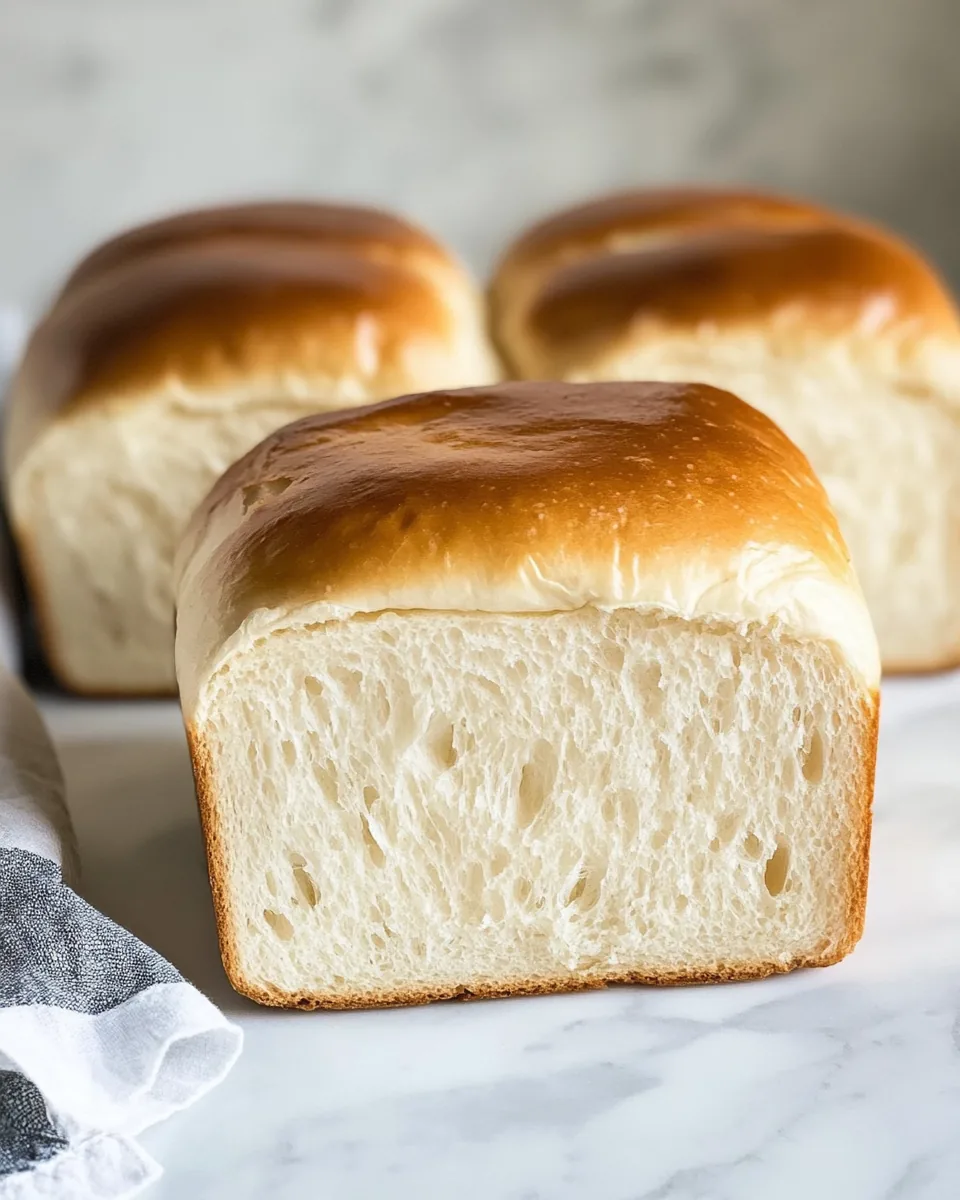
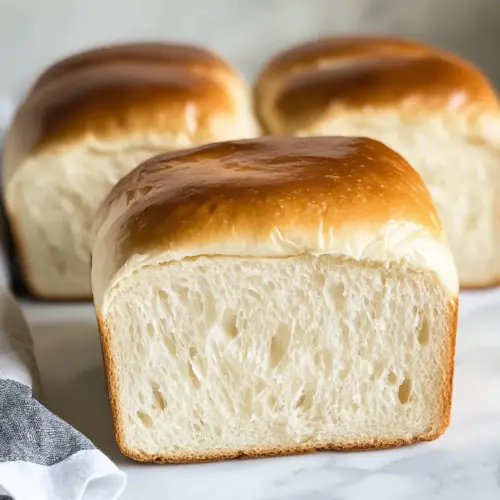
Japanese Milk Bread
The first time I tasted Japanese Milk Bread, I was instantly transported to a cozy bakery in Tokyo, where the air was filled with the warm aroma of freshly baked goods. This bread is something special; it’s impossibly soft and slightly sweet, with a texture that just begs to be enjoyed. I remember sitting in that little shop, watching as the baker skillfully kneaded the dough, and I knew I had to try making it myself. After a few attempts, I finally perfected my own version of Japanese Milk Bread, and now it’s a staple in my home. Whether you’re enjoying it toasted with butter or turning it into a delicious sandwich, this bread brings a little taste of Japan to your kitchen.
Recipe Snapshot
50 mins
20 mins
30 mins
Medium
170 kcal
4 g
Gluten-Free, Low FODMAP
4 g
Frying Pan, Whisk, Oven, Wooden Spoon, Mixing Bowl, Baking Sheet
The Best Thing About This Japanese Milk Bread
It’s Incredibly Soft
One of the standout features of Japanese Milk Bread is its unique texture. The combination of ingredients and the kneading process creates a bread that’s so soft, it feels like a cloud. You’ll find it’s perfect for sopping up soups or as the base for a sandwich. The tenderness is unmatched!
It’s Versatile
This bread can be enjoyed in so many ways! You can serve it as toast for breakfast, make sandwiches for lunch, or simply enjoy it with butter and jam as a snack. The possibilities are endless when it comes to using Japanese Milk Bread.
It’s a Great Baking Project
If you love baking, this recipe is a wonderful challenge. It allows you to practice your kneading and shaping techniques, and there’s something deeply satisfying about watching the dough rise and transform into a beautiful loaf. Plus, the smell of baking bread is hard to beat!
It’s a Crowd-Pleaser
Whenever I make Japanese Milk Bread, it never fails to impress friends and family. The moment they take a bite, they’re hooked! It’s the kind of bread that makes everyone feel special, and it’s perfect for gatherings or special occasions.
It’s a Taste of Japan at Home
This recipe brings a taste of my travels back home. Making Japanese Milk Bread allows me to relive those wonderful memories while sharing the joy of this incredible bread with loved ones.
What to Buy for Japanese Milk Bread

When it comes to Japanese Milk Bread, the ingredients are key to its light and fluffy texture. Each component plays a significant role in creating the perfect loaf, from the flour to the milk. Let’s dive into what you’ll need to bring this delightful bread to life.
- Water: Two tablespoons are needed to help mix the dough and activate the yeast.
- Flour: You’ll need two tablespoons as well for the initial mixture. But don’t forget, more will be used later!
- Milk: Use a quarter cup to add richness and moisture to the dough.
- Active Dry Yeast: One packet, or about 2 ¼ teaspoons, is essential to help the bread rise.
- Warm Milk: Two-thirds of a cup will help to dissolve the yeast and provide a tender texture.
- Sugar: A quarter cup adds sweetness and helps to activate the yeast.
- Tangzhong: This unique ingredient is a cooked mixture of water and flour that contributes to the softness of the bread.
- Egg: One large egg helps bind the ingredients and enrich the dough.
- All-Purpose Flour: A total of three and a quarter cups will give structure to your loaf.
- Salt: One teaspoon enhances flavor and controls yeast activity.
- Unsalted Butter: A quarter cup, softened, ensures a rich, tender crumb.
- Egg White: Used for the egg wash to give the crust a beautiful golden color.
- Water: Another tablespoon is needed for the egg wash.
Instructions for Japanese Milk Bread

Making Japanese Milk Bread is a rewarding process that fills your kitchen with delightful smells. Follow these simple steps, and you’ll have a loaf that you can’t resist.
- Add two tablespoons of water, two tablespoons of flour, and ¼ cup of milk to a small saucepan over medium-low heat. Stir continually until the mixture thickens into a paste, resembling a pudding. Remove from heat and set aside to cool while you prepare the other ingredients.
- In the bowl of a stand mixer, combine one packet of active dry yeast, ⅔ cup of warm milk, and ¼ cup of sugar. Let this mixture sit for about five minutes until the yeast becomes frothy. This step is crucial as it activates the yeast, ensuring your bread rises beautifully.
- To the yeast mixture, add the prepared Tangzhong, one large egg, three and a quarter cups of all-purpose flour, and one teaspoon of salt. Using the stand mixer fitted with a dough hook, mix on low speed until the dough comes together.
- Once the dough has formed, gradually add in ¼ cup of unsalted butter, one tablespoon at a time, mixing until completely incorporated. The dough should be smooth and start to pull away from the sides of the bowl. If it feels too sticky, don’t hesitate to add additional flour, one tablespoon at a time, until the desired consistency is reached.
- Lightly oil a bowl and place the dough inside, covering it with plastic wrap or a damp towel. Allow the dough to proof until it doubles in size, which should take about one hour.
- Meanwhile, prepare a loaf pan by spraying it with non-stick cooking spray. This will ensure your bread releases easily after baking.
- Once the dough has doubled, turn it out onto a lightly floured surface. Divide the dough into three equal pieces and flatten each piece into a rectangle. Fold the sides inward, lengthwise, to create a skinnier rectangle, and flatten further until they’re about the width of your bread pan.
- Roll each rectangle into a log and place them side by side in the prepared loaf pan, keeping the seams on the bottom.
- Cover the pan and let the formed loaf proof again until it rises just above the edge of the pan, approximately 45 minutes to one hour.
- While the loaf is proofing, preheat your oven to 350 degrees Fahrenheit.
- When the loaf is ready to bake, create an egg wash by whisking one egg white with one tablespoon of water. Brush this mixture over the top of the loaf.
- Bake the loaf for 25 to 30 minutes, or until it turns a gorgeous golden brown and the internal temperature reaches 190 degrees Fahrenheit.
- After baking, carefully remove the bread from the pan and allow it to cool on a wire rack for at least ten minutes before slicing. Trust me, this wait is worth it!
Things Worth Knowing
- Proofing Time is Key: The rising time for the dough can vary based on your kitchen temperature. Make sure to let it rise until it has doubled in size for the best texture.
- Don’t Skip the Tangzhong: This step might seem extra, but it significantly contributes to the softness and shelf life of your bread.
- Oven Temperature Matters: Ensure your oven is fully preheated before baking. This helps achieve that golden crust.
- Cooling is Important: Let the bread cool in the pan for a few minutes but then transfer it to a wire rack to cool completely. This prevents sogginess.
Variations to Try

Once you master the classic Japanese Milk Bread, you can have fun experimenting with variations. Here are some ideas to inspire your creativity!
- Add Flavor: Experiment with adding matcha powder or cocoa powder to the dough for a unique twist.
- Incorporate Fillings: Consider adding red bean paste or chocolate chips to the dough before rolling it into logs.
- Create Small Breads: Instead of one loaf, shape the dough into smaller rolls for individual servings.
- Try Different Milks: Use almond milk or oat milk for a dairy-free version.
- Seasonal Spices: In the fall, you could incorporate cinnamon or nutmeg for a warm, cozy flavor.
- Make it Savory: Add herbs or cheese to create a savory version for sandwiches.
Side Dish Ideas for Japanese Milk Bread
When it comes to serving Japanese Milk Bread, there are so many delightful ways to enjoy it. Here are some ideas to consider!
- With Breakfast: Serve warm slices of bread with butter and your favorite jam for a lovely start to your day.
- In Sandwiches: Use Japanese Milk Bread for making hearty sandwiches filled with vegetables, meats, or spreads; the bread’s softness complements well.
- A Snack: Toast it lightly and enjoy with a side of cream cheese or peanut butter for an afternoon treat.
- As a Side: Pair it with soups or salads for a comforting meal.
- For Gatherings: Slice the bread and display it on a platter for guests to enjoy at parties or picnics.
- Storage Tips: Keep any leftovers in an airtight container at room temperature for up to three days, or slice and freeze for longer storage.
FAQ
Conclusion
Japanese Milk Bread is truly a remarkable recipe that brings warmth and comfort to any meal. Its fluffy texture and sweet flavor make it a favorite for breakfast, lunch, or dinner. I encourage you to try making it yourself; once you’ve tasted the softness of this bread, you won’t want to go back!
Japanese Milk Bread
Equipment
- Frying Pan
- Whisk
- Oven
- Wooden Spoon
- Mixing Bowl
- Baking Sheet
Ingredients
- 2 tablespoons Water
- 2 tablespoons Flour
- ¼ cup Milk
- 1 packet Active Dry Yeast 2 ¼ teaspoons
- ⅔ cup Warm Milk
- ¼ cup Sugar
- 1 serving Tangzhong
- 1 large Egg
- 3 ¼ cups All-Purpose Flour
- 1 teaspoon Salt
- ¼ cup Unsalted Butter softened
- 1 egg white Egg White
- 1 tablespoon Water
Instructions
- Add two tablespoons of water, two tablespoons of flour, and ¼ cup of milk to a small saucepan over medium-low heat. Stir continually until the mixture thickens into a paste, resembling a pudding. Remove from heat and set aside to cool while you prepare the other ingredients.
- In the bowl of a stand mixer, combine one packet of active dry yeast, ⅔ cup of warm milk, and ¼ cup of sugar. Let this mixture sit for about five minutes until the yeast becomes frothy. This step is crucial as it activates the yeast, ensuring your bread rises beautifully.
- To the yeast mixture, add the prepared Tangzhong, one large egg, three and a quarter cups of all-purpose flour, and one teaspoon of salt. Using the stand mixer fitted with a dough hook, mix on low speed until the dough comes together.
- Once the dough has formed, gradually add in ¼ cup of unsalted butter, one tablespoon at a time, mixing until completely incorporated. The dough should be smooth and start to pull away from the sides of the bowl. If it feels too sticky, don't hesitate to add additional flour, one tablespoon at a time, until the desired consistency is reached.
- Lightly oil a bowl and place the dough inside, covering it with plastic wrap or a damp towel. Allow the dough to proof until it doubles in size, which should take about one hour.
- Meanwhile, prepare a loaf pan by spraying it with non-stick cooking spray. This will ensure your bread releases easily after baking.
- Once the dough has doubled, turn it out onto a lightly floured surface. Divide the dough into three equal pieces and flatten each piece into a rectangle. Fold the sides inward, lengthwise, to create a skinnier rectangle, and flatten further until they’re about the width of your bread pan.
- Roll each rectangle into a log and place them side by side in the prepared loaf pan, keeping the seams on the bottom.
- Cover the pan and let the formed loaf proof again until it rises just above the edge of the pan, approximately 45 minutes to one hour.
- While the loaf is proofing, preheat your oven to 350 degrees Fahrenheit.
- When the loaf is ready to bake, create an egg wash by whisking one egg white with one tablespoon of water. Brush this mixture over the top of the loaf.
- Bake the loaf for 25 to 30 minutes, or until it turns a gorgeous golden brown and the internal temperature reaches 190 degrees Fahrenheit.
- After baking, carefully remove the bread from the pan and allow it to cool on a wire rack for at least ten minutes before slicing. Trust me, this wait is worth it!
Notes
- Storage: Keep any leftovers in an airtight container at room temperature for up to three days, or slice and freeze for longer storage.
- Freezing: You can freeze Japanese Milk Bread for up to three months. Just slice it before freezing for easier use.
- Pairing: Enjoy this bread with soups, salads, or as a base for sandwiches.