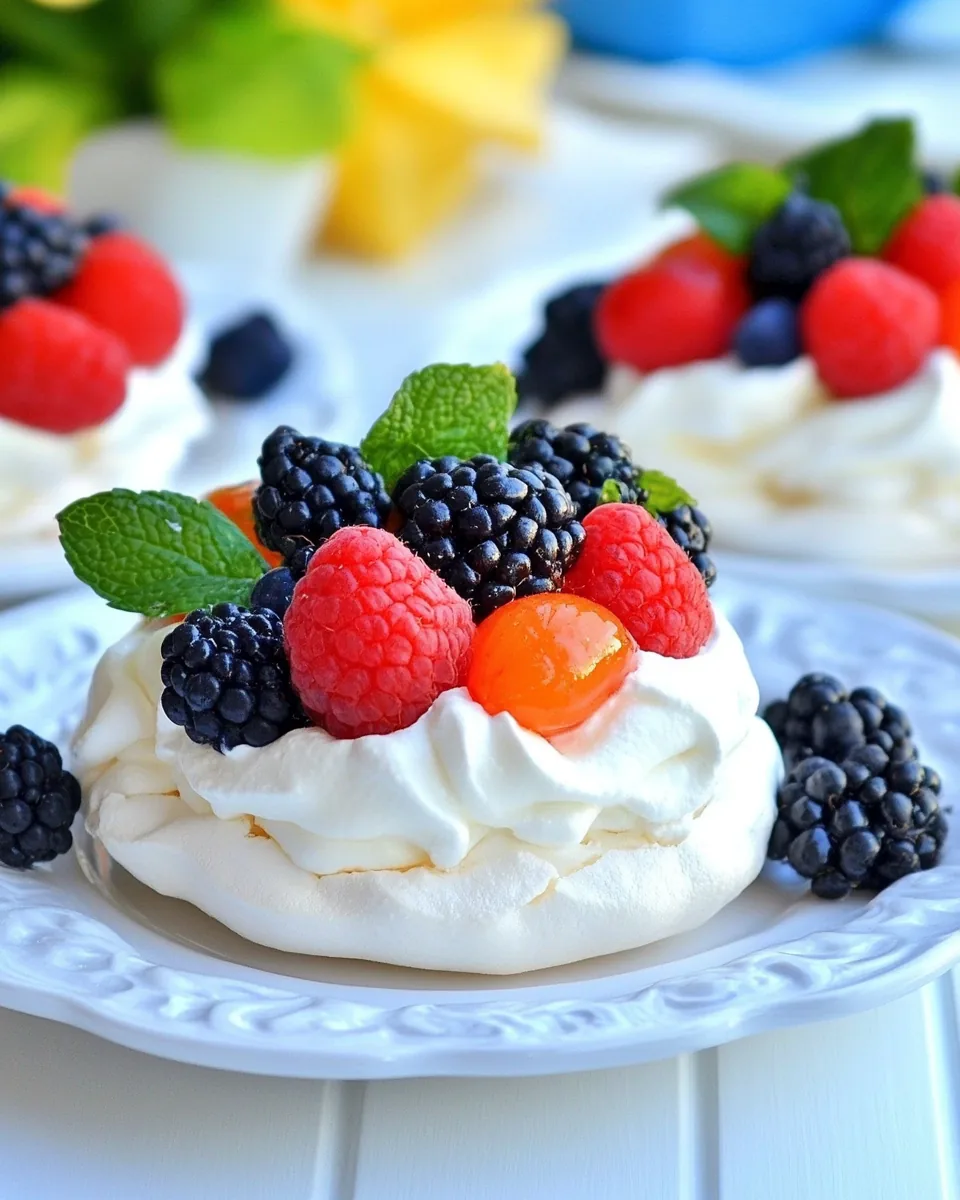
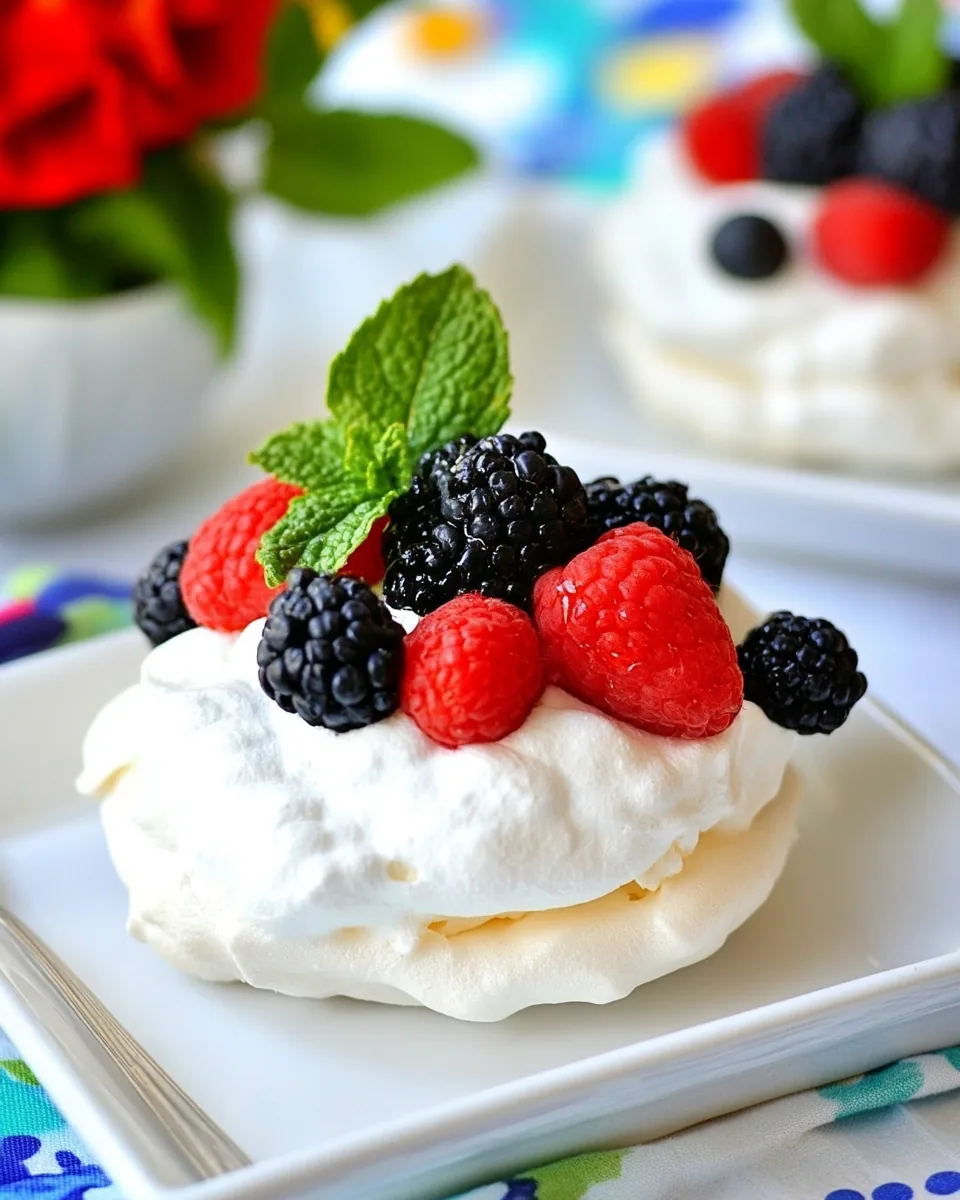
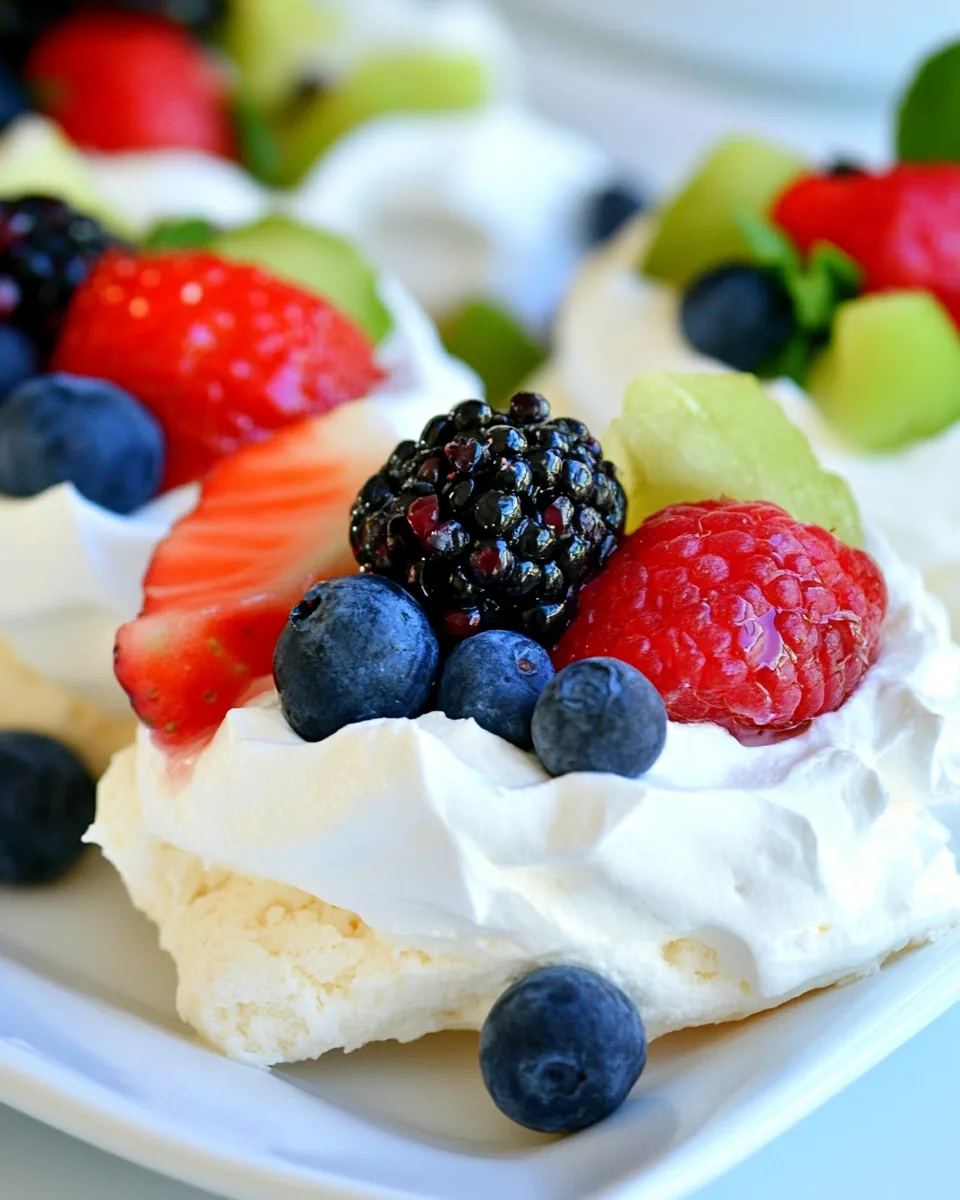
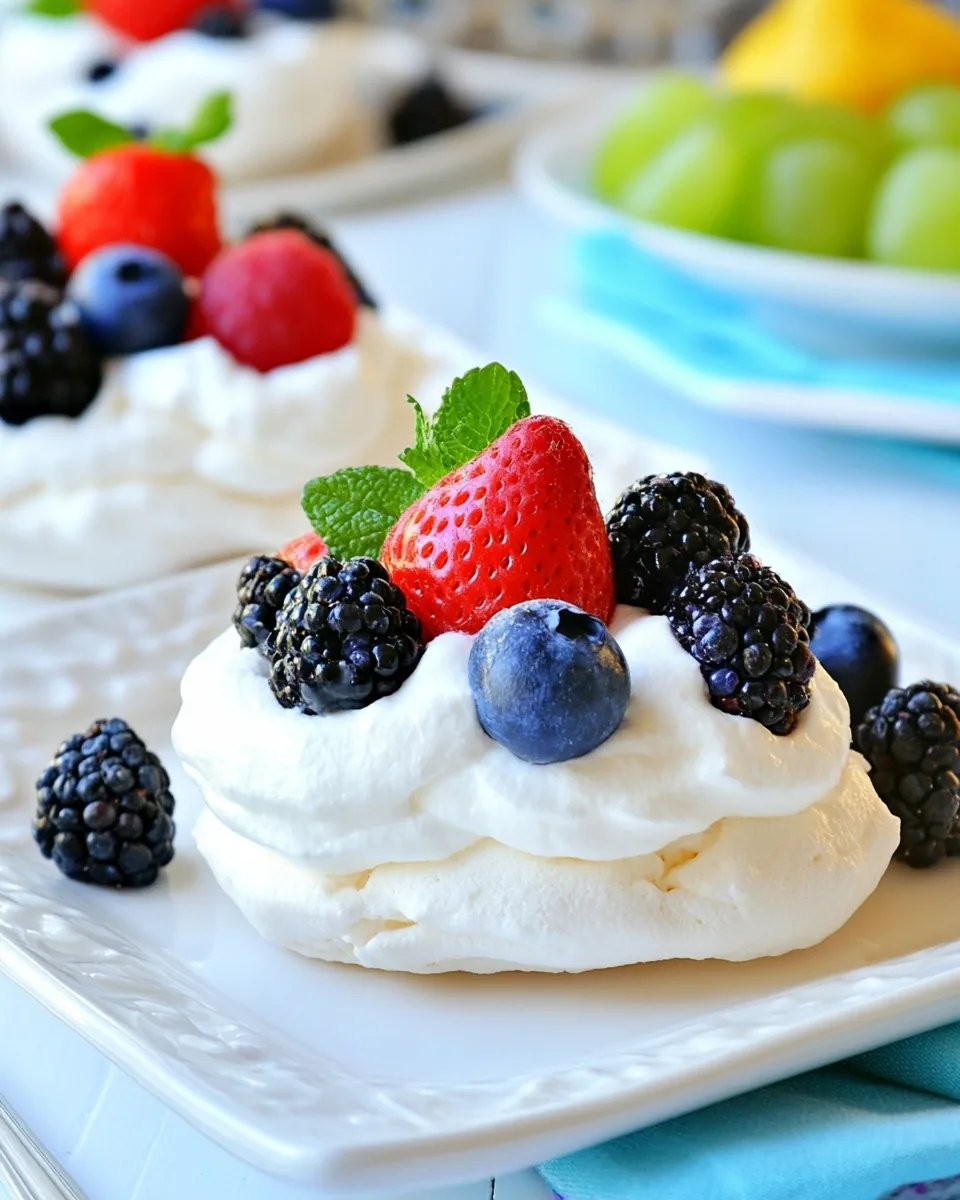
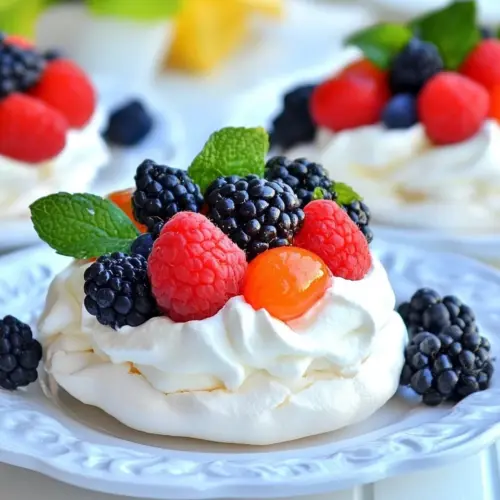
Individual Pavlova Nests
There’s something magical about creating Individual Pavlova Nests. Each time I make them, I remember the first time I shared these delightful treats with my friends on a sunny spring afternoon. The fluffy meringue, light as a feather, cradling a cloud of whipped cream and topped with fresh, vibrant fruits brings joy to any gathering. It’s a dessert that not only looks stunning but also tastes heavenly. The beauty of Individual Pavlova Nests lies in their versatility. You can customize them with your favorite seasonal fruits or whatever’s fresh at the market. I often find myself experimenting with different toppings, and each version becomes a new favorite. These nests are perfect for celebrating special occasions or simply treating yourself after a long week. They are a testament to how simple ingredients can come together to create something incredibly special.
Recipe Snapshot
2 hr 15 mins
15 mins
120 mins
Hard
150 kcal
2 g
Gluten-Free, Low FODMAP
6 g
Oven, Blender, Baking Sheet
The Best Thing About This Individual Pavlova Nests
Light and Airy Texture
There’s nothing quite like the ethereal texture of Individual Pavlova Nests. When you bite into the delicate meringue, it crumbles effortlessly, revealing the soft, whipped cream inside. This contrast in textures elevates your dessert experience, making each bite truly memorable.
Customizable Delight
One of my favorite aspects of Individual Pavlova Nests is their adaptability. You can choose to top them with a variety of fruits, from ripe strawberries to tangy kiwis, allowing each nest to reflect the flavors of the season or the preferences of your guests. It’s a blank canvas for your creativity!
Perfect for Any Occasion
Whether it’s a birthday celebration, a spring picnic, or a casual dinner with friends, Individual Pavlova Nests fit right in. Their elegant appearance makes them suitable for any event, and they are sure to impress your guests.
Easy to Make
Despite their sophisticated look, making Individual Pavlova Nests is surprisingly easy. With just a few simple steps, you can whip up a batch that looks like it came from a gourmet bakery. Plus, the satisfaction of creating something beautiful from scratch is unmatched!
Make Ahead Option
You can easily prepare the meringue nests in advance, allowing you to assemble them just before serving. This makes them an excellent choice for entertaining, as you can focus on your guests while serving a luxurious dessert.
Impressive Presentation
There’s no denying that Individual Pavlova Nests are a showstopper. Serve them on a beautiful platter, and watch your guests’ eyes light up as they admire your creation. Their beauty is just as important as their taste.
Ingredients Required for Individual Pavlova Nests
When it comes to creating Individual Pavlova Nests, the ingredients play a crucial role in achieving that perfect balance of flavor and texture. Each one has a purpose, working together to create a dessert that’s both stunning and delicious. The stars of this recipe are the egg whites and granulated sugar, which form the airy meringue. The heavy cream adds a luxurious richness, while the assorted fruits lend a refreshing brightness.
- 5 Egg Whites – Essential for creating the meringue base, these should be at room temperature for better whipping.
- 1/2 teaspoon Cream of Tartar – This stabilizes the egg whites, helping them hold their structure when whipped.
- Pinch of Salt – A small amount enhances the flavor of the meringue without making it salty.
- 1 cup Granulated Sugar – It sweetens and adds stability to the meringue. Use superfine sugar or blend regular sugar for a smoother texture.
- 1 1/4 cups Heavy Whipping Cream – This creates a rich, fluffy filling that complements the meringue perfectly.
- 2 tablespoons Powdered Sugar – A dusting of this in the cream adds sweetness and helps it hold its shape.
- 1/2 teaspoon Vanilla Extract – While I avoid using this, it could enhance the flavor of the whipped cream.
- 2-3 cups Assorted Fruits – Choose your favorites, including berries, kiwi, or peaches, for a colorful and fresh topping.
Instructions for Individual Pavlova Nests
Making Individual Pavlova Nests is straightforward and fun! Follow these steps to create beautiful meringue nests filled with whipped cream and topped with fresh fruit. Trust me, you’ll love the process as much as the final product!
- Preheat your oven to 225 degrees Fahrenheit. Line two baking sheets with parchment paper. For perfect, uniform nests, draw 3-inch circles on the parchment paper and turn the paper upside down so the ink doesn’t touch the meringue.
- Place the egg whites in a clean mixing bowl. Beat at medium speed until foamy. This initial step is crucial as it helps incorporate air into the whites.
- Add the salt and cream of tartar to the whipped egg whites. Increase the speed to medium-high and continue beating until soft peaks form. You want the peaks to gently fold over when you lift the beaters.
- Gradually add the granulated sugar one tablespoon at a time, continuing to beat on high speed. This is when the magic happens. Keep beating until stiff peaks form, and the mixture appears glossy. You should be able to turn the bowl upside down without the meringue moving at all.
- Transfer the meringue to a pastry bag fitted with a large decorator tip. A star tip works beautifully for creating texture. Pipe the meringue onto the parchment paper, outlining the drawn circles and filling the bases. Don’t be shy; build up the sides with a second layer of meringue for a nice nest shape.
- Place the baking sheets in the preheated oven and bake for 50 to 60 minutes. You want the nests to be dry to the touch and easily peel off the parchment. Keep an eye on them to avoid over-browning.
- Once baked, turn off the oven and leave the nests inside for an additional 2 hours to dry out completely. This step is essential for achieving that crisp texture.
- While the nests cool, prepare the whipped cream filling. In a separate bowl, beat the heavy cream with the powdered sugar and vanilla extract on high speed until soft peaks form. The cream should hold its shape but remain soft.
- When the nests are cool, carefully pipe or spoon the whipped cream filling into each nest, filling them generously.
- Finally, top each nest with your choice of assorted fruits. Enjoy your Individual Pavlova Nests right away for the best texture and flavor!
Things Worth Knowing
- Drying the Meringue: It’s important to leave the nests in the oven after turning it off. This allows them to dry out completely without direct heat, ensuring the perfect crunch.
- Whipping Cream: Make sure your mixing bowl and beaters are clean and cold before whipping the cream. This helps achieve stiff peaks more easily.
- Fruit Selection: Choose fruits that are in season for the best flavor. Berries, kiwi, and peaches are all excellent choices!
- Storage: Store the baked meringue nests in an airtight container to keep them crisp until you’re ready to fill them.
Helpful Hints
To ensure success with your Individual Pavlova Nests, here are some helpful hints. These tips will help you create the perfect dessert every time!
- Storage: Meringue nests can be made ahead of time and stored in an airtight container. They stay fresh and crunchy for several days, making them ideal for preparing in advance.
- Freezing: You can freeze the meringue nests for up to a month. Just make sure they are completely cool and stored properly to maintain their texture.
- Variations: Try different flavor profiles by adding spices like cinnamon or nutmeg to the meringue or experimenting with flavored whipped creams.
- Serving: Serve the nests immediately after assembly for the best experience. The whipped cream may soften the meringue if left for too long.
- Preparation: Ensure all your tools and bowls are grease-free, as any fat can prevent the egg whites from whipping properly.
Serve This Individual Pavlova Nests With
Pairing Individual Pavlova Nests with the right accompaniments can elevate your dessert experience. Here are some ideas on how to serve and enjoy them:
- Refreshing Beverages: Serve with iced tea or sparkling water. Their crispness complements the lightness of the pavlova.
- Fresh Salads: Light salads with citrus dressings can balance the sweetness of the nests, providing a refreshing contrast.
- Seasonal Fruits: Add more fruits on the side for a colorful platter, enhancing the appeal of your dessert.
- Festive Occasions: These nests are perfect for celebrations like birthdays or springtime gatherings, adding a touch of elegance to your dessert table.
- Picnics: Pack them up for a delightful treat during a picnic. Their individual portions make them easy to serve and enjoy outdoors.
- Leftover Cream: If you have extra whipped cream, serve it in a small bowl for guests to add more to their nests as they desire.
FAQ
Conclusion
The Individual Pavlova Nests are not just a dessert; they are an experience filled with delightful textures and fresh flavors. I encourage you to try making these heavenly treats and share them with your loved ones. You’ll find that they are easy to prepare and will undoubtedly impress anyone lucky enough to have one. So, gather your ingredients and enjoy the wonderful process of creating these beautiful nests!
Individual Pavlova Nests
Equipment
- Oven
- Blender
- Baking Sheet
Ingredients
- 5 Egg Whites Egg Whites Essential for creating the meringue base.
- 1/2 teaspoon Cream of Tartar Stabilizes the egg whites.
- Pinch Salt Enhances the flavor of the meringue.
- 1 cup Granulated Sugar Sweetens and adds stability to the meringue.
- 1 1/4 cups Heavy Whipping Cream Creates a rich filling.
- 2 tablespoons Powdered Sugar Sweetens the whipped cream.
- 1/2 teaspoon Vanilla Extract Enhances the flavor of the whipped cream.
- 2-3 cups Assorted Fruits Topping for the nests.
Instructions
- Preheat your oven to 225 degrees Fahrenheit. Line two baking sheets with parchment paper. For perfect, uniform nests, draw 3-inch circles on the parchment paper and turn the paper upside down so the ink doesn’t touch the meringue.
- Place the egg whites in a clean mixing bowl. Beat at medium speed until foamy. This initial step is crucial as it helps incorporate air into the whites.
- Add the salt and cream of tartar to the whipped egg whites. Increase the speed to medium-high and continue beating until soft peaks form. You want the peaks to gently fold over when you lift the beaters.
- Gradually add the granulated sugar one tablespoon at a time, continuing to beat on high speed. This is when the magic happens. Keep beating until stiff peaks form, and the mixture appears glossy. You should be able to turn the bowl upside down without the meringue moving at all.
- Transfer the meringue to a pastry bag fitted with a large decorator tip. A star tip works beautifully for creating texture. Pipe the meringue onto the parchment paper, outlining the drawn circles and filling the bases. Don’t be shy; build up the sides with a second layer of meringue for a nice nest shape.
- Place the baking sheets in the preheated oven and bake for 50 to 60 minutes. You want the nests to be dry to the touch and easily peel off the parchment. Keep an eye on them to avoid over-browning.
- Once baked, turn off the oven and leave the nests inside for an additional 2 hours to dry out completely. This step is essential for achieving that crisp texture.
- While the nests cool, prepare the whipped cream filling. In a separate bowl, beat the heavy cream with the powdered sugar and vanilla extract on high speed until soft peaks form. The cream should hold its shape but remain soft.
- When the nests are cool, carefully pipe or spoon the whipped cream filling into each nest, filling them generously.
- Finally, top each nest with your choice of assorted fruits. Enjoy your Individual Pavlova Nests right away for the best texture and flavor!
Notes
- Tip 1: Meringue nests can be made ahead of time and stored in an airtight container.
- Tip 2: You can freeze the meringue nests for up to a month.
- Tip 3: Try different flavor profiles by adding spices.
- Tip 4: Serve the nests immediately for the best experience.
- Tip 5: Ensure all your tools are grease-free.