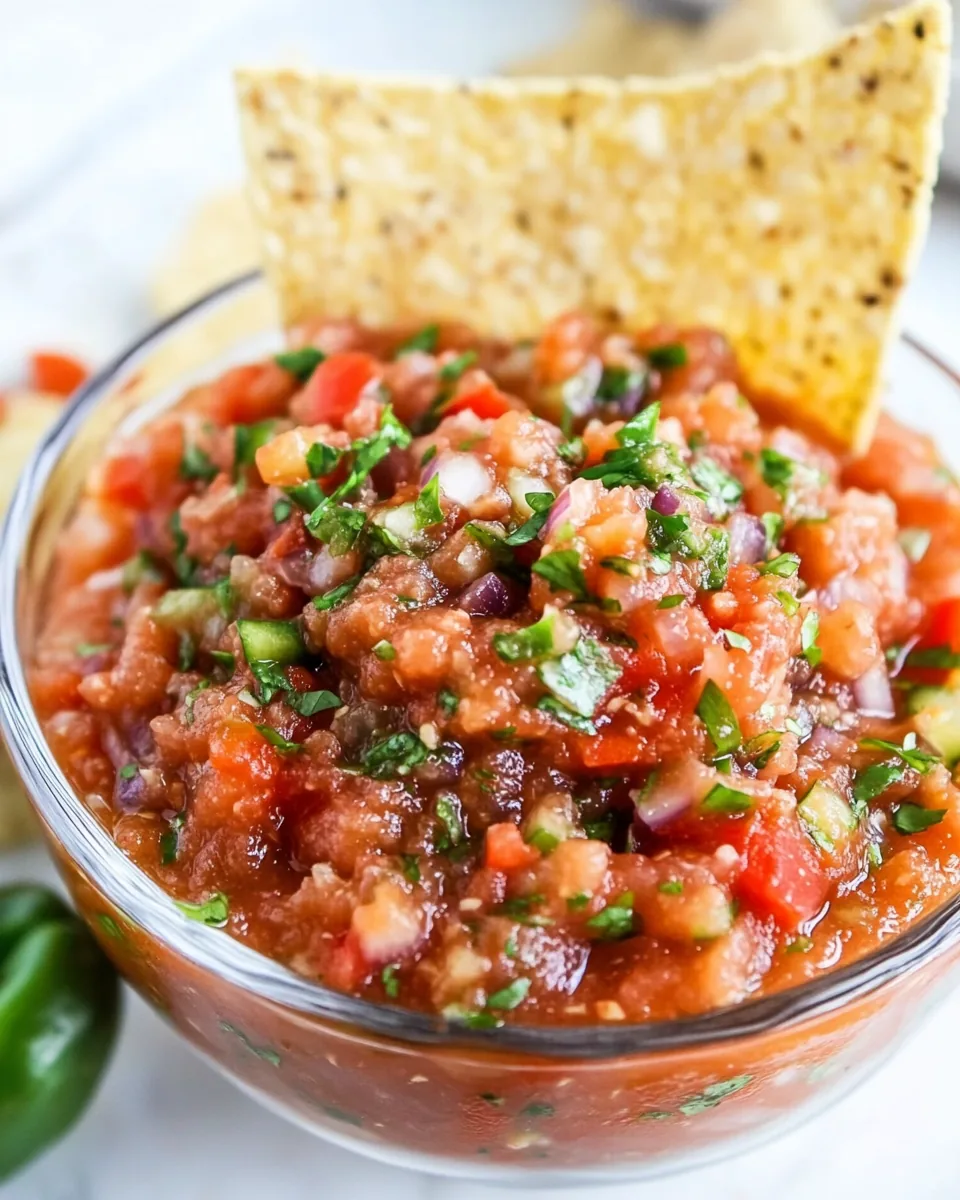
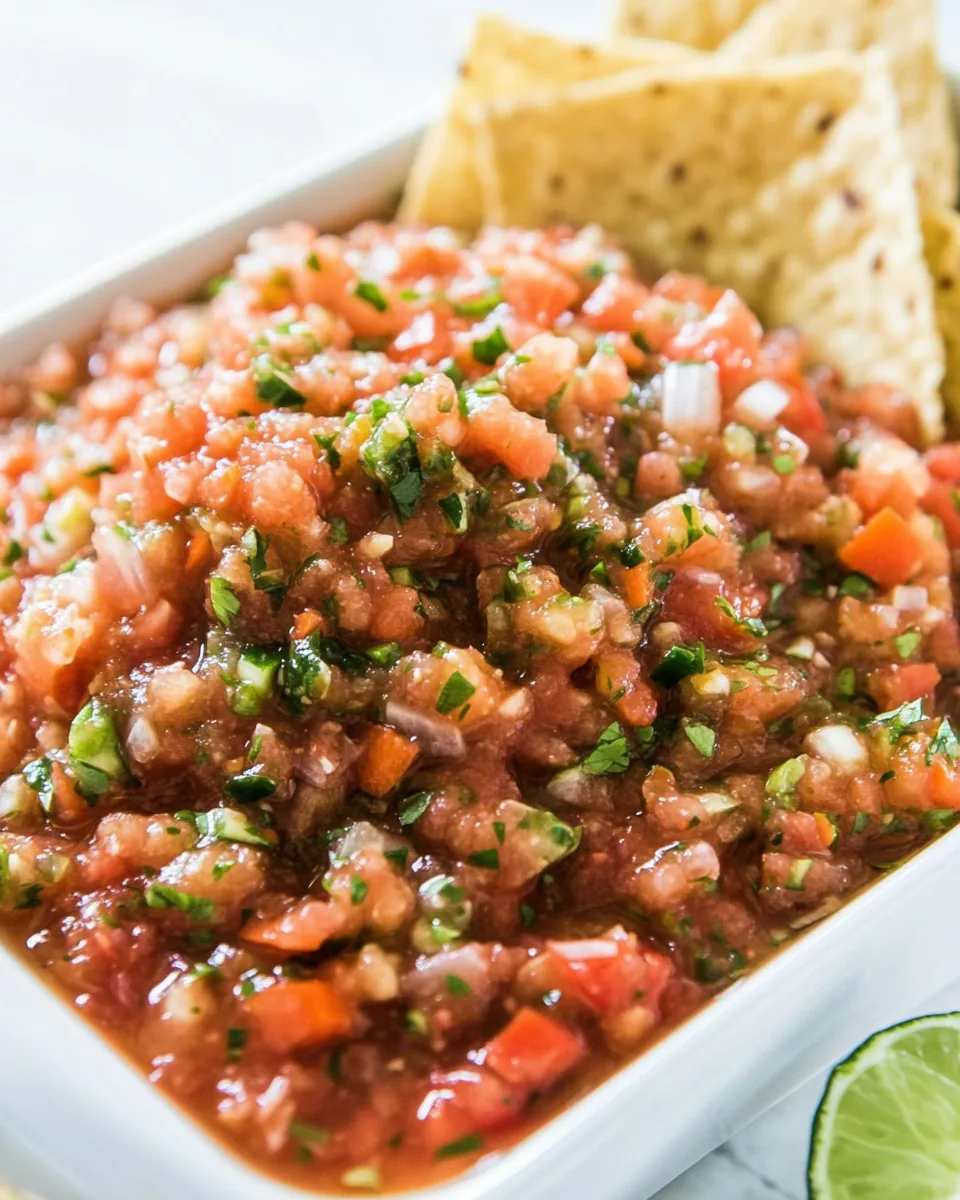
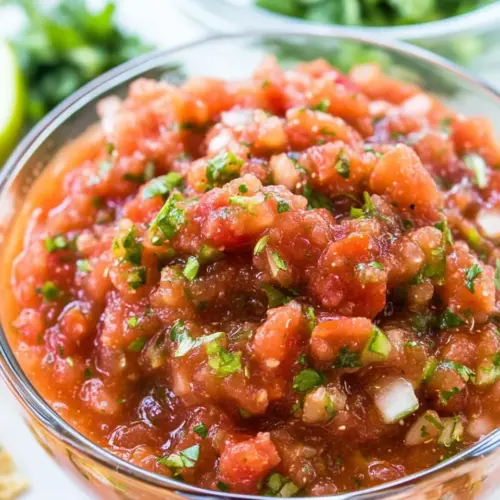
Homemade Salsa
Whenever I’m in the mood for a fresh, vibrant dip, I turn to my trusty recipe for Homemade Salsa. It’s one of those dishes that never fails to impress, whether I’m hosting a gathering or simply enjoying a quiet evening at home. The first time I made it was a summer picnic, and the bright flavors danced on our taste buds, bringing smiles all around. The moment the tomatoes hit the oven, the kitchen filled with the amazing aroma of roasting vegetables, and I knew I had stumbled upon something special. Every batch I create brings back that joyful memory, and I love sharing it with friends and family.
Recipe Snapshot
25 mins
10 mins
15 mins
Easy
50 kcal
2 g
Keto, Paleo, Whole30
0 g
Food Processor, Oven, Peeler, Cutting Board, Baking Sheet
Why We Love This Homemade Salsa
There’s a certain magic in a good salsa, and my Homemade Salsa truly stands out for several reasons.
Fresh Ingredients Make All the Difference
Using fresh produce is the key to this salsa’s vibrant flavor. With ripe tomatoes, crisp onions, and aromatic garlic, every bite bursts with freshness. I often find that store-bought options just can’t compare, and the satisfaction of creating something from scratch is unbeatable.
Customization is Yours
What I love most about this recipe is its flexibility. You can easily adjust the heat by adding jalapeños or other favorite peppers, making it a dish you can tailor to your liking. Want it tangier? Just squeeze in a bit more lime juice. The possibilities are endless!
Perfect for Any Occasion
Whether it’s game night, a barbecue, or a casual get-together, Homemade Salsa is always a crowd-pleaser. It pairs beautifully with tortilla chips, enhancing the flavors of any meal. I’ve even used it as a topping for grilled chicken, giving a whole new dimension to my dish.
Quick and Easy to Prepare
Even on busy days, I can whip up this salsa in no time, making it my go-to recipe for spontaneous gatherings. With just a handful of ingredients and minimal prep, it’s ready to impress in a flash. Plus, no cooking skills are necessary; just chop, blend, and enjoy!
Healthier Choice
Finally, I appreciate that my Homemade Salsa is a healthy option. Packed with vitamins and nutrients, it’s a guilt-free indulgence that tastes great. I can enjoy it without worrying about what I’m putting into my body, which is a win-win!
Homemade Salsa Shopping List
When crafting your Homemade Salsa, quality ingredients are essential. Fresh produce not only enhances the flavor but also elevates the overall experience. The key players include juicy tomatoes, flavorful onions, and fragrant garlic, all coming together to create a vibrant blend that excites the palate. Here’s what you’ll need:
- 8 medium tomatoes (halved, preferably Roma tomatoes for their sweetness)
- 2 medium onions (quartered, adding a lovely sharpness)
- 6 cloves garlic (peeled, for that aromatic kick)
- 4.5 ounces mild diced green chiles (1 can, for a subtle heat)
- ½ cup fresh cilantro (chopped, bringing a fresh herbaceous note)
- 2 tablespoons lime juice (freshly squeezed for brightness)
- ½ teaspoon salt (or to taste, to enhance flavors)
- ½ teaspoon pepper (or to taste, for a hint of spice)
Cooking Instructions for Homemade Salsa
Creating your own Homemade Salsa is a rewarding process that can be done in just a few simple steps. Follow along as I guide you through each point, bringing out the best flavors in your ingredients.
Preheat your oven to 350℉. This step is crucial as it prepares the environment for roasting your vegetables, which will enhance their natural sweetness.
Place the tomatoes, onions, and garlic on a baking sheet. Make sure they’re spread out to allow even roasting. Roast for about 15 minutes or until the onions and tomatoes start to get a little char on them, which adds depth to the flavor.
Remove the baking sheet from the oven and let the tomatoes cool for about 5 minutes. This cooling period is essential to avoid burns and allows the roasting flavors to settle.
Add the roasted tomatoes, onions, and garlic to a food processor. Include the green chiles, cilantro, lime juice, salt, and pepper at this stage. Pulse a few times until you get the desired consistency—smooth or chunky, whichever you prefer.
Pour the salsa into a bowl. Cover with plastic wrap or transfer to an airtight container. Refrigerate for 2 to 4 hours before serving. This chilling time allows the flavors to meld beautifully, enhancing the overall taste.
Things Worth Knowing
Things Worth Knowing
- Roasting the vegetables intensifies their flavors, making your salsa more delicious.
- Leave the skins on the tomatoes for added texture.
- Fresh cilantro is best added right before blending to preserve its vibrant flavor.
- Allowing the salsa to chill is crucial for flavor development.
Ways to Customize

There’s so much to explore when it comes to customizing your Homemade Salsa. Here are some ideas to make it your own:
- Add Heat: If you love spicy food, consider adding 1 or 2 jalapeños to the roasting pan along with the other ingredients for an extra kick.
- Adjust the Acidity: Want a tangier flavor? Feel free to add more freshly squeezed lime juice to elevate the taste.
- Fresh Herbs: Experiment with different herbs like parsley or basil to change up the flavor profile.
- Texture Variations: For a smoother salsa, blend it longer; for a chunkier version, pulse it less.
- Storage: How to store leftovers? Keep the salsa in an airtight container in the fridge for 5 to 7 days.
- Freezing: Can you freeze this? Absolutely! It will last for about 3 to 4 months in the freezer.
- Pairing: What to serve with this? It’s perfect with tortilla chips, tacos, or grilled meats for those summer barbecues!
Side Dish Ideas for Homemade Salsa
Serving your Homemade Salsa can be just as fun as making it! Here’s how to enhance your meal:
- Tortilla Chips: The classic pairing! Serve with crispy tortilla chips for a perfect snack or appetizer.
- Tacos: Use it as a fresh topping for tacos, adding crunch and flavor to your favorite fillings.
- Grilled Chicken: Try it on top of grilled chicken for a refreshing twist. The salsa’s acidity cuts through the richness of the meat.
- Salads: Drizzle over salads for an added zing, transforming a simple green salad into something special.
- Picnics: Ideal for outdoor gatherings, pack it along with a selection of dips for guests to enjoy.
- Brunch: It’s also great as a fresh side at brunch parties, complimenting eggs or breakfast burritos.
- Storage Tips: If you have leftovers, store them in an airtight container. They can last for up to a week in the fridge.
FAQ
Conclusion
The magic of Homemade Salsa lies in its fresh ingredients and versatility. It’s a dish that can brighten any meal, from casual snacks to festive gatherings. I encourage you to give this recipe a try and experience the joy of making something delicious from scratch. Trust me, once you make your own salsa, you’ll never want to go back to store-bought!
Homemade Salsa
Equipment
- Food Processor
- Oven
- Peeler
- Cutting Board
- Baking Sheet
Ingredients
- 8 medium tomatoes halved, preferably Roma tomatoes
- 2 medium onions quartered
- 6 cloves garlic peeled
- 4.5 ounces diced green chiles 1 can, mild
- ½ cup cilantro fresh, chopped
- 2 tablespoon lime juice freshly squeezed
- ½ teaspoon salt or to taste
- ½ teaspoon pepper or to taste
Instructions
- Preheat your oven to 350℉. This step is crucial as it prepares the environment for roasting your vegetables, which will enhance their natural sweetness.
- Place the tomatoes, onions, and garlic on a baking sheet. Make sure they’re spread out to allow even roasting. Roast for about 15 minutes or until the onions and tomatoes start to get a little char on them, which adds depth to the flavor.
- Remove the baking sheet from the oven and let the tomatoes cool for about 5 minutes. This cooling period is essential to avoid burns and allows the roasting flavors to settle.
- Add the roasted tomatoes, onions, and garlic to a food processor. Include the green chiles, cilantro, lime juice, salt, and pepper at this stage. Pulse a few times until you get the desired consistency—smooth or chunky, whichever you prefer.
- Pour the salsa into a bowl. Cover with plastic wrap or transfer to an airtight container. Refrigerate for 2 to 4 hours before serving. This chilling time allows the flavors to meld beautifully, enhancing the overall taste.
Notes
- Add Heat: If you love spicy food, consider adding 1 or 2 jalapeños to the roasting pan along with the other ingredients for an extra kick.
- Adjust the Acidity: Want a tangier flavor? Feel free to add more freshly squeezed lime juice to elevate the taste.
- Storage: How to store leftovers? Keep the salsa in an airtight container in the fridge for 5 to 7 days.
- Freezing: Can you freeze this? Absolutely! It will last for about 3 to 4 months in the freezer.
- Pairing: What to serve with this? It’s perfect with tortilla chips, tacos, or grilled meats for those summer barbecues!