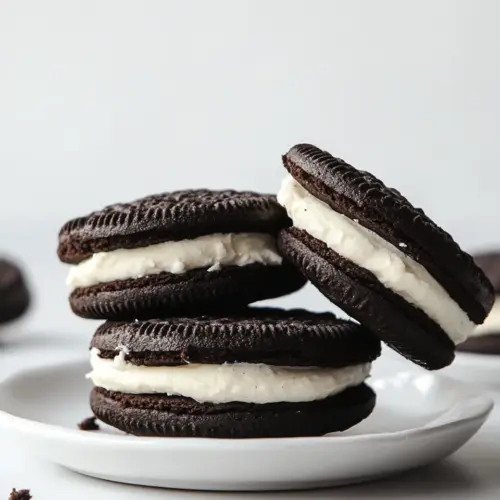
Homemade Oreo Cakesters
There’s something incredibly nostalgic about the Homemade Oreo Cakesters that takes me back to my childhood. I remember raiding my mom’s pantry, hoping to find a treat that could satisfy my sweet tooth. One day, I stumbled upon a box of chocolate cake mix, and inspiration struck! With a few simple ingredients, I transformed that mix into delightful cakesters that resemble the beloved Oreo cookie. They’re not just cookies; they’re a warm hug on a plate, perfect for sharing with friends or enjoying during a cozy night in.
Recipe Snapshot
32 mins
20 mins
12 mins
Easy
150 kcal
2 g
Vegan, Gluten-Free, AIP
7 g
Mixing Bowl, Oven, Baking Sheet
The Beauty of This Homemade Oreo Cakesters
Pure Nostalgia
Every bite of these Homemade Oreo Cakesters brings back memories of my childhood, where sweets were a rare but cherished luxury. The combination of rich chocolate and creamy filling is a reminder of carefree days and childhood laughter. I can’t help but smile when I see my family enjoying them as much as I did.
Easy to Make
These cakesters are surprisingly easy to whip up! With just a handful of ingredients, you can create a delightful treat that feels like a special occasion. I love that I can satisfy my cravings without spending hours in the kitchen. It’s perfect for those who want to indulge in baking without the hassle.
Perfect for Any Occasion
Whether it’s a birthday party, a casual get-together, or just an ordinary day that needs a little sweetness, Homemade Oreo Cakesters fit right in. They’re great for sharing with friends or simply enjoying by yourself while binge-watching your favorite show. They bring people together, creating moments that matter.
Customize to Your Taste
One of the best things about these cakesters is their versatility. You can play around with different fillings, perhaps adding a hint of orange zest or a touch of mint for a twist. The possibilities are endless, and that’s what makes them such a fun recipe to have in your repertoire.
Kid-Friendly Fun
This recipe is also a fantastic way to get kids involved in the kitchen. They can help with mixing, scooping, and assembling the cakesters. Watching their faces light up as they create their own tasty treats is a joy that’s hard to beat. It’s not just about the cookies; it’s about making memories.
Main Ingredients for Homemade Oreo Cakesters
When it comes to the ingredients for Homemade Oreo Cakesters, there’s a perfect blend that works together to create that rich flavor and delightful texture. Each ingredient plays a vital role in achieving the best results. Here’s a closer look at the key players:
- 1 Box Devil’s Food Cake Mix: This mix is the foundation of your cakesters, providing a rich chocolate flavor.
- 1/3 Cup Vegetable Oil: This adds moisture and helps create a tender texture.
- 2 Large Eggs: Eggs help bind the ingredients together and provide structure.
- Black Food Coloring (Optional): This ingredient helps to achieve that classic Oreo look, making your cookies even more appealing.
- 4 Oz Cream Cheese (Softened): Cream cheese gives the filling a creamy and delicious flavor.
- 1/4 Cup Unsalted Butter (Softened): Butter adds richness to the filling, making it smooth and indulgent.
- 2 Cups Powdered Sugar: This sweetens the filling and helps achieve a nice consistency.
- 1/4 Teaspoon Salt: A pinch of salt enhances the flavors in your filling.
- 1/2 Teaspoon Vanilla: Vanilla adds a lovely warmth to the flavor profile.
Making This Homemade Oreo Cakesters
Making Homemade Oreo Cakesters is a fun and satisfying process. You’ll love the aroma that fills your kitchen as they bake. Let’s dive into the steps you need to follow to create these delightful treats.
- Preheat your oven to 350°F. While the oven heats up, line two baking sheets with parchment paper and set them aside. It’s important to have your baking sheets ready so you can move quickly once the dough is mixed.
- In a large mixing bowl, combine the Devil’s Food Cake Mix, vegetable oil, and eggs. Using a hand mixer or a stand mixer, blend these ingredients until well combined. You want a smooth batter, free from lumps. If you desire a darker cookie, now is the time to add a few drops of black food coloring to achieve that classic Oreo color.
- Using a medium cookie scoop, scoop the dough onto the prepared baking sheets. Make sure to leave about 2 inches of space between each scoop to allow for spreading. This is where you’ll start to see the magic happen as they bake!
- Place the baking sheets in the preheated oven and bake for 11 to 12 minutes. Look for the edges of the cookies to be set but the centers soft. This balance provides that perfect cakester texture.
- After baking, let the cookies cool on the baking sheet for about 2 minutes before gently transferring them to a cooling rack. This helps them firm up without breaking.
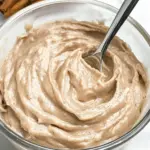
- While the cookies cool, prepare the filling. In a medium bowl, beat together the cream cheese and unsalted butter until smooth. The mixture should be creamy and luscious, ready to be sweetened.
- Add the powdered sugar, salt, and vanilla to the bowl. Beat again until fully combined. The filling should be thick but spreadable, ideal for creating those delicious sandwiches.
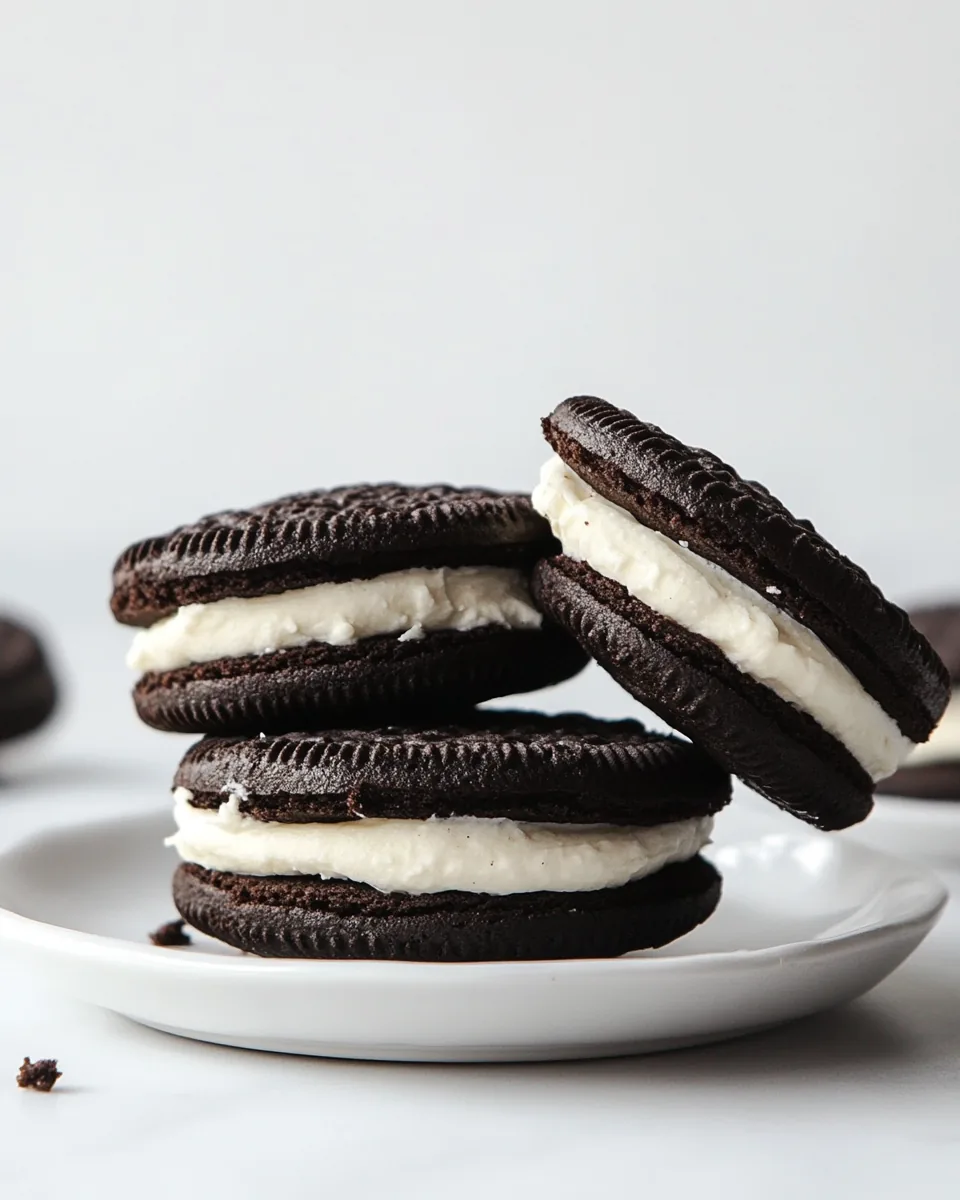
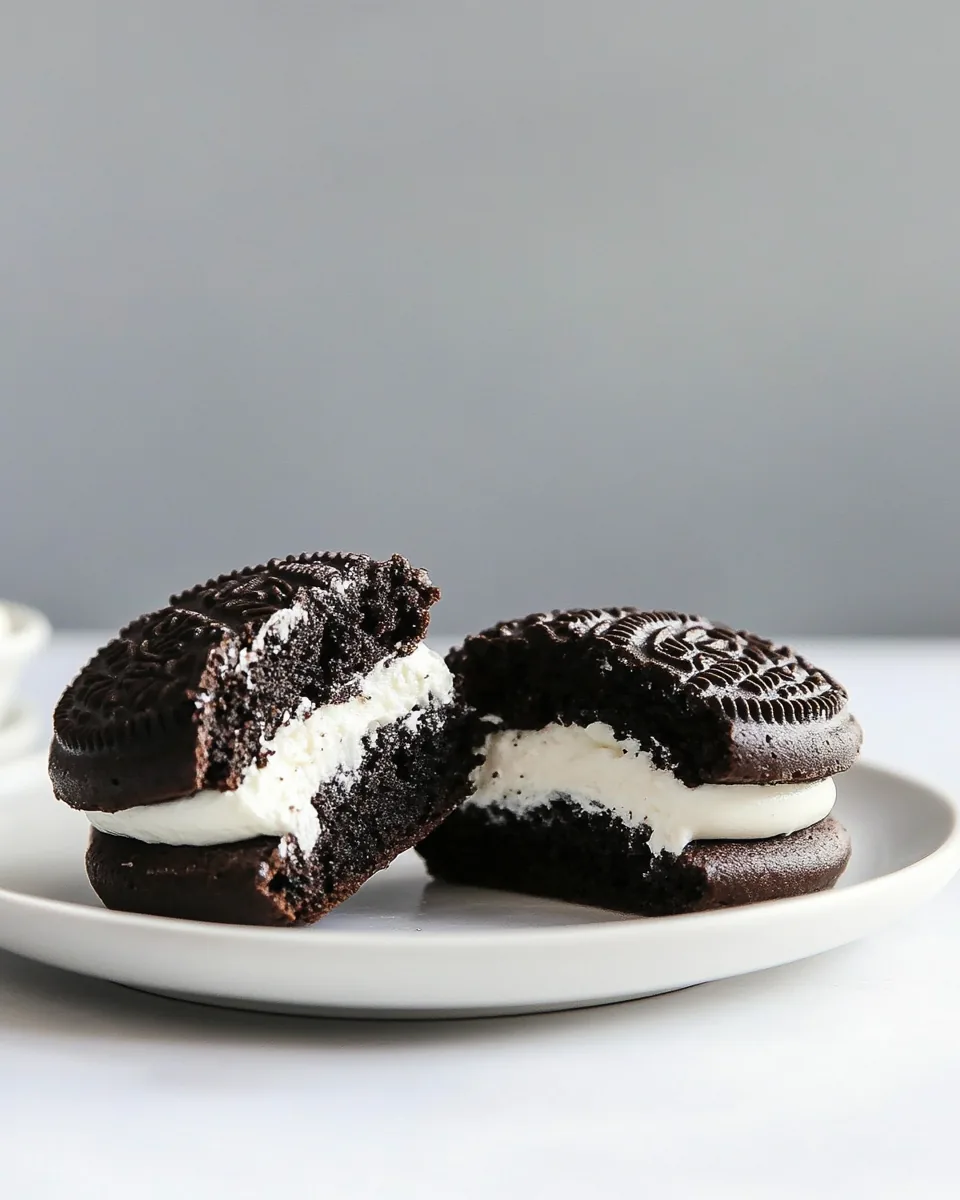
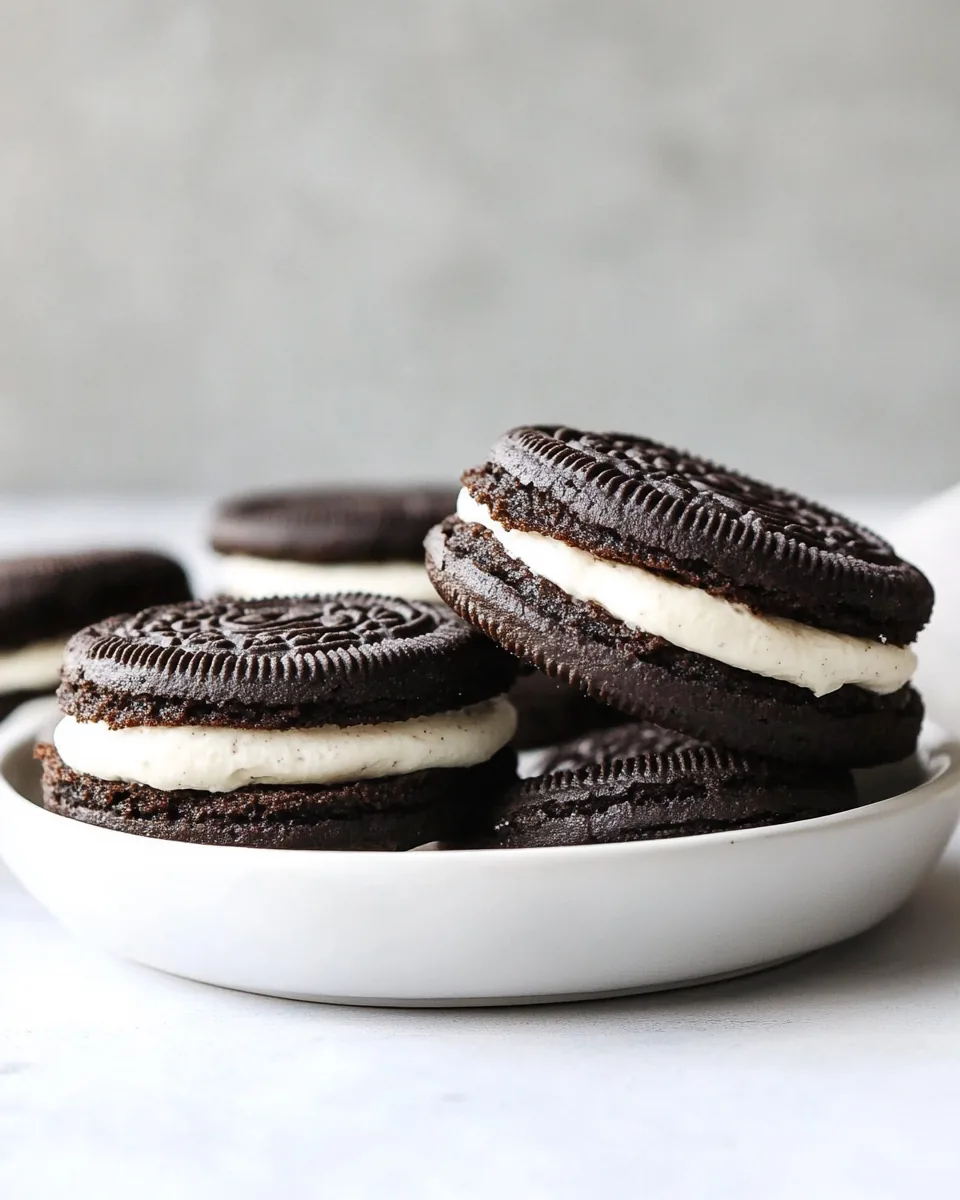
- Once your cookies have completely cooled, it’s time to assemble. You can use a piping bag or a ziplock bag with a snipped corner to easily pipe the filling onto the backside of one cookie.
- Sandwich another cookie on top, pressing gently to spread the filling to the edges. Repeat this process with the remaining cookies until they are all filled and paired.
- Enjoy your Homemade Oreo Cakesters fresh or store them in an airtight container to keep them soft and delicious!
Things Worth Knowing
- Room Temperature Ingredients: Ensure your cream cheese and butter are at room temperature for easier mixing.
- Cookie Scooping: Use a cookie scoop for even-sized cookies, ensuring uniform baking.
- Cooling Time: Don’t skip the cooling time; it prevents the cookies from breaking when handling.
- Storing Cookies: Keep any leftover cookies in an airtight container to maintain their freshness.
Tips for Success

To ensure your Homemade Oreo Cakesters turn out perfectly, here are some tips to consider. Following these will help you achieve the best results and make the baking process enjoyable.
- Storage: Store leftover cakesters in an airtight container at room temperature for up to three days to maintain their softness.
- Freezing: You can freeze the assembled cakesters! Just make sure to wrap them well in plastic wrap and then store in a freezer bag for up to a month.
- Pairing: These cakesters are fantastic with a glass of cold milk or a scoop of vanilla ice cream for an indulgent dessert.
- Variations: Experiment with different fillings! Add peanut butter or cookie butter for a unique twist.
- Don’t Overmix: Mix the batter just until combined to avoid tough cookies.
Great Combinations for Homemade Oreo Cakesters
If you’re thinking about how to best enjoy your Homemade Oreo Cakesters, there are countless ways to serve them. Here are some ideas:
- Birthday Parties: They make a fantastic treat that guests of all ages will love.
- Afternoon Snack: Serve with a glass of milk for a delightful after-school snack.
- Seasonal Occasions: Great for any occasion, from summer picnics to winter gatherings.
- Dessert Buffets: Perfect addition to dessert tables, standing out with their unique look.
- With Coffee: Pair them with a cup of coffee for a delightful afternoon pick-me-up.
FAQ
Conclusion
The Homemade Oreo Cakesters are a perfect blend of nostalgia and indulgence, making them a delightful treat for any occasion. They’re easy to make and customize, which adds to their charm. I encourage you to try making them yourself and experience the joy they bring. You won’t be disappointed!
Homemade Oreo Cakesters
Equipment
- Mixing Bowl
- Oven
- Baking Sheet
Ingredients
- 1 box Devil’s Food Cake Mix
- 1/3 cup Vegetable Oil
- 2 large Eggs
- to taste Black Food Coloring Optional for achieving a darker cookie color.
- 4 oz Cream Cheese Softened for easier mixing.
- 1/4 cup Unsalted Butter Softened.
- 2 cups Powdered Sugar
- 1/4 teaspoon Salt
- 1/2 teaspoon Vanilla
Instructions
- Preheat your oven to 350°F and line two baking sheets with parchment paper. Set aside.
- Add the Devil’s Food Cake Mix, vegetable oil, and eggs to a large bowl. Use a hand mixer or a stand mixer to combine. If a darker cookie is desired for that Oreo look, add a few drops of black food coloring until the desired color is achieved.
- Use a medium cookie scoop to scoop dough onto the prepared baking sheets, leaving 2 inches between them. Bake for 11-12 minutes, until the edges of the cookies are set. Let them cool for 2 minutes on the baking sheet before transferring to a cooling rack to cool completely.
- In a medium bowl, beat the cream cheese and butter together until smooth. Add the powdered sugar, salt, and vanilla and beat again until fully combined.
- Add the filling to a piping bag or a ziplock bag and snip off the end for a medium sized opening. Squeeze a dollop of frosting on the backside of one cookie and sandwich another on top. Repeat with the rest of the cookies.
Notes
- Tip 1: Store leftover cakesters in an airtight container at room temperature for up to three days to maintain their softness.
- Tip 2: You can freeze the assembled cakesters! Just make sure to wrap them well in plastic wrap and then store in a freezer bag for up to a month.
- Tip 3: These cakesters are fantastic with a glass of cold milk or a scoop of vanilla ice cream for an indulgent dessert.
- Tip 4: Experiment with different fillings! Add peanut butter or cookie butter for a unique twist.
- Tip 5: Mix the batter just until combined to avoid tough cookies.