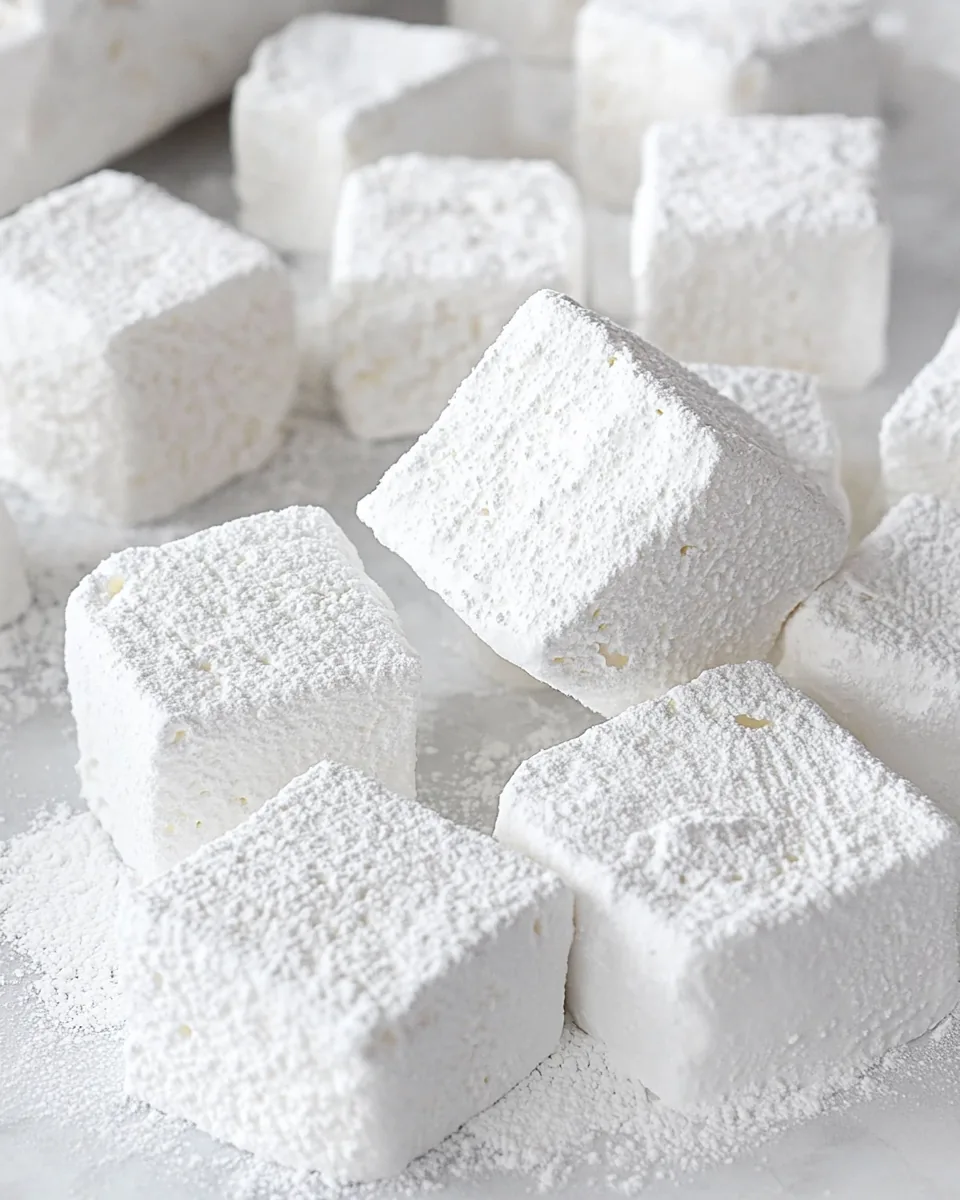
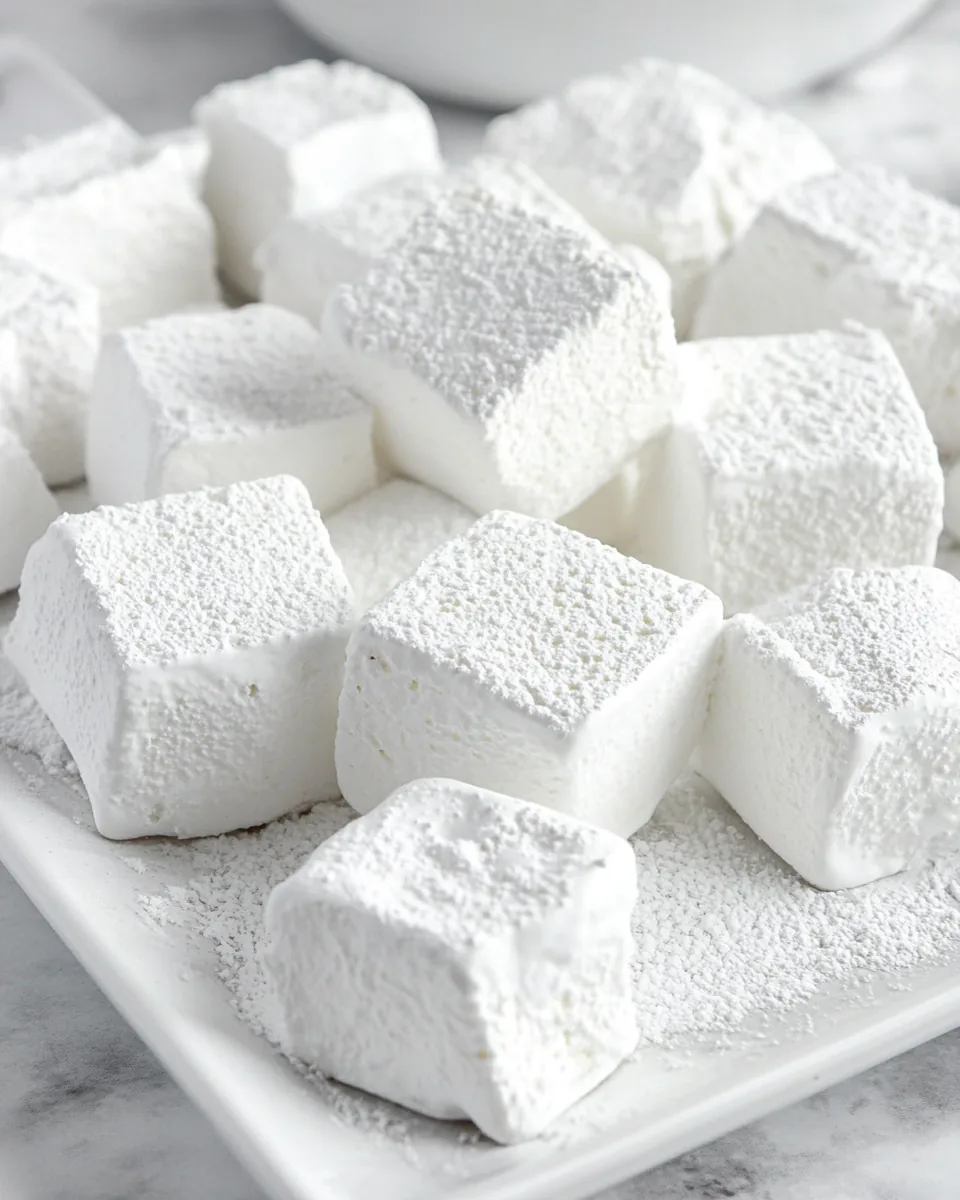
Homemade Marshmallow Recipe
There’s something incredibly nostalgic about making Homemade Marshmallow Recipe. I vividly remember my childhood kitchen, filled with laughter and the scent of sweetness. The thrill of watching a simple mix of ingredients transform into fluffy clouds of sugary goodness was nothing short of magical. My family and I would often gather around, each taking turns stirring and waiting with bated breath as the mixture whipped into a frothy delight. The joy of using them in hot cocoa or roasting them over a fire made those moments even more special. Making Homemade Marshmallow Recipe is not just about the end product; it’s about the time spent together, creating memories that linger long after the last marshmallow has been devoured.
Recipe Snapshot
40 mins
20 mins
20 mins
Medium
120 kcal
1 g
Gluten-Free, Low FODMAP
0 g
Wooden Spoon, Frying Pan, Whisk, Mixing Bowl
Why This Homemade Marshmallow Recipe Works
Unmatched Freshness
One of the biggest reasons I adore this Homemade Marshmallow Recipe is the incredible freshness it brings. There’s nothing like a soft, fluffy marshmallow made from scratch. Store-bought options simply can’t compete with the delightful texture and taste of homemade ones. They melt beautifully in hot cocoa and can elevate any dessert.
Customization at Its Best
When you make your own marshmallows, the possibilities are endless! You can infuse them with different flavors, add colors, or even sprinkle them with toppings. Want a hint of mint or a touch of strawberry? You can easily customize your marshmallows to fit your taste preferences or the theme of your gathering.
Perfect for Gifting
What’s more personal than a jar filled with Homemade Marshmallow Recipe? These fluffy treats make for charming gifts. Whether it’s a hostess gift or a sweet surprise for a loved one, a jar of homemade marshmallows wrapped with a ribbon brings joy and warmth to any occasion.
A Fun Activity for All Ages
Making marshmallows is not just for experienced bakers. It’s a fun and engaging activity for the whole family. Kids love to watch the mixture transform and can help with various steps, making it a great way to bond and teach them about cooking.
Transform Ordinary Desserts
Homemade marshmallows can take your desserts to the next level. Whether you’re topping off a cake, making s’mores, or crafting a gourmet hot chocolate, these fluffy delights add a touch of indulgence to any sweet creation.
Healthier Alternatives
When you make marshmallows at home, you have complete control over the ingredients. You can avoid artificial additives and preservatives commonly found in commercial marshmallows. This means you can enjoy a delightful treat that’s a little bit healthier and guilt-free.
Ingredients to Make Homemade Marshmallow Recipe
When it comes to creating the soft, fluffy wonder that is Homemade Marshmallow Recipe, the choice of ingredients is key. Each element plays a vital role in achieving that perfect marshmallow texture and flavor. The key players include granulated sugar, which sweetens and stabilizes, and gelatin, which gives marshmallows their signature bounce. Together, they create a delightful treat that can be enjoyed in various ways.
- 1 cup water, lukewarm: This serves as the base for dissolving the gelatin, ensuring a smooth mixture.
- 3 packages unflavored gelatin: Vital for achieving that fluffy structure we all love in marshmallows.
- 1 1/2 cups granulated sugar: The main sweetener that adds flavor and helps create the marshmallow’s structure.
- 1 cup light corn syrup: This ingredient gives the marshmallows their glossy finish and helps prevent crystallization.
- pinch kosher salt: A small but essential addition to balance out the sweetness.
- 2 teaspoons vanilla extract: For a touch of flavor that enhances the sweetness.
- shortening: Used to grease the pan and tools to prevent sticking.
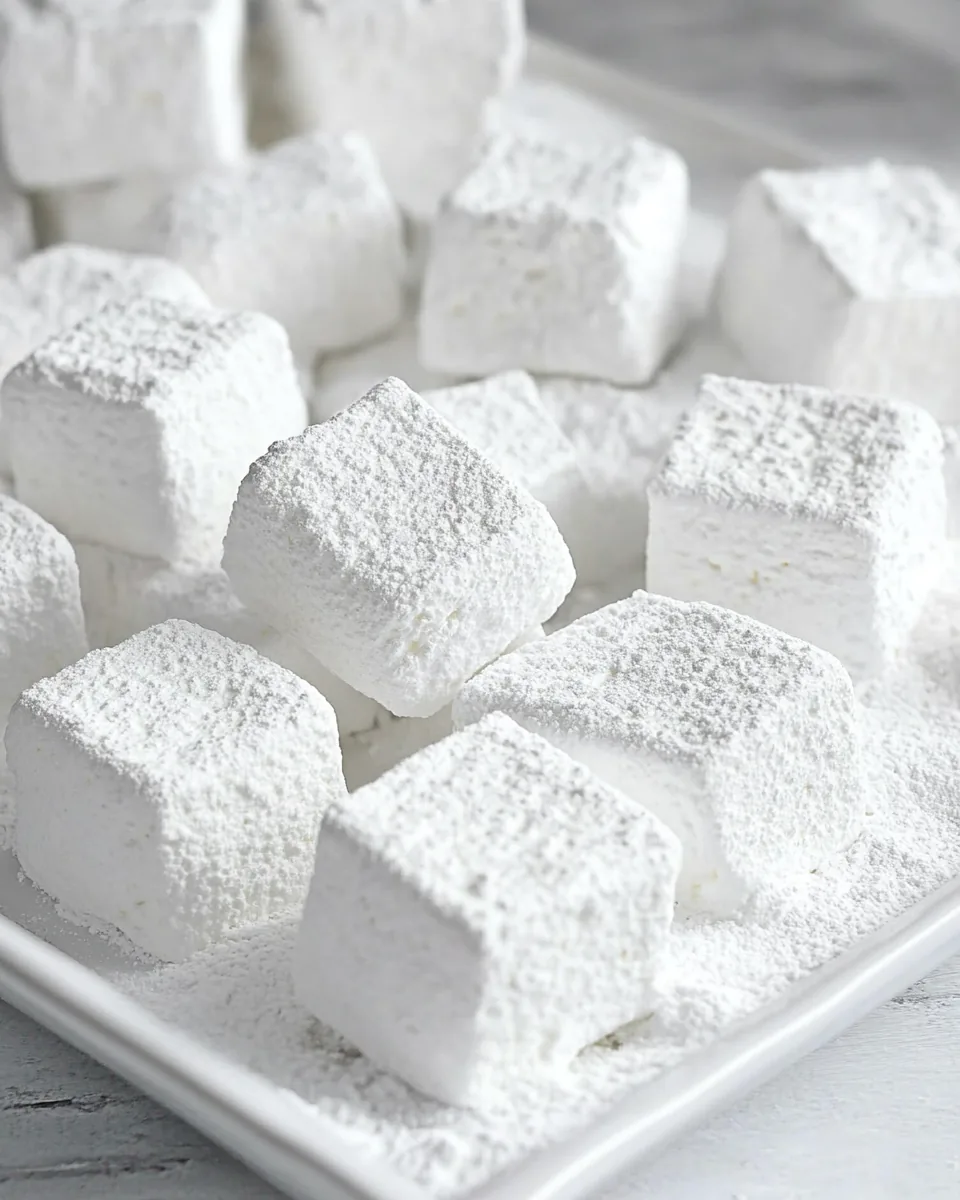
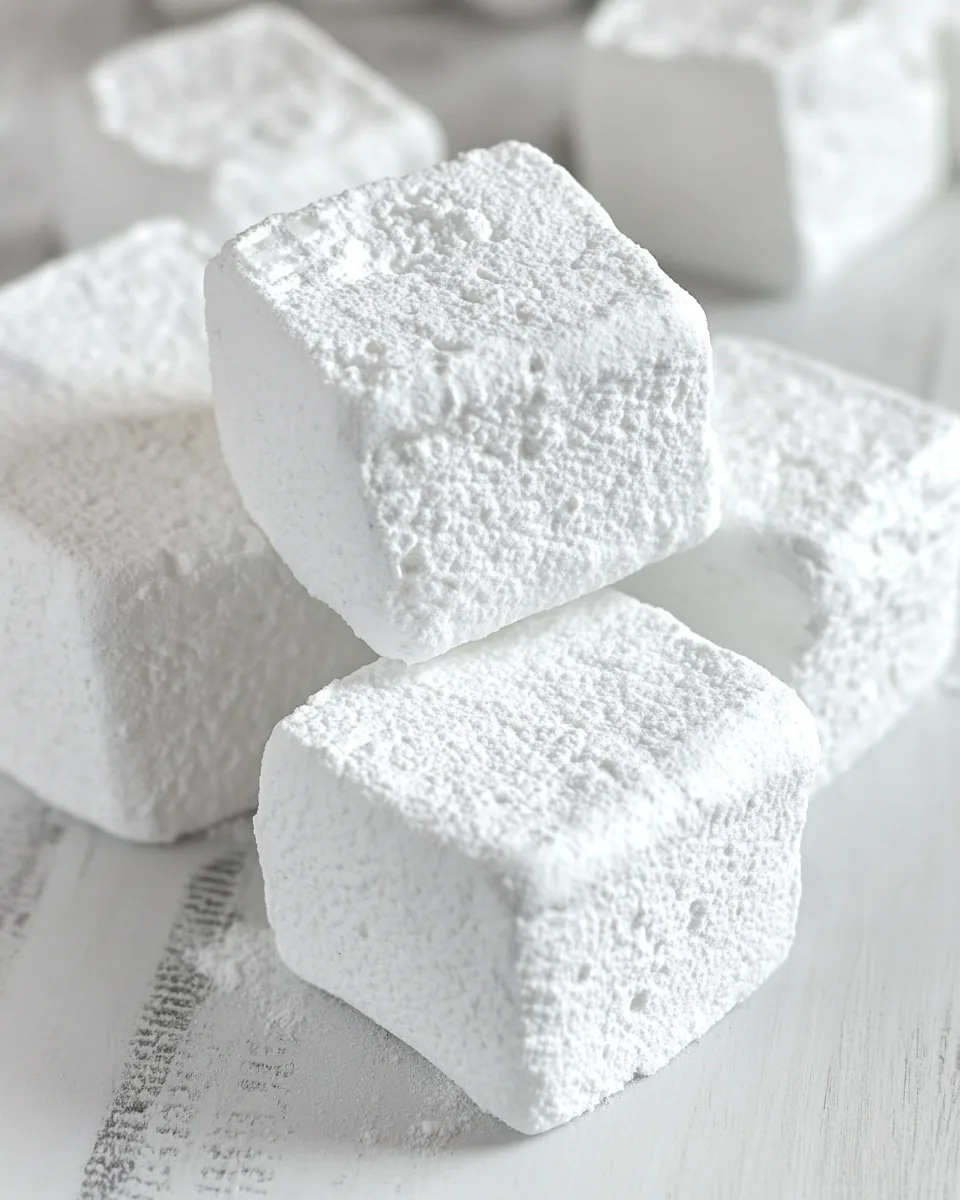
- Confectioner’s sugar: Essential for dusting the marshmallows and preventing them from sticking together.
Step by Step Instructions for Homemade Marshmallow Recipe
Making Homemade Marshmallow Recipe is an exciting journey filled with transformative moments. As you start, you’ll see how simple ingredients can change into something extraordinary. Let me guide you through the process step by step.
- In a bowl, stir together 1/2 cup of lukewarm water and 3 packages of unflavored gelatin. Allow this to stand while you prepare the syrup. This step is crucial as it hydrates the gelatin, ensuring it dissolves properly later.
- In a medium saucepan, combine 1 1/2 cups of granulated sugar, 1 cup of light corn syrup, pinch of kosher salt, and the remaining 1/2 cup of lukewarm water. Heat the mixture over medium-high heat, stirring until the sugar completely dissolves.
- As the mixture cooks, keep an eye on the temperature. You need to bring it to the softball stage, which is around 240º F. Use a candy thermometer for accuracy. Once it reaches this point, carefully remove it from the heat.
- Now, attach the whisk to your electric mixer. With the mixer on low speed, gradually pour the syrup mixture into the swollen gelatin while it’s whisking. This method prevents the gelatin from clumping and ensures a smooth consistency.
- After pouring in the syrup, stop the mixer and make sure all the gelatin is loosened from the bowl’s bottom. It’s important for the mixture to be thoroughly combined.
- Increase the mixer speed to high and whip the mixture for about 15 minutes. You’ll notice it becoming light and fluffy. The volume will increase significantly, creating that desired marshmallow texture.
- While the marshmallow mixture is whipping, prepare your dish. Lightly coat an 8 x 12 glass or non-metallic dish with shortening. Dust with confectioner’s sugar to ensure it’s well coated and prevents sticking.
- Once the marshmallow mixture is whipped to perfection, add 2 teaspoons of vanilla extract and mix until well incorporated. This step adds delightful flavor to your marshmallows.
- Spread the marshmallow mixture evenly into the prepared dish using a greased rubber scraper. Make sure to smooth the top for even drying.
- Dust the top lightly with more confectioner’s sugar and leave it uncovered overnight to dry completely. This drying time is crucial for achieving the right texture.
- Once dried, carefully pour the marshmallow out onto parchment paper. Using a sharp knife, cut it into large pieces, dusting the cut edges with additional confectioner’s sugar to prevent them from sticking together.
- Store your marshmallows in an airtight container for up to three weeks. Enjoy them in various desserts or on their own!
Things Worth Knowing
- Make Sure to Whip Enough: Whipping the mixture for the full 15 minutes is crucial for achieving the light and fluffy texture characteristic of marshmallows.
- Keep Your Tools Greased: Always grease your mixing bowl and tools with shortening to prevent sticking.
- Check the Temperature: Use a reliable candy thermometer to ensure the syrup reaches the right temperature for the best results.
- Patience is Key: Allow the marshmallows to dry overnight for the best texture. Rushing this step can lead to a sticky mess.
Making Adjustments
Adjusting your Homemade Marshmallow Recipe can enhance your culinary experience. Here are some tips to consider when making your marshmallows:
- Storage: Keep your homemade marshmallows in an airtight container. This will help them maintain their soft texture and flavor.
- Freezing: You can freeze your marshmallows for longer storage. Just be sure to layer them with parchment paper to prevent sticking.
- Pairing: These marshmallows are perfect for serving with hot cocoa, in s’mores, or as toppings on cakes and cupcakes.
- Flavor Variations: Experiment with different flavors by adding extracts or even incorporating fruit puree into the mixture.
- Texture Adjustments: For chewier marshmallows, reduce the amount of water you use when preparing the syrup.
Serving Suggestions
Serving Homemade Marshmallow Recipe opens up a world of delightful possibilities. Here are some serving suggestions to elevate your homemade treats:
- Hot Cocoa: Add a few marshmallows to a warm cup of hot cocoa for a rich and comforting drink.
- Camping Treats: Roast them over a campfire for a classic s’more experience, pairing with chocolate and graham crackers.
- Dessert Topping: Use them as a fluffy topping for brownies or cakes for an eye-catching dessert.
- Gift Giving: Package them in a decorative jar with a ribbon as a sweet gift for friends or family.
- Seasonal Celebrations: Use them as festive toppings for holiday treats, like pumpkin pie or gingerbread cookies.
- Snack Time: Enjoy them on their own as a fluffy, sweet snack any time of day.
FAQ
Conclusion
This Homemade Marshmallow Recipe is a delightful treat that can bring warmth to any occasion. The joy of creating these fluffy wonders in your own kitchen is truly special, and it’s a fantastic way to make memories with family and friends. I encourage you to try making them at home. Not only are they delicious, but they also allow you to express your creativity. So gather your ingredients and start whipping up a batch—your taste buds will thank you!

Homemade Marshmallow Recipe
Equipment
- Wooden Spoon
- Frying Pan
- Whisk
- Mixing Bowl
Ingredients
- 1 cup water lukewarm
- 3 packages unflavored gelatin
- 1.5 cups granulated sugar
- 1 cup light corn syrup
- 1 pinch kosher salt
- 2 teaspoons vanilla extract
- shortening for greasing
- Confectioner’s sugar for dusting
Instructions
- In a bowl, stir together 1/2 cup of lukewarm water and 3 packages of unflavored gelatin. Allow this to stand while you prepare the syrup. This step is crucial as it hydrates the gelatin, ensuring it dissolves properly later.
- In a medium saucepan, combine 1 1/2 cups of granulated sugar, 1 cup of light corn syrup, pinch of kosher salt, and the remaining 1/2 cup of lukewarm water. Heat the mixture over medium-high heat, stirring until the sugar completely dissolves.
- As the mixture cooks, keep an eye on the temperature. You need to bring it to the softball stage, which is around 240º F. Use a candy thermometer for accuracy. Once it reaches this point, carefully remove it from the heat.
- Now, attach the whisk to your electric mixer. With the mixer on low speed, gradually pour the syrup mixture into the swollen gelatin while it’s whisking. This method prevents the gelatin from clumping and ensures a smooth consistency.
- After pouring in the syrup, stop the mixer and make sure all the gelatin is loosened from the bowl’s bottom. It’s important for the mixture to be thoroughly combined.
- Increase the mixer speed to high and whip the mixture for about 15 minutes. You’ll notice it becoming light and fluffy. The volume will increase significantly, creating that desired marshmallow texture.
- While the marshmallow mixture is whipping, prepare your dish. Lightly coat an 8 x 12 glass or non-metallic dish with shortening. Dust with confectioner’s sugar to ensure it’s well coated and prevents sticking.
- Once the marshmallow mixture is whipped to perfection, add 2 teaspoons of vanilla extract and mix until well incorporated. This step adds delightful flavor to your marshmallows.
- Spread the marshmallow mixture evenly into the prepared dish using a greased rubber scraper. Make sure to smooth the top for even drying.
- Dust the top lightly with more confectioner’s sugar and leave it uncovered overnight to dry completely. This drying time is crucial for achieving the right texture.
- Once dried, carefully pour the marshmallow out onto parchment paper. Using a sharp knife, cut it into large pieces, dusting the cut edges with additional confectioner’s sugar to prevent them from sticking together.
- Store your marshmallows in an airtight container for up to three weeks. Enjoy them in various desserts or on their own!
Notes
- Tip 1: Keep your homemade marshmallows in an airtight container. This will help them maintain their soft texture and flavor.
- Tip 2: You can freeze your marshmallows for longer storage. Just be sure to layer them with parchment paper to prevent sticking.
- Tip 3: These marshmallows are perfect for serving with hot cocoa, in s'mores, or as toppings on cakes and cupcakes.
- Tip 4: Experiment with different flavors by adding extracts or even incorporating fruit puree into the mixture.
- Tip 5: For chewier marshmallows, reduce the amount of water you use when preparing the syrup.