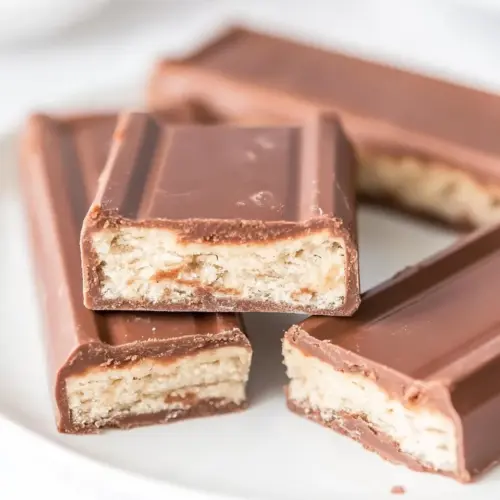
Homemade Kit Kat Bars
There’s something undeniably nostalgic about biting into a crisp, chocolate-covered treat. The Homemade Kit Kat Bars bring back those childhood memories of sneaking a candy bar from the corner store. As a child, I would savor each layer, enjoying the perfect balance of crunchy wafers and creamy chocolate. Now, as I recreate this delightful confection in my own kitchen, it feels like a sweet journey back in time. The beauty of making your own Kit Kat bars lies in the simplicity of the process and the joy of sharing them with friends and family. One bite of these homemade delights and you’ll be transported back to your younger days, only this time you can proudly say you made them yourself!
Recipe Snapshot
30 mins
25 mins
5 mins
Easy
130 kcal
1 g
Vegan, Gluten-Free, AIP
6 g
Wooden Spoon
Why You Need This Homemade Kit Kat Bars
1. It’s a Fun Project
Making Homemade Kit Kat Bars is not just about the end product; the process is half the fun! Gathering your ingredients and setting up your workspace can feel like a mini baking adventure. Involve your kids or friends, and you’ll create memories that last long after the treats are gone. Plus, it’s an excellent way to bond over something delicious.
2. Customizable Flavor Combinations
While the classic Kit Kat flavor is beloved, the beauty of making them at home is the opportunity to be creative. Perhaps you want to experiment with different types of chocolate like dark or white chocolate. Or maybe add some sea salt for a touch of contrast. The possibilities are endless, and you can tailor them to your taste!
3. Perfect for Any Occasion
These treats are perfect for a snack, a dessert at a gathering, or even a delightful gift for a loved one. Imagine surprising your friends at a party with a plate full of these homemade goodies or wrapping them up beautifully for a birthday present. They’re sure to impress!
4. Budget-Friendly Sweet Treat
Store-bought candy bars can get pricey, especially if you have a sweet tooth! By making Homemade Kit Kat Bars, you not only save money, but you also control the quality of the ingredients. This means no artificial additives or preservatives, just pure deliciousness made from scratch.
5. A Sweet Nostalgia
There’s a special kind of joy that comes from recreating a childhood favorite. Each bite of these Homemade Kit Kat Bars is a reminder of those simpler times, evoking memories of sharing treats with friends during school lunch breaks or after school snacks. It’s a way to relive those moments while indulging in something delicious that you made yourself.
6. Easy to Make
Despite how impressive these look, making Homemade Kit Kat Bars is surprisingly easy. With just a few steps and simple ingredients, anyone can create these delightful treats. No extensive baking skills are required, just a keen eye for melting chocolate and assembling layers!
What’s In This Homemade Kit Kat Bars
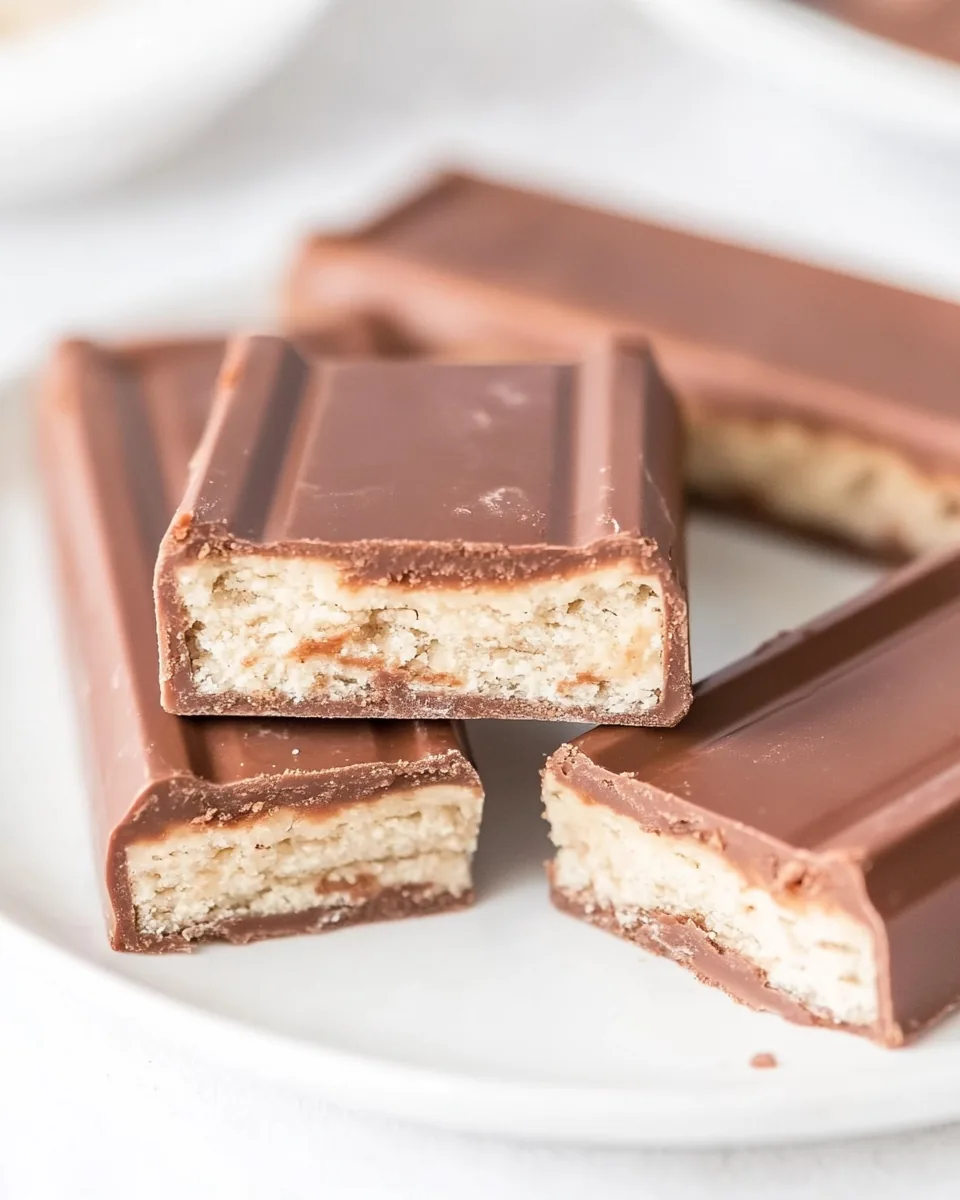
The ingredients for Homemade Kit Kat Bars are straightforward and work beautifully together to create that nostalgic combination of chocolate and wafer. At the heart of this recipe is the perfect blend of crunchy vanilla sugar wafers and rich semi-sweet chocolate chips, brought together with a splash of vegetable oil to achieve that silky smooth chocolate coating. It’s a delightful combination that balances texture and sweetness.
- 15 vanilla sugar wafers: These serve as the crisp foundation of our treat, providing that satisfying crunch.
- 2 cups semi-sweet chocolate chips: Divided for melting and coating, these chocolate chips create the rich chocolate flavor.
- 1 tablespoon vegetable oil: Added to the chocolate for a smooth texture, making it easier to dip and coat the wafers.
Putting Together Homemade Kit Kat Bars
Creating Homemade Kit Kat Bars is a fun and rewarding process! I love gathering all my ingredients and getting into the groove of melting chocolate and assembling layers. Follow these detailed steps to achieve that delicious, nostalgic treat.
Start by lining a large baking sheet with parchment paper. This will be your workspace for the Homemade Kit Kat Bars. The parchment paper will prevent the bars from sticking, making it easier to remove them later. Take a moment to smooth out the paper and ensure it covers the entire surface of the baking sheet.
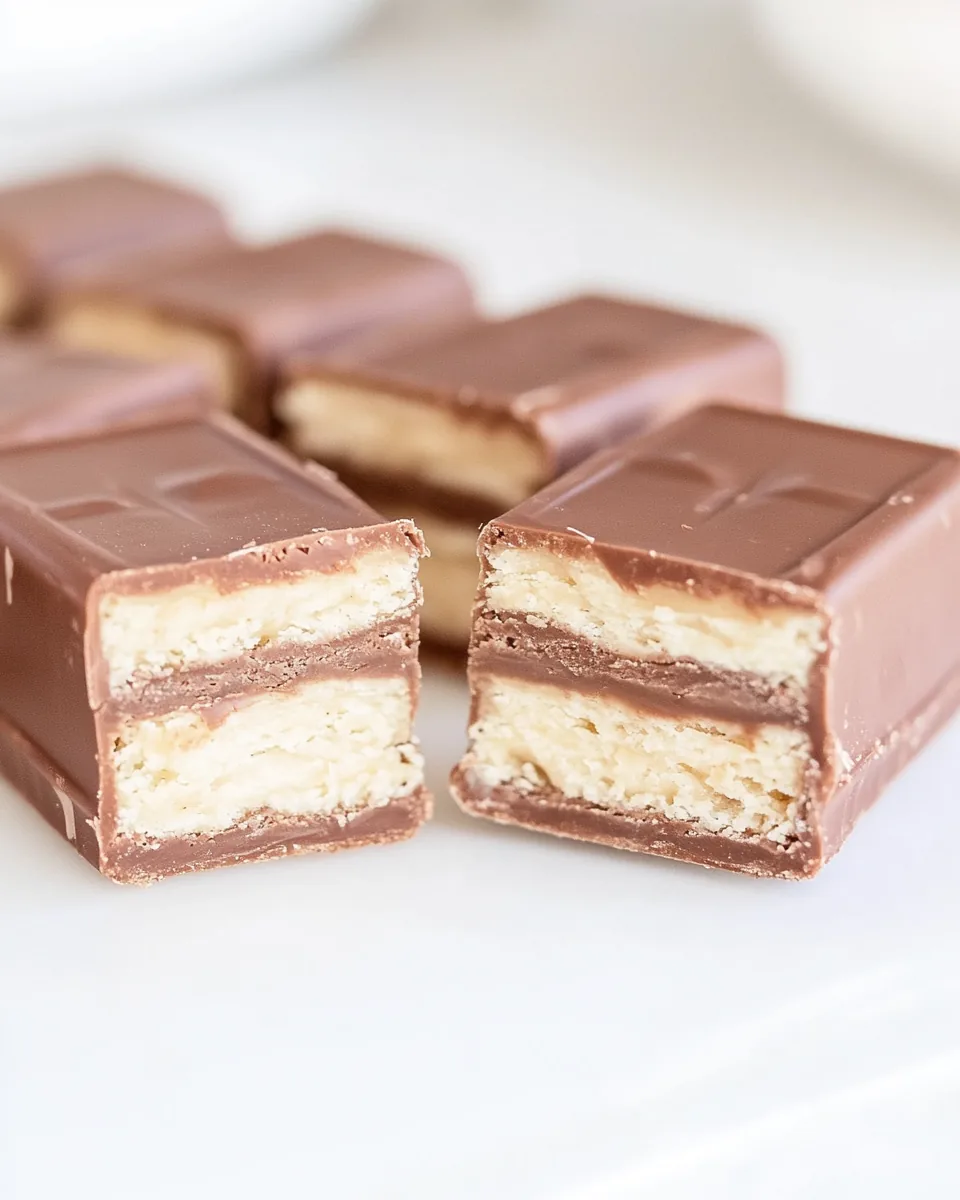
Using a sharp knife, carefully cut each vanilla wafer in half through the middle, creating two thinner wafers. This step is crucial, as it forms the layers of your Kit Kat bars. As you slice, be mindful of your fingers; it’s easy to get excited and rush through this step!
Place one half of each wafer on the baking sheet. Make sure to give them enough space to avoid sticking together. You’ll need room to work, especially for adding the chocolate later.
Now, take about 1/2 cup of semi-sweet chocolate chips and place them in a small microwave-safe bowl. Microwave the chocolate on 50% power for 1 minute. This gentle heat will help melt the chocolate without burning it.
Once the minute is up, stir the chocolate with a fork. Continue microwaving in 30-second intervals on 50% power, stirring in between, until the chocolate is silky smooth. Be patient—this step is critical for achieving the perfect consistency.
When your chocolate is melted, it’s time to get creative! Put it in a piping bag with a small round attachment, or use a plastic zip-top bag with a corner cut off. Carefully pipe the melted chocolate onto the upward face of each vanilla wafer half on the baking sheet. Aim for an even layer!
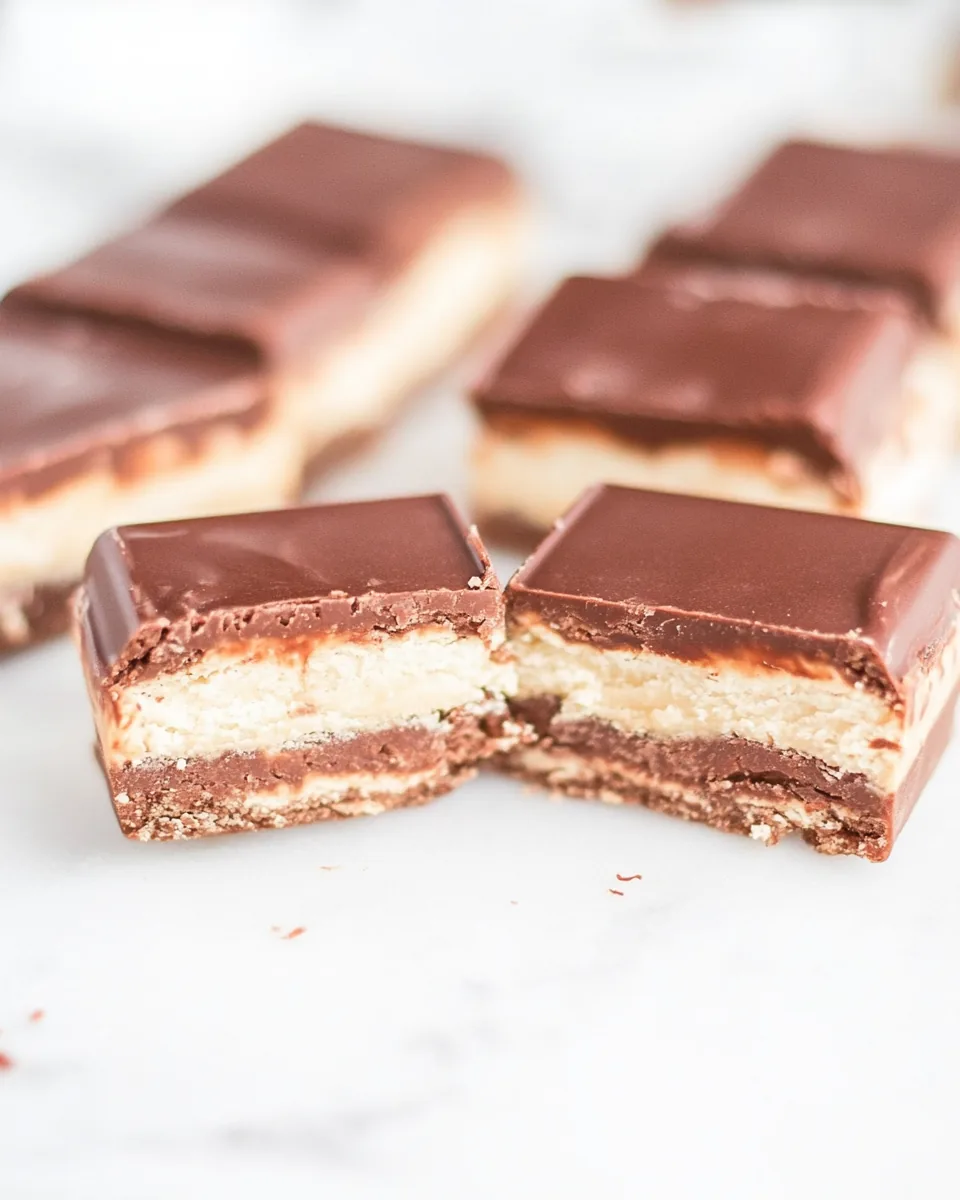
As soon as you pipe the chocolate onto the wafers, place the second half of each wafer on top. Gently press down to adhere them together, creating a lovely sandwich of flavors. Refrigerate for an hour to let the chocolate set.
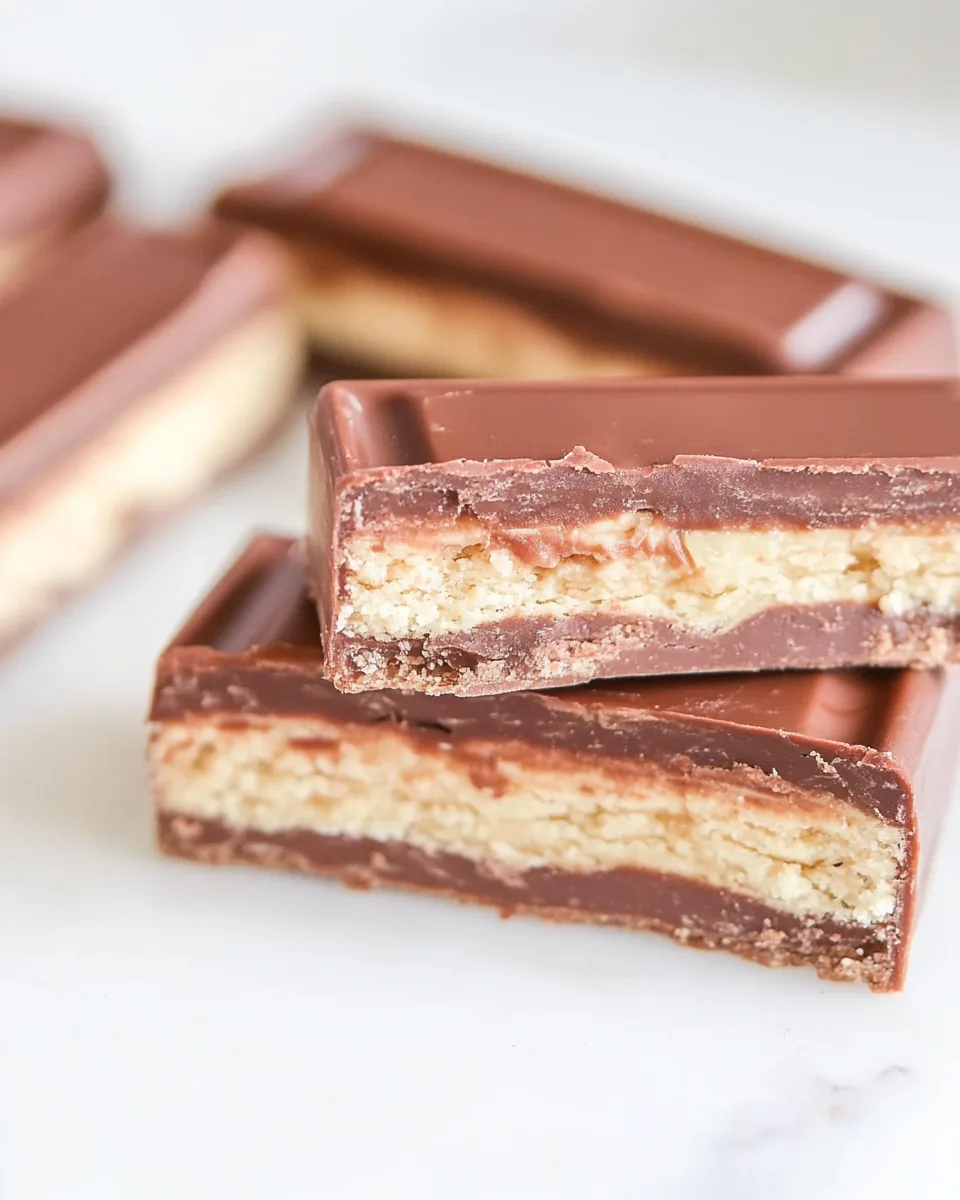
While the wafers are chilling, prepare the remaining chocolate. Near the end of the chill time, place the remaining chocolate chips in a medium-sized microwave-safe bowl. Repeat the melting process as before. Once melted, add vegetable oil and stir until smooth. This mixture will be used to dip the assembled bars.
Using two forks or dipping tools, dip each wafer sandwich into the melted chocolate, ensuring they are covered completely. This step is where the magic happens! Gently shake side to side as the wafer rests on the fork to sling off any excess chocolate.
Return the chocolate-covered cookie back on the baking sheet. Remember to refrigerate for at least one hour until the chocolate shell is completely hardened. This is crucial for that satisfying crunch when you take a bite!
Things Worth Knowing
- Chill Time: Don’t rush the chilling process. Allowing the chocolate to set properly ensures the bars hold their shape and have that delightful crunch.
- Chocolate Melting: Use a microwave-safe bowl and be cautious with the power settings to avoid burning the chocolate. Stirring frequently is key to a smooth consistency.
- Wafer Selection: The type of wafers you choose can affect the flavor; feel free to explore different brands for a unique twist on this classic treat.
- Storage Tips: Keep the bars in the refrigerator to maintain their structure. If left at room temperature, they may melt or become soft.
Helpful Notes about Homemade Kit Kat Bars
As you embark on your journey to create the perfect Homemade Kit Kat Bars, here are some tips to guide you along the way.
- Storage: Store these treats in the refrigerator when not serving. Keeping them at room temperature may cause these treats to melt or crack.
- Freezing: You can freeze the bars for later enjoyment. Simply wrap them securely and place them in an airtight container to maintain freshness.
- Pairing: These bars pair beautifully with a cup of coffee or a glass of milk—try serving them alongside your favorite beverage!
- Experimentation: Consider experimenting with different chocolate types or adding flavorings to the chocolate for variety.
- Presentation: If you’re serving these at a gathering, consider cutting them into fun shapes for a playful touch.
Serving Ideas for Homemade Kit Kat Bars
When it comes to serving your Homemade Kit Kat Bars, the options are as delightful as the bars themselves. Here are some creative serving ideas:
- Snack Time: They make a perfect afternoon snack, whether you’re at home or on the go.
- Party Treat: Serve these bars at birthday parties or gatherings—they’re sure to be a hit with guests of all ages.
- Gift Idea: Wrap them in pretty packaging for a thoughtful homemade gift that’s sure to impress.
- Lunchbox Surprise: Slip a few bars into your kid’s lunchbox for a sweet surprise that will brighten their day.
- Seasonal Delights: Add a seasonal twist by incorporating holiday-themed decorations or packaging when serving during festive seasons.
FAQ
Conclusion
The Homemade Kit Kat Bars are truly a delightful treat that not only brings back childhood memories but also gives you a chance to create something special in your kitchen. I encourage you to try making them! It’s a fun and rewarding process that yields delicious results. You won’t be disappointed, and I promise they’ll disappear quickly once you share them with family and friends!
Homemade Kit Kat Bars
Equipment
- Wooden Spoon
Ingredients
- 15 vanilla sugar wafers
- 2 cups semi-sweet chocolate chips divided use
- 1 tablespoon vegetable oil
Instructions
- Line a large baking sheet with parchment paper.
- Using a sharp knife, carefully cut each vanilla wafer in half through the middle, creating two thinner wafers. Place one half of each wafer on the baking sheet.
- Place about 1/2 cup of chocolate chips in a small microwave-safe bowl and microwave on 50% power for 1 minute. Stir with a fork and return to the microwave for 30-second intervals on 50% power, stirring in between, until the chocolate is silky smooth.
- When the chocolate is melted, put it in a piping bag with a small round attachment. You can also use a plastic zip-top bag with a corner cut off to create a small hole. Pipe the chocolate onto the upward face of each vanilla wafer half on the baking sheet, placing the second half of each wafer on top as soon as the chocolate is added. Refrigerate for 1 hour.
- Near the end of the chill time, place the remaining chocolate chips in a medium-sized, microwave-safe bowl. Microwave on 50% power for 1 minute. Add the vegetable oil and stir. Continue to microwave the chocolate in 30-second intervals on 50% power, stirring in between, until the chocolate is silky smooth.
- Using two forks or dipping tools, dip each wafer sandwich into the melted chocolate, covering it completely. Gently shake side to side as the wafer rests on the fork to sling off any excess chocolate before placing the chocolate-covered cookie back on the baking sheet. Refrigerate for at least 1 hour, until the chocolate shell is completely hardened.
Notes
- Storage: Store these treats in the refrigerator when not serving. Keeping them at room temperature may cause these treats to melt or crack.
- Freezing: You can freeze the bars for later enjoyment. Simply wrap them securely and place them in an airtight container to maintain freshness.
- Pairing: These bars pair beautifully with a cup of coffee or a glass of milk—try serving them alongside your favorite beverage!
- Experimentation: Consider experimenting with different chocolate types or adding flavorings to the chocolate for variety.
- Presentation: If you’re serving these at a gathering, consider cutting them into fun shapes for a playful touch.