Golden Beet and Goat Cheese Quiches
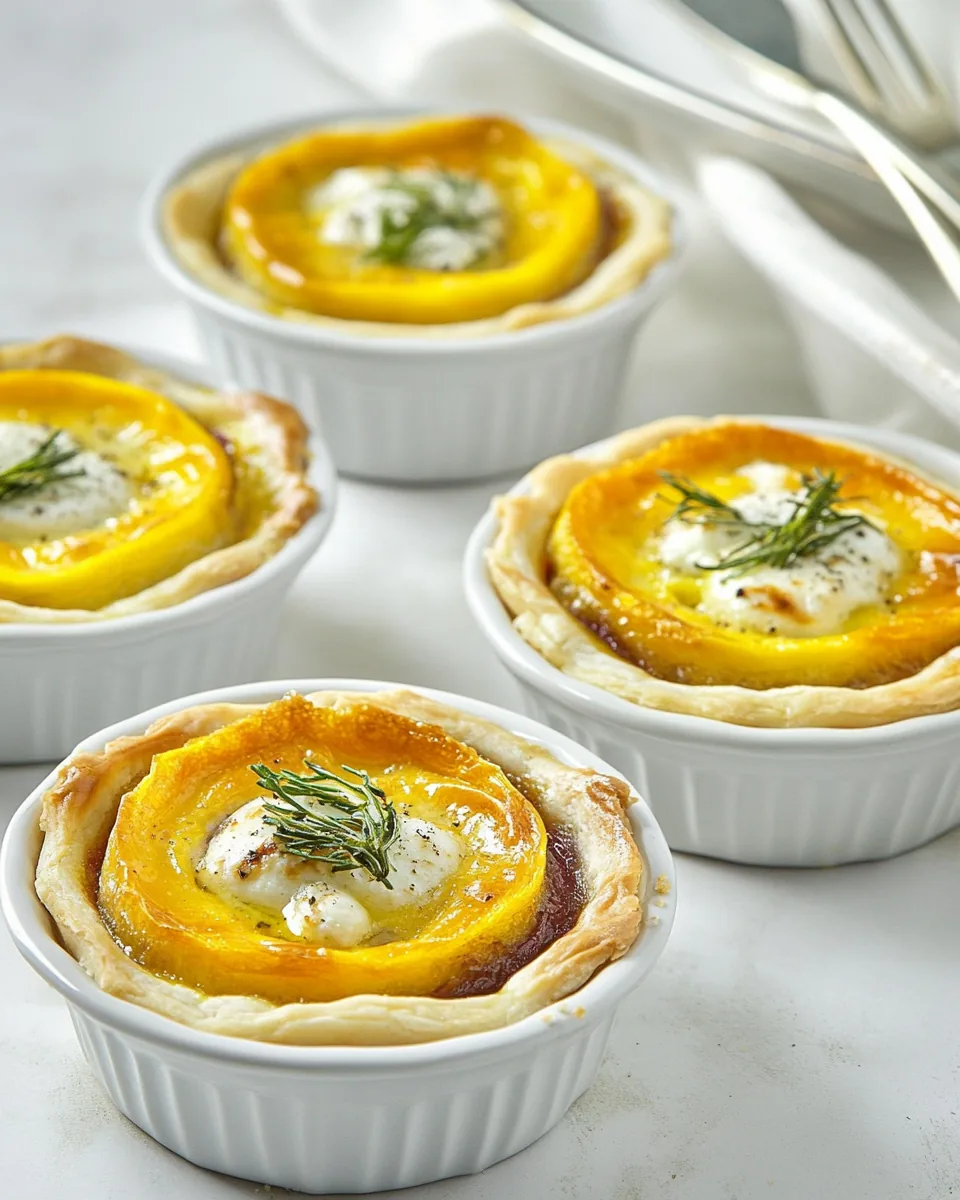
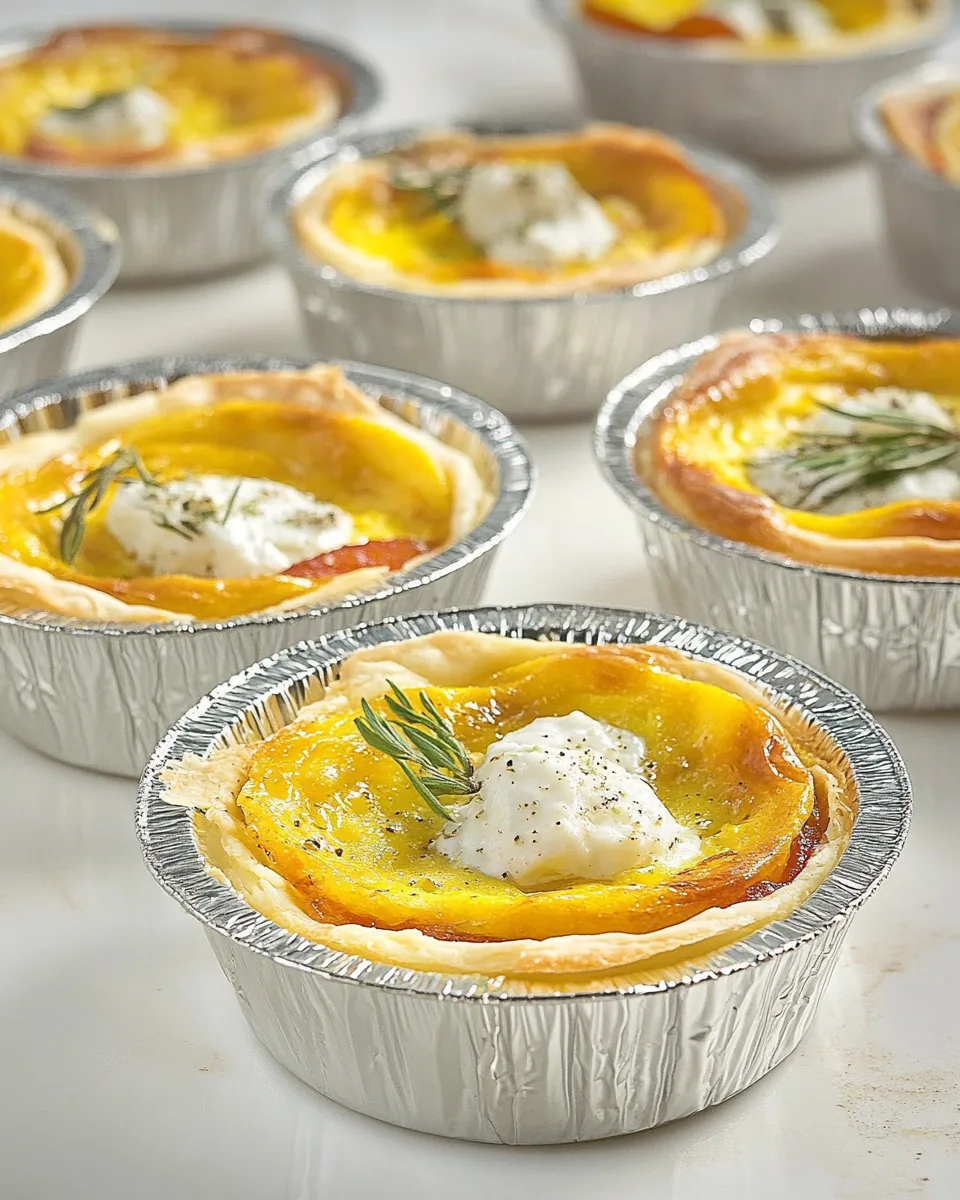
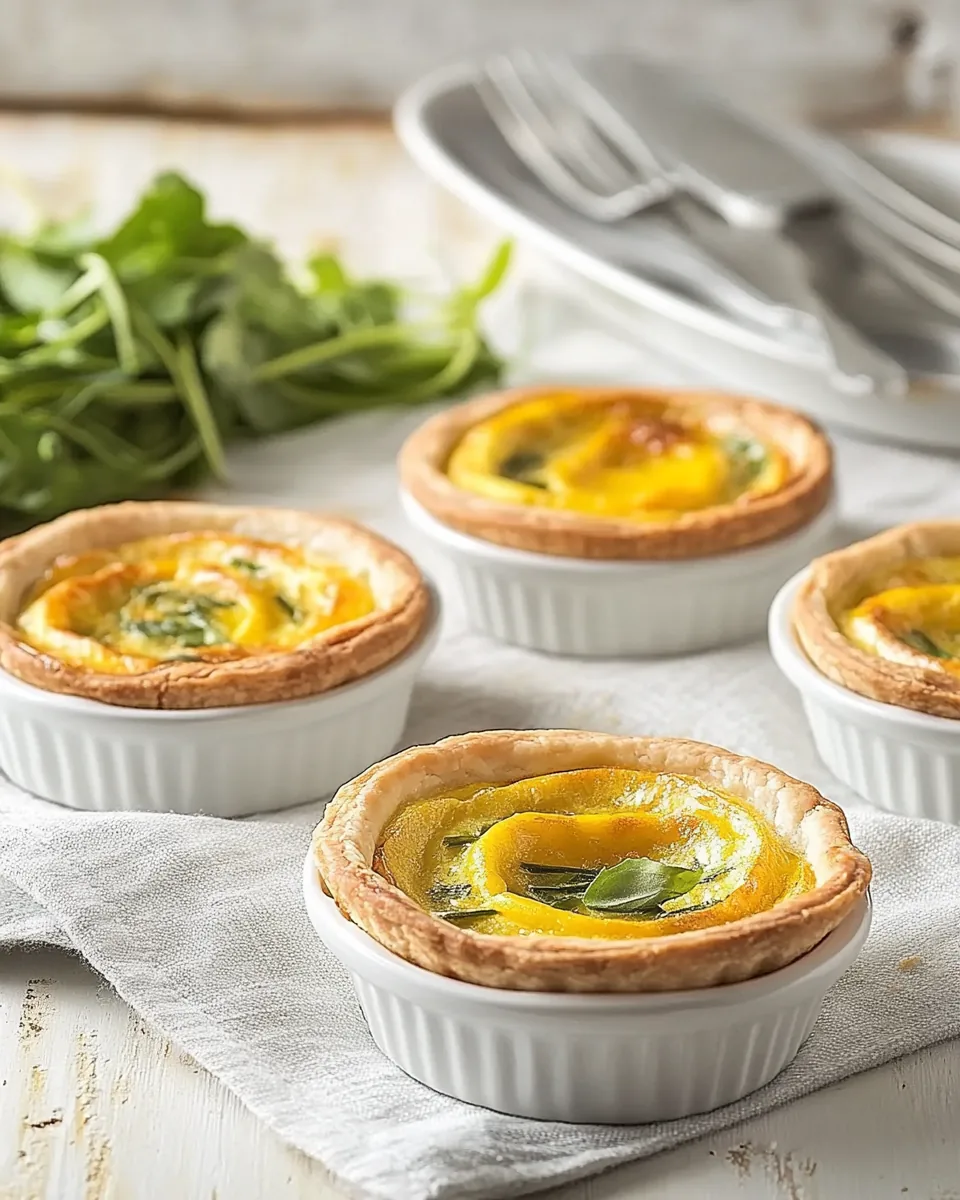
Whenever I think about hosting a gathering, Golden Beet and Goat Cheese Quiches come to mind. These delightful little bites never fail to impress my guests. I remember the first time I served them; the vibrant colors of the roasted golden beets contrasted beautifully against the creamy goat cheese, making for a truly stunning dish. The combination of flavors is rich yet refreshing, and I love how they can be enjoyed warm or at room temperature. Whether it’s for a brunch with friends or an elegant dinner party, these quiches always steal the show. I also appreciate how easy they are to prepare, which means I get to spend more time with my guests instead of being stuck in the kitchen. With each bite, you experience a delicate crunch from the crust, followed by the soft, flavorful filling that dances on your palate. I can’t wait to share this recipe with you!
Recipe Snapshot
1 hr 30 mins
30 mins
60 mins
Medium
210 kcal
6 g
Gluten-Free, Low FODMAP
12 g
Frying Pan, Whisk, Food Processor, Oven, Chef’s Knife, Cutting Board, Mixing Bowl, Baking Sheet
What Sets This Golden Beet and Goat Cheese Quiches Apart
Beautiful Presentation
One of the standout features of Golden Beet and Goat Cheese Quiches is their stunning presentation. These colorful little quiches are not only delicious but also look fantastic on any table. The golden hue of the beets combined with the soft, creamy goat cheese creates an inviting dish that catches the eye. You can be sure that your guests will be reaching for these as they admire how lovely they are.
Perfect for Any Occasion
These quiches are incredibly versatile. They work wonderfully as an appetizer, a light lunch option, or even as part of a buffet spread. You can easily make them ahead of time, allowing you to enjoy your own party without the stress of last-minute cooking. Whether it’s a casual gathering or a festive celebration, they fit right in, making any event feel special.
Flavorful and Nutritious
The combination of golden beets, fresh herbs like thyme and rosemary, and tangy goat cheese in these quiches not only tastes amazing but also packs a nutritional punch. Beets are known for their health benefits, including being high in vitamins and minerals. The addition of herbs enhances the flavor profile, giving each bite a fresh and vibrant taste that you’ll love.
Easy to Customize
Another reason to love Golden Beet and Goat Cheese Quiches is their adaptability. You can easily swap out ingredients based on what you have on hand or to suit your taste preferences. Want to add some sautéed greens or different cheeses? Go for it! The recipe allows for creativity, making it fun to experiment and make it your own.
Great for Leftovers
If you find yourself with leftovers, you’re in luck! These quiches store beautifully. You can keep them in the fridge and enjoy them the next day, either cold or reheated. It’s a great way to have a delicious and healthy option ready for a quick meal or snack.
What Goes Into Golden Beet and Goat Cheese Quiches
Creating the perfect Golden Beet and Goat Cheese Quiches starts with selecting quality ingredients. Each component plays a vital role in achieving the delightful texture and flavor of the dish. The earthy sweetness of the golden beet pairs beautifully with the tangy notes of goat cheese, while the fresh herbs elevate the flavor profile. Together, they create a harmonious balance that is simply irresistible.
- All-Purpose Flour: 1 cup/125g – This flour serves as the base for the quiche crust, providing the structure needed for a flaky texture.
- Pine Nuts: 2 tablespoons/20g – Toasted pine nuts add a delightful crunch and a rich, nutty flavor to the crust.
- Salt: ¼ teaspoon – Enhances the overall flavor of the crust.
- Unsalted Butter: ¼ cup/56g (1/2 stick) – Cold butter is essential for a flaky crust, adding richness and depth to the dough.
- Egg: 1 large (and 1 egg separated) – Eggs provide binding and help achieve a tender texture in both the crust and filling.
- Golden Beet: 1 large – The star of the dish, golden beets introduce sweetness and a beautiful hue.
- Olive Oil: For roasting – Helps to enhance the flavor of the beet and ensure it roasts beautifully.
- Whole Milk or Half-and-Half: ¼ cup/60g – Adds creaminess to the filling.
- Fresh Thyme Leaves: ½ teaspoon – Infuses the filling with a fragrant herbal note.
- Fresh Rosemary: ¼ teaspoon – Offers a robust flavor that complements the beet and cheese.
- Garlic: 1 clove minced – Adds depth and a savory quality to the filling.
- Ground Nutmeg: Pinch – This warm spice enhances the overall flavor profile.
- Black Pepper: To taste – Provides a slight kick to balance the sweetness of the beet.
- Goat Cheese: 2 tablespoons/28g – The creamy, tangy cheese brings a delightful richness to the quiche.
- Pine Nuts: Additional for garnish – A finishing touch that enhances presentation and flavor.
How to Make Golden Beet and Goat Cheese Quiches
Making Golden Beet and Goat Cheese Quiches is a rewarding experience filled with delightful aromas and flavors. Follow these simple yet detailed steps to create this masterpiece. You’ll find that the process is enjoyable and easy to follow, leading to a delicious result that you can be proud of.
To start, prepare the crust. In a food processor, pulse together all-purpose flour, pine nuts, and salt until everything is finely ground and well-combined. This step is crucial for achieving a smooth and flavorful crust.
Next, add the cold unsalted butter cut into cubes. Pulse the mixture until it resembles pea-sized crumbles. You want to achieve a texture that will create a flaky crust once baked.
Now, add the large egg and the reserved egg yolk. Pulse again 3 to 4 times until the mixture is evenly moistened. If it still feels too dry, you can add a tablespoon of cold water, ensuring the crumbs stick together when pinched.
Transfer the crumb mixture onto a piece of plastic wrap. Knead it a couple of times to form a ball, then flatten it into a disc. Wrap it tightly in plastic wrap and refrigerate for at least 30 minutes. This chilling step is essential for helping the crust maintain its shape while baking.
While the crust is chilling, preheat your oven to 400 degrees F. Meanwhile, prepare the golden beet. Trim the stem end, rub it all over with olive oil, and wrap it loosely in aluminum foil.
Roast the wrapped beet in the oven for 40 to 45 minutes until it’s fork-tender. Once it’s done, remove it from the oven and let it cool for about 10 minutes. After cooling, rub the beet between two paper towels to remove the skin, which should come off easily.
Once the beet is peeled, slice it and cut it into ¼-inch dice. Set aside. Now, reduce the oven temperature to 375 degrees F.
On a lightly floured surface, roll the chilled crust dough into a 7-by-11-inch rectangle, about ¼-inch thick. Using a cookie cutter or a small bowl, cut out 3 ½-inch rounds. Carefully ease these rounds into mini pie cavities, being cautious not to stretch the dough.
To prevent shrinkage during baking, place mini muffin papers inside each crust, filling them with pie weights or dried beans. Bake the crusts for 10 minutes, then remove the weights and papers, brushing the insides with the reserved beaten egg white. Bake for an additional 5 minutes or until the edges are just barely golden.
Remove the crusts from the oven and let them cool for at least 10 minutes. Meanwhile, prepare the filling. In a bowl, whisk together the egg, whole milk or half-and-half, thyme, rosemary, garlic, ground nutmeg, and a pinch of salt and black pepper. This filling will create a creamy and flavorful base.
Next, spoon 1 tablespoon of the diced golden beet into each crust. Then, pour the filling mixture into each crust, filling it within ¼-inch of the tops. You may end up with some leftover filling.
Sprinkle the tops with crumbled goat cheese and a few extra pine nuts for garnish if desired. This adds extra flavor and a beautiful finish.
Finally, bake the quiches for 15 to 18 minutes, or until the tops are set, no longer jiggly, and the edges of the crust are golden brown. Once done, let them cool slightly, then carefully remove them from the pan using removable bottoms. Serve them warm or at room temperature for the best experience.
Things Worth Knowing
- Chilling the Dough: Always chill your crust dough. This helps to relax the gluten and ensures a tender and flaky result.
- Roasting Tips: When roasting beets, keep them wrapped tightly in foil to retain moisture, leading to a better texture.
- Monitoring Baking Time: Keep an eye on the quiches as they bake; ovens can vary, and you want them set but not overcooked.
- Using Fresh Herbs: Fresh herbs make a significant difference in flavor compared to dried; use fresh whenever possible.
Ways to Adapt This Recipe

There are many exciting ways to adapt Golden Beet and Goat Cheese Quiches to fit your tastes or dietary needs. These tips will inspire you to get creative and make this dish truly your own.
- Storage: Store leftover quiches in an airtight container in the refrigerator for up to 3 days. Reheat in the oven for the best texture.
- Freezing: You can freeze unbaked quiches; simply assemble them and cover tightly before freezing. Bake from frozen, adding a few extra minutes to the cooking time.
- Variations: Try adding cooked spinach or other vegetables to the filling for added nutrition and flavor.
- Different Cheeses: Experiment with different types of cheese, like feta or ricotta, for a new twist on the flavor.
- Herb Blends: Mix and match herbs; dill or chives would also work beautifully in this recipe.
Serving Options for Golden Beet and Goat Cheese Quiches
When it comes to serving Golden Beet and Goat Cheese Quiches, the possibilities are endless. Here are some ideas to help you present this dish beautifully and deliciously:
- Brunch Delight: These quiches are perfect for brunch gatherings. Pair them with fresh fruit or a light salad to create a well-rounded meal.
- Picnic Treat: They make for an ideal picnic food. Just pack them in a container, and you’re set for a lovely outdoor meal.
- Elegant Appetizer: Serve them as bite-sized appetizers at your next dinner party. Cut them into smaller portions for a sophisticated touch.
- Seasonal Pairings: Pair these quiches with a crisp fall salad featuring apples and walnuts for a seasonal touch.
- Storage Ideas: If you have leftovers, store them in the fridge or freeze them for a quick meal later.
- Warm or Cold: Remember, these quiches can be enjoyed warm or at room temperature, making them versatile for any occasion!
FAQ
Conclusion
The Golden Beet and Goat Cheese Quiches are not only a feast for the eyes but also a delightful explosion of flavor. Their unique combination of ingredients makes them a standout dish for any gathering. I encourage you to try making these quiches yourself; you won’t be disappointed! They’re sure to impress your guests and become a favorite in your cooking repertoire.

Golden Beet and Goat Cheese Quiches
Equipment
- Frying Pan
- Whisk
- Food Processor
- Oven
- Chef's Knife
- Cutting Board
- Mixing Bowl
- Baking Sheet
Ingredients
- 1 cup All-Purpose Flour
- 2 tablespoons Pine Nuts
- ¼ teaspoon Salt
- ¼ cup Unsalted Butter
- 1 large Egg
- 1 large Egg (separated)
- 1 large Golden Beet
- Olive Oil, for roasting
- ¼ cup Whole Milk or Half-and-Half
- ½ teaspoon Fresh Thyme Leaves
- ¼ teaspoon Fresh Rosemary
- 1 clove Garlic, minced
- pinch Ground Nutmeg
- Salt and Freshly Ground Black Pepper
- 2 tablespoons Crumpled Goat Cheese
- Additional Pine Nuts, for garnish
Instructions
- To start, prepare the crust. In a food processor, pulse together all-purpose flour, pine nuts, and salt until everything is finely ground and well-combined. This step is crucial for achieving a smooth and flavorful crust.
- Next, add the cold unsalted butter cut into cubes. Pulse the mixture until it resembles pea-sized crumbles. You want to achieve a texture that will create a flaky crust once baked.
- Now, add the large egg and the reserved egg yolk. Pulse again 3 to 4 times until the mixture is evenly moistened. If it still feels too dry, you can add a tablespoon of cold water, ensuring the crumbs stick together when pinched.
- Transfer the crumb mixture onto a piece of plastic wrap. Knead it a couple of times to form a ball, then flatten it into a disc. Wrap it tightly in plastic wrap and refrigerate for at least 30 minutes. This chilling step is essential for helping the crust maintain its shape while baking.
- While the crust is chilling, preheat your oven to 400 degrees F. Meanwhile, prepare the golden beet. Trim the stem end, rub it all over with olive oil, and wrap it loosely in aluminum foil.
- Roast the wrapped beet in the oven for 40 to 45 minutes until it's fork-tender. Once it's done, remove it from the oven and let it cool for about 10 minutes. After cooling, rub the beet between two paper towels to remove the skin, which should come off easily.
- Once the beet is peeled, slice it and cut it into ¼-inch dice. Set aside. Now, reduce the oven temperature to 375 degrees F.
- On a lightly floured surface, roll the chilled crust dough into a 7-by-11-inch rectangle, about ¼-inch thick. Using a cookie cutter or a small bowl, cut out 3 ½-inch rounds. Carefully ease these rounds into mini pie cavities, being cautious not to stretch the dough.
- To prevent shrinkage during baking, place mini muffin papers inside each crust, filling them with pie weights or dried beans. Bake the crusts for 10 minutes, then remove the weights and papers, brushing the insides with the reserved beaten egg white. Bake for an additional 5 minutes or until the edges are just barely golden.
- Remove the crusts from the oven and let them cool for at least 10 minutes. Meanwhile, prepare the filling. In a bowl, whisk together the egg, whole milk or half-and-half, thyme, rosemary, garlic, ground nutmeg, and a pinch of salt and black pepper. This filling will create a creamy and flavorful base.
- Next, spoon 1 tablespoon of the diced golden beet into each crust. Then, pour the filling mixture into each crust, filling it within ¼-inch of the tops. You may end up with some leftover filling.
- Sprinkle the tops with crumbled goat cheese and a few extra pine nuts for garnish if desired. This adds extra flavor and a beautiful finish.
- Finally, bake the quiches for 15 to 18 minutes, or until the tops are set, no longer jiggly, and the edges of the crust are golden brown. Once done, let them cool slightly, then carefully remove them from the pan using removable bottoms. Serve them warm or at room temperature for the best experience.
Notes
- Tip 1: Store leftover quiches in an airtight container in the refrigerator for up to 3 days. Reheat in the oven for the best texture.
- Tip 2: You can freeze unbaked quiches; simply assemble them and cover tightly before freezing. Bake from frozen, adding a few extra minutes to the cooking time.
- Tip 3: Try adding cooked spinach or other vegetables to the filling for added nutrition and flavor.
- Tip 4: Experiment with different types of cheese, like feta or ricotta, for a new twist on the flavor.
- Tip 5: Mix and match herbs; dill or chives would also work beautifully in this recipe.