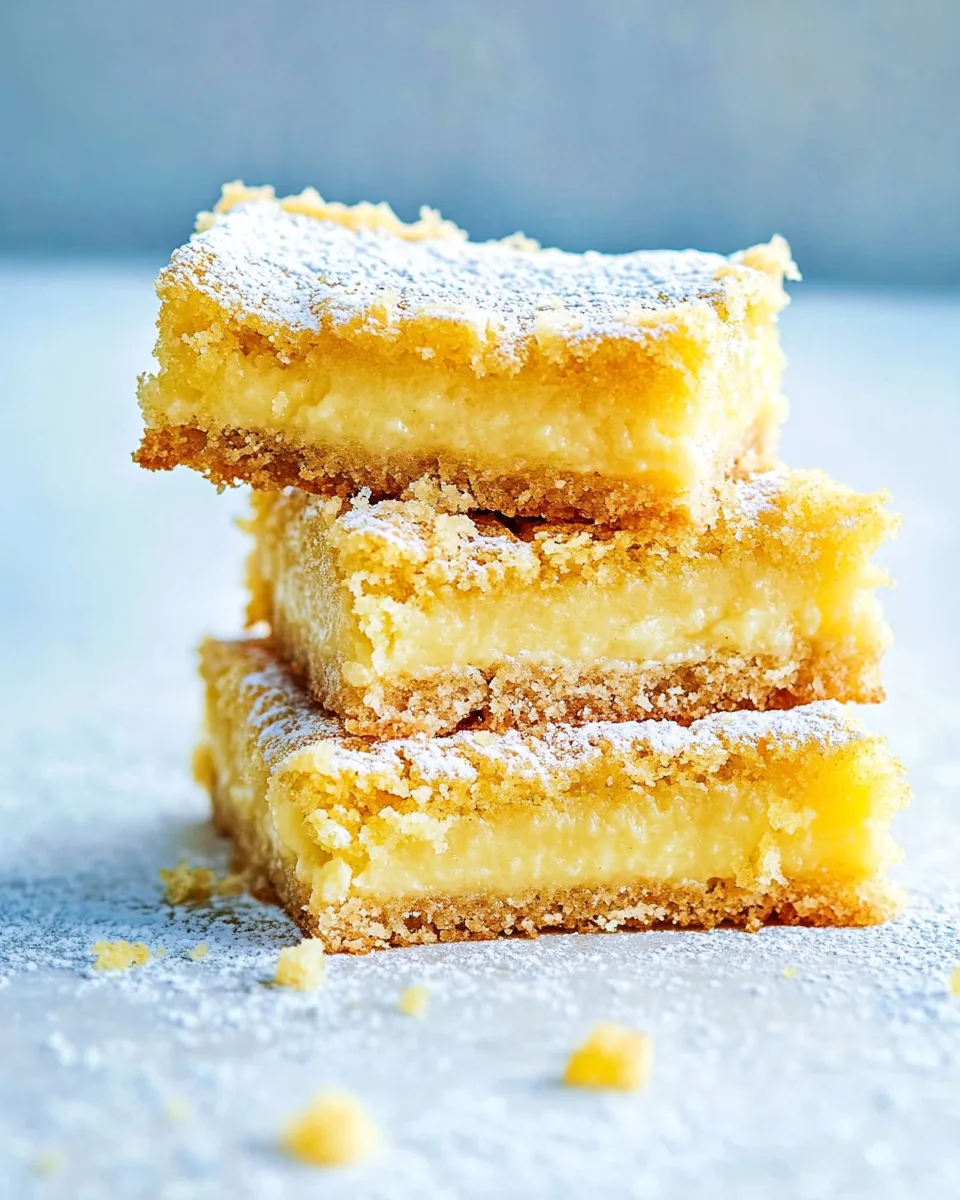
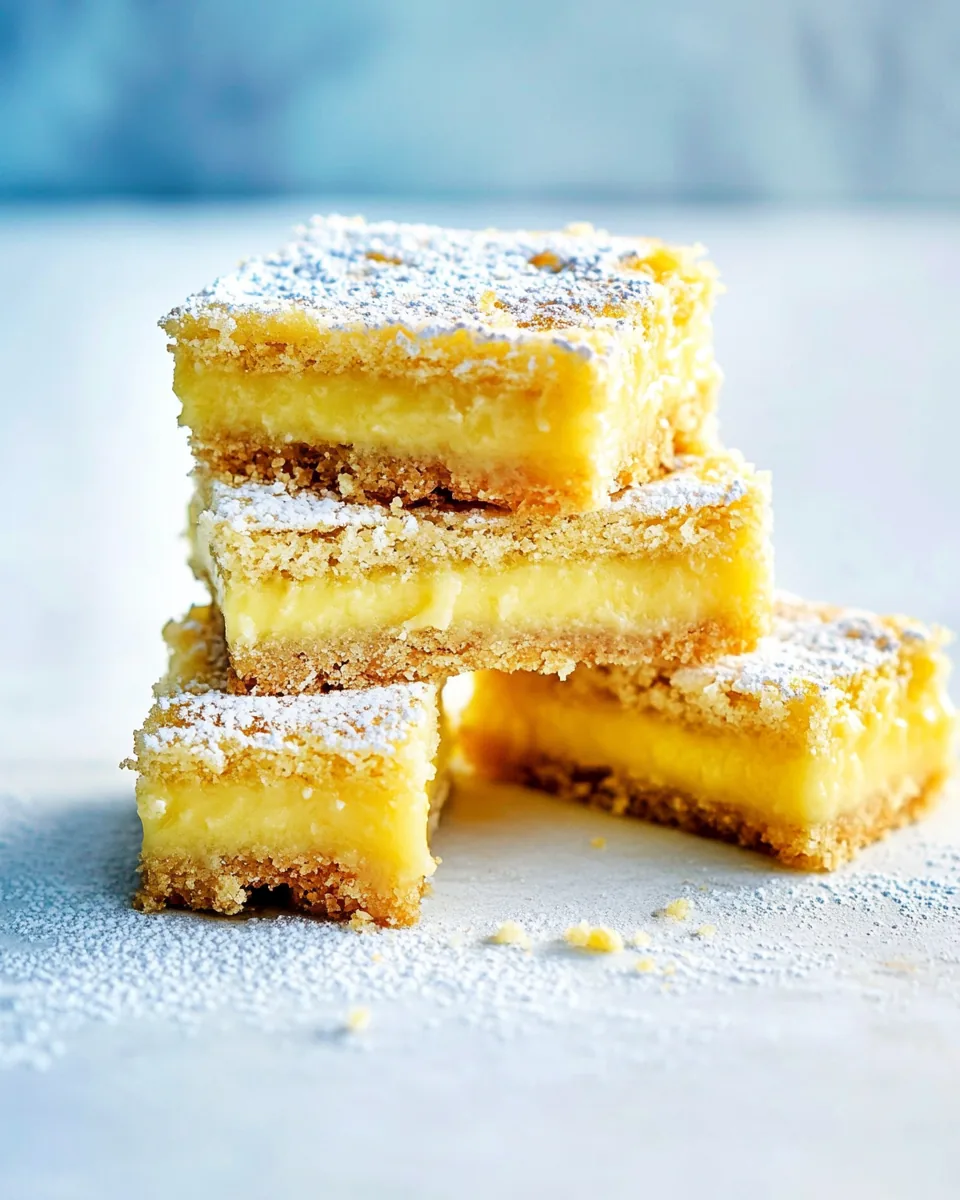
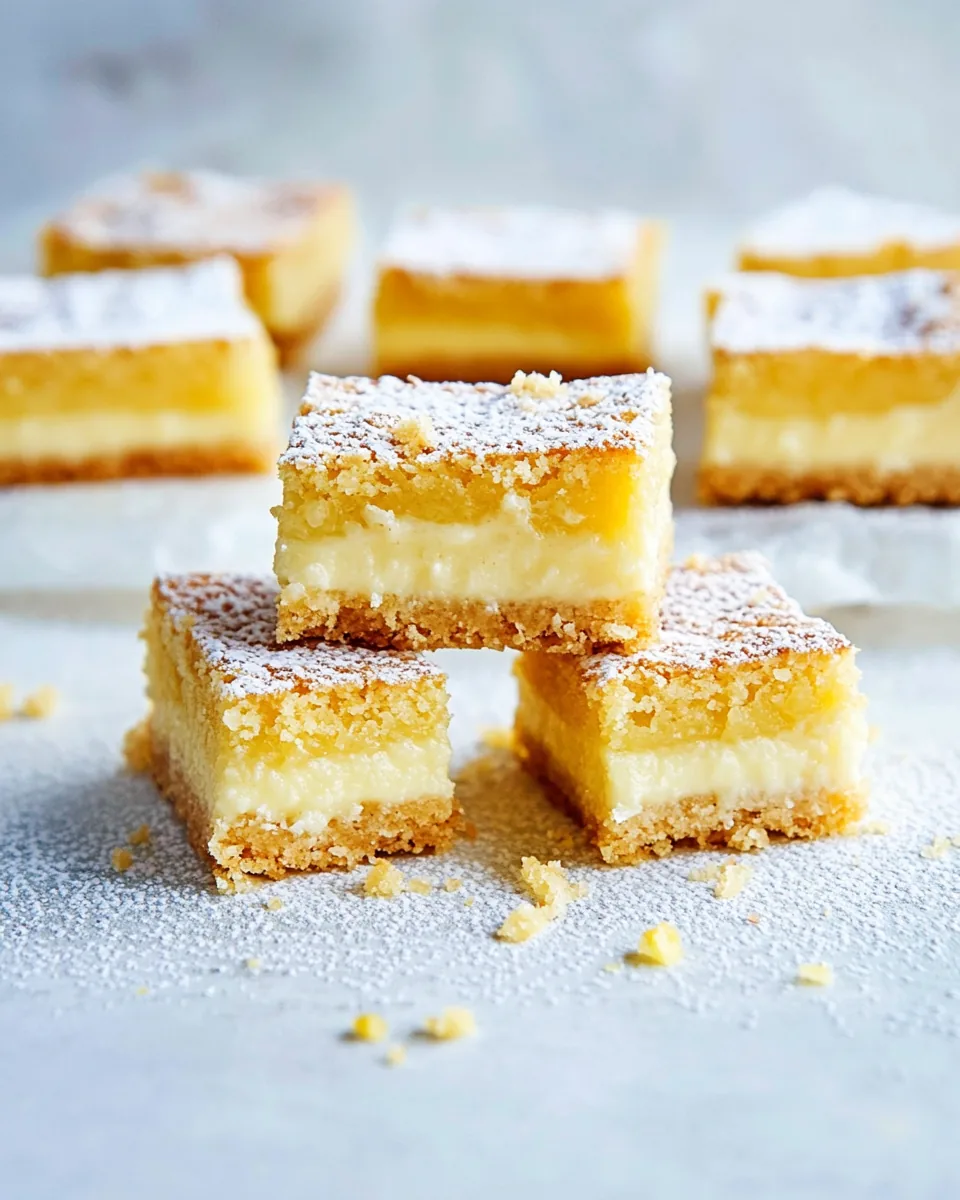
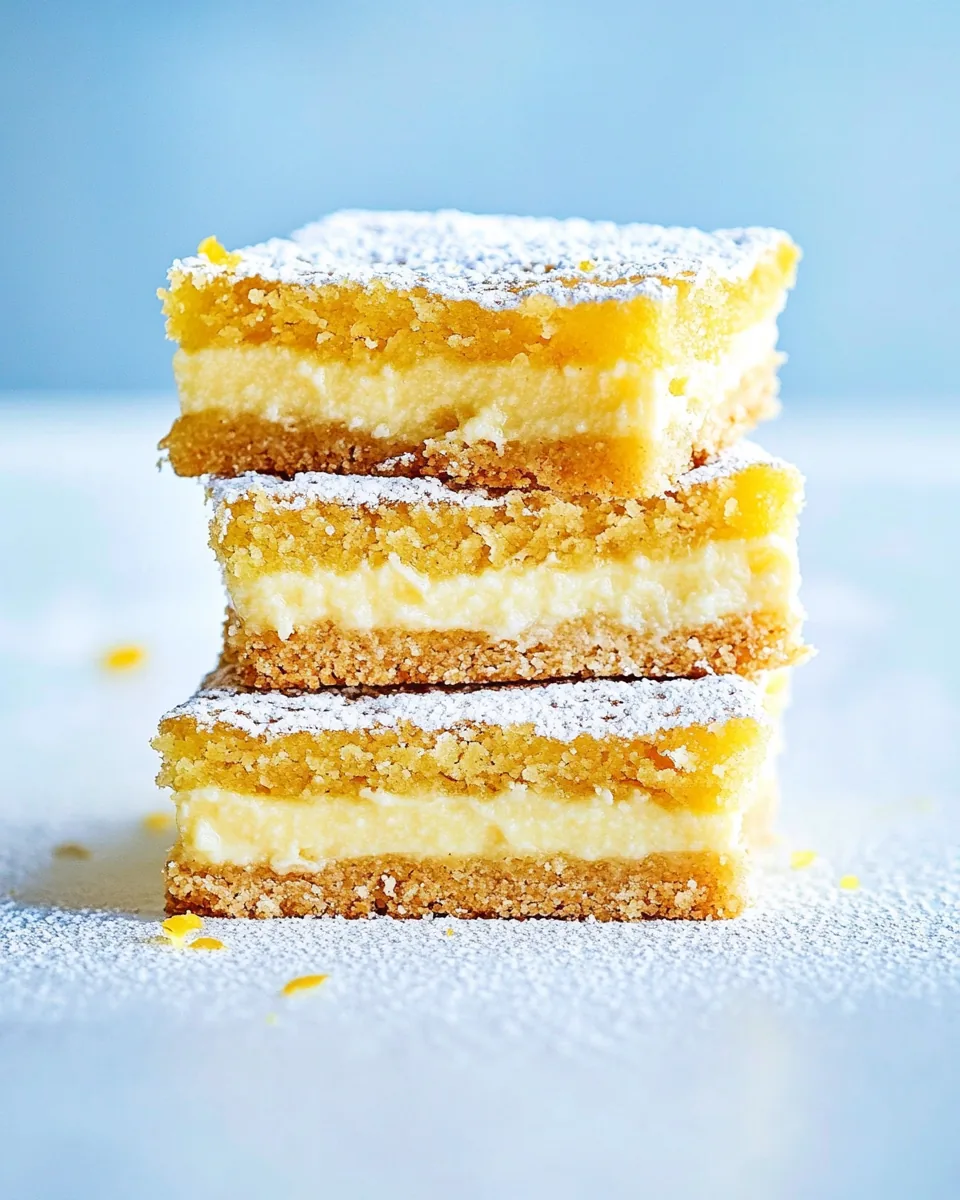
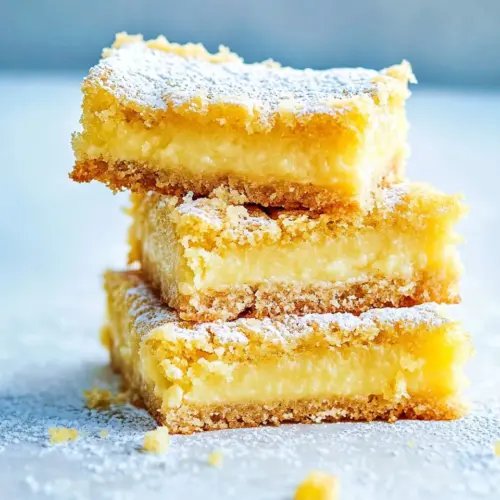
Gluten Free Lemon Bars
There’s something truly enchanting about Gluten Free Lemon Bars that brings back fond memories of sunny spring afternoons. Every year, as the days grow warmer and the flowers bloom, I find myself craving these sweet yet tangy delights. They remind me of backyard picnics and laughter drifting through the air, as we gather with friends and family. The moment I take a bite, I’m transported back to my childhood, with bright lemon flavor dancing on my palate. This recipe is not just about food; it’s about creating joyful moments and sharing heartwarming experiences.
Recipe Snapshot
50 mins
10 mins
40 mins
Medium
250 kcal
4 g
Keto, Paleo, Gluten-Free
12 g
Frying Pan, Whisk, Food Processor, Oven, Chef’s Knife, Mixing Bowl, Wooden Spoon, Baking Sheet
The Appeal of This Gluten Free Lemon Bars
Why do I adore Gluten Free Lemon Bars? Let me share some of the reasons that make this recipe a staple in my kitchen.
1. Bright Flavor
Each bite of these lemon bars bursts with refreshing citrus goodness. The combination of fresh-squeezed lemon juice and zest creates a vibrant flavor profile that’s both satisfying and invigorating. It’s like a splash of sunshine on your taste buds!
2. Gluten-Free Delight
Whether you’re gluten intolerant or simply looking to eat healthier, these Gluten Free Lemon Bars provide a delectable option. Made with almond flour and tapioca flour, they’re a wholesome alternative that doesn’t compromise on taste. Everyone, regardless of dietary restrictions, can enjoy these delicious treats.
3. Simple Ingredients
This recipe utilizes everyday ingredients found in most kitchens. From eggs to butter, each component plays a vital role in achieving the perfect texture and flavor. It’s rewarding to whip up these bars without having to hunt for exotic or hard-to-find ingredients.
4. Perfect for Any Occasion
These bars are incredibly versatile! They’re perfect for spring gatherings, birthday parties, or a simple afternoon snack. No matter the occasion, Gluten Free Lemon Bars always impress and bring a smile to everyone’s face.
5. Easy to Make
Even if you’re new to baking, this recipe is straightforward and uncomplicated. With clear instructions and minimal hassle, you’ll find yourself creating these bars in no time. They’re perfect for budding bakers wanting to impress their friends!
6. Satisfying Texture
The contrast between the crumbly crust and the smooth lemon curd creates a heavenly texture that is absolutely irresistible. Each bite is a perfect harmony of creaminess and crunch that keeps you coming back for more.
Shopping List for Gluten Free Lemon Bars
When creating Gluten Free Lemon Bars, it’s essential to choose quality ingredients that work harmoniously together. Each ingredient plays a crucial role in achieving the perfect balance of taste and texture.
- Almond flour: A gluten-free alternative to traditional flour, it adds a nutty flavor and moist texture.
- Tapioca flour: Provides elasticity and helps to bind the ingredients together.
- Butter: Adds richness and depth to both the crust and lemon curd.
- Maple syrup or raw honey: Natural sweeteners that infuse the bars with flavor.
- Fresh lemons: The star of the show, providing that zesty brightness.
- Eggs: Essential for the lemon curd, giving it structure and creaminess.
- Powdered sugar: For dusting, adding a touch of sweetness and a beautiful finish.
Instructions for Gluten Free Lemon Bars
Making Gluten Free Lemon Bars is a delightful experience, and I’m excited to share the process with you! Follow these simple steps, and you’ll be on your way to creating a treat that everyone will love.
- Preheat your oven to 350 degrees Fahrenheit. Line an 8×8 baking pan with parchment paper, ensuring it hangs slightly over the edges for easy removal later. This step is crucial for a smooth release of your delicious bars.
- Make the crust: In a large mixing bowl, combine the almond flour, tapioca flour, melted butter, maple syrup, and a pinch of sea salt. Mix well until the mixture resembles a crumbly dough. Press the mixture evenly into the bottom of the prepared baking pan. Bake for 25 to 30 minutes, until the crust is lightly golden brown. Keep an eye on it to prevent burning!
- While the crust is baking, prepare the lemon curd: In a medium-sized pot, whisk together whole eggs, egg yolks, beet sugar, lemon zest, fresh-squeezed lemon juice, and the remaining sea salt. Cook over low heat, whisking continuously, until the mixture thickens and coats the back of a spoon, approximately 8 to 10 minutes.
- Strain the lemon curd: Once thickened, remove it from heat and strain the curd through a fine mesh strainer into a medium mixing bowl. This step ensures a silky-smooth texture by removing any lumps or solids.
- Add the butter: Stir in the softened butter until it melts completely and the curd is smooth. This adds a lovely richness that balances the tartness of the lemons.
- Pour the lemon curd over the crust: Carefully pour the prepared lemon curd over the pre-baked crust, spreading it evenly with a spatula. Bake for an additional 10 to 15 minutes, until the curd is just set but still slightly jiggly in the center.
- Let cool: After baking, set the pan aside to cool completely at room temperature. Once cool, cover and refrigerate for at least 3 hours to allow the bars to set.
- Dust and serve: Once set, dust the top with powdered sugar before slicing into squares. Serve chilled for a refreshing treat that’s perfect for any occasion!
Things Worth Knowing
- Tip for baking the crust: Make sure not to overbake the crust. You want it lightly golden to ensure a crumbly texture, not too hard or dry.
- Using fresh lemons: Fresh-squeezed lemon juice is essential for the best flavor. Bottled lemon juice can’t compare!
- Cooling time: Patience is key! Allowing the lemon bars to set in the refrigerator helps achieve that perfect texture.
- Serving suggestion: Serve these bars chilled for a refreshing treat, especially on hot days.
Customization Ideas
There are countless ways to customize Gluten Free Lemon Bars to suit your preferences! Here are some creative ideas:
- Add berries: Incorporate fresh blueberries or raspberries into the lemon curd for a fruity twist.
- Experiment with sweeteners: Try using agave syrup or coconut sugar for a different flavor profile.
- Infuse with herbs: Add a hint of fresh mint or basil to the lemon mixture for a refreshing herbal note.
- Make it a lemon meringue: Top with a light, fluffy meringue for a delightful twist on the classic.
- Change the crust: Use a gluten-free graham cracker crust for a different texture and flavor.
What to Serve Alongside Gluten Free Lemon Bars
- Tea: These bars pair beautifully with a cup of herbal tea, enhancing the citrus notes.
- Fresh fruits: Serve alongside a mixed fruit platter for a colorful and refreshing dessert spread.
- Ice cream: A scoop of vanilla or coconut ice cream on the side makes for a delightful contrast to the tartness of the bars.
- Cheese platter: Include a selection of cheeses for a more sophisticated dessert option.
- Picnics: Perfect for outdoor gatherings, these bars are easy to transport and always a hit.
FAQ
Conclusion
The Gluten Free Lemon Bars are more than just a treat; they are a celebration of flavor that brings joy and sunshine into any gathering. From their bright lemony taste to the crumbly crust, they offer a delightful balance that’s hard to resist. I encourage you to try making these bars and experience the happiness they bring. Your guests will thank you, and you might just find yourself making them again and again!
Gluten Free Lemon Bars
Equipment
- Frying Pan
- Whisk
- Food Processor
- Oven
- Chef's Knife
- Mixing Bowl
- Wooden Spoon
- Baking Sheet
Ingredients
- 2 cups Almond flour
- 2 tablespoons Tapioca flour
- 4 tablespoons Butter grass-fed or coconut oil, melted
- 1/4 cup Maple syrup or raw honey
- 1 teaspoon Vanilla
- 1/4 teaspoon Sea salt
- 3 large Eggs
- 4 large Egg yolks
- 1/2 cup Beet sugar or maple sugar
- Zest from 4 lemons Lemon zest
- 3/4 cup Fresh-squeezed lemon juice from about 6 lemons
- 1/4 teaspoon Sea salt
- 8 tablespoons Unsalted butter softened and cut into cubes
- Powdered sugar for dusting
Instructions
- Pre-heat the oven to 350 degrees °F and line an 8x8 baking pan with parchment paper and set aside.
- Make the crust: Add all ingredients to a large mixing bowl and mix well. Press evenly into the baking pan. Bake for 25-30 minutes, or until crust is lightly brown.
- Meanwhile, make lemon curd: Place whole eggs and yolks, sugar, lemon zest and juice and sea salt in a medium pot.
- Over low heat, whisk the lemon curd until it becomes thick enough to coat the back of a spoon and take off heat. This process should take around 8-10 minutes.
- Using a fine mesh strainer, strain the lemon curd into a medium mixing bowl. Add in the butter and stir well until melted.
- Pour lemon curd over the crust. Bake for an additional 10-15 minutes. Set aside, let cool completely, cover, and store in the refrigerator for at least 3 hours to set.
- Top with powdered sugar, slice, and serve!
Notes
- Tip: This recipe was originally published in June 2015, and updated slightly in June 2019.