Gluten Free Graham Cracker Crust Recipe
The first time I made a Gluten Free Graham Cracker Crust Recipe, it was an experiment. I had a friend coming over who was gluten intolerant, and I wanted to create something special for her. As I gathered my ingredients, the smell of the almond flour and coconut oil filled my kitchen, bringing back memories of childhood. I remembered the joy of baking with my grandmother, who always insisted that the secret to a perfect crust was using the finest ingredients. This crust not only turned out beautifully, but it also exceeded my expectations in flavor. My friend loved it, and it made the dessert special for her. Since then, this recipe has become a staple in my kitchen, and I can’t wait to share it with you!
Recipe Snapshot
35 mins
15 mins
20 mins
Medium
150 kcal
3 g
Keto, Paleo, Whole30
12 g
Frying Pan, Food Processor, Oven, Wooden Spoon, Mixing Bowl, Baking Sheet
The Magic of This Gluten Free Graham Cracker Crust Recipe
Gluten-Free Goodness
What I love most about this Gluten Free Graham Cracker Crust Recipe is how it captures the essence of traditional graham cracker crusts while being entirely gluten-free. The use of almond flour gives it a unique texture that pairs perfectly with any filling. It’s not only suitable for those with dietary restrictions but also adds a nutty flavor that enhances dessert.
Sugar-Free Option
This recipe is versatile because it can be made sugar-free without compromising taste. By using monk fruit as a sweetener, you can enjoy a guilt-free treat that everyone will love. It’s an excellent option for those watching their sugar intake but still wanting to indulge in a delicious dessert.
Easy to Make
With only a few simple steps, you can whip up this crust in no time. The process is straightforward, making it perfect for baking novices or busy individuals. Just mix, bake, and chill!
Perfect for Any Occasion
This crust is incredibly versatile, making it an ideal base for various fillings, from cheesecakes to fruit tarts. Whether it’s a family gathering, a holiday celebration, or just a sweet treat for yourself, this recipe fits the occasion beautifully.
Healthy Fats
Utilizing coconut oil not only adds flavor but also provides healthy fats that are beneficial for your body. It’s a great alternative to traditional fats used in crusts, making this recipe a healthier choice without sacrificing taste.
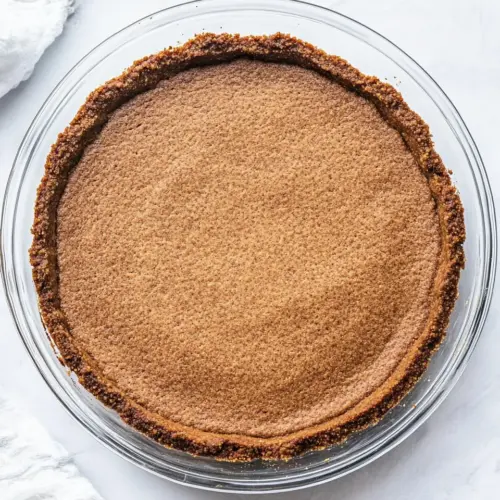
Texture is Key
The combination of almond flour and coconut oil creates a delightful crunch that is often missing in gluten-free recipes. It holds up well under fillings, ensuring that each slice maintains its shape and delivers the perfect bite.
Shopping List for Gluten Free Graham Cracker Crust Recipe
When it comes to making a crust that stands out, the ingredients play a crucial role. In this Gluten Free Graham Cracker Crust Recipe, we use a combination of almond flour, monk fruit, and coconut oil to create a base that is both delicious and versatile. Each component works beautifully together, providing not only flavor but also the right texture for the perfect crust.
- 1 1/4 cups almond flour (125g) – This gluten-free flour gives the crust a nutty flavor and a crumbly texture.
- 1/4 cup + 2 tablespoons monk fruit – A natural sweetener that keeps the crust sugar-free while adding sweetness.
- 1 1/4 teaspoons baking powder – Helps the crust rise slightly, creating a light texture.
- 1/4 teaspoon salt – Enhances the overall flavor of the crust.
- 1 egg yolk – Provides richness and helps bind the crust together.
- 2 tablespoons coconut oil (melted and divided) – Adds moisture and a subtle coconut flavor.
- 1 teaspoon molasses – Contributes depth and richness to the crust.
The Method for Gluten Free Graham Cracker Crust Recipe
Making this crust is a breeze and can be a fun activity for the whole family. Follow these steps to create a delicious, gluten-free base for your favorite desserts. You’ll love how simple it is!
- Preheat your oven to 400°F (200°C). This initial high temperature will help create a crisp crust.
- Line the bottom of a 9-inch pie plate or springform pan with parchment paper for easy removal. This ensures that the crust doesn’t stick.
- In a large bowl, stir together the almond flour, monk fruit (reserve 2 tablespoons for later), baking powder, and salt. Mixing these dry ingredients thoroughly will help distribute the flavors evenly.
- Add the egg yolk, 1 tablespoon of melted coconut oil (reserve the other tablespoon), and molasses to the dry ingredients. Use your hands to mix until the mixture becomes crumbly, resembling wet sand.
- Spread the crumb mixture onto a large baking sheet lined with parchment paper, breaking it into very small pieces, like large grains of sand. This allows for even baking.
- Bake for 4 minutes, then stir the mixture and bake for another 3 to 4 minutes. Keep a close eye on it, as it can burn easily. You want it to be deep brown but not burnt.
- Once the crumbs are golden brown, remove them from the oven and let them cool for 15 minutes on the counter. This cooling step is crucial for achieving the right texture.
- Transfer the baking sheet to the refrigerator and chill the crumbs for 20 minutes. This helps firm up the mixture before processing.
- Lower the oven temperature to 375°F (190°C). This lower temperature will help the crust cook evenly without burning.
- Add the chilled crumbs to a food processor along with the remaining 2 tablespoons of monk fruit. Pulse until the crumbs are finely broken down.
- With the food processor running, drizzle in the remaining 1 tablespoon of melted coconut oil. Continue processing until the mixture begins to stick together.
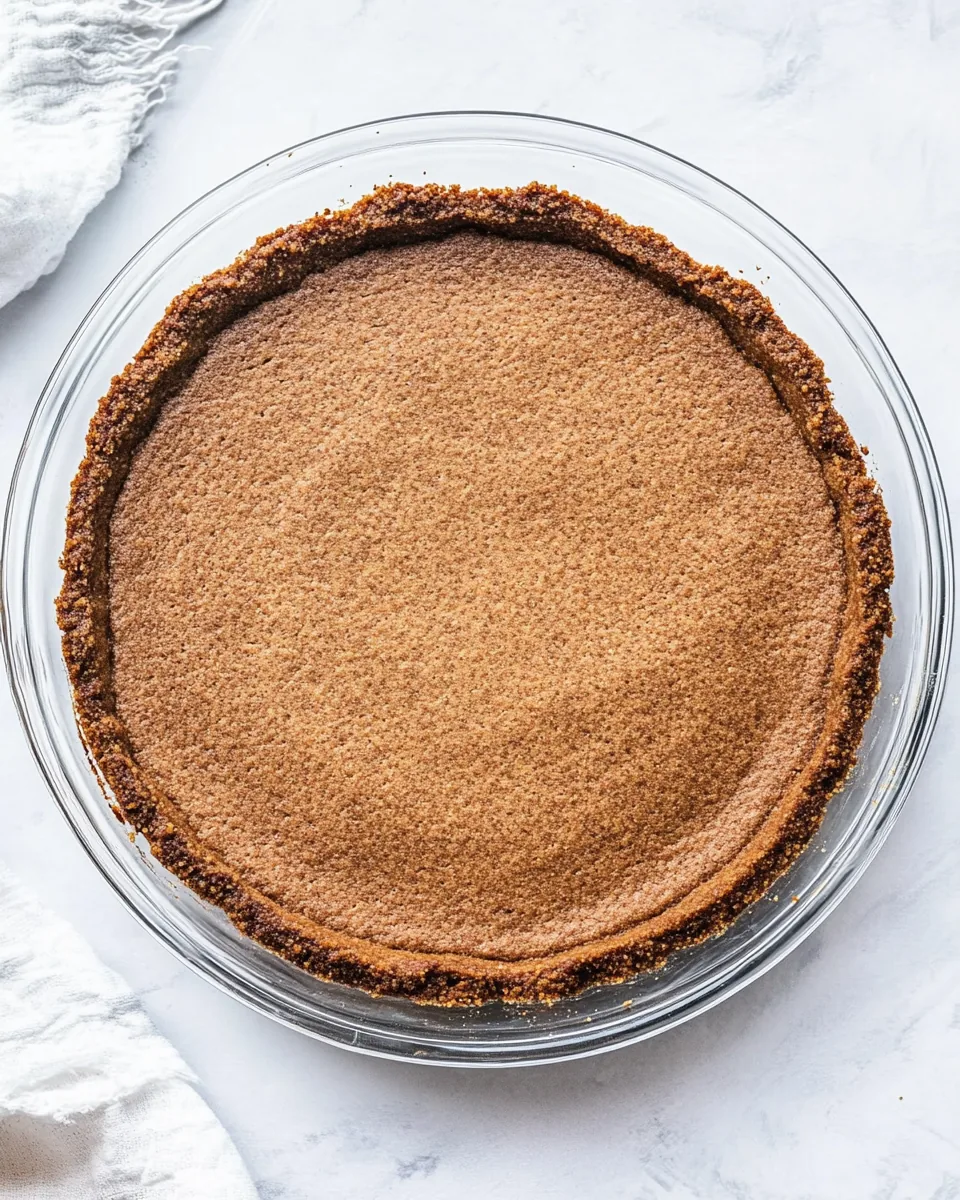
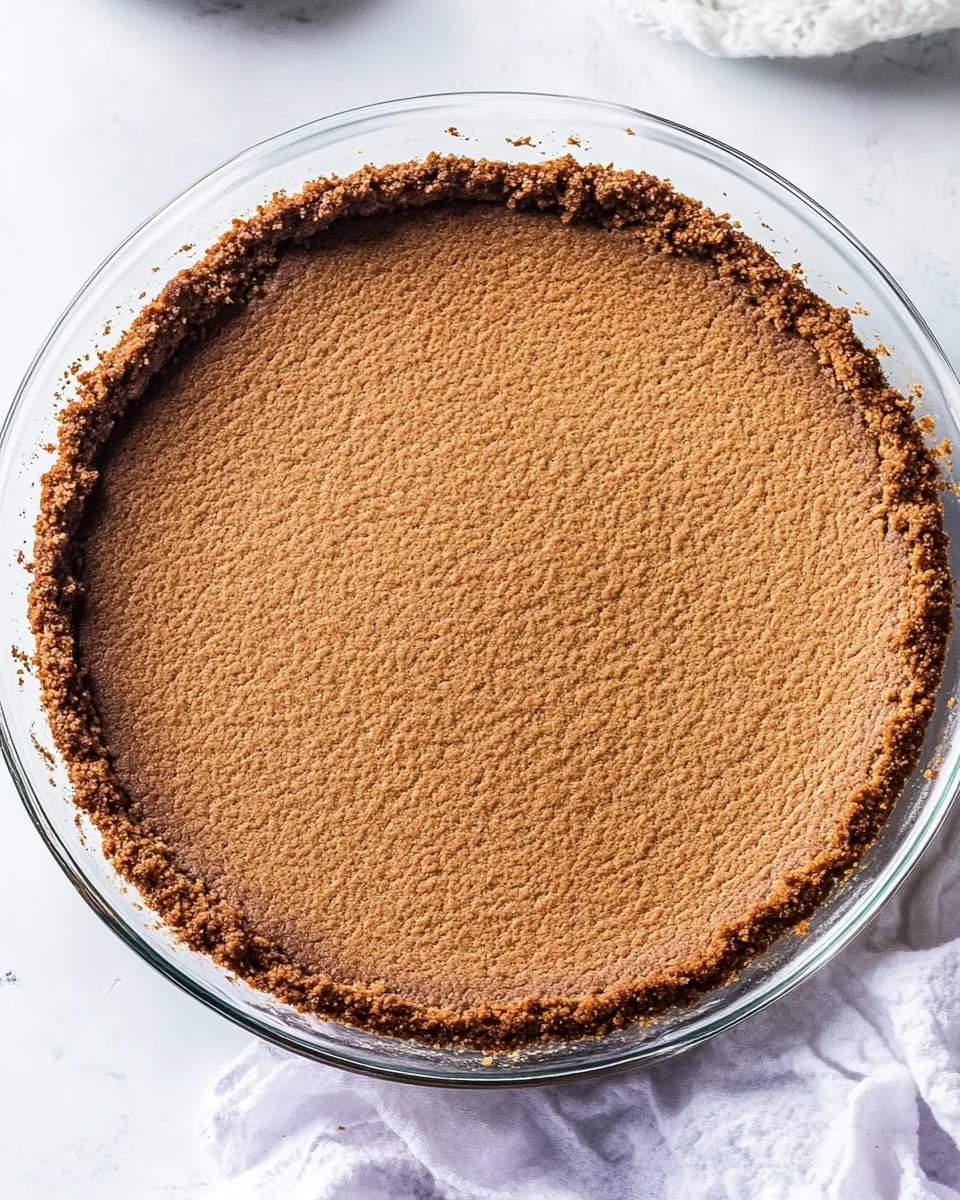
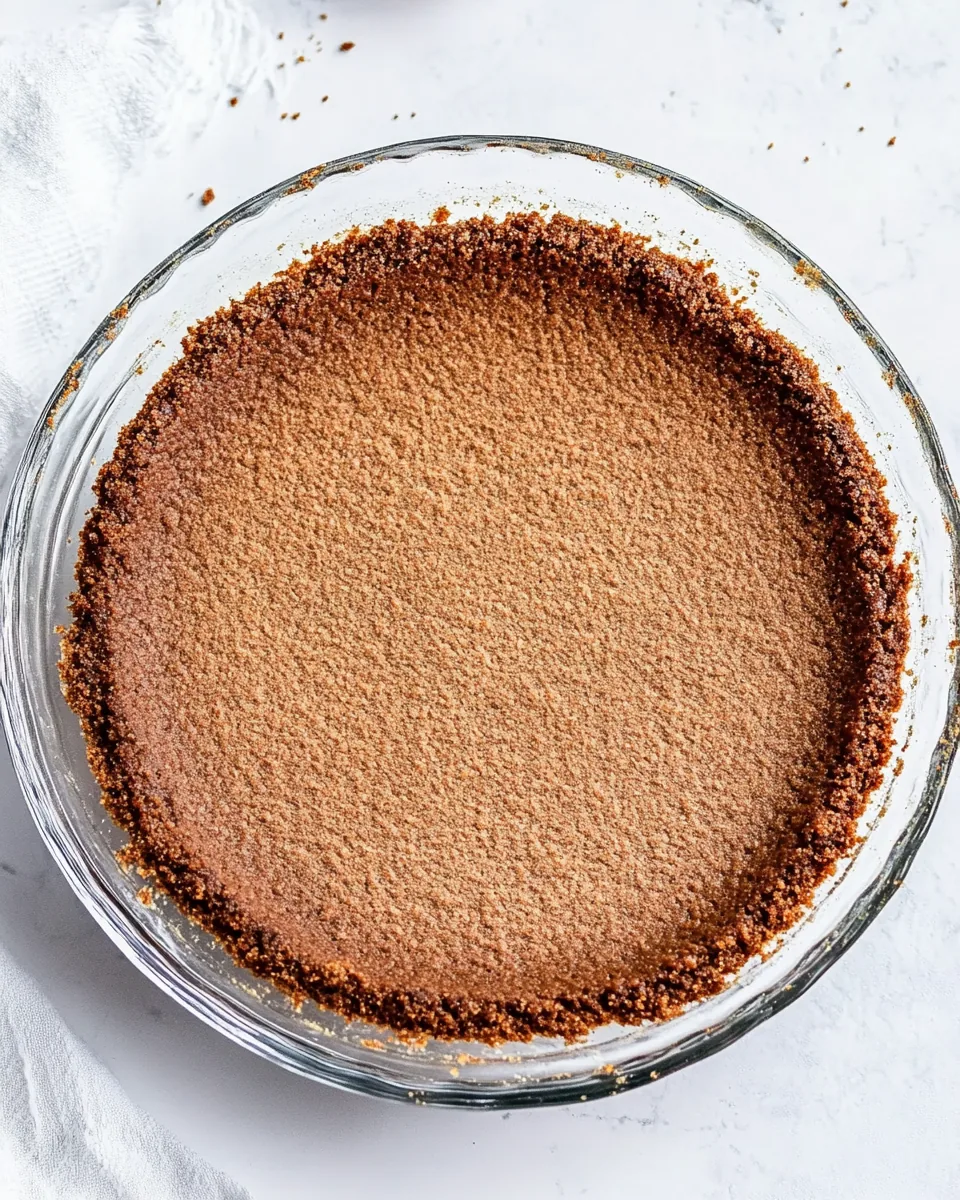
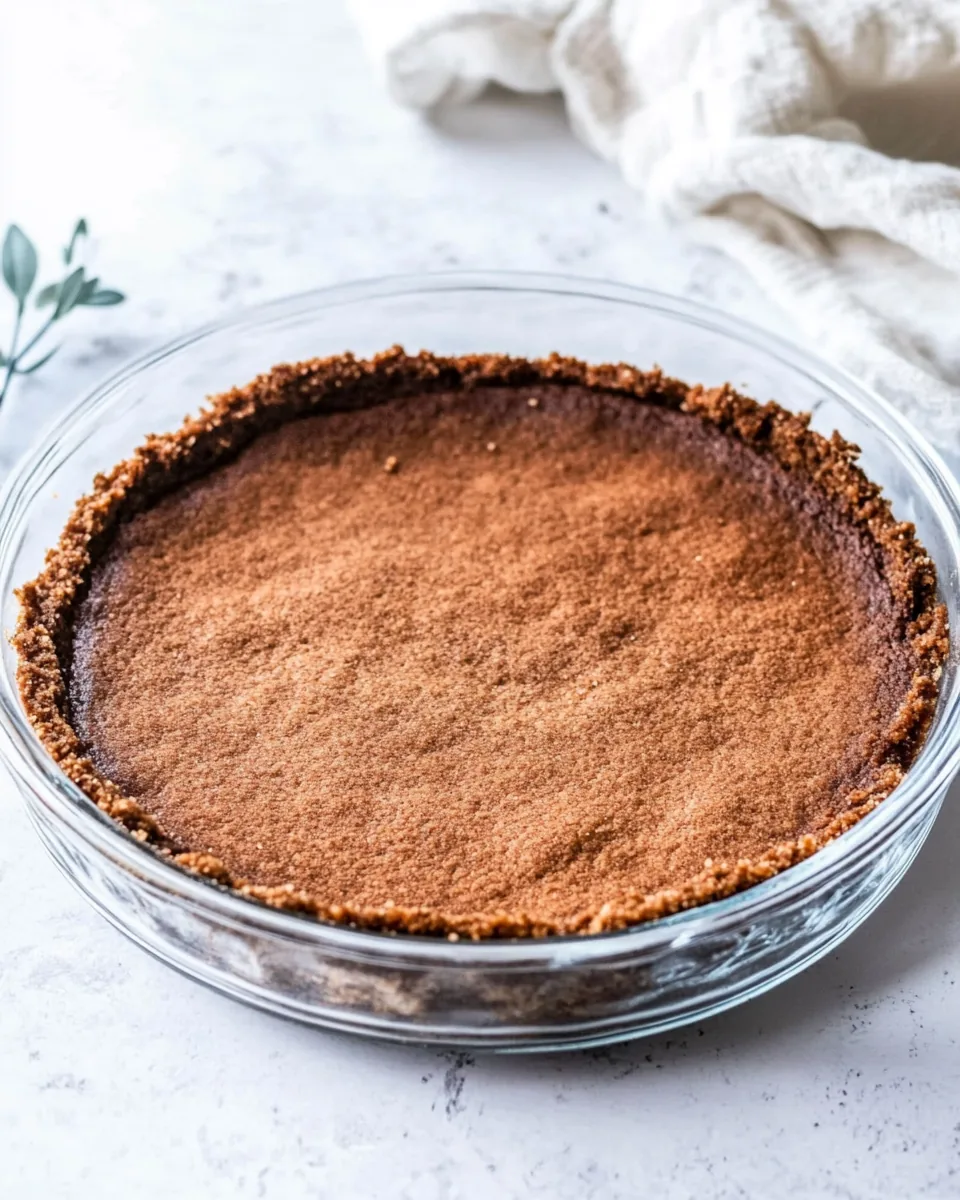
- Press the crumb mixture evenly into the prepared pie plate or springform pan. Make sure the bottom is thin and compact, but with slightly thicker edges for support.
- Bake the crust for 11 to 13 minutes, or until it is a deep golden brown. Watch it closely to avoid overbaking.
- Remove from the oven and let it cool completely on the counter. This helps set the crust.
- Once cooled, transfer the crust to the freezer and chill until completely hard, about 40 to 60 minutes. This step is essential for no-bake recipes.
- Make sure the crust is frozen and hard before adding your filling. For no-bake recipes, bake the crust for an additional 3 to 5 minutes before freezing to ensure it stays firm.
Things Worth Knowing
- Watch the Color: Keep an eye on the crumbs while baking; they can go from golden to burnt quickly.
- Chill for Best Results: Chilling the crumbs helps them hold together better when pressed into the pan.
- Use Parchment Paper: Lining the pan makes it much easier to remove the crust once it’s baked.
- Mixing Technique: Don’t overmix the crumb mixture; it should be crumbly, not a dough.
Helpful Notes about Gluten Free Graham Cracker Crust Recipe
This recipe is not only delicious but also offers some great tips to enhance your experience. Here are some helpful notes:
- Storage: Keep any leftover crust in an airtight container in the fridge for up to a week.
- Freezing: You can freeze this crust for up to three months. Just ensure it’s well-wrapped to avoid freezer burn.
- Pairing: This crust works wonderfully with fillings like cheesecake, chocolate mousse, or fruit tarts.
- Serving Suggestions: Try serving it with fresh berries or a drizzle of sugar-free chocolate sauce for added flair.
- Variations: Feel free to experiment with different sweeteners or add spices like cinnamon for an extra kick.
How to Enjoy Gluten Free Graham Cracker Crust Recipe
Serving your Gluten Free Graham Cracker Crust Recipe can be a delightful experience as it pairs well with various fillings and occasions. Here are some ideas:
- With Cheesecake: This crust is the perfect base for a creamy cheesecake. Top it with fresh fruit for a refreshing dessert.
- During Holidays: Serve it during gatherings or holidays; it’s a great way to impress your guests with a gluten-free treat.
- For Birthday Cakes: Use this crust as a base for an unconventional birthday cake by layering it with whipped cream and fruit.
- Seasonal Pairings: In the summer, try it with lemon or berry fillings; in winter, opt for richer flavors like chocolate or caramel.
- Storage Tips: If you have leftovers, store them in the fridge or freeze for later use.
- Make-ahead Option: You can prepare the crust in advance and store it until you’re ready to fill it.
FAQ
Conclusion
This Gluten Free Graham Cracker Crust Recipe is truly a gem! Its nutty flavor and delightful crunch make it a standout choice for any dessert. I encourage you to try it out and see how it elevates your favorite fillings. Whether you’re serving it for a special occasion or enjoying it with your family, this crust will surely impress. Happy baking!
Gluten Free Graham Cracker Crust Recipe
Equipment
- Frying Pan
- Food Processor
- Oven
- Wooden Spoon
- Mixing Bowl
- Baking Sheet
Ingredients
- 1 1/4 cups Almond Flour
- 1/4 cup Monk Fruit divided
- 1 1/4 teaspoons Baking Powder
- 1/4 teaspoon Salt
- 1 Egg Yolk
- 2 tablespoons Coconut Oil melted and divided
- 1 teaspoon Molasses
Instructions
- Preheat your oven to 400°F (200°C). Line the bottom of a 9-inch pie plate or springform pan with parchment paper for easy removal.
- In a large bowl, stir together the almond flour, 1/4 cup of monk fruit sweetener (reserve the remaining 2 tablespoons for later), baking powder, and salt.
- Add the egg yolk, 1 tablespoon of melted coconut oil (reserve the other tablespoon for later), and molasses to the dry ingredients. Use your hands to mix everything until the mixture is crumbly.
- Spread the crumb mixture onto a large baking sheet with sides, breaking it into very small pieces, like large grains of sand, in a single layer. Bake for 4 minutes, stir, then bake for another 3 to 4 minutes. Watch closely, as it can burn quickly. Once the crumbs are deep brown but not burnt, remove from the oven and let them cool for 15 minutes on the counter.
- Transfer the baking sheet to the refrigerator and chill the crumbs for 20 minutes. Lower the oven temperature to 375°F (190°C).
- Add the chilled crumbs to a food processor along with the remaining 2 tablespoons of monk fruit sweetener. Pulse until the crumbs are finely broken down. With the food processor running, drizzle in the remaining 1 tablespoon of melted coconut oil. Process until the mixture begins to stick together.
- Press the crumb mixture evenly into the prepared pie plate or springform pan. Make the bottom thin and compact, with slightly thicker edges for support.
- Bake the crust for 11 to 13 minutes, or until it is a deep golden brown. Remove from the oven and let it cool completely on the counter.
- Once cooled, transfer the crust to the freezer and chill it until it is completely hard, about 40 to 60 minutes. Make sure the crust is frozen and hard before adding your filling. For no-bake recipes, bake the crust for an additional 3 to 5 minutes before freezing to ensure it stays firm.
Notes
- Storage: Keep any leftover crust in an airtight container in the fridge for up to a week.
- Freezing: You can freeze this crust for up to three months. Just ensure it’s well-wrapped to avoid freezer burn.
- Pairing: This crust works wonderfully with fillings like cheesecake, chocolate mousse, or fruit tarts.
- Serving Suggestions: Try serving it with fresh berries or a drizzle of sugar-free chocolate sauce for added flair.
- Variations: Feel free to experiment with different sweeteners or add spices like cinnamon for an extra kick.