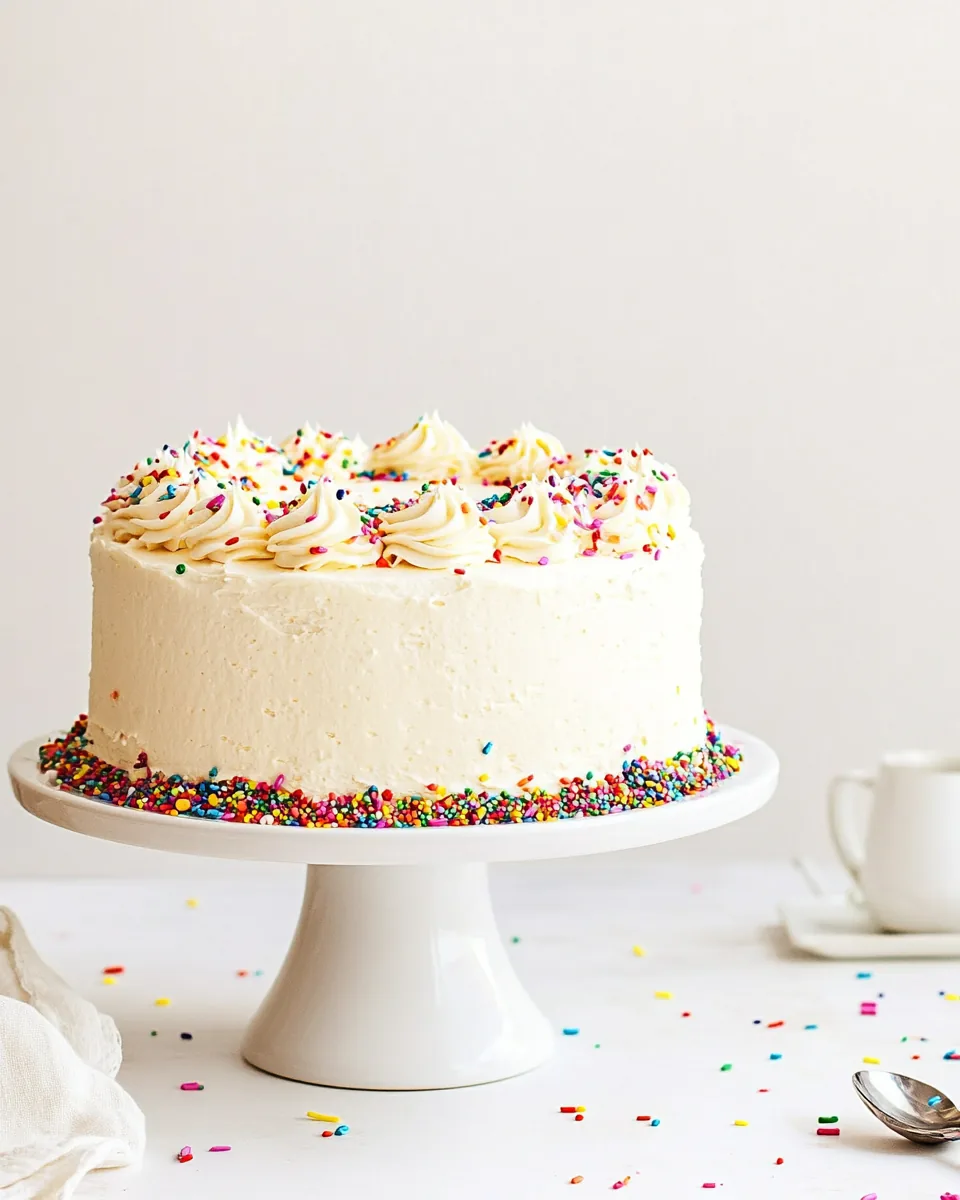
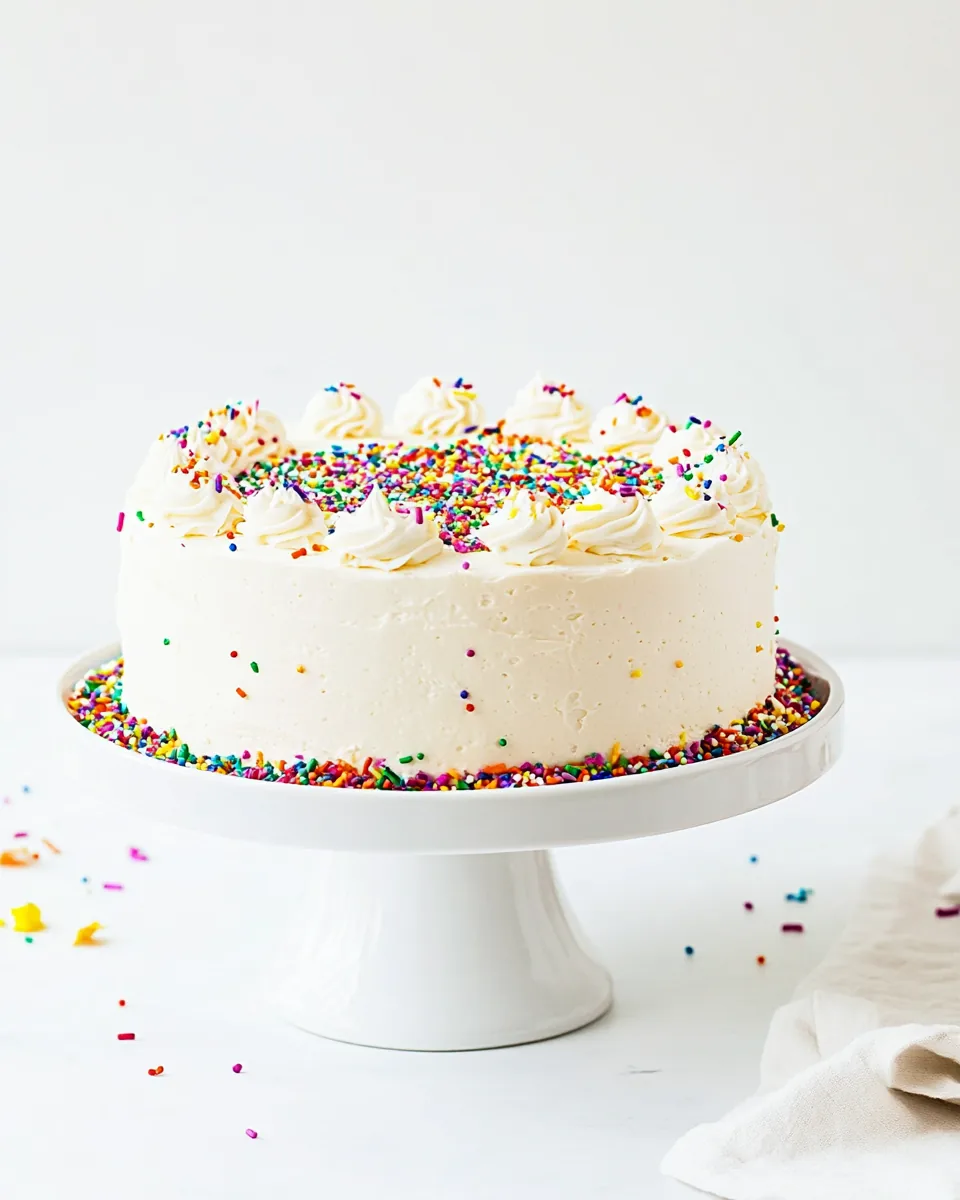
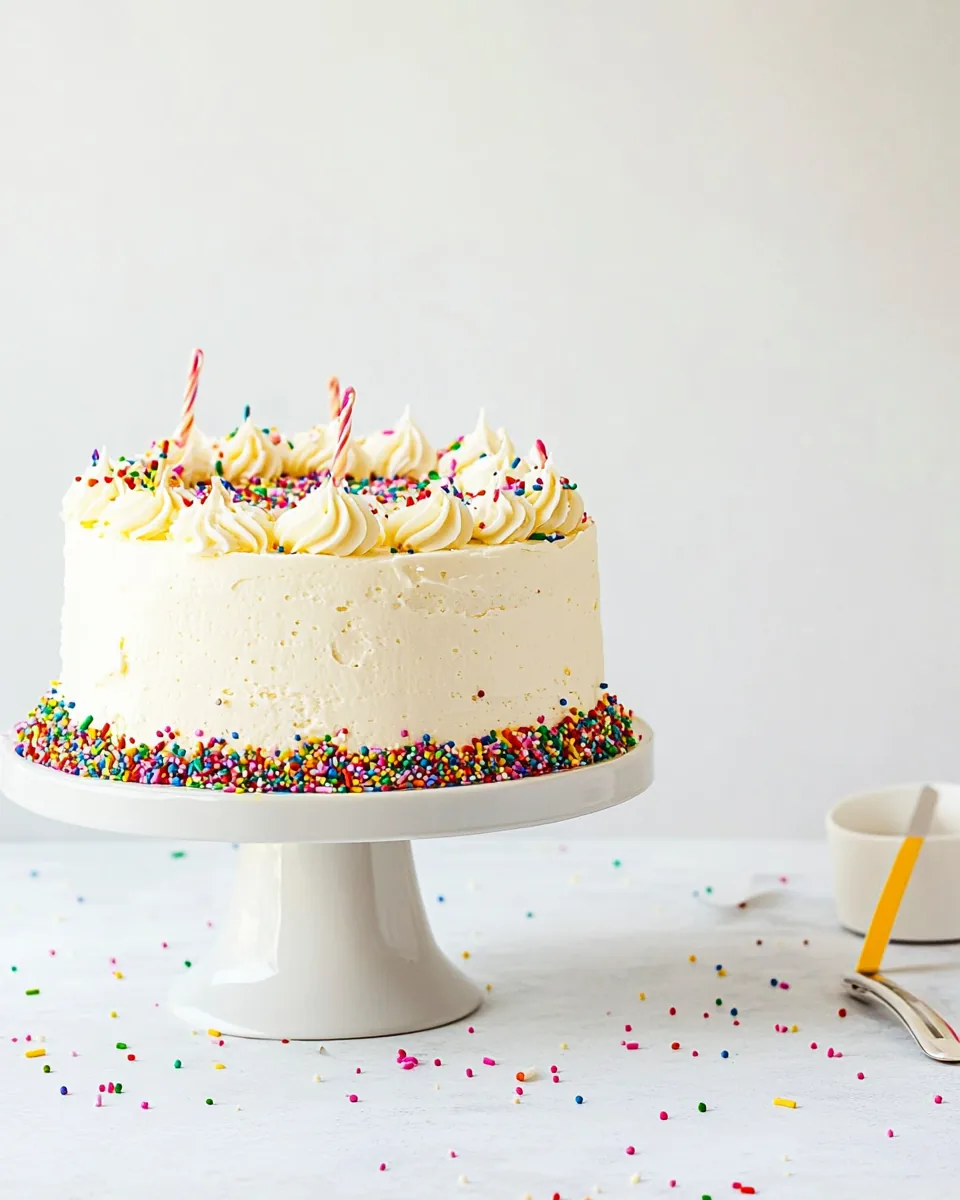
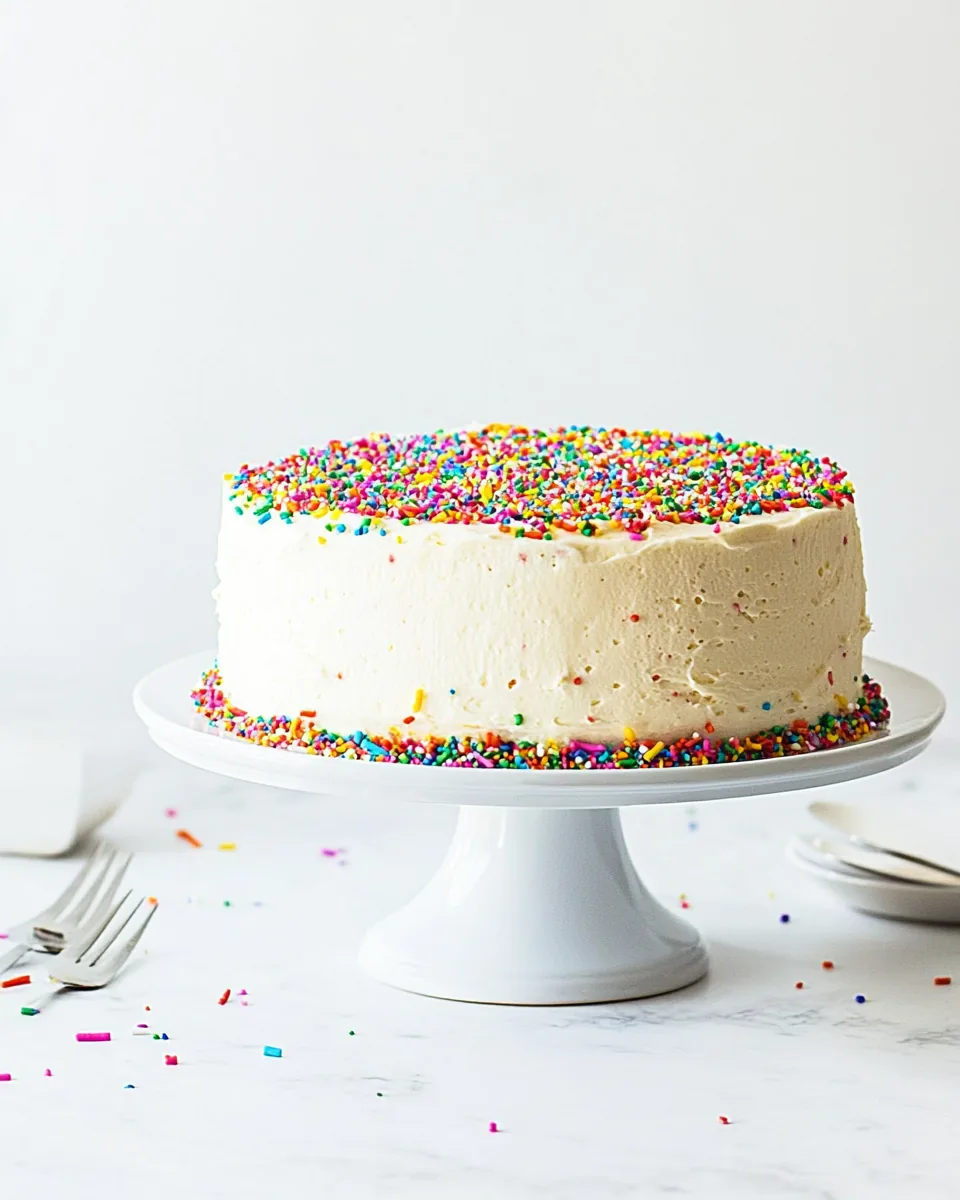
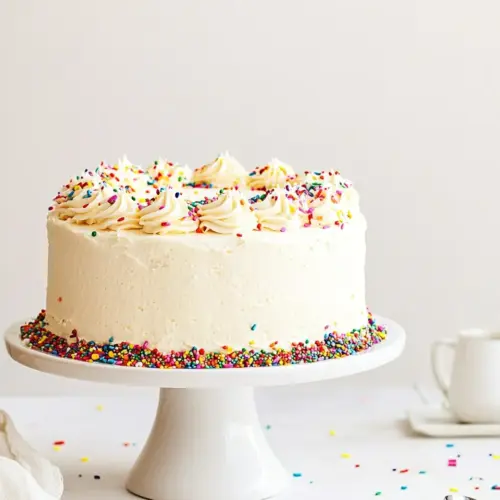
Funfetti Cake
There’s something undeniably magical about celebrating with a Funfetti Cake. Growing up, every birthday was an occasion to whip up this joyful treat, its colorful sprinkles adding a burst of happiness to our gatherings. I remember the excitement in the kitchen, with flour dusting the countertops and the sweet aroma of butter and sugar swirling in the air. Each layer of this cake holds a story, a memory of laughter and love shared around the table. It’s the kind of cake that brings back childhood nostalgia, a treat that turns any gathering into a celebration. Whether it’s a birthday, an anniversary, or just a reason to indulge, this Funfetti Cake has always been the star of the show, making every moment a little sweeter.
Recipe Snapshot
1 hr 25 mins
45 mins
40 mins
Hard
350 kcal
3 g
Gluten-Free, Low FODMAP
18 g
Frying Pan, Whisk, Oven, Large Pot, Saucepan, Mixing Bowl, Baking Sheet
The Best Thing About This Funfetti Cake
Celebration Essential
The Funfetti Cake is not just a dessert; it’s a centerpiece for any celebration. The vibrant sprinkles make it visually appealing, instantly lifting spirits and creating an atmosphere of joy. Seeing it on the table invites smiles, making it a must-have for birthdays and special occasions.
Childhood Nostalgia
For many, this cake represents the joy of childhood. It evokes memories of birthday parties and family gatherings, where the excitement of cutting into a beautifully decorated cake was palpable. It’s the taste of nostalgia in every bite, reminding us of simpler times filled with laughter.
Customizable Delight
This cake is incredibly versatile. You can play around with colors, sprinkle varieties, or even layer flavors to make it uniquely yours. Adding different extracts or fillings can turn it into a personal signature cake that reflects your creativity and style.
Easy to Make
Despite its impressive appearance, the Funfetti Cake is surprisingly easy to prepare. With simple ingredients and straightforward steps, you don’t need to be a master baker to create this showstopper. It’s perfect for both novice and experienced bakers.
Deliciously Moist
The combination of ingredients in this cake produces a delightfully moist texture. The use of yogurt and egg whites helps keep the cake fluffy and tender, ensuring that each slice is a heavenly experience, melting in your mouth with every bite.
Perfect for Sharing
This cake is large enough to feed a crowd, making it ideal for gatherings. Friends and family will eagerly gather around, sharing slices and happy moments, creating memories together. The Funfetti Cake is truly a cake that brings people together.
Key Ingredients for Funfetti Cake
The ingredients for a Funfetti Cake come together beautifully to create a delightful sweet treat. Using fresh produce and high-quality pantry staples ensures a cake that is not only delicious but also visually stunning. Each component plays a vital role in achieving the perfect texture and flavor, making it a delightful choice for any occasion.
- All-Purpose Flour: Provides the structure of the cake, allowing it to rise and hold its shape.
- Baking Powder: Acts as a leavening agent, helping the cake to rise and become fluffy.
- Kosher Salt: Enhances the flavors and balances the sweetness of the cake.
- Baking Soda: Works with acidic components to create a light and airy texture.
- Unsalted Butter: Adds richness and moisture, contributing to the cake’s tender crumb.
- Granulated Sugar: Sweetens the cake and helps create a lovely golden color when baked.
- Whole Milk: Keeps the cake moist and adds creaminess to the batter.
- Plain Yogurt: Enhances moisture and adds a slight tang, making the cake incredibly tender.
- Rainbow Sprinkles: The star of the show, adding color and a fun crunch throughout the cake.
- Egg Whites: Provide structure and volume to the batter, keeping it light.
Recipe Steps for Funfetti Cake
Making a Funfetti Cake is a delightful experience that brings joy to the kitchen. Gather your ingredients, and let’s get started on this colorful journey to create a cake that’s perfect for any celebration! Follow these detailed steps to ensure your cake turns out beautifully.
- Preheat your oven to 350 degrees F. Begin by preparing three 9-inch cake pans. Line the bottoms with parchment paper and spray the sides with non-stick spray. This ensures your cakes release easily once baked.
- In a medium mixing bowl, whisk together all-purpose flour, baking powder, kosher salt, and baking soda. This dry mixture is essential for a well-risen cake, so make sure it’s combined thoroughly.
- In a stand mixer, add the unsalted butter and granulated sugar. Cream these ingredients together for about 3 to 5 minutes until the mixture is light and fluffy. Scraping down the sides of the bowl will ensure everything is well mixed.
- Once fluffy, add in the vanilla extract and almond extract. Mix until just combined. These extracts add a wonderful depth of flavor to the cake.
- In a separate bowl, whisk together the whole milk and plain yogurt. Don’t worry if the mixture seems thick; this will contribute to the cake’s moistness.
- With the mixer on low speed, begin to alternate between adding the dry flour mixture and the milk/yogurt mixture. Start with the flour, then add a little of the milk, and repeat. This method prevents the batter from being overmixed, which keeps the cake light.
- Once everything is combined, mix gently just until you achieve a smooth batter. Be cautious not to over-mix as it can lead to a dense cake.
- In another mixing bowl, add the egg whites and whisk them on high speed until they become light and fluffy. This step helps to incorporate air into the batter, leading to a fluffier cake.
- Carefully fold the fluffy egg whites and rainbow sprinkles into the batter. Use a spatula to gently combine them without deflating the mixture. Over-mixing here can make your cake dense.
- Divide the batter equally among the prepared cake pans. A kitchen scale can help you ensure each pan has the same amount of batter for even baking.
- Bake the cakes for about 20 to 25 minutes. They’re done when the centers spring back to the touch. Allow the cakes to cool in the pans for about 10 minutes before transferring them to a wire rack to cool completely.
- For the frosting, prepare a double boiler by bringing water to a simmer in a medium pot. Place a heatproof bowl over it, combining the egg whites and granulated sugar. Whisk continuously until the mixture reaches 150 degrees F and the sugar is dissolved.
- Transfer the warm mixture to a stand mixer and whisk on high speed for about 5 minutes until thick and glossy meringue forms. Let it cool to room temperature.
- Once cooled, start adding small pieces of salted butter into the meringue while mixing on low. It’s crucial that both the meringue and butter are at the right temperature to achieve the perfect frosting consistency.
- When the frosting looks thick and creamy, increase the mixer speed for about 30 seconds until fully blended. Your buttercream frosting is now ready to use!
- To assemble, place one layer of the cake on a turntable or serving plate. Spread a thick layer of buttercream on top before adding the second layer. Repeat this for the third layer as well.
- Cover the top and sides of the cake with the remaining buttercream, smoothing it out with a spatula. Finally, add more rainbow sprinkles on top and along the sides for that extra festive look.
- Slice, serve, and enjoy your stunning Funfetti Cake with loved ones!
Things Worth Knowing
- Know your oven: Every oven is different. Make sure to check for doneness a few minutes before the suggested bake time.
- Cooling is key: Allow your cakes to cool fully before frosting them to prevent melting your frosting.
- Folding technique: When combining the egg whites with the batter, use a gentle folding motion to keep the batter airy.
- Butter temperature matters: For frosting, ensure your butter is soft but not melted to get the perfect texture.
- Storing leftovers: Keep any leftover cake in an airtight container to keep it fresh for longer.
Making Adjustments
Adjusting your Funfetti Cake can lead to delightful variations. Here are some tips to help you customize your cake experience:
- Storage: Store leftovers in an airtight container at room temperature for up to three days. For longer storage, refrigerate.
- Freezing: You can freeze the layers before frosting them. Wrap each layer in plastic wrap and freeze for up to a month. Just thaw them before decorating.
- Flavor Variations: Experiment with different extracts like lemon or orange for a unique twist.
- Frosting Options: Swap the buttercream for cream cheese frosting for a tangy flavor that pairs wonderfully with the cake.
- Serving Ideas: Serve with fresh fruits like strawberries or a scoop of vanilla ice cream for a delightful dessert experience.
- Gluten-Free Option: Use a gluten-free flour blend to make this delicious cake gluten-free. Just ensure the other ingredients are also gluten-free.
How to Serve Funfetti Cake
Serving your Funfetti Cake is just as fun as making it! Here are some delightful ideas:
- Birthdays: This cake is a must-have for birthdays! Decorate with extra sprinkles and maybe some themed candles for that party vibe.
- Celebrations: Perfect for celebrations like graduations or baby showers. Add themed decorations based on the occasion for an extra special touch.
- Pairings: Serve alongside fresh fruit or a scoop of vanilla ice cream for a delightful contrast to the sweet cake.
- Seasonal Treats: Add seasonal decorations like edible flowers or themed sprinkles to celebrate holidays throughout the year.
- Tea Time: Perfect for a cozy tea time with friends; slice it into smaller pieces and serve with tea or coffee.
- Storing: If you have leftovers, cover the cake with plastic wrap or store it in an airtight container. It tastes great for a few days after baking!
FAQ
Conclusion
The Funfetti Cake is a joyous celebration in dessert form, bringing color and excitement to any occasion. Its moist texture and delightful flavor make it a favorite for birthdays, holidays, or just because. I encourage you to give this cake a try and share it with friends and family. You’ll create memories that are just as sweet as the cake itself!
Funfetti Cake
Equipment
- Frying Pan
- Whisk
- Oven
- Large Pot
- Saucepan
- Mixing Bowl
- Baking Sheet
Ingredients
- 3-1/2 cups All-Purpose Flour
- 1-1/2 teaspoons Baking Powder
- 1 teaspoon Kosher Salt
- 1/4 teaspoon Baking Soda
- 1 cup Unsalted Butter room temperature
- 1-1/3 cups Granulated Sugar
- 2 teaspoons Clear Vanilla Extract
- 1/2 teaspoon Almond Extract
- 1-1/2 cups Whole Milk
- 1/3 cup Plain Yogurt
- 6 Egg Whites
- 3/4 cup Rainbow Sprinkles divided
- 7 Large Egg Whites
- 2 cups Granulated Sugar
- 1 teaspoon Vanilla Extract
- 1-1/2 cups Salted Butter
Instructions
- Preheat your oven to 350 degrees F and prepare three 9-inch cake pans by lining them with parchment paper and spraying them with non-stick spray.
- In a medium-sized mixing bowl whisk or sift together all-purpose flour, baking powder, kosher salt, and baking soda. Set aside.
- In the bowl of a stand mixer add unsalted butter and granulated sugar. Cream the ingredients until light and fluffy using the paddle attachment, about 3-5 minutes.
- Add in vanilla extract and almond extract and mix to combine.
- Whisk together whole milk and plain yogurt. The mixture will be thick but that is ok.
- With the mixer on low, alternately add the flour mixture and the milk/yogurt mixture.
- When all the ingredients are combined mix just until thoroughly combined.
- In another mixing bowl add egg whites and mix on high speed until light and fluffy.
- Fold the fluffy egg whites and rainbow sprinkles into the cake batter just until combined.
- Pour the batter into the prepared cake pans making sure to add an equal amount to each pan.
- Bake for 20-25 minutes or until the centers spring back to the touch.
- Let the cakes cool for 10 minutes in the pan, then remove them from the baking pans and let them cool on a cooling rack.
- We will be using the double boiler technique for our frosting. First, boil some water in a small to a medium pot.
- Place the egg whites and granulated sugar in a heatproof bowl that fits over the pot without touching the water.
- Using a whisk, mix continuously and add the vanilla extract.
- Keep whisking until the sugar is dissolved into the egg whites.
- Once heated to 150 degrees F and the meringue is formed, let it cool to room temperature for 15-20 minutes.
- Once cooled, turn the mixer on low, and begin adding small pieces of salted butter.
- When the mixture looks thick, put it on high for 30 seconds until well mixed.
- Pipe some buttercream onto your first layer of cake.
- Repeat with your second layer, then place the third layer on top.
- Cover your cake with the rest of your buttercream, add rainbow sprinkles, and enjoy!
Notes
- Tip 1: Store leftovers in an airtight container at room temperature.
- Tip 2: You can freeze the layers before frosting them.
- Tip 3: Experiment with different extracts like lemon for a unique twist.
- Tip 4: Serve with fresh fruit or a scoop of ice cream.
- Tip 5: Use a gluten-free flour blend for a gluten-free cake.