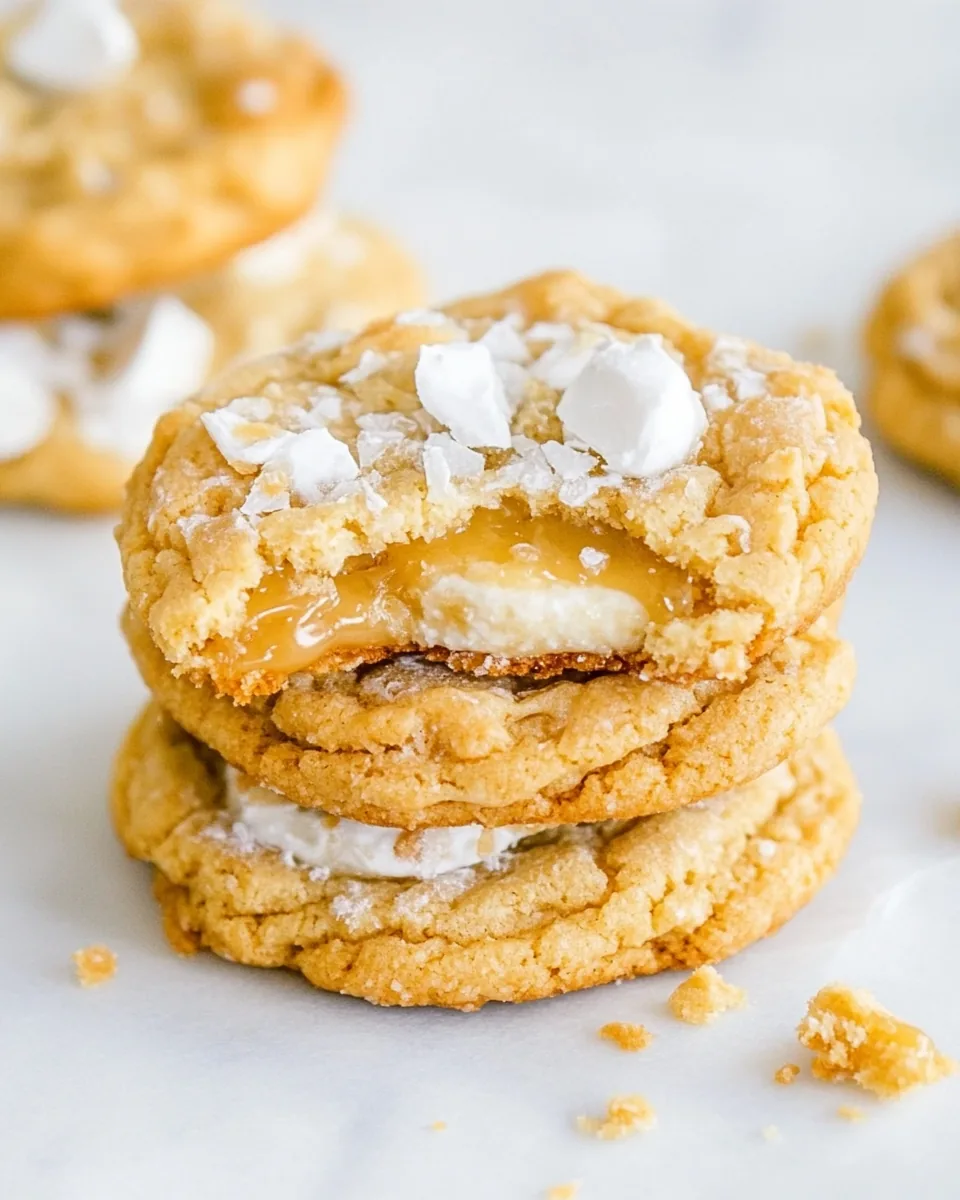
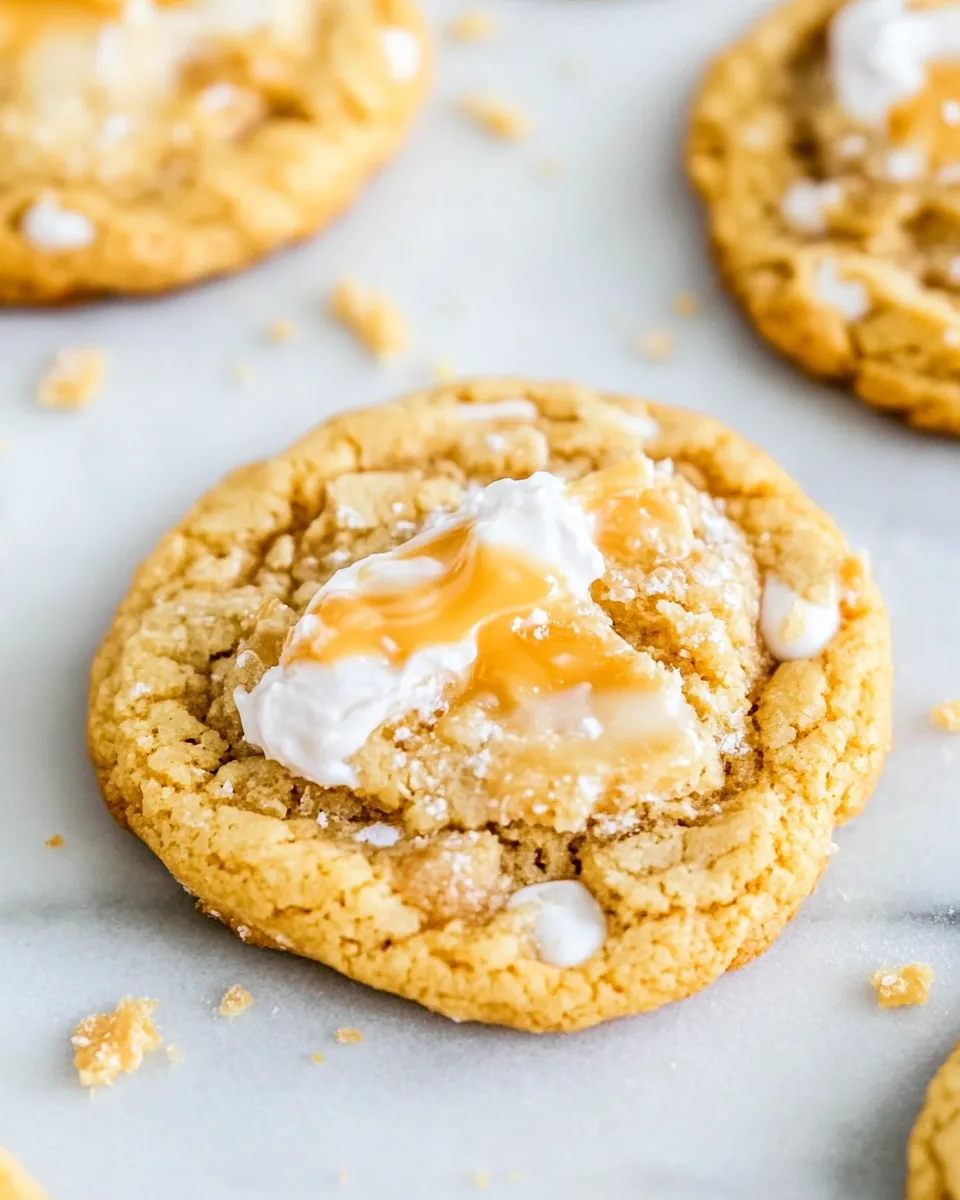
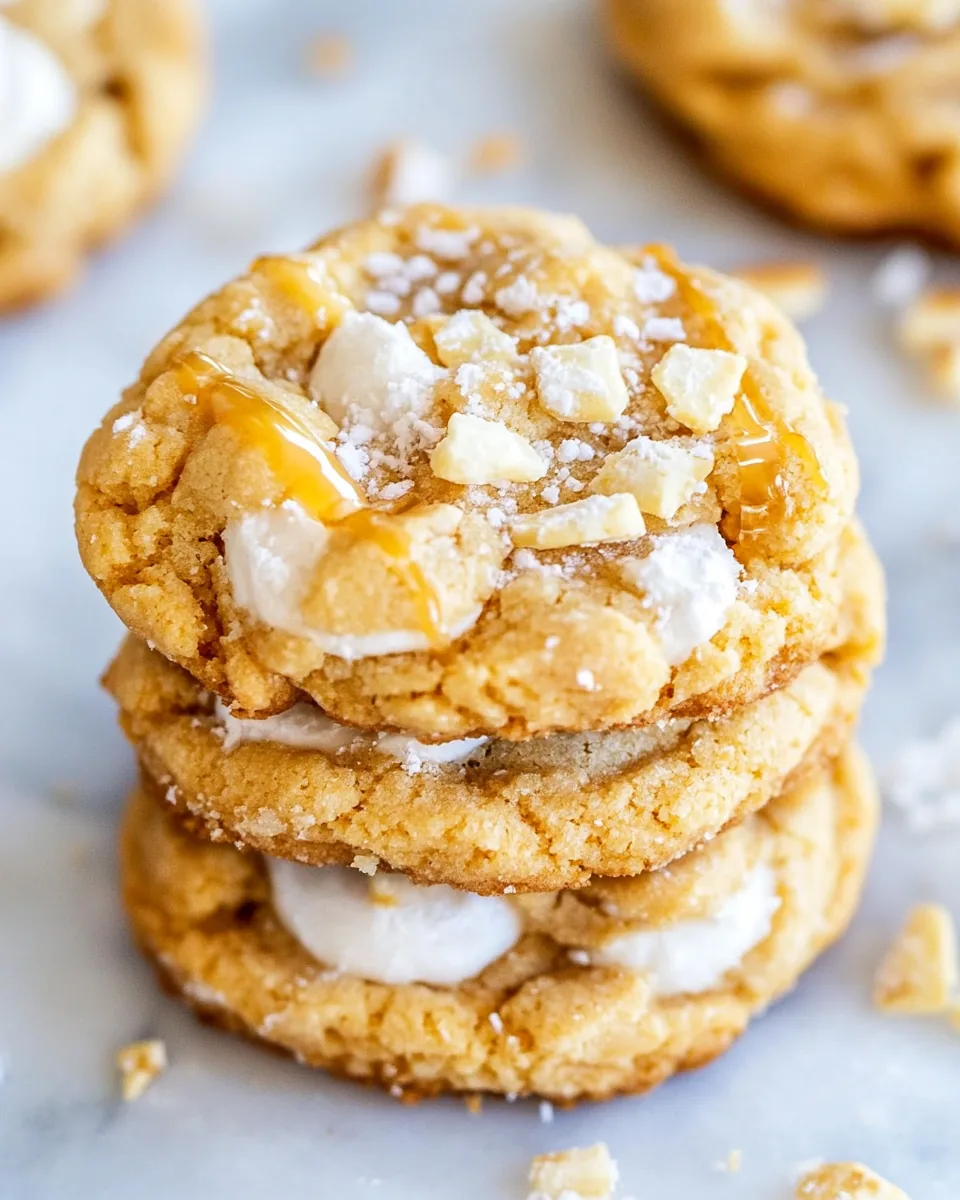
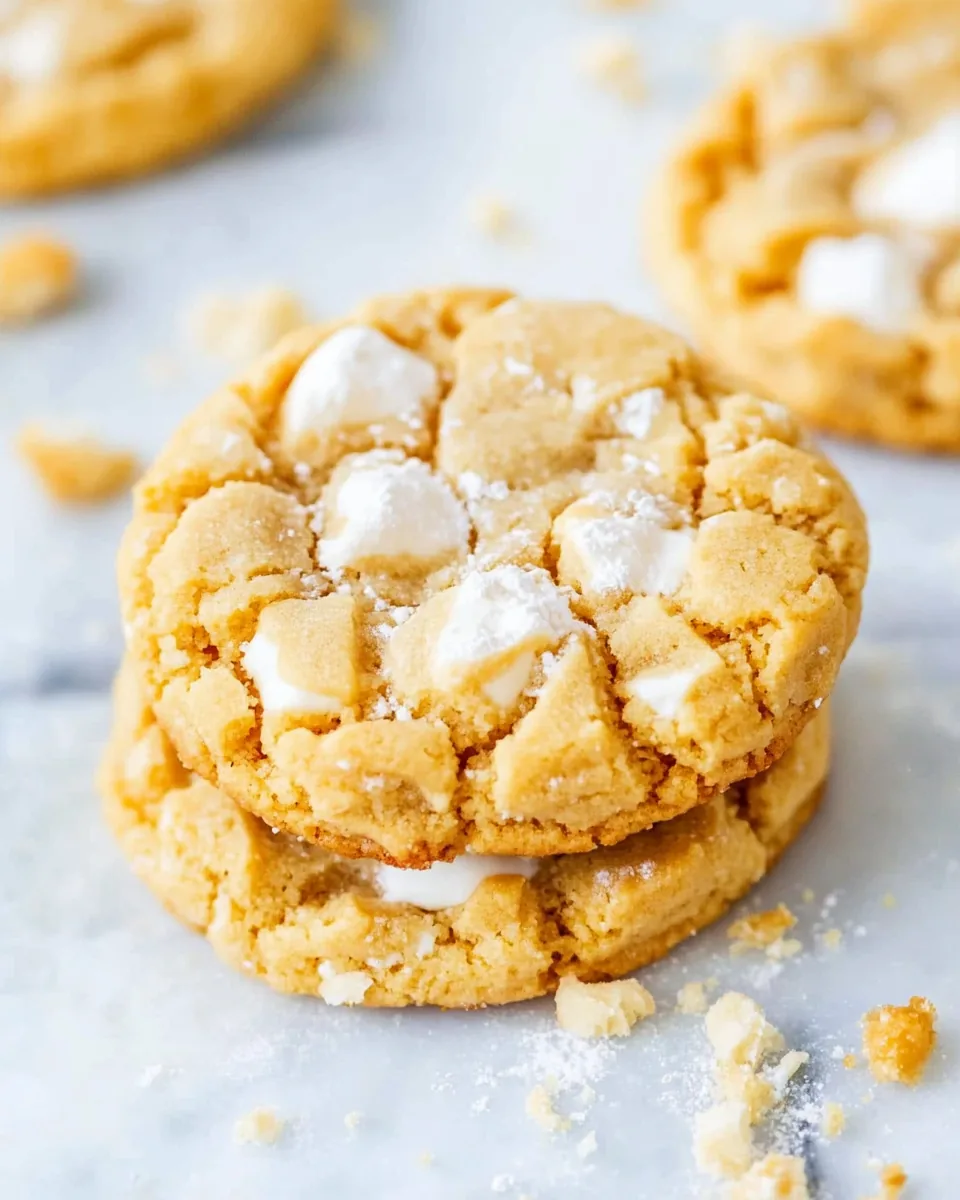
Fluffernutter Cookies
There’s something incredibly nostalgic about Fluffernutter Cookies. I remember the first time I had a fluffernutter sandwich as a kid, the combination of creamy peanut butter, sweet marshmallow fluff, and soft bread felt like a warm hug. Fast forward to today, and I’ve channeled that same magic into these cookies! Every bite is a delightful blend of flavors that takes me back to those carefree days. Making Fluffernutter Cookies is like capturing a childhood memory and baking it into a delicious treat. Imagine walking into a cozy kitchen, the aroma of freshly baked cookies filling the air, and seeing these golden delights just waiting to be devoured. It’s pure joy!
Recipe Snapshot
20 mins
10 mins
10 mins
Medium
150 kcal
2 g
Gluten-Free, Low FODMAP
7 g
Frying Pan, Oven, Mixing Bowl, Baking Sheet
The Best Thing About This Fluffernutter Cookies
Comforting Nostalgia
Every bite of these cookies brings forth a wave of nostalgia. The combination of peanut butter and marshmallow is a childhood favorite for many, creating an instant connection to simpler times. There’s just something about the taste that evokes comfort.
Easy to Make
The beauty of Fluffernutter Cookies lies in their simplicity. With just a handful of ingredients, you can whip up a batch that’s sure to impress. You don’t need to be a baking expert; this recipe allows anyone to feel like a pro in the kitchen.
Perfectly Soft and Chewy
These cookies strike the perfect balance between soft and chewy. The combination of butter, sugars, and flour creates a texture that melts in your mouth, while the addition of crispy rice cereal adds a delightful crunch.
Customizable Toppings
Feel free to get creative with your toppings! Whether you want to add extra miniature marshmallows or some chocolate chips, this recipe is flexible enough to accommodate your cravings.
Great for Any Occasion
No matter the occasion, Fluffernutter Cookies are a hit. They’re perfect for school lunches, parties, or simply as a sweet treat after dinner. Everyone will love the nostalgic flavors and you’ll find them disappearing quickly!
Sharing the Love
Sharing these cookies with friends and family is a joy. The compliments you’ll receive will warm your heart, and nothing beats the happiness of bringing smiles to others through baking.
What to Buy for Fluffernutter Cookies
When it comes to baking Fluffernutter Cookies, the ingredients you choose are key to achieving those perfect cookies. This recipe combines the richness of butter with the sweetness of granulated sugar and light brown sugar, creating a delicious base. The addition of peanut butter and marshmallows brings back those nostalgic flavors we all adore, while crispy rice cereal adds that desired crunch. Each ingredient plays a vital role in creating a cookie that is not only tasty but also texturally interesting.
- 1 cup unsalted butter, softened – Provides richness and a soft texture.
- 1 ¼ cups granulated sugar – Adds sweetness and helps with the cookie structure.
- ⅔ cup light brown sugar, packed – Enhances flavor and moisture.
- 1 large egg – Helps bind the ingredients together.
- 1 teaspoon vanilla – A classic flavor that enhances sweetness.
- 1 ¾ cups all-purpose flour – Gives the cookie structure and chewiness.
- 1 ½ teaspoons kosher salt, or to taste – Balances the sweetness.
- ½ teaspoon baking powder – Helps with leavening.
- ½ teaspoon baking soda – Aids in spreading and browning.
- 2 ½ cups crisp rice cereal – Adds crunch and texture.
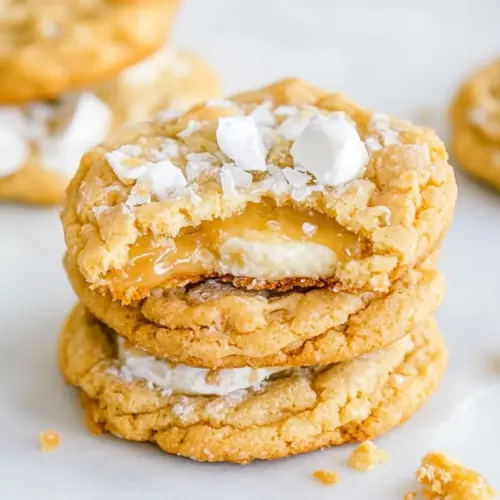
- 1 ¼ cups miniature marshmallows, plus more for adding on top of each cookie – The star ingredient, creating that fluffernutter flavor.
- ⅔ cup peanut butter chips, plus more for adding on top of each cookie – Intensifies the peanut butter flavor.
Fluffernutter Cookies Instructions
Making Fluffernutter Cookies is just as fun as eating them! Follow these steps to create your own batch of chewy, delicious cookies. You’ll soon be embracing the sweet aroma wafting from your kitchen.
- Start by placing butter and both types of sugar into the bowl of a stand mixer fitted with the paddle attachment. Alternatively, you can use a large mixing bowl and a handheld electric mixer. Beat on medium-high speed until the mixture is well combined and creamy, about 2 minutes. The mixture should be light in color and fluffy.
- Next, stop the mixer and scrape down the sides of the bowl. Add the egg and vanilla to the bowl. Beat until the mixture is light and fluffy, which should take about 5 minutes. You’ll notice that it becomes pale and airy.
- Now it’s time to add the dry ingredients. Into the bowl, sift in the flour, salt, baking powder, and baking soda. Beat on low speed until just combined, taking care not to overmix. This step should only take about 1 minute, and the dough will still look a little shaggy.
- Next, gently fold in the cereal, marshmallows, and peanut butter chips. Beat briefly, just until all the ingredients are incorporated, which should take around 15 seconds. You want to see pockets of peanut butter and marshmallows throughout the dough.
- Using a 2-tablespoon cookie scoop or your hands, form approximately 25 to 30 equal-sized mounds of dough. Roll each mound into a ball and then flatten them a little less than halfway. This helps them bake evenly.
- Place the mounds of dough on a large plate or tray, cover with plastic wrap, and refrigerate them for at least 2 hours, or up to 3 days. This chilling step is crucial as it prevents the cookies from spreading too much during baking.
- When you’re ready to bake, preheat your oven to 350°F (175°C). Line a baking sheet with a Silpat or spray it with cooking spray to prevent sticking.
- Arrange the chilled dough mounds on the prepared baking sheet, spaced at least 2 inches apart. Do not crowd them, as they will spread. Optionally, press an additional marshmallow or two on top of each cookie along with some extra peanut butter chips for a fun touch.
- Bake for about 9 to 10 minutes. Keep an eye on them; the cookies are done when the edges have set and the tops are just set, even if they appear slightly undercooked and glossy in the center. Remember, they will firm up as they cool.
- Finally, allow the cookies to cool on the baking sheet before enjoying them. Resist the urge to use a cooling rack – letting them cool on the baking sheet helps maintain that perfect chewy texture.
Things Worth Knowing
- Chill Your Dough: Chilling the dough prevents cookies from spreading excessively. This will help maintain the desired texture.
- Watch the Bake Time: Since ovens can vary, keep an eye on the cookies as they bake. Overbaking can lead to hard cookies.
- Use Quality Ingredients: Using high-quality peanut butter and fresh marshmallows makes a noticeable difference in flavor.
- Experiment with Mix-Ins: Feel free to add nuts, chocolate chips, or even a sprinkle of sea salt for added depth of flavor!
Tips and Tricks about Fluffernutter Cookies
These tips will help you perfect your batch of Fluffernutter Cookies. Don’t be afraid to take notes and enjoy the baking process!
- Storage: Cookies are best warm and fresh but will keep airtight at room temperature for up to 5 days.
- Freezing: You can freeze unbaked dough for up to 2 months. Just scoop the mounds onto a baking sheet, freeze solid, then transfer to a freezer bag.
- Pairing: These cookies pair wonderfully with a glass of cold milk or a warm cup of coffee for a delightful treat!
- Variations: Feel free to substitute peanut butter chips with chocolate chips or experiment with different cereals for unique textures.
- Presentation: For a fun touch, drizzle melted chocolate over the cooled cookies for an elegant presentation.
- Batch Sizes: If you want to make fewer cookies, simply halve the ingredients. The cookie dough can also be made ahead of time and baked as needed!
How to Enjoy Fluffernutter Cookies
There are countless ways to enjoy Fluffernutter Cookies. Here are some delightful serving suggestions:
- As a Sweet Snack: Perfect for an afternoon pick-me-up or as a tasty addition to lunchboxes.
- Great for Parties: These cookies are a hit at gatherings, ensuring they won’t last long on the dessert table.
- With Ice Cream: Sandwich two cookies with your favorite ice cream for an indulgent treat.
- For Special Occasions: Serve these cookies at birthdays or celebrations to make them extra special.
- Seasonal Treats: Decorate the cookies with seasonal sprinkles for holidays or themed parties.
- Storage Tips: Keep any leftover cookies in an airtight container to maintain their softness and flavor.
FAQ
Conclusion
In conclusion, Fluffernutter Cookies are not just your average cookie; they bring together the delight of childhood flavors in a fun and delicious way. Whether you’re enjoying them with a glass of milk or sharing them with friends, these cookies are sure to satisfy your sweet tooth. I encourage you to try making them soon—you won’t be disappointed!
Fluffernutter Cookies
Equipment
- Frying Pan
- Oven
- Mixing Bowl
- Baking Sheet
Ingredients
- 1 cup Unsalted Butter
- 1.25 cups Granulated Sugar
- 0.67 cups Light Brown Sugar
- 1 large Egg
- 1 teaspoon Vanilla
- 1.75 cups All-Purpose Flour
- 1.5 teaspoons Kosher Salt
- 0.5 teaspoon Baking Powder
- 0.5 teaspoon Baking Soda
- 2.5 cups Crisp Rice Cereal
- 1.25 cups Miniature Marshmallows
- 0.67 cups Peanut Butter Chips
Instructions
- To the bowl of a stand mixer fitted with the paddle attachment (or a large mixing bowl and handheld electric mixer), and the butter, sugars, and beat on medium-high speed until well combined, about 2 minutes.
- Stop, scrape down the sides of the bowl, and add the egg, vanilla, and beat until light and fluffy, about 5 minutes.
- Add the flour, salt, baking powder, baking soda, and beat on low speed until just combine, about 1 minute.
- Add the cereal, marshmallows, peanut butter chips, and beat very briefly to just incorporate, about 15 seconds.
- Using a 2-tablespoon cookie scoop, or your hands, form approximately 25 to 30 equal-sized mounds of dough, roll into balls, and flatten a little less than halfway.
- Place mounds on a large plate or tray, cover with plastic wrap, and refrigerate for at least 2 hours, up to 3 days.
- Preheat oven to 350F, line a baking sheet with a Silpat or spray with cooking spray.
- Place dough mounds on baking sheet, spaced at least 2 inches apart (do not crowd them, they will spread; I use a half-sheet pan and bake 8 cookies per sheet), optionally add an additional marshmallow or two to the top of each cookie, and/or extra peanut butter chips.
- Bake for about 9 to 10 minutes (if your cookies are smaller/larger than mine, reduce/increase baking time) or until edges have set and tops are just set, even if slightly undercooked, pale, and glossy in the center; don’t overbake.
- Allow cookies to cool on baking sheet before eating. I let them cool on the baking sheet and don’t use a rack.
Notes
- Storage: Cookies are best warm and fresh but will keep airtight at room temp for up to 5 days.