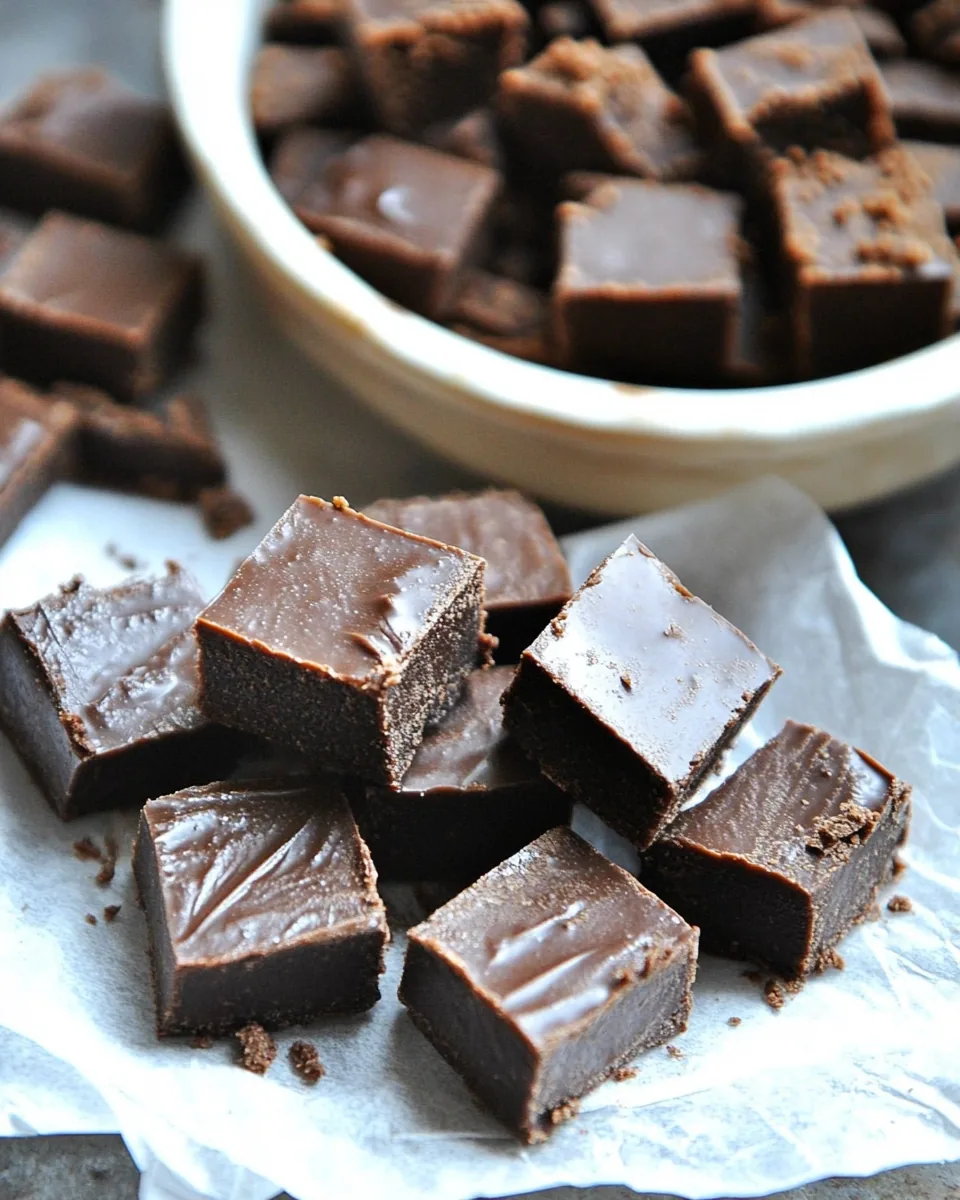
Easy Chocolate Peanut Butter Fudge
As a chocolate lover, there’s nothing quite like the moment you bite into a piece of fudgy goodness, and that’s exactly what you get with this Easy Chocolate Peanut Butter Fudge. I still remember the first time I made it; the rich aroma of melting chocolate and peanut butter filled my kitchen, making my mouth water in anticipation. This delightful treat isn’t just sweet; it’s a nostalgic reminder of family gatherings and celebrations where the dessert table is always the highlight. Whether it’s a casual movie night or a festive gathering, there’s always room for this fudge. Plus, it’s so simple to whip up that I often find myself making it on a whim, just to satisfy a sweet tooth or to share with friends. Yes, this is definitely one recipe you’ll want to keep close at hand!
Recipe Snapshot
10 mins
8 mins
2 mins
Medium
150 kcal
3 g
Keto, Gluten-Free, Low FODMAP
9 g
Wooden Spoon, Frying Pan, Mixing Bowl
The Magic of This Easy Chocolate Peanut Butter Fudge
Quick and Easy Preparation
What I love most about the Easy Chocolate Peanut Butter Fudge is how quickly it comes together. With just a few ingredients and minimal effort, you can create a dessert that tastes indulgent and impressive. It’s perfect for when you need a last-minute treat or a dessert for unexpected guests.
Decadent Flavor Combination
The combination of bittersweet chocolate and peanut butter creates a rich, satisfying flavor that’s hard to resist. The slight bitterness of the chocolate perfectly balances the creamy sweetness of the peanut butter, making every bite a harmonious experience that keeps you coming back for more.
Versatile Treat
This fudge is incredibly versatile. You can cut it into thicker squares for a more indulgent treat or thinner ones for a lighter option. It’s suitable for all occasions, from casual snack time to festive gatherings. You can even customize it by adding toppings like chopped nuts or drizzling with caramel for an extra touch!
Perfect for Sharing
One of the best parts of making Easy Chocolate Peanut Butter Fudge is sharing it with others. Its rich taste and delightful texture make it a crowd-pleaser. It’s great for gifting, whether it’s for the holidays or just because. Seeing the smiles on my friends’ faces when they take a bite brings me so much joy.
Make-Ahead Convenience
This fudge is an excellent make-ahead dessert. It stores well in the fridge for up to three weeks or can be frozen for even longer. This means you can prepare it in advance and have a delicious treat ready whenever a craving strikes!
What You’ll Need for Easy Chocolate Peanut Butter Fudge
The beauty of this recipe lies in its simplicity, relying on just a handful of high-quality ingredients that work together to create something truly magical. The key players here are bittersweet chocolate and peanut butter, which form the base of this creamy fudge. Together, they create a rich flavor that is both comforting and indulgent.
- 8 ounces (224g) bittersweet chocolate – This is the main ingredient that gives the fudge its rich flavor. Opt for high-quality chocolate for the best results.
- 1 cup (270g) peanut butter – Creamy or crunchy, this ingredient adds a delightful nutty flavor and creaminess to the fudge.
- 3 tablespoons (42g) butter – Butter enhances the richness of the fudge and helps achieve a smooth texture.
- 1 1/4 cups (380g) sweetened condensed milk – This ingredient is key to achieving that perfect fudge consistency, adding sweetness and moisture.
- 1/2 teaspoon (2g) vanilla extract – A touch of vanilla elevates the flavor profile, rounding out the sweetness.
- Sea salt – A sprinkle of salt at the end enhances the overall flavor, providing a lovely contrast to the sweetness.
How to Assemble Easy Chocolate Peanut Butter Fudge
Making this fudge is as easy as it is satisfying. Let’s dive into the steps to create your very own Easy Chocolate Peanut Butter Fudge. You’ll see just how simple it is to whip up this delicious treat!
- Start by lining an 8×8 baking pan with parchment paper, ensuring that there’s an overhang on two sides. This will make it easier to lift the fudge out once it’s set. Lightly spray the parchment paper with nonstick cooking spray to prevent sticking. Set this aside.
- In a microwave-safe bowl, combine bittersweet chocolate, peanut butter, and butter. Heat this mixture in the microwave for about 1 and a half to 2 minutes on 80% power. Keep an eye on it, as microwaves vary in strength. You want the chocolate to be melted but not scorched.
- Once melted, remove the bowl from the microwave and stir the mixture until it becomes smooth and creamy. The warmth from the melted chocolate will help melt the peanut butter and butter, blending everything together beautifully.
- Next, add the sweetened condensed milk and vanilla extract into the chocolate mixture. Stir until fully combined. You should see a luscious, glossy fudge mixture forming.
- Pour the fudge mixture into the prepared baking pan. Use the back of a spoon to smooth out the top, ensuring it’s evenly distributed. This is where you can get creative if you’d like to add any toppings!
- Allow the fudge to sit at room temperature for about 3 to 5 minutes. This lets it start to firm up slightly, making it easier to sprinkle with sea salt without it sinking in.
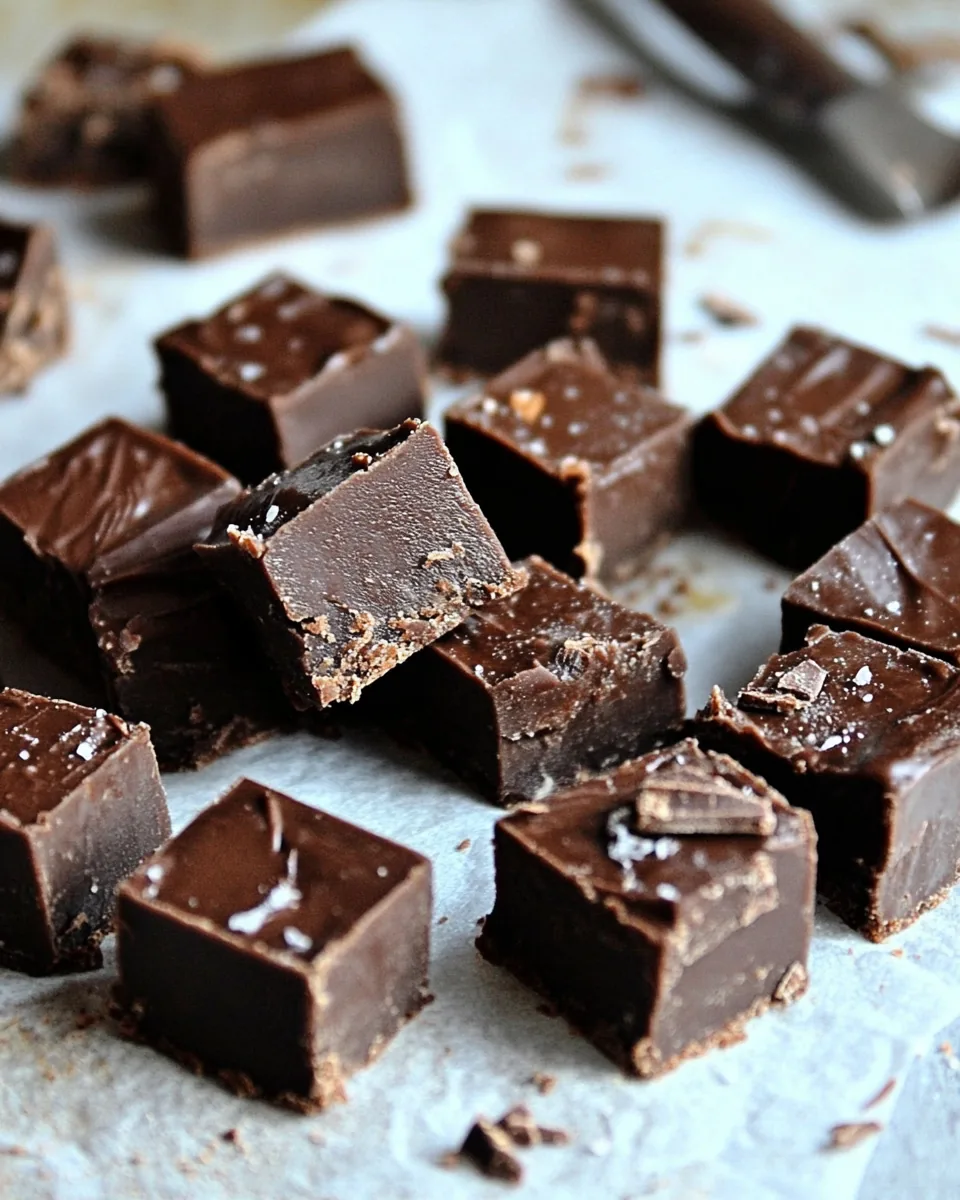
- Carefully sprinkle a light layer of sea salt over the top. This touch of salt is what truly elevates the flavor and balances the sweetness.
- Now, it’s time to chill! Place the baking pan in the refrigerator and let it chill for about 2 hours or, if you’re in a hurry, the freezer for about 30 minutes until hardened.
- Once the fudge is set, use the overhanging parchment paper to lift it out of the pan. Cut it into 1-inch squares using a sharp knife. This is where you can control your portion sizes!
- Finally, store any leftover fudge in an airtight container lined with parchment paper in the refrigerator. It should keep well for up to three weeks—if it lasts that long!
Things Worth Knowing
- Double Boiler Method: If you prefer, you can melt the chocolate using a double boiler instead of the microwave. This method gives you more control over the heat and reduces the risk of burning the chocolate.
- Ingredient Quality: Using high-quality ingredients makes a significant difference in flavor. Always go for the best chocolate and peanut butter you can find!
- Cooling Time: Be patient with the cooling time. For best results, allow the fudge to chill thoroughly before cutting to ensure clean edges.
- Mix-Ins: Feel free to get creative by adding mix-ins like chopped nuts, dried fruits, or even swirls of caramel or white chocolate for added flavor and texture.
Substitutions and Tips

When making Easy Chocolate Peanut Butter Fudge, it’s helpful to have a few tips in mind. Here are some suggestions to ensure your fudge turns out perfectly every time.
- Storage: If you have leftovers, store the fudge in an airtight container lined with parchment paper to prevent sticking. It can last in a cool place for a week or in the refrigerator for up to three weeks.
- Freezing: You can freeze the fudge for up to three months. Wrap it tightly in plastic wrap and then foil, or store it in a freezer-safe container. Just be sure to place waxed paper between layers if cutting into pieces.
- Flavor Variations: Consider adding a dash of cinnamon or espresso powder to elevate the flavor profile of your fudge. Experimenting with spices can create a unique twist on this classic recipe.
- Cutting Tips: For cleaner cuts, run your knife under hot water, then wipe it dry before slicing. This helps prevent the fudge from sticking to the knife.
- Presentation: For special occasions, consider drizzling melted chocolate over the top or adding colorful sprinkles to make the fudge even more festive.
Serving Options for Easy Chocolate Peanut Butter Fudge
The Easy Chocolate Peanut Butter Fudge is versatile and can be served in many exciting ways. Here are some ideas:
- On its own: Serve the fudge squares on a decorative plate for a simple yet elegant treat during coffee breaks.
- As a dessert platter: Pair the fudge with fresh fruits like strawberries or bananas for a delightful contrast of flavors.
- At parties: Offer the fudge as part of a dessert table at gatherings. It’s sure to be a hit alongside cakes and cookies!
- Gift giving: Wrap pieces of fudge in cellophane and tie with a ribbon for an easy, homemade gift for friends or family.
- Seasonal events: This fudge is perfect for holidays like Christmas or Valentine’s Day. You can even customize it with themed decorations or packaging.
- Pairing drinks: Enjoy the fudge with a glass of milk or a warm cup of coffee. The flavors complement each other beautifully.
FAQ
Conclusion
The Easy Chocolate Peanut Butter Fudge is not just a treat; it’s an experience that brings back fond memories and creates new ones. It’s a crowd-pleaser that’s simple enough to whip up any time you have a craving. Don’t hesitate—try making this fudge today and indulge in its rich flavors. Your taste buds will thank you!

Easy Chocolate Peanut Butter Fudge
Equipment
- Wooden Spoon
- Frying Pan
- Mixing Bowl
Ingredients
- 8 ounces bittersweet chocolate
- 1 cup peanut butter
- 3 tablespoons butter
- 1 1/4 cups sweetened condensed milk
- 1/2 teaspoon vanilla extract
- to taste sea salt
Instructions
- Line an 8×8 baking pan with parchment paper, including an additional 2-inches of parchment paper to hang over both sides of the baking pan. Lightly spray the parchment paper with nonstick cooking spray. Set the baking pan aside.
- Add bittersweet chocolate, peanut butter, and butter to a microwave safe bowl. Heat between 1 1/2 – 2 minutes on 80% power, depending on your microwave, until chocolate has begun to melt. Remove from microwave and stir until smooth.
- Add sweetened condensed milk and vanilla extract to chocolate peanut butter mixture and stir until well-combined. Pour into the prepared pan and smooth the top of the mixture with the back of a spoon.
- Allow the fudge to sit at room temperature for about 3-5 minutes to begin to firm slightly. Sprinkle with sea salt.
- Place baking pan into the refrigerator to chill until hardened, about 2 hours or the freezer for about 30 minutes.
- To cut the fudge, lift the fudge out of the baking pan using the overhanging parchment edges. Cut into 1-inch squares.
- Store fudge in an airtight container lined with parchment paper in the refrigerator.
Notes
- Make Ahead: this recipe makes a wonderful make ahead candy recipe. While it is quick and easy to make right before serving, you can make ahead to make sharing even easier.
- Store: If storing cut into pieces, arrange in an airtight container in layers with parchment or waxed paper to divide the candies. You can store in an airtight container in a cool place for up to a week or in the refrigerator for up to 3 weeks.
- Freeze: Wrap the uncut block of fudge well with plastic wrap and then foil, store in the freezer up to 3 months. Place pieces of waxed paper between layers of cut fudge in an airtight, freezer-safe container and store for up to 3 months.