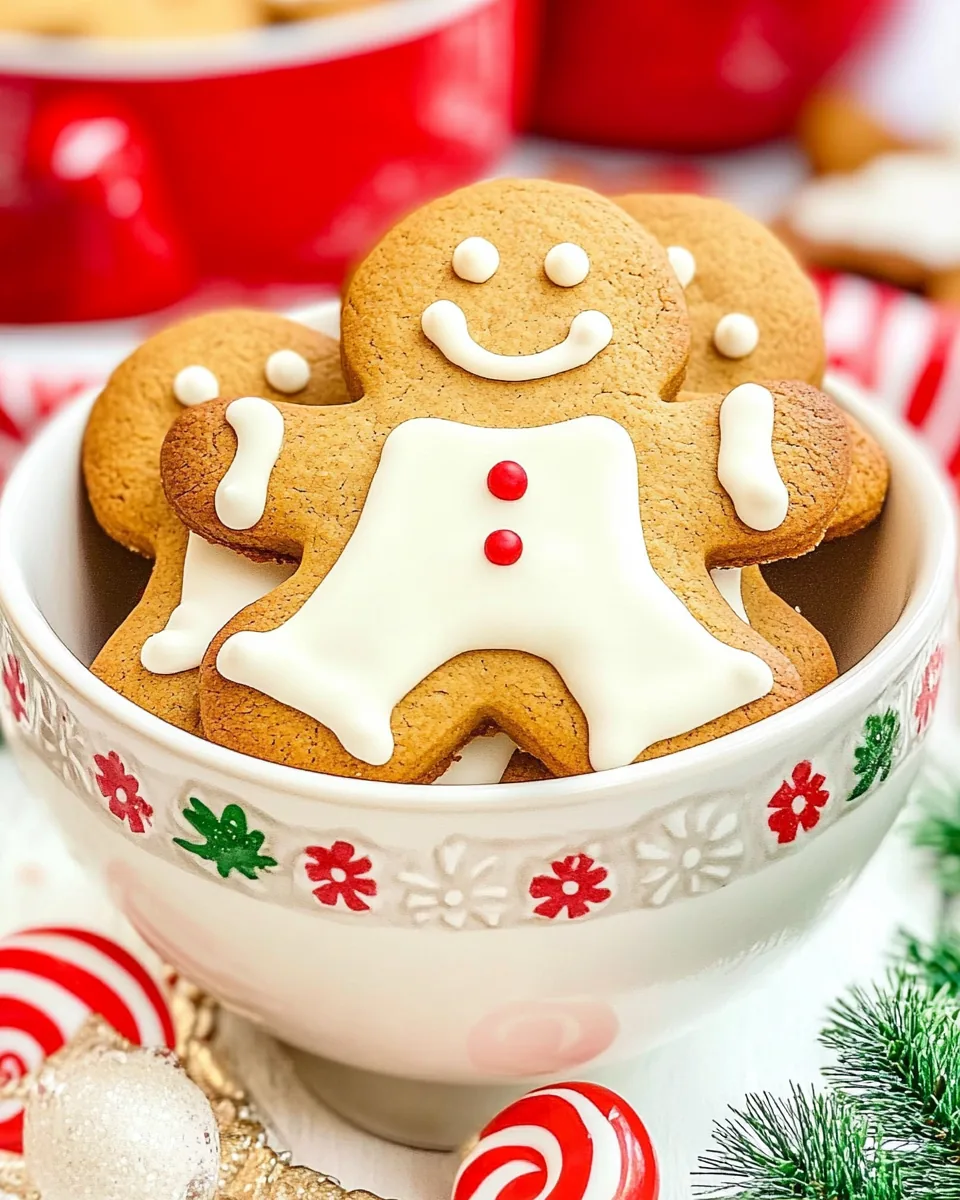
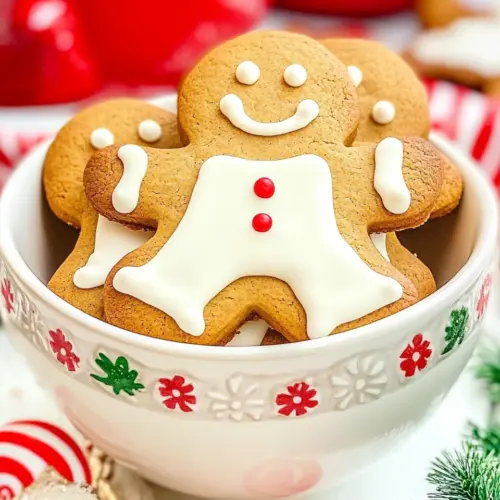
Classic Gingerbread Cookies
There’s something truly magical about making Classic Gingerbread Cookies during the holiday season. The aroma of spices fills the kitchen, instantly transporting me to memories of childhood Christmases, where I would eagerly help my mom roll out the dough and cut out gingerbread shapes. As we decorated the cookies with icing and colorful sprinkles, laughter and joy filled the air. These moments are what inspired me to perfect my own recipe, and now I can’t wait to share it with you. Baking these cookies is not just about the end result; it’s about creating memories with loved ones, bringing warmth into your home, and embracing the festive spirit. So let’s dive into this delightful journey of baking
Recipe Snapshot
2 hr 8 mins
120 mins
8 mins
Hard
130 kcal
1 g
Gluten-Free, Low FODMAP
6 g
Stand Mixer Fitted with a Paddle Attachment, Gingerbread Man Cookie Cutter
Why This Classic Gingerbread Cookies Works
A Taste of Tradition
The Classic Gingerbread Cookies recipe is a beloved holiday tradition that has stood the test of time. Every bite brings a taste of nostalgia that connects generations. It’s the perfect way to celebrate the season with family and friends.
Creative Decorating
One of the best parts of making these cookies is the opportunity to unleash your creativity. Whether you choose to pipe intricate designs, sprinkle some festive colors, or even make your own gingerbread house, each cookie can be a unique masterpiece.
Family Bonding
Baking is a wonderful way to connect with loved ones. Gather your family or friends in the kitchen, and let everyone get involved in rolling, cutting, and decorating. It’s a fun way to spend time together and create lasting memories.
Deliciously Aromatic
The scent of ginger, cinnamon, and cloves wafting through your home is incredibly inviting. It’s a sensory experience that not only adds to the festive atmosphere but also makes your home feel cozy and welcoming.
Perfect for Gifting
These cookies make for delightful gifts! Package them in decorative boxes or tins, and share the joy of your homemade treats with neighbors and friends. Everyone loves receiving something special during the holidays.
Versatile Treats
While traditionally enjoyed during the holiday season, Classic Gingerbread Cookies can be made year-round. They’re perfect for any occasion, from birthdays to casual get-togethers. With a few tweaks, you can even experiment with different flavors!
Main Ingredients for Classic Gingerbread Cookies
Creating the perfect Classic Gingerbread Cookies starts with selecting the right ingredients. This recipe balances the warm spices with sweet elements, resulting in a delectable treat that’s sure to please. Each ingredient plays a crucial role in building flavor and texture, making this combination essential for achieving that beloved gingerbread taste.
- Unsalted Butter: 1 cup, softened to room temperature – The rich flavor of butter enhances the overall taste and texture of the cookies.
- Light Brown Sugar: ⅔ cup, packed – This ingredient adds sweetness and a hint of molasses that contributes to the cookie’s moistness.
- Granulated Sugar: ⅓ cup – Balances the sweetness and helps with the cookie’s structure.
- Unsulfured Molasses: 1 cup – The key ingredient that gives gingerbread its signature flavor and deep color.
- Large Egg Yolks: 2, whites discarded or saved for another use – Provides moisture and richness to the cookie dough.
- All-Purpose Flour: 5 cups – Essential for structure, allowing the cookies to hold their shape while baking.
- Ground Ginger: 3 ½ teaspoons, or to taste – The star spice that gives gingerbread its defining flavor.
- Ground Cinnamon: 2 teaspoons – Adds warmth and sweetness to the cookies.
- Salt: 1 teaspoon – Enhances all the flavors in the cookies.
- Baking Powder: ½ teaspoon – Provides a slight rise for softer cookies.
- Baking Soda: ½ teaspoon – Helps to create a chewy texture.
- Allspice: ¼ teaspoon – Adds depth and complexity to the flavor profile.
- Ground Nutmeg: ¼ teaspoon – Infuses warmth and a subtle aromatic quality to the dough.
- Confectioners’ Sugar: 1 ⅔ cups, sifted – For making a perfect icing that coats the cookies.
- Light Corn Syrup: 1 ½ teaspoons – Helps the icing achieve a smooth consistency.
- Milk: 3 tablespoons – Provides the right texture for the icing.
- Red and Green Food Coloring: Gel recommended – For decorating the cookies with festive colors.
- Red Cinnamon Candies: Optional but recommended – Fun toppings that add a pop of color and flavor.
- Red and Green Sprinkles: Optional but recommended – Perfect for adding some sparkle to your cookies.
Step by Step Guide for Classic Gingerbread Cookies

Ready to bake some delicious Classic Gingerbread Cookies? This step-by-step guide will walk you through the entire process, from mixing the dough to decorating the cookies. It’s easier than you think, and the results are worth it!
- Start by preparing your workspace. Gather all the ingredients and equipment: a stand mixer fitted with a paddle attachment, a rolling pin, and your gingerbread cookie cutter. This will make the process smooth and enjoyable.
- In the bowl of the stand mixer, add the unsalted butter, light brown sugar, and granulated sugar. Beat on medium-high speed for about 3 to 4 minutes until the mixture is smooth and creamy. Make sure to scrape down the sides of the bowl to incorporate all ingredients.
- Next, add in the unsulfured molasses, egg yolks, and vanilla. Continue to beat on medium-high speed for another minute until everything is well combined. Set this aside for now.
- In a separate medium-sized bowl, whisk together the all-purpose flour, ground ginger, ground cinnamon, salt, baking powder, baking soda, allspice, and ground nutmeg. This dry mixture is essential for balanced flavor and proper texture.
- Gradually add the dry ingredients to the wet mixture in the stand mixer. Mix on low speed to prevent flour from flying everywhere. Continue mixing until the flour is just incorporated. Be careful not to overmix, as this could result in tough cookies.
- Once the dough is ready, remove it from the mixing bowl and form it into a rough disc shape, about 3 to 4 inches thick. Wrap it tightly in plastic wrap and place it in the refrigerator to chill for at least one hour, or up to overnight. Chilling the dough helps to firm it up, making it easier to roll out.
- After the dough has chilled, preheat your oven to 350°F (175°C). Prepare several baking sheets by lining them with Silpat liners or parchment paper and lightly spraying them with baking spray.
- On a lightly floured surface, roll out the dough to about ⅛ inch thick using a rolling pin. Make sure the surface is floured to prevent sticking. A thicker dough will yield softer cookies, while a thinner dough will result in crispier cookies.
- Using a 3.75-inch gingerbread cookie cutter, cut out as many cookies as possible from the dough. Ensure not to overlap the cutter onto previously cut cookies. If you do, simply roll the dough back together and continue cutting.
- Carefully transfer the cut-out cookies onto the prepared baking sheets, ensuring they are spaced about ½ inch apart. Roll any remaining dough into a ball and repeat the cutting process until all the dough is used.
- Place the baking sheets in the center of the preheated oven and bake for 8 to 9 minutes. The edges should not be browned; the cookies will be soft when done. Baking them longer will result in crispier cookies, so keep an eye on them!
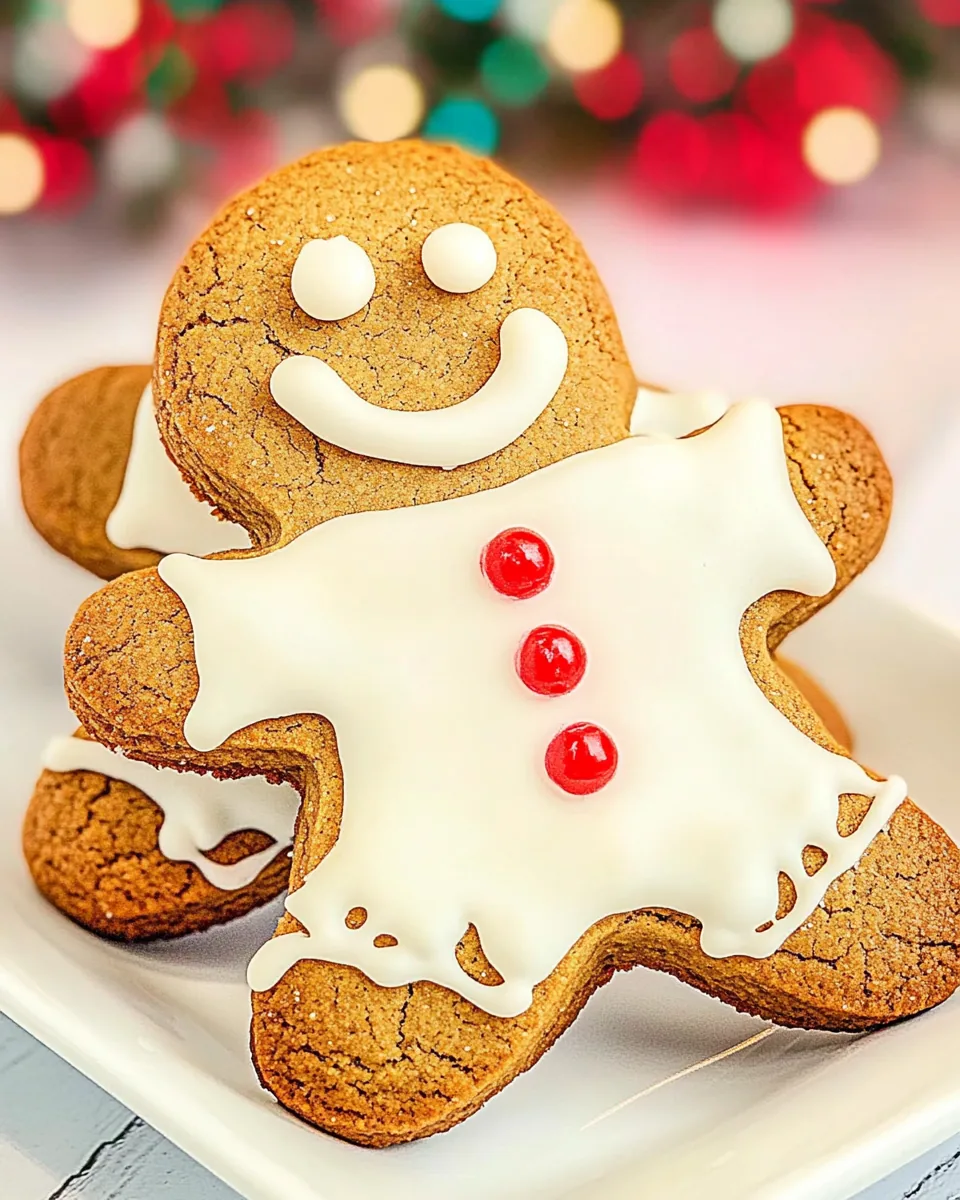
- Once baked, remove the cookies from the oven and let them cool on the baking sheets for a few minutes before transferring them to a cooling rack. Allow the cookies to cool completely before decorating.
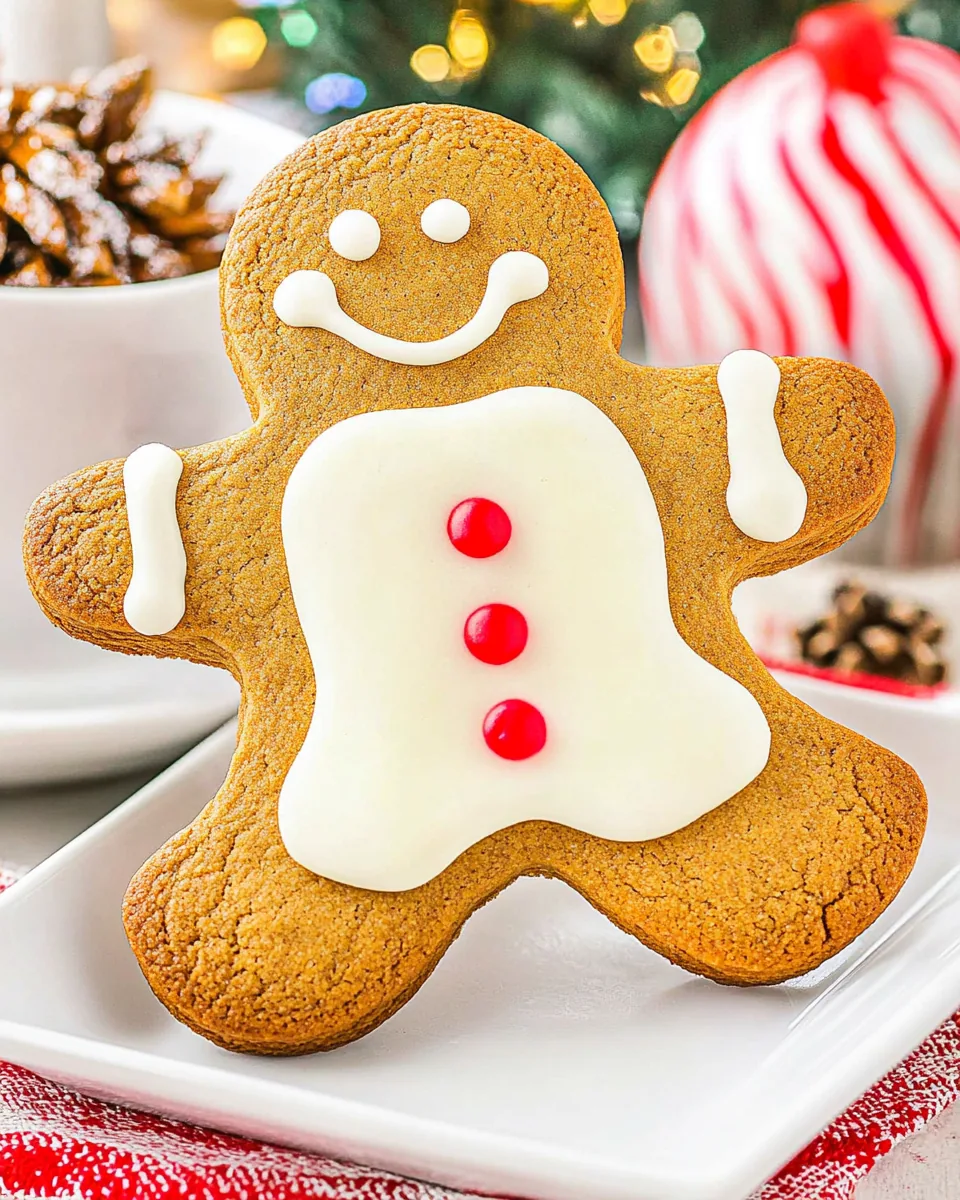
- While the cookies cool, prepare the icing. In a medium-sized mixing bowl, whisk together the confectioners’ sugar and salt. Add the light corn syrup, vanilla, and milk. Mix until you achieve a smooth frosting, which should be thick enough to hold its shape when piped.
- Divide the icing into three bowls. Add a bit of red food coloring to one, green food coloring to another, and leave one plain. Spoon the icing into separate piping bags. Snip a small hole at the bottom of each bag for decorating.
- To decorate, hold the piping bag at a slight angle about ⅛ inch above the cookie. Squeeze gently to pipe the icing in your desired design. Get creative and have fun with the decorations!
- Once decorated, your Classic Gingerbread Cookies are ready to be enjoyed! Store them in an airtight container at room temperature for up to one month. Make sure they are sealed to prevent them from becoming too soft.
Things Worth Knowing
- Chilling the Dough: Refrigerating the dough is crucial. It helps the cookies maintain their shape while baking.
- Mixing Technique: Avoid overmixing after adding the flour; it can lead to hard cookies instead of soft and chewy ones.
- Baking Time: Pay attention to the baking time. Overbaked cookies will become too crunchy, while underbaked ones will stay soft.
- Icing Consistency: Ensure your icing is thick enough to hold its shape but not so thick that it can’t be squeezed out easily.
Make It Your Own
Baking is all about personalization, and your Classic Gingerbread Cookies can be tailored to suit your tastes! Here are some tips to make this recipe truly yours:
- Storage: Store your cookies in an airtight container to keep them fresh and maintain their texture.
- Freezing: You can freeze the cookie dough for up to three months. Just let it thaw in the fridge before rolling it out.
- Flavor Variations: Experiment with different spices. A hint of cardamom or black pepper can add an interesting twist to the traditional flavor.
- Decorating Ideas: Use royal icing for more precise designs or try fondant for a different texture. Get creative with toppings like dried fruits or nuts.
- Alternative Shapes: These cookies can be cut into various shapes, not just gingerbread men. Use holiday-themed cookie cutters to match the occasion.
- Gifting: Package your cookies in decorative boxes or tins. Add a personal note to make your gift extra special.
How to Enjoy Classic Gingerbread Cookies
Enjoying your Classic Gingerbread Cookies can be a delightful experience. Here are some ideas for serving these festive treats:
- Holiday Gatherings: Serve them at your holiday parties or family gatherings as a sweet treat that everyone will love.
- Pairing: These cookies pair wonderfully with a cup of spiced tea or hot cocoa, enhancing the festive flavors.
- Decorative Displays: Use them as decorations on your holiday table. They look charming displayed on a festive platter.
- Gift Ideas: Package them beautifully to give as gifts during the holiday season, spreading joy to friends and family.
- Kids Activities: Engage children in decorating during playdates. It adds fun to their experience and encourages creativity.
- Seasonal Treats: Make these cookies as part of your holiday baking tradition, creating memories with your loved ones every year.
FAQ
Conclusion
The Classic Gingerbread Cookies recipe is not just a treat; it’s a celebration of tradition and creativity. Each cookie is an opportunity to express yourself and share joy with others. I encourage you to give this recipe a try, whether it’s to delight your family or to bring some holiday cheer to your friends. Enjoy the process, and happy baking!
Classic Gingerbread Cookies
Equipment
- Stand Mixer Fitted with a Paddle Attachment
- Gingerbread Man Cookie Cutter
Ingredients
- 1 cup Unsalted Butter softened to room temp
- ⅔ cup Light Brown Sugar packed
- ⅓ cup Granulated Sugar
- 1 cup Unsulfured Molasses
- 2 large Egg Yolks whites discarded or saved for another use
- 1 teaspoon Vanilla Extract
- 5 cups All-Purpose Flour
- 3 ½ teaspoons Ground Ginger or to taste
- 2 teaspoons Ground Cinnamon
- 1 teaspoon Salt
- ½ teaspoon Baking Powder
- ½ teaspoon Baking Soda
- ¼ teaspoon Allspice
- ¼ teaspoon Ground Nutmeg
- 1 ⅔ cup Confectioners’ Sugar sifted
- ¼ teaspoon Salt
- 1 ½ teaspoon Light Corn Syrup
- ½ teaspoon Vanilla Extract
- 3 tablespoons Milk
- Red and Green Food Coloring gel recommended
- Red Cinnamon Candies optional but recommended
- Red and Green Sprinkles optional but recommended
Instructions
- Step 1: Start by preparing your workspace. Gather all the ingredients and equipment: a stand mixer fitted with a paddle attachment, a rolling pin, and your gingerbread cookie cutter. This will make the process smooth and enjoyable.
- Step 2: In the bowl of the stand mixer, add the unsalted butter, light brown sugar, and granulated sugar. Beat on medium-high speed for about 3 to 4 minutes until the mixture is smooth and creamy. Make sure to scrape down the sides of the bowl to incorporate all ingredients.
- Step 3: Next, add in the unsulfured molasses, egg yolks, and vanilla. Continue to beat on medium-high speed for another minute until everything is well combined. Set this aside for now.
- Step 4: In a separate medium-sized bowl, whisk together the all-purpose flour, ground ginger, ground cinnamon, salt, baking powder, baking soda, allspice, and ground nutmeg. This dry mixture is essential for balanced flavor and proper texture.
- Step 5: Gradually add the dry ingredients to the wet mixture in the stand mixer. Mix on low speed to prevent flour from flying everywhere. Continue mixing until the flour is just incorporated. Be careful not to overmix, as this could result in tough cookies.
- Step 6: Once the dough is ready, remove it from the mixing bowl and form it into a rough disc shape, about 3 to 4 inches thick. Wrap it tightly in plastic wrap and place it in the refrigerator to chill for at least one hour, or up to overnight. Chilling the dough helps to firm it up, making it easier to roll out.
- Step 7: After the dough has chilled, preheat your oven to 350°F (175°C). Prepare several baking sheets by lining them with Silpat liners or parchment paper and lightly spraying them with baking spray.
- Step 8: On a lightly floured surface, roll out the dough to about ⅛ inch thick using a rolling pin. Make sure the surface is floured to prevent sticking. A thicker dough will yield softer cookies, while a thinner dough will result in crispier cookies.
- Step 9: Using a 3.75-inch gingerbread cookie cutter, cut out as many cookies as possible from the dough. Ensure not to overlap the cutter onto previously cut cookies. If you do, simply roll the dough back together and continue cutting.
- Step 10: Carefully transfer the cut-out cookies onto the prepared baking sheets, ensuring they are spaced about ½ inch apart. Roll any remaining dough into a ball and repeat the cutting process until all the dough is used.
- Step 11: Place the baking sheets in the center of the preheated oven and bake for 8 to 9 minutes. The edges should not be browned; the cookies will be soft when done. Baking them longer will result in crispier cookies, so keep an eye on them!
- Step 12: Once baked, remove the cookies from the oven and let them cool on the baking sheets for a few minutes before transferring them to a cooling rack. Allow the cookies to cool completely before decorating.
- Step 13: While the cookies cool, prepare the icing. In a medium-sized mixing bowl, whisk together the confectioners' sugar and salt. Add the light corn syrup, vanilla, and milk. Mix until you achieve a smooth frosting, which should be thick enough to hold its shape when piped.
- Step 14: Divide the icing into three bowls. Add a bit of red food coloring to one, green food coloring to another, and leave one plain. Spoon the icing into separate piping bags. Snip a small hole at the bottom of each bag for decorating.
- Step 15: To decorate, hold the piping bag at a slight angle about ⅛ inch above the cookie. Squeeze gently to pipe the icing in your desired design. Get creative and have fun with the decorations!
- Step 16: Once decorated, your Classic Gingerbread Cookies are ready to be enjoyed! Store them in an airtight container at room temperature for up to one month. Make sure they are sealed to prevent them from becoming too soft.
Notes
- Chilling the Dough: Refrigerating the dough is crucial. It helps the cookies maintain their shape while baking.
- Mixing Technique: Avoid overmixing after adding the flour; it can lead to hard cookies instead of soft and chewy ones.
- Baking Time: Pay attention to the baking time. Overbaked cookies will become too crunchy, while underbaked ones will stay soft.
- Icing Consistency: Ensure your icing is thick enough to hold its shape but not so thick that it can't be squeezed out easily.