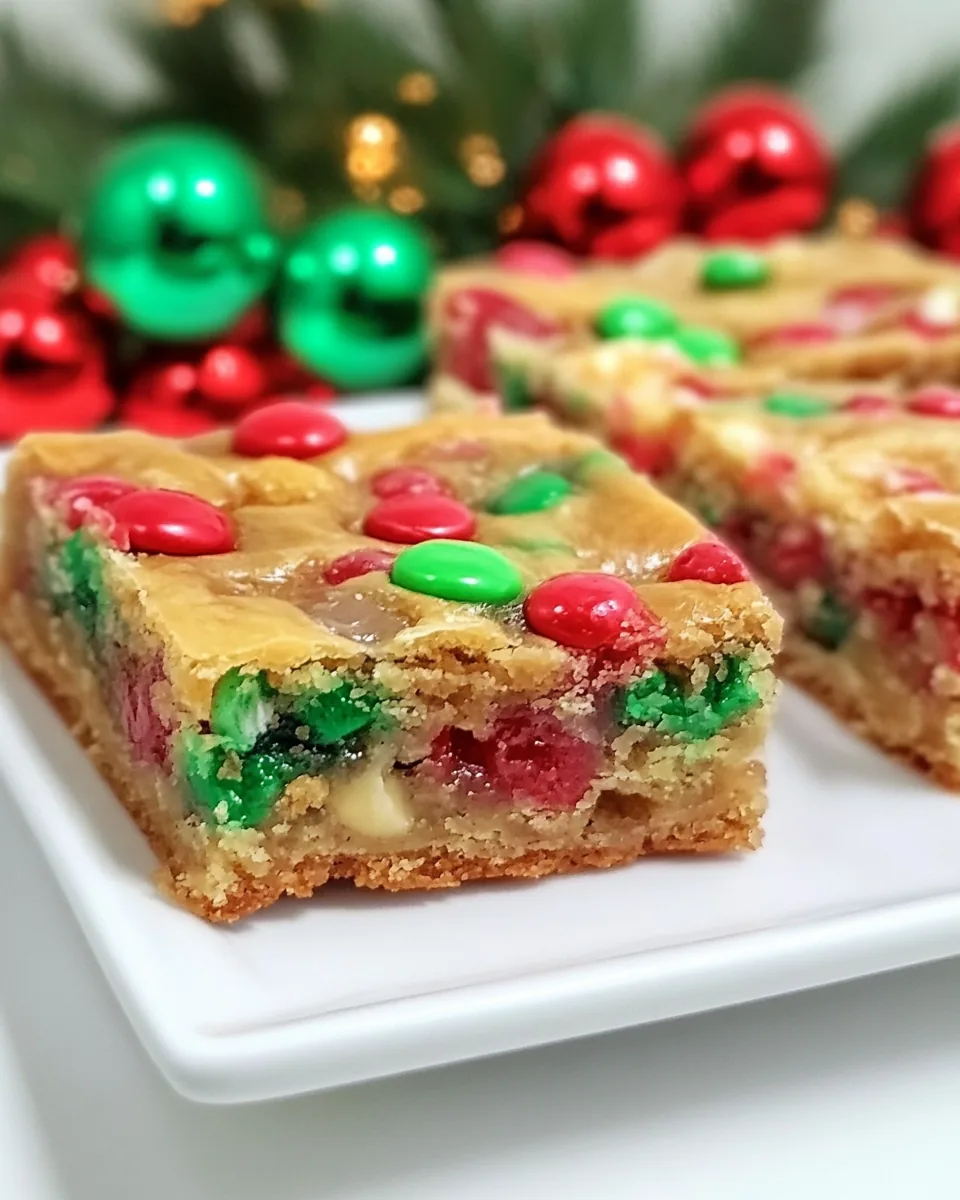
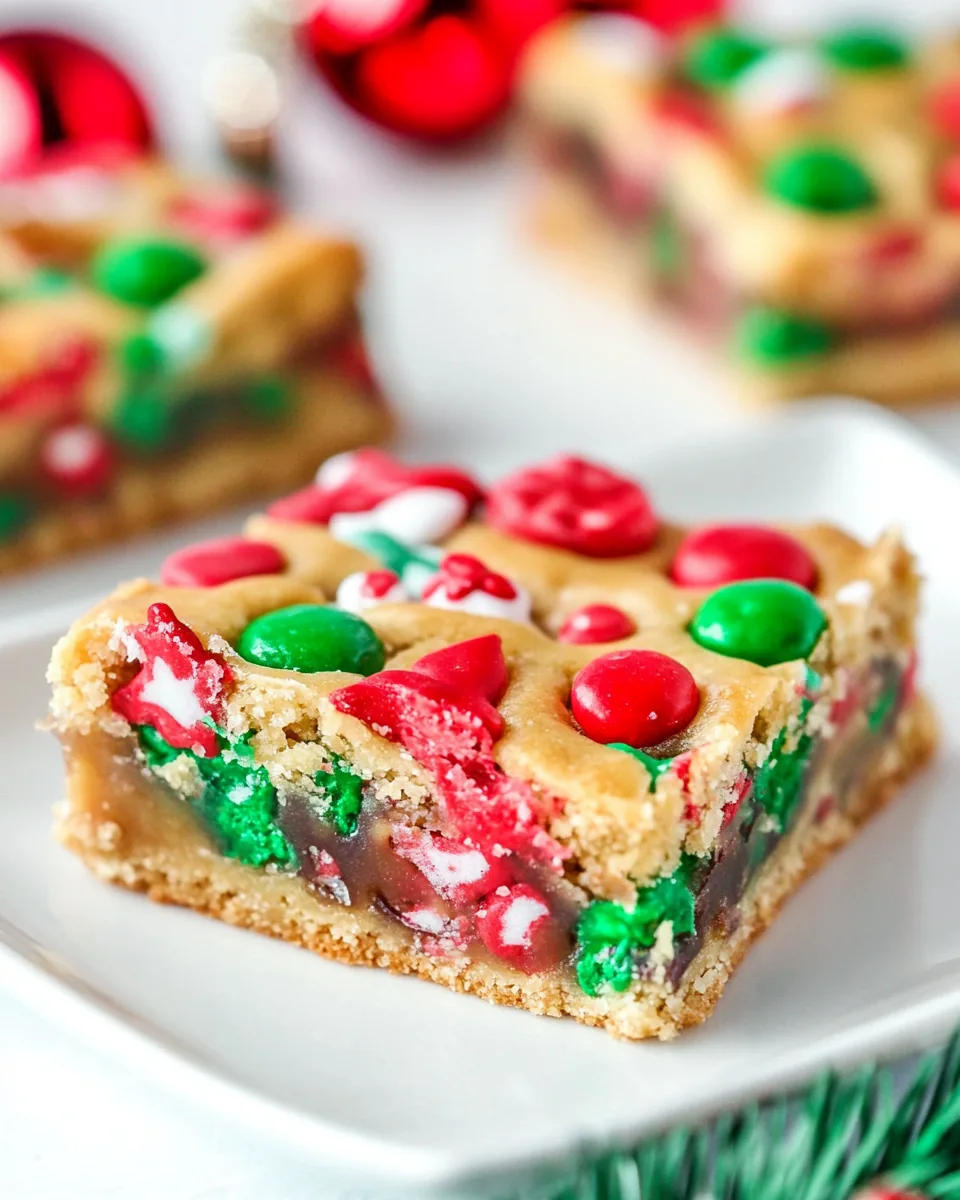
Christmas Cookie Bars
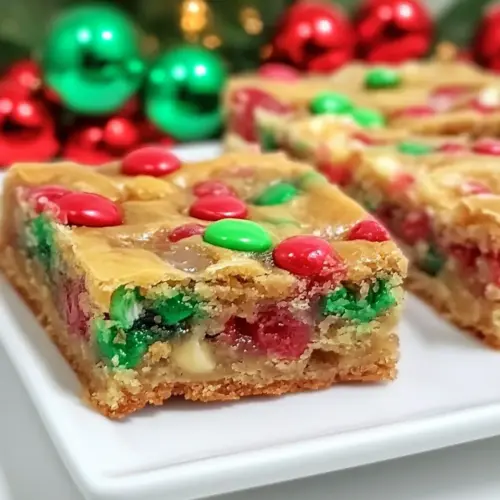
The festive season is upon us, and what better way to celebrate than with a batch of Christmas Cookie Bars? I remember the first time I tried making these delicious bars; the aroma of melted butter and brown sugar wafted through the house, making everyone eager to taste. These bars have a rich, fudgy texture that perfectly captures the holiday spirit. Each bite is a delightful combination of sweet and festive, thanks to the colorful Christmas M&Ms and sprinkles. It’s become a tradition in my family to whip up a batch of Christmas Cookie Bars to share with friends and neighbors during this special time of year.
Recipe Snapshot
45 mins
20 mins
25 mins
Medium
160 kcal
2 g
Gluten-Free, Low FODMAP
7 g
Frying Pan, Oven, Chef’s Knife, Mixing Bowl, Wooden Spoon, Baking Sheet
What We Adore About This Christmas Cookie Bars
They’re Perfect for Sharing
One of the reasons I absolutely love Christmas Cookie Bars is how easy they are to share. You can cut them into uniform squares, making them perfect for holiday parties, gift exchanges, or simply enjoying with loved ones. Each bar is a perfect bite-sized treat that can be wrapped up and given as a thoughtful gift.
Versatile for Any Occasion
These bars are incredibly versatile; while they are a fantastic addition to any holiday dessert table, they can also be enjoyed year-round. Change out the M&Ms or sprinkles to suit different holidays or celebrations. The basic recipe is a canvas for creativity!
Rich and Fudgy Texture
What sets these Christmas Cookie Bars apart is their rich and fudgy texture. Unlike traditional cookies that can sometimes be dry, these bars maintain a moist and chewy center. This makes them a hit among both kids and adults alike!
Easy to Make
Don’t let the deliciousness fool you; these bars are surprisingly easy to whip up. With just a handful of ingredients mixed together, you’ll have a batter ready to go in no time. Even if you’re not a seasoned baker, this recipe is straightforward enough for anyone to tackle.
Fun for the Whole Family
Making Christmas Cookie Bars can be a fun family activity! Get the kids involved in mixing the ingredients and, of course, sprinkling on the festive toppings. It’s a great way to create memories while baking something delicious together.
Perfect for Holiday Gifting
These bars not only taste amazing but also look festive, making them an excellent gift option. Package them in a decorative box, and they become a charming present for friends, coworkers, or anyone who deserves a little holiday cheer!
Ingredients Overview for Christmas Cookie Bars

When it comes to making Christmas Cookie Bars, each ingredient plays a vital role in achieving that perfect balance of flavor and texture. From the creamy richness of unsalted butter to the sweetness of brown sugar, these ingredients come together to create a delightful treat. The eggs ensure a moist texture, while the all-purpose flour provides just the right amount of structure. And let’s not forget the festive M&Ms and sprinkles, which bring that holiday spirit to every bite!
- Unsalted Butter – ½ cup (113g): Adds a rich, creamy texture and flavor to the bars.
- Packed Brown Sugar – 2 cups (400g): Provides sweetness and moisture, contributing to the fudgy texture.
- Large Eggs – 2: Binds the ingredients together and helps create a tender crumb.
- Baking Powder – 1 teaspoon: Helps the bars rise slightly, giving them a light texture.
- Salt – ½ teaspoon: Enhances the sweetness and balances the flavors.
- All-Purpose Flour – 2 cups (248g): The base of the recipe that gives structure to the bars.
- Christmas M&Ms – 1 cup: Adds a festive touch and bursts of sweetness in every bite.
- Christmas Sprinkles – ½ cup: Provides a decorative and colorful finish, perfect for the holidays.
Christmas Cookie Bars Instructions

Making Christmas Cookie Bars is a delightful process that comes together quickly. You’ll be amazed at how simple it is to create these delicious treats. Follow these steps for a guaranteed success!
- Preheat your oven to 350°F (175°C). Line a 9×13-inch metal pan with foil and spray it well with cooking spray. Using a metal pan helps with even baking, so avoid glass pans for this recipe.
- In a large mixing bowl, combine the unsalted butter and brown sugar. Using a stand mixer or hand mixer, blend them together until the mixture is crumbly and well combined. The texture should resemble wet sand at this point.
- Add the eggs and vanilla to the bowl. Mix until everything is smooth and well incorporated. You want the mixture to be light and fluffy, which usually takes about 1 to 2 minutes of mixing.
- Next, sprinkle in the salt and baking powder. Mix them into the batter, ensuring they’re evenly distributed.
- Gradually add the all-purpose flour to the mixture. Mix on low speed or gently fold it in with a spatula to avoid overmixing. The batter will be thick and somewhat sticky.
- Now it’s time to stir in the festive M&Ms and sprinkles. Make sure they are evenly distributed throughout the batter for that colorful pop in every bar.
- Spread the batter into the prepared pan, smoothing the top with a spatula. Since the mixture is wet, you might find it easier to spray your hands with cooking spray and gently press it into an even layer.
- Top the batter with any remaining M&Ms and sprinkles for an extra festive look. Don’t be shy; it adds to the visual appeal!
- Bake in the preheated oven for about 22 to 25 minutes. You want them to start turning golden. Keep an eye on them; it’s better to err on the side of underbaking since they will continue to cook as they cool.
- Once baked, remove the pan from the oven and allow the bars to cool in the pan for about 10 minutes. Then, lift them out using the foil and transfer them to a cooling rack to cool completely. Once cooled, slice them into bars and enjoy!
- Store any leftovers in an airtight container for up to 4 days, or freeze for up to a month. These bars are perfect for making ahead!
Things Worth Knowing
- Use a metal pan: Metal pans conduct heat evenly, which promotes consistent baking. A glass pan can cause overbaking on the edges while leaving the center undercooked.
- Don’t overmix: Once you add the flour, mix just until combined. Overmixing can lead to tough bars.
- If they seem underdone: Trust the process! The bars will firm up as they cool. You want a slightly fudgy center, not a cake-like texture.
- Customize your mix-ins: Feel free to add other festive candies or nuts for variation. Just keep the proportions similar to maintain the texture.
Helpful Hints
When it comes to making the best Christmas Cookie Bars, here are some helpful hints to ensure your baking success!
- Storage: Store any leftover bars in an airtight container at room temperature for up to 4 days to keep them fresh. They’re great for sharing with family and friends!
- Freezing: You can freeze these bars by slicing them and placing them in a single layer in a freezer-safe container. They’ll last for up to a month!
- Serving suggestion: These bars are perfect for holiday gatherings, as a sweet addition to lunch boxes, or as a festive treat for special occasions.
- Using real butter: Always opt for real butter rather than margarine for the best flavor and texture.
- Check your oven: Make sure your oven is preheated properly; an oven thermometer can help ensure accuracy.
- Enjoy warm: For an extra treat, serve the bars warm from the oven, perhaps with a scoop of ice cream on the side!
Side Dish Ideas for Christmas Cookie Bars
Pairing your Christmas Cookie Bars with the right accompaniments can elevate your dessert experience. Here are some delightful suggestions:
- Hot cocoa: A warm mug of hot cocoa pairs beautifully with these bars, creating a cozy dessert experience.
- Ice cream: Serve warm bars with a scoop of vanilla or peppermint ice cream on top for a delightful contrast in flavors and temperatures.
- Holiday fruit salad: A light and refreshing fruit salad can balance the richness of the bars, offering a colorful and healthy side dish.
- Tea or coffee: Enjoy these bars with a cup of your favorite tea or coffee for a warm and comforting treat.
- Cheese platter: For a more savory twist, a cheese platter with assorted cheeses can complement the sweetness of the bars nicely.
- Seasonal nuts: Offer some spiced or candied nuts as a crunchy contrast and a festive touch.
FAQ
Conclusion
The Christmas Cookie Bars are a delightful blend of texture and taste, wrapped in a festive package. They’re incredibly easy to make and perfect for any holiday gathering. I encourage you to try this recipe and share the joy it brings to your home. With their rich, fudgy interior and colorful toppings, they are sure to brighten up any occasion. Enjoy sharing these sweet treats with everyone you love!
Christmas Cookie Bars
Equipment
- Frying Pan
- Oven
- Chef's Knife
- Mixing Bowl
- Wooden Spoon
- Baking Sheet
Ingredients
- 0.5 cup Unsalted Butter
- 2 cups Packed Brown Sugar
- 2 large Eggs
- 1 teaspoon Vanilla
- 0.5 teaspoon Salt
- 1 teaspoon Baking Powder
- 2 cups All-Purpose Flour
- 1 cup Christmas M&Ms
- 0.5 cup Christmas Sprinkles
Instructions
- Preheat your oven to 350°F (175°C). Line a 9×13-inch metal pan with foil and spray it well with cooking spray. Using a metal pan helps with even baking, so avoid glass pans for this recipe.
- In a large mixing bowl, combine the unsalted butter and brown sugar. Using a stand mixer or hand mixer, blend them together until the mixture is crumbly and well combined. The texture should resemble wet sand at this point.
- Add the eggs and vanilla to the bowl. Mix until everything is smooth and well incorporated. You want the mixture to be light and fluffy, which usually takes about 1 to 2 minutes of mixing.
- Next, sprinkle in the salt and baking powder. Mix them into the batter, ensuring they’re evenly distributed.
- Gradually add the all-purpose flour to the mixture. Mix on low speed or gently fold it in with a spatula to avoid overmixing. The batter will be thick and somewhat sticky.
- Now it’s time to stir in the festive M&Ms and sprinkles. Make sure they are evenly distributed throughout the batter for that colorful pop in every bar.
- Spread the batter into the prepared pan, smoothing the top with a spatula. Since the mixture is wet, you might find it easier to spray your hands with cooking spray and gently press it into an even layer.
- Top the batter with any remaining M&Ms and sprinkles for an extra festive look. Don’t be shy; it adds to the visual appeal!
- Bake in the preheated oven for about 22 to 25 minutes. You want them to start turning golden. Keep an eye on them; it’s better to err on the side of underbaking since they will continue to cook as they cool.
- Once baked, remove the pan from the oven and allow the bars to cool in the pan for about 10 minutes. Then, lift them out using the foil and transfer them to a cooling rack to cool completely. Once cooled, slice them into bars and enjoy!
- Store any leftovers in an airtight container for up to 4 days, or freeze for up to a month. These bars are perfect for making ahead!