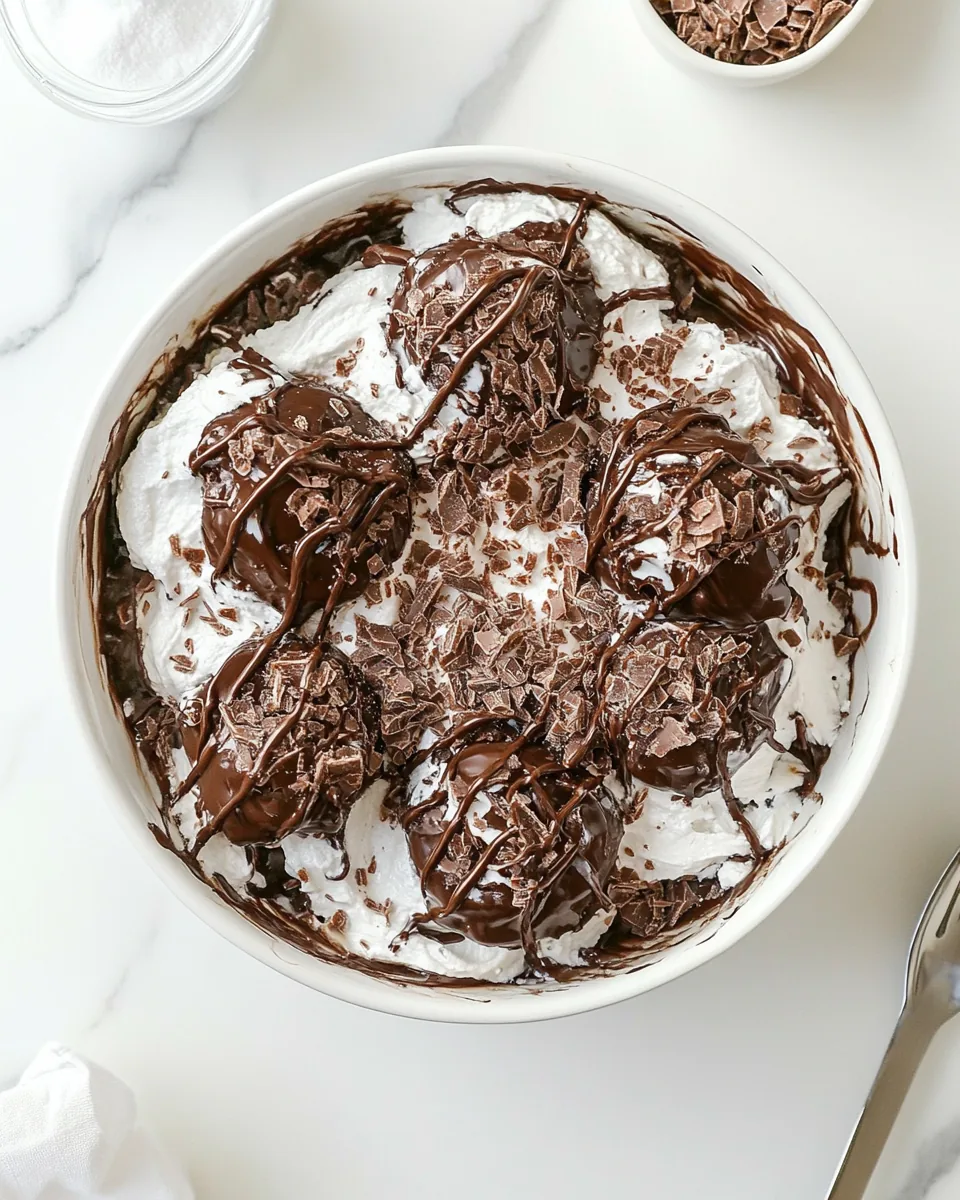
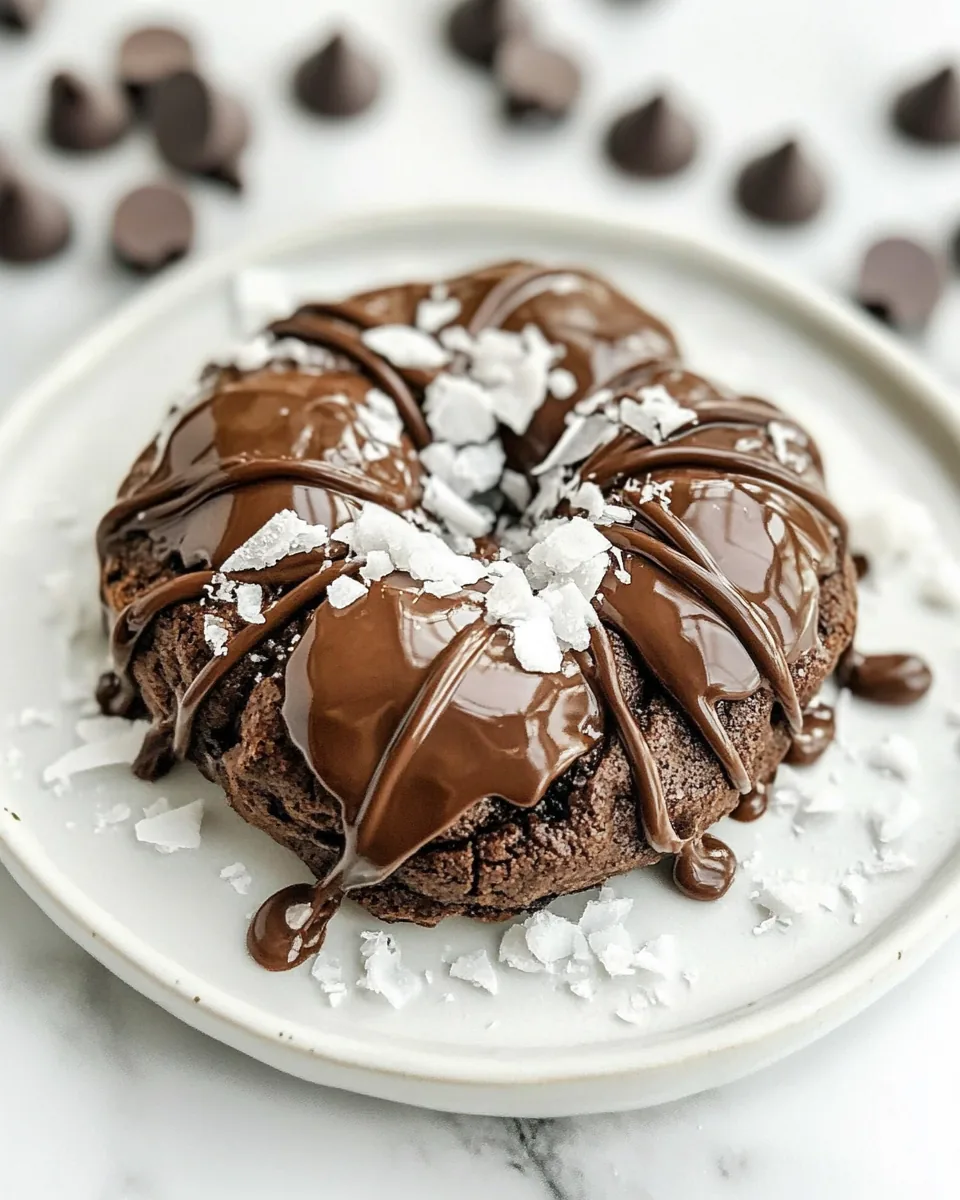
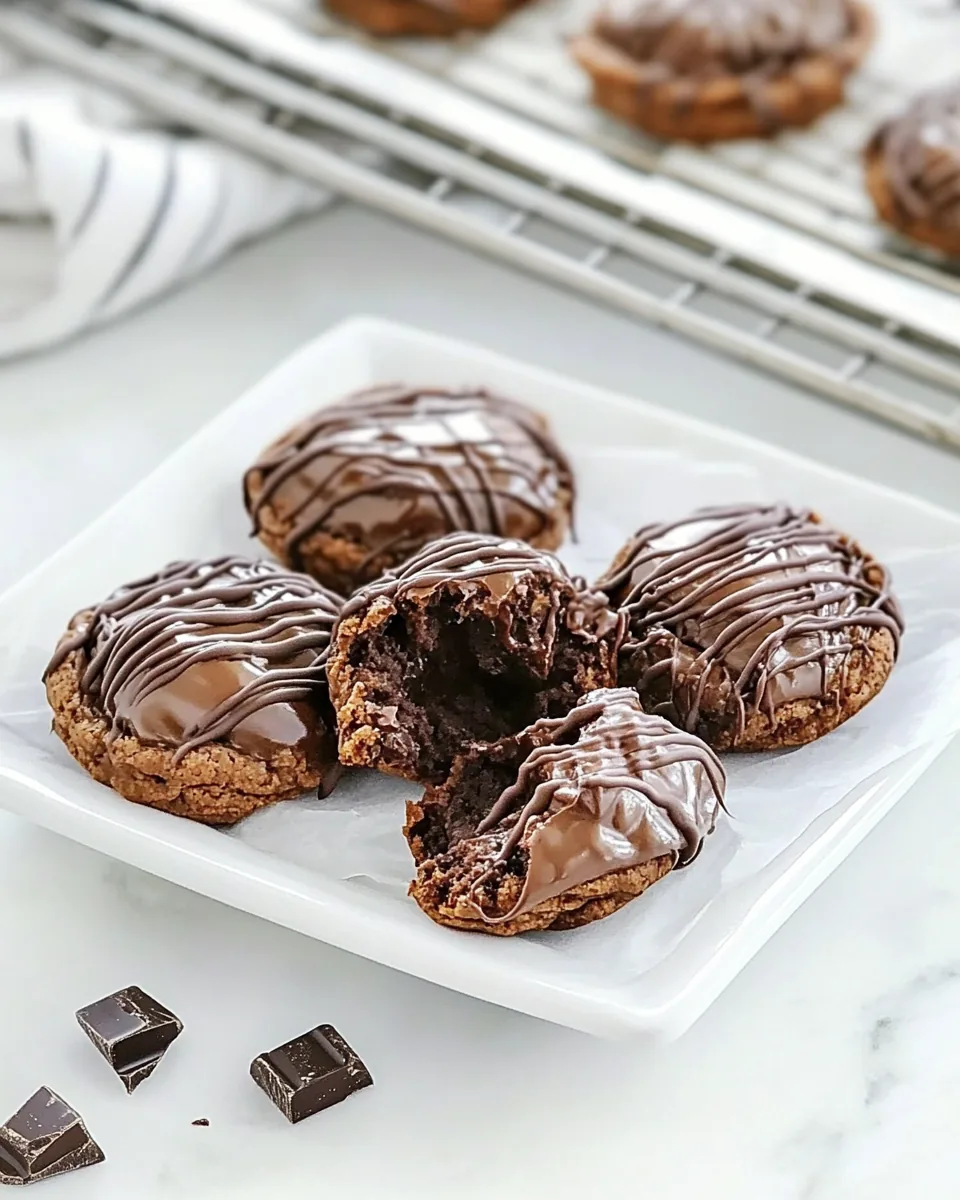
Chocolate Puddles
There’s something incredibly charming about Chocolate Puddles that brings back fond memories of childhood. I still remember the aroma wafting through the kitchen as my mom baked these delightful cookies. It was a ritual; every Sunday, she would gather us around the kitchen, transforming our home into a fragrant haven of chocolate goodness. The anticipation would build as we watched her mix the ingredients, and the moment they came out of the oven, hot and gooey, we knew we were in for a treat. The best part? Watching those chocolate kisses melt into soft, puddle-like pools of bliss, inviting us to dive right in. Every bite was a sweet escape, a reminder that sometimes, the simplest recipes hold the most cherished memories. Over the years, I’ve perfected this recipe, ensuring that each batch of Chocolate Puddles remains as delightful as I remember. Whether it’s a family gathering or just a quiet afternoon, these cookies always manage to bring smiles and laughter to the table.
Recipe Snapshot
1 hr 23 mins
15 mins
68 mins
Medium
120 kcal
2g g
Gluten-Free, Low FODMAP
6g g
Mixing Bowl, Oven, Whisk, Baking Sheet
What Makes This Chocolate Puddles Special
They’re Incredibly Decadent
One of the standout features of Chocolate Puddles is their rich, chocolatey flavor. The combination of cocoa powder and Hershey’s kisses creates a deliciously intense chocolate experience that’s hard to resist. Each bite feels like a mini-celebration, making them perfect for any occasion.
Perfect for Sharing
These cookies are not just for indulgence; they’re also ideal for sharing with friends and family. The recipe yields a large batch, so you can easily make enough to bring to gatherings or bake sales. Watching others enjoy them brings me just as much joy as eating them myself.
Easy to Make
You don’t have to be a baking expert to whip up a batch of Chocolate Puddles. The recipe is straightforward and doesn’t require any fancy techniques. It’s perfect for baking with kids or if you’re short on time.
Versatile and Customizable
While I love the classic version of these cookies, they also lend themselves well to variations. You can mix in nuts, swap out the chocolate kisses for other candies, or even add a hint of mint for a refreshing twist. The possibilities are endless!
Great for Any Season
Whether it’s a cozy winter afternoon or a summer picnic, Chocolate Puddles fit right in. They’re a year-round treat that can be enjoyed at any time. Their comforting chocolate flavor makes them a go-to snack when you need a little pick-me-up.
A Fun Activity
Baking these cookies is more than just making a delicious treat; it’s an activity that brings people together. I often invite friends over for a baking party, and we have a blast mixing, rolling, and decorating our cookies. It’s a great way to bond and create new memories.
What You Need for Chocolate Puddles
When it comes to making scrumptious Chocolate Puddles, the ingredients play a pivotal role in achieving that perfect texture and flavor. Each component has its purpose, working harmoniously to create a delightful cookie experience. The star players include all-purpose flour for structure, cocoa powder for rich chocolate flavor, and Hershey’s kisses that add a delicious surprise in every bite. Together, they come together in a sweet symphony that’s simply irresistible.
- 1¾ cups All-Purpose Flour – The foundation of your cookies, this ingredient provides the necessary structure while ensuring a soft texture.
- ½ cup Cocoa Powder – This adds the rich chocolate flavor that makes these cookies so decadent and satisfying.
- 1 teaspoon Baking Soda – A leavening agent that helps the cookies rise and become light and fluffy.
- ¾ teaspoon Baking Powder – Works alongside baking soda to give the cookies their perfect height and texture.
- 2 tablespoons Cornstarch – This ingredient helps to create a softer cookie by preventing the gluten from developing too much.
- ½ cup Salted Butter (softened) – Adds richness and moisture, ensuring that the cookies are tender and flavorful.
- ½ cup Granulated Sugar – Sweetens the cookies and contributes to their texture.
- ½ cup Packed Light Brown Sugar – Adds moisture and a slight caramel flavor that enhances the overall taste.
- 2 Large Eggs (room temperature) – Binds the ingredients together and adds moisture, ensuring a rich texture.
- 2 teaspoons Vanilla Extract (or 1 teaspoon peppermint extract) – Gives the cookies a warm, inviting flavor that complements the chocolate.
- ½ cup Powdered Sugar – Used to roll the cookie dough balls for a beautiful finish and a touch of sweetness.
- 24 Hershey’s Kisses – The star of the show, these chocolate treats melt beautifully in the center of each cookie, creating that signature puddle.
Preparation Steps for Chocolate Puddles
Making Chocolate Puddles is a delightful process that fills your kitchen with sweet aromas. You’ll start by combining the dry ingredients, then move on to creaming butters and sugars, creating a light and fluffy mixture. With each step, you’ll see your cookie dough come together beautifully. Let’s get started!
- In a medium bowl, whisk together all-purpose flour, cocoa powder, baking soda, baking powder, and cornstarch. This step is crucial as it ensures that all dry ingredients are well mixed, providing a uniform flavor and texture in your Chocolate Puddles.
- In a second mixing bowl, cream together salted butter, granulated sugar, and light brown sugar until light and fluffy (about 2 minutes on medium speed). This process aerates the mixture, leading to a lighter cookie texture.
- Add the eggs and vanilla (or mint) and beat until combined. This will enrich the dough and provide moisture.
- With the mixer on low, gradually add the flour mixture and beat just until combined. Avoid overmixing to keep your cookies tender.
- Cover the dough with plastic wrap and chill for 1 hour in the refrigerator. Chilling the dough helps prevent the cookies from spreading too much during baking, enhancing their shape.
- Preheat the oven to 350 degrees and line baking sheets with parchment paper. This ensures easy cleanup and prevents the cookies from sticking.
- Use a cookie scoop to form 1½ tablespoon balls of dough. Roll them in a small bowl with powdered sugar to coat each ball, adding a sweet touch to the final product.
- Place the dough balls about 2 inches apart on prepared cookie sheets. Give them enough space to spread while baking.
- Bake for 8 to 9 minutes and remove from the oven. You want them to look slightly underbaked, as they will continue to cook on the baking sheet.
- Press one unwrapped Hershey’s kiss into the center of each cookie as soon as they come out of the oven. This gives that iconic chocolate puddle effect.
- After 2 minutes, when the Hershey’s kiss has softened through, lift and discard the tip from each kiss so that the chocolate will puddle into the cookie.
- Transfer cookies to a cooling rack and allow them to cool. This step is essential for letting the cookies set perfectly.
Things Worth Knowing
- Chill the Dough: Chilling the dough not only helps prevent spreading but also enhances the flavor as the ingredients meld together.
- Watch the Baking Time: Keep an eye on your cookies while they bake; they should look slightly underbaked when you take them out.
- Quality Ingredients Matter: Use high-quality chocolate and butter to ensure your cookies taste as rich and decadent as possible.
- Storing the Cookies: Store any leftovers in an airtight container at room temperature to keep them fresh.
Recipe Tips about Chocolate Puddles
To make the most out of your Chocolate Puddles, I’ve gathered some helpful tips that will elevate your baking experience. These little nuggets of wisdom can turn a good cookie into a great one!
- Storage: Keep your cookies in an airtight container at room temperature for up to five days. This helps maintain their softness and flavor.
- Freezing: You can freeze the cookie dough before baking. Just scoop the dough balls onto a baking sheet and freeze until solid, then transfer to a zip-top bag. Bake from frozen, adding a couple of minutes to the cooking time.
- Pairing: These cookies pair perfectly with a glass of cold milk or a cup of coffee. The rich chocolate flavors complement each other beautifully.
- Variations: Feel free to add in nuts or swap out the chocolate kisses for other types of chocolate or candies for a fun twist!
- Make It Fun: Get creative by having a cookie decorating party! Let everyone add their favorite toppings to their own cookies.
What to Pair With Chocolate Puddles
When it comes to serving Chocolate Puddles, the options are endless! Here are some delightful ideas to complement your cookies:
- Milk: Nothing beats the classic pairing of warm cookies with a glass of cold milk. It’s a nostalgic combination that never fails to satisfy.
- Coffee: The richness of a good cup of coffee enhances the chocolate flavors, making it a perfect afternoon treat.
- Ice Cream: Serve your Chocolate Puddles alongside a scoop of vanilla or chocolate ice cream for a decadent dessert.
- Fruit: Fresh strawberries or raspberries can add a refreshing contrast to the sweetness of the cookies.
- Occasions: These cookies are great for any celebration, be it birthdays, holidays, or just a casual get-together with friends. Their rich flavor makes them suitable for any dessert table.
- Storage Tips: You can keep these cookies in a sealed container at room temperature for up to five days, or freeze them to enjoy later.
FAQ
Conclusion
In wrapping up, Chocolate Puddles truly capture the essence of comfort food with their gooey chocolate centers and delightful texture. These cookies not only bring a smile to your face but also create joyful memories to share with friends and family. I encourage you to try making them yourself! You’ll experience the wonderful combination of flavors and the joy they bring, making every bite worth it.

Chocolate Puddles
Equipment
- Mixing Bowl
- Oven
- Whisk
- Baking Sheet
Ingredients
- 1¾ cups All-Purpose Flour
- ½ cup Cocoa Powder
- 1 teaspoon Baking Soda
- ¾ teaspoon Baking Powder
- 2 tablespoons Cornstarch
- ½ cup Salted Butter (softened)
- ½ cup Granulated Sugar
- ½ cup Packed Light Brown Sugar
- 2 Large Eggs (room temperature)
- 2 teaspoons Vanilla Extract (or 1 teaspoon peppermint extract)
- ½ cup Powdered Sugar
- 24 Hershey’s Kisses
Instructions
- In a medium bowl, whisk together all-purpose flour, cocoa powder, baking soda, baking powder, and cornstarch. This step is crucial as it ensures that all dry ingredients are well mixed, providing a uniform flavor and texture in your Chocolate Puddles.
- In a second mixing bowl, cream together salted butter, granulated sugar, and light brown sugar until light and fluffy (about 2 minutes on medium speed). This process aerates the mixture, leading to a lighter cookie texture.
- Add the eggs and vanilla (or mint) and beat until combined. This will enrich the dough and provide moisture.
- With the mixer on low, gradually add the flour mixture and beat just until combined. Avoid overmixing to keep your cookies tender.
- Cover the dough with plastic wrap and chill for 1 hour in the refrigerator. Chilling the dough helps prevent the cookies from spreading too much during baking, enhancing their shape.
- Preheat the oven to 350 degrees and line baking sheets with parchment paper. This ensures easy cleanup and prevents the cookies from sticking.
- Use a cookie scoop to form 1½ tablespoon balls of dough. Roll them in a small bowl with powdered sugar to coat each ball, adding a sweet touch to the final product.
- Place the dough balls about 2 inches apart on prepared cookie sheets. Give them enough space to spread while baking.
- Bake for 8 to 9 minutes and remove from the oven. You want them to look slightly underbaked, as they will continue to cook on the baking sheet.
- Press one unwrapped Hershey’s kiss into the center of each cookie as soon as they come out of the oven. This gives that iconic chocolate puddle effect.
- After 2 minutes, when the Hershey’s kiss has softened through, lift and discard the tip from each kiss so that the chocolate will puddle into the cookie.
- Transfer cookies to a cooling rack and allow them to cool. This step is essential for letting the cookies set perfectly.