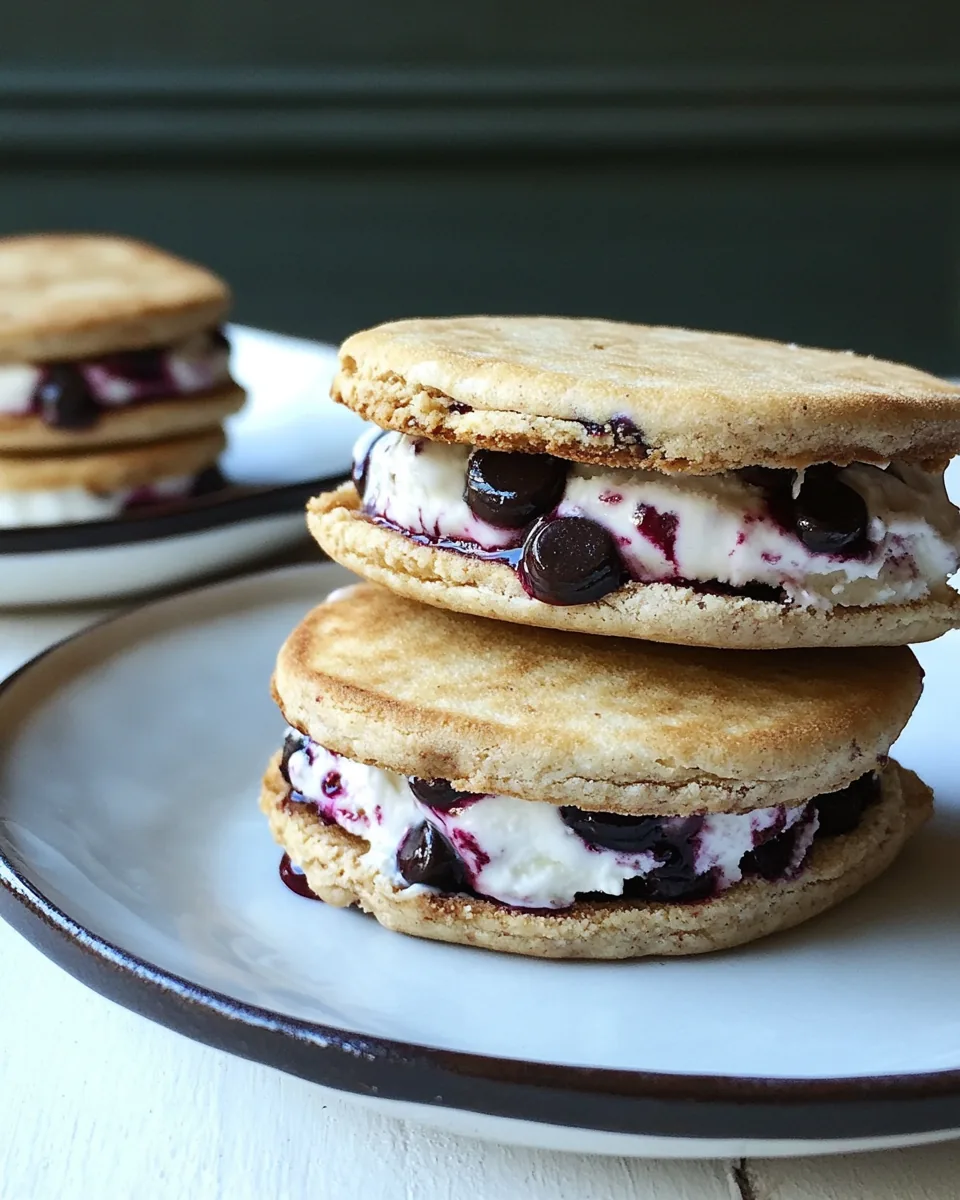
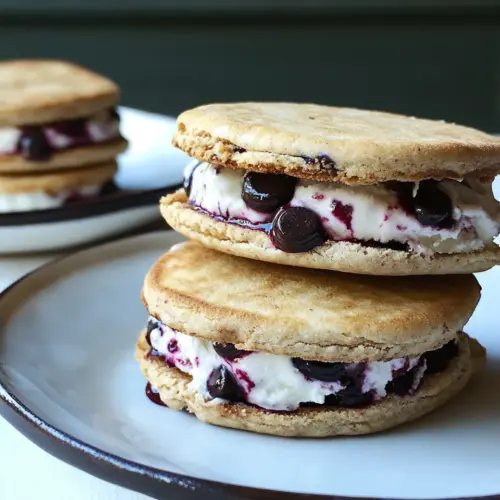
Chocolate Chip Ice Cream Sandwiches
There’s something magical about summer treats, and Chocolate Chip Ice Cream Sandwiches hold a special place in my heart. Growing up, my family would gather around the kitchen as we crafted these delightful sandwiches, each bite bringing forth memories of laughter and warm afternoons. We would experiment with different combinations, sometimes swapping out the classic chocolate chips for other fun flavors. As the sun set, our backyard would be filled with the sweet aroma of freshly baked cookies mingling with the rich and creamy scent of homemade ice cream. Creating Chocolate Chip Ice Cream Sandwiches is not just about the flavors, but also about the connection and joy it brings to those around us.
Recipe Snapshot
2 hr 12 mins
120 mins
12 mins
Hard
350 kcal
4 g
Gluten-Free, Low FODMAP
17 g
Frying Pan, Whisk, Oven, Large Pot, Wooden Spoon, Mixing Bowl, Baking Sheet
Why This Chocolate Chip Ice Cream Sandwiches Is So Good
It’s a Nostalgic Experience
There’s an undeniable nostalgia that comes with Chocolate Chip Ice Cream Sandwiches. They remind me of childhood summers spent at the park, where we would indulge in these sweet treats after a long day of playing. Each sandwich is a bite of joy that recalls warm days and carefree moments.
Customizable Fun
One of the best things about Chocolate Chip Ice Cream Sandwiches is how customizable they are. You can play around with different cookies, ice cream flavors, and even toppings. Want to try peanut butter cookies with vanilla ice cream? Go for it! The combinations are endless, letting you explore your creativity in the kitchen.
Perfect for Gatherings
These sandwiches are always a hit at parties and gatherings. People of all ages love them, making them a great dessert for any occasion. They bring everyone together, sparking conversations and laughter as we indulge in these delightful treats.
Easy to Make Ahead
Another fantastic aspect of Chocolate Chip Ice Cream Sandwiches is that they can be made ahead of time. You can prepare the cookies and ice cream, assemble the sandwiches, and then keep them frozen until you’re ready to serve. This makes them perfect for impromptu get-togethers or planned parties.
Deliciously Satisfying
There’s something inherently satisfying about the contrast of a warm, chewy cookie with cold, creamy ice cream. The textures blend perfectly, making every bite a delightful experience. Simply put, Chocolate Chip Ice Cream Sandwiches are a treat that satisfies both your sweet tooth and your love for comfort food.
Teach Kids to Cook
Making these sandwiches is an excellent way to teach kids some basic cooking skills. From measuring ingredients to baking cookies, it’s a hands-on activity that’s both educational and fun. Plus, they’ll be thrilled to enjoy the delicious results!
Chocolate Chip Ice Cream Sandwiches Ingredients

The ingredients for Chocolate Chip Ice Cream Sandwiches come together to create a delightful mix of flavors and textures. The star players here are the creamy ice cream and the chewy cookies, each enhancing the other. With a combination of basic pantry staples and a few special touches, you’ll have everything you need for this indulgent treat.
- 2 tablespoons unsalted butter
- 1 cup light brown sugar, packed
- 1 tablespoon vanilla
- 2 cups heavy cream, divided
- 1 1/2 cups whole milk
- 1/4 teaspoon sea salt
- 4 large egg yolks
- 1 3/4 cups all-purpose flour
- 1/2 teaspoon baking soda
- 1/2 teaspoon baking powder
- 1/4 teaspoon sea salt
- 4 ounces unsalted butter, at room temperature
- 1/2 cup granulated sugar
- 1/2 cup light brown sugar, packed
- 1 large egg, at room temperature
- 1 tablespoon milk
- 2 teaspoons vanilla
- 1 cup semi-sweet chocolate chips
How to Assemble Chocolate Chip Ice Cream Sandwiches

Assembling Chocolate Chip Ice Cream Sandwiches is a fun and rewarding process that brings together the best of both worlds—cookies and ice cream. Just follow these steps, and you’ll be enjoying your homemade treats in no time!
Start by melting the unsalted butter in a medium saucepan over medium flame. Add the light brown sugar and vanilla, whisking until the sugar dissolves and the mixture bubbles. This should take about three minutes, and you’ll notice a lovely, rich aroma filling your kitchen.
Next, mix in half a cup of the heavy cream and whisk until smooth. Once combined, remove the pan from heat and let it cool while you prepare the ice cream.
To create an ice bath, fill a large bowl with ice and about two cups of water. Place a medium bowl fitted with a fine mesh strainer inside the ice bath. This setup will help cool the mixture quickly later on.
In a medium saucepan, combine the remaining whole milk, the rest of the heavy cream, and sea salt. Set this saucepan over medium flame and heat until the mixture is warm and starting to steam. Stir occasionally to prevent sticking.
In another bowl, whisk the large egg yolks until smooth. Gradually whisk in half of the warm milk mixture, a ladleful at a time, until it’s warm and smooth. This technique tempers the eggs, ensuring they don’t scramble.
Pour the egg/milk mixture back into the saucepan and cook over medium heat. Stir constantly with a wooden spoon, watching for the mixture to thicken enough to coat the back of the spoon. This should take about five minutes, but be careful not to let it boil.
Once thickened, immediately strain the mixture through the fine mesh strainer into the prepared ice bath. This step ensures a smooth texture for your ice cream custard.
Add the butterscotch to the custard and stir to combine thoroughly. Allow the custard to cool in the ice bath until it reaches room temperature, stirring often to speed up the process.
Press plastic wrap against the surface of the custard and refrigerate until chilled, about four hours or up to a day. This chilling period is crucial for flavor development.
When you’re ready, pour the chilled custard into an ice cream maker and freeze according to the product’s instructions. Transfer the finished ice cream to an airtight container and freeze until firm, about two hours.
Meanwhile, preheat your oven to 350 degrees Fahrenheit and line two large baking sheets with parchment paper.
In a medium bowl, whisk together the all-purpose flour, baking soda, baking powder, and sea salt. In a separate large bowl, beat the unsalted butter and granulated sugar together until light and fluffy—this should take around two minutes.
Add the large egg, milk, and more vanilla, beating until smooth. Gradually mix in the flour mixture until combined, and then fold in the semi-sweet chocolate chips.
Using a tablespoon, drop balls of cookie dough onto the prepared baking sheets. Flatten the tops slightly with your palm and bake for 10 to 12 minutes. Keep an eye on the cookies, as they should be golden brown around the edges.
Let the cookies cool on the baking sheets for five minutes before transferring them to a cooling rack. Once completely cooled, freeze the cookies until firm, at least one hour.
Now, it’s time to assemble the sandwiches! Take one frozen cookie, top it with a generous scoop of ice cream, then place another cookie on top. Gently press down to form a sandwich. For an extra treat, roll the edges in additional chocolate chips.
Finally, place the assembled sandwiches in the freezer. Allow them to freeze for at least two hours before serving, ensuring they hold together perfectly.
Things Worth Knowing
- Chill Your Tools: For the best results, ensure your mixing bowls and utensils are chilled. This helps keep the ice cream cold during preparation.
- Cookie Texture: Watch the cookies closely while baking. They should be slightly underbaked for a chewy texture, as they will firm up while cooling.
- Ice Cream Consistency: If your ice cream is too soft to scoop, let it freeze for a bit longer. It should be firm but scoopable.
- Assembly Pointers: Work quickly when assembling the sandwiches to prevent the ice cream from melting. Have everything ready to go!
How to Switch It Up

There are countless ways to switch up your Chocolate Chip Ice Cream Sandwiches, allowing for endless fun and creativity. Here are some tips to inspire your next batch!
- Flavor Combinations: Experiment with different cookie flavors, like oatmeal or snickerdoodle, to give your sandwiches a unique twist.
- Ice Cream Varieties: Try different ice cream flavors, such as mint chocolate chip or strawberry, for a refreshing change.
- Add Toppings: Roll the edges in sprinkles, crushed nuts, or even crushed cookies for added texture and flavor.
- Make Mini Sandwiches: Use smaller cookies and ice cream scoops to create bite-sized versions, perfect for parties.
- Sandwiches Without Ice Cream: For a fun alternative, use whipped cream and fresh fruits instead of ice cream.
Best Served With
When enjoying Chocolate Chip Ice Cream Sandwiches, consider pairing them with a variety of delightful options:
- Fresh Fruit: Serve with sliced strawberries or a fruit salad for a refreshing contrast to the sweetness.
- Chocolate Sauce: Drizzle some warm chocolate sauce over the sandwiches for an indulgent finish.
- Milkshakes: A thick milkshake pairs wonderfully with these sandwiches, creating a deliciously rich dessert experience.
- Summer Parties: These sandwiches are perfect for summer BBQs, picnics, or birthday parties, bringing smiles to every face.
- Seasonal Desserts: During the holidays, consider adding festive flavors like peppermint or pumpkin spice to your sandwiches.
FAQ
Conclusion
Chocolate Chip Ice Cream Sandwiches are a delightful combination of warm cookies and creamy ice cream that brings back cherished memories of summer fun. They are not just a treat, but a celebration of joy and creativity in the kitchen. I encourage you to try making these delicious sandwiches—your family and friends will thank you, and you’ll find yourself making them again and again. Enjoy the moments they create and the smiles they bring!
Chocolate Chip Ice Cream Sandwiches
Equipment
- Frying Pan
- Whisk
- Oven
- Large Pot
- Wooden Spoon
- Mixing Bowl
- Baking Sheet
Ingredients
- 2 tablespoons unsalted butter
- 1 cup light brown sugar packed
- 1 tablespoon vanilla
- 2 cups heavy cream divided
- 1.5 cups whole milk
- 0.25 teaspoon sea salt
- 4 large egg yolks
- 1.75 cups all-purpose flour
- 0.5 teaspoon baking soda
- 0.5 teaspoon baking powder
- 0.25 teaspoon sea salt
- 4 ounces unsalted butter at room temperature
- 0.5 cup granulated sugar
- 0.5 cup light brown sugar packed
- 1 large egg at room temperature
- 1 tablespoon milk
- 2 teaspoons vanilla
- 1 cup semi-sweet chocolate chips
Instructions
- Start by melting the unsalted butter in a medium saucepan over medium flame. Add the light brown sugar and vanilla, whisking until the sugar dissolves and the mixture bubbles. This should take about three minutes, and you'll notice a lovely, rich aroma filling your kitchen.
- Next, mix in half a cup of the heavy cream and whisk until smooth. Once combined, remove the pan from heat and let it cool while you prepare the ice cream.
- To create an ice bath, fill a large bowl with ice and about two cups of water. Place a medium bowl fitted with a fine mesh strainer inside the ice bath. This setup will help cool the mixture quickly later on.
- In a medium saucepan, combine the remaining whole milk, the rest of the heavy cream, and sea salt. Set this saucepan over medium flame and heat until the mixture is warm and starting to steam. Stir occasionally to prevent sticking.
- In another bowl, whisk the large egg yolks until smooth. Gradually whisk in half of the warm milk mixture, a ladleful at a time, until it's warm and smooth. This technique tempers the eggs, ensuring they don't scramble.
- Pour the egg/milk mixture back into the saucepan and cook over medium heat. Stir constantly with a wooden spoon, watching for the mixture to thicken enough to coat the back of the spoon. This should take about five minutes, but be careful not to let it boil.
- Once thickened, immediately strain the mixture through the fine mesh strainer into the prepared ice bath. This step ensures a smooth texture for your ice cream custard.
- Add the butterscotch to the custard and stir to combine thoroughly. Allow the custard to cool in the ice bath until it reaches room temperature, stirring often to speed up the process.
- Press plastic wrap against the surface of the custard and refrigerate until chilled, about four hours or up to a day. This chilling period is crucial for flavor development.
- When you're ready, pour the chilled custard into an ice cream maker and freeze according to the product's instructions. Transfer the finished ice cream to an airtight container and freeze until firm, about two hours.
- Meanwhile, preheat your oven to 350 degrees Fahrenheit and line two large baking sheets with parchment paper.
- In a medium bowl, whisk together the all-purpose flour, baking soda, baking powder, and sea salt. In a separate large bowl, beat the unsalted butter and granulated sugar together until light and fluffy—this should take around two minutes.
- Add the large egg, milk, and more vanilla, beating until smooth. Gradually mix in the flour mixture until combined, and then fold in the semi-sweet chocolate chips.
- Using a tablespoon, drop balls of cookie dough onto the prepared baking sheets. Flatten the tops slightly with your palm and bake for 10 to 12 minutes. Keep an eye on the cookies, as they should be golden brown around the edges.
- Let the cookies cool on the baking sheets for five minutes before transferring them to a cooling rack. Once completely cooled, freeze the cookies until firm, at least one hour.
- Now, it’s time to assemble the sandwiches! Take one frozen cookie, top it with a generous scoop of ice cream, then place another cookie on top. Gently press down to form a sandwich. For an extra treat, roll the edges in additional chocolate chips.
- Finally, place the assembled sandwiches in the freezer. Allow them to freeze for at least two hours before serving, ensuring they hold together perfectly.
Notes
- Storage: Store leftover sandwiches in an airtight container in the freezer for up to a month.
- Freezing: These sandwiches can be made in advance and kept frozen until you’re ready to serve.
- Variations: Feel free to get creative with different ice cream flavors, cookies, and toppings.
- Serving Suggestions: Pair with fresh fruit or a drizzle of chocolate sauce for an extra special treat.
- Fun Fact: These sandwiches are a perfect summer treat and can be enjoyed year-round!