Chocolate Chip Cookie Icebox Cake
There’s something incredibly comforting about a dessert that combines the beloved flavors of chocolate chip cookies and the ease of an icebox cake. The Chocolate Chip Cookie Icebox Cake is my go-to treat for gatherings, family nights, or simply when I need a little pick-me-up. I remember the first time I made it; my friends were over for a movie night, and I wanted to impress them without spending hours in the kitchen. I couldn’t believe how easy it was to whip up! Layering soft, creamy pudding with crunchy cookies created a heavenly dessert that everyone raved about. In just a few steps, I transformed ordinary ingredients into something truly special. The best part? It needs to chill in the fridge, so I could kick back and enjoy the movie while it worked its magic. Every time I serve it, I feel like a rockstar, and I know you’ll feel the same!
Recipe Snapshot
20 mins
20 mins
0 mins
Medium
320 kcal
4 g
Keto, Gluten-Free, Low FODMAP
15 g
8 x 8-inch baking pan
What We Adore About This Chocolate Chip Cookie Icebox Cake
Irresistibly Delicious Layers
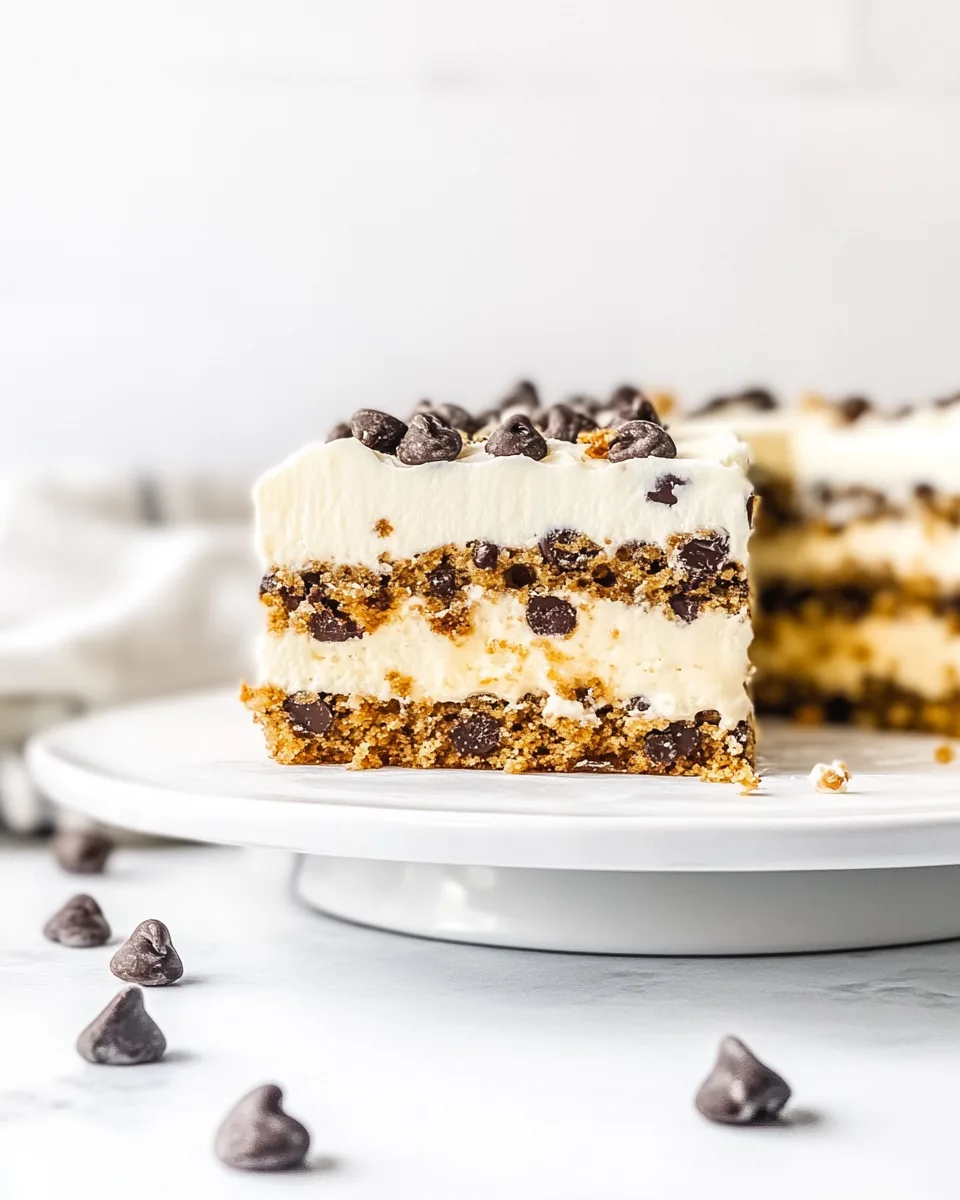
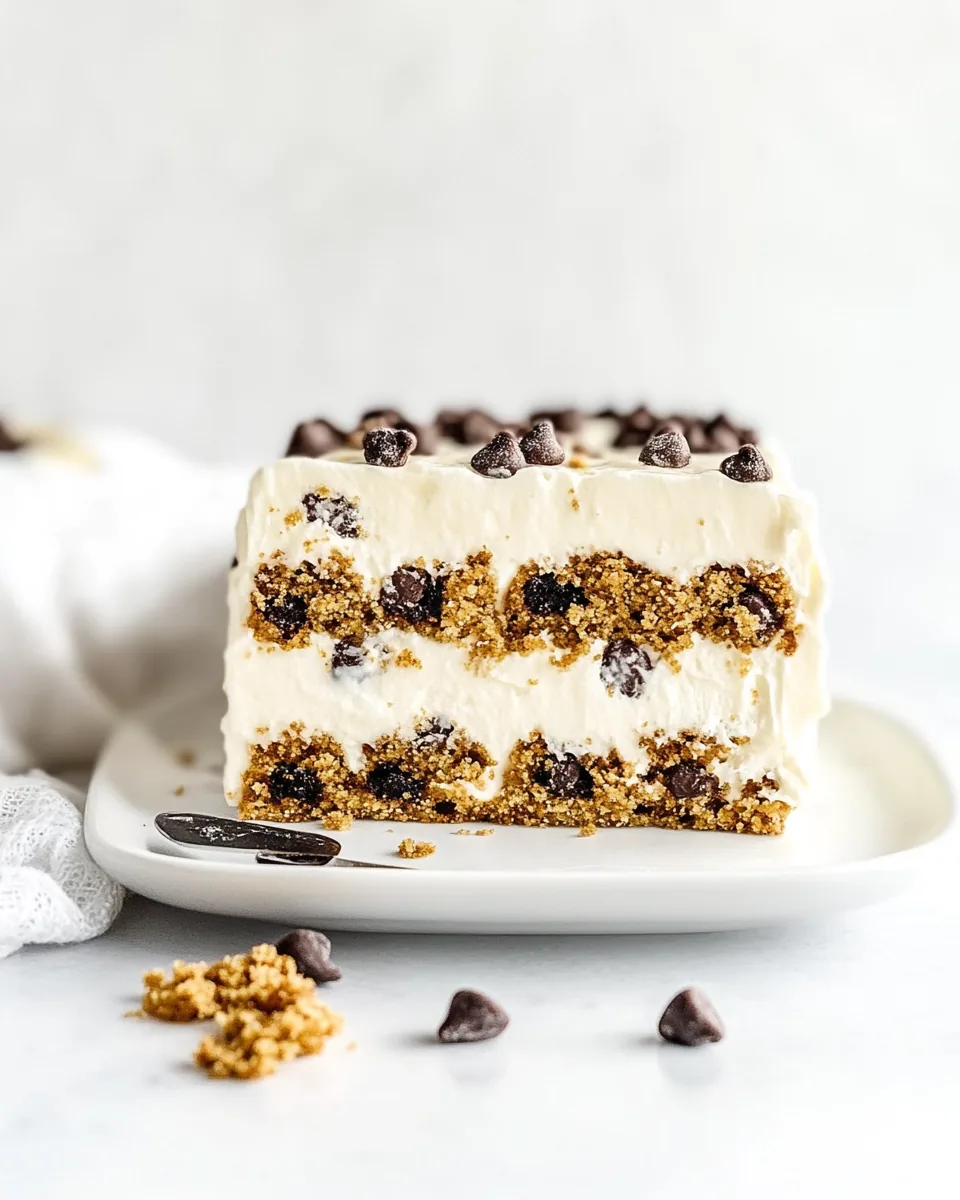
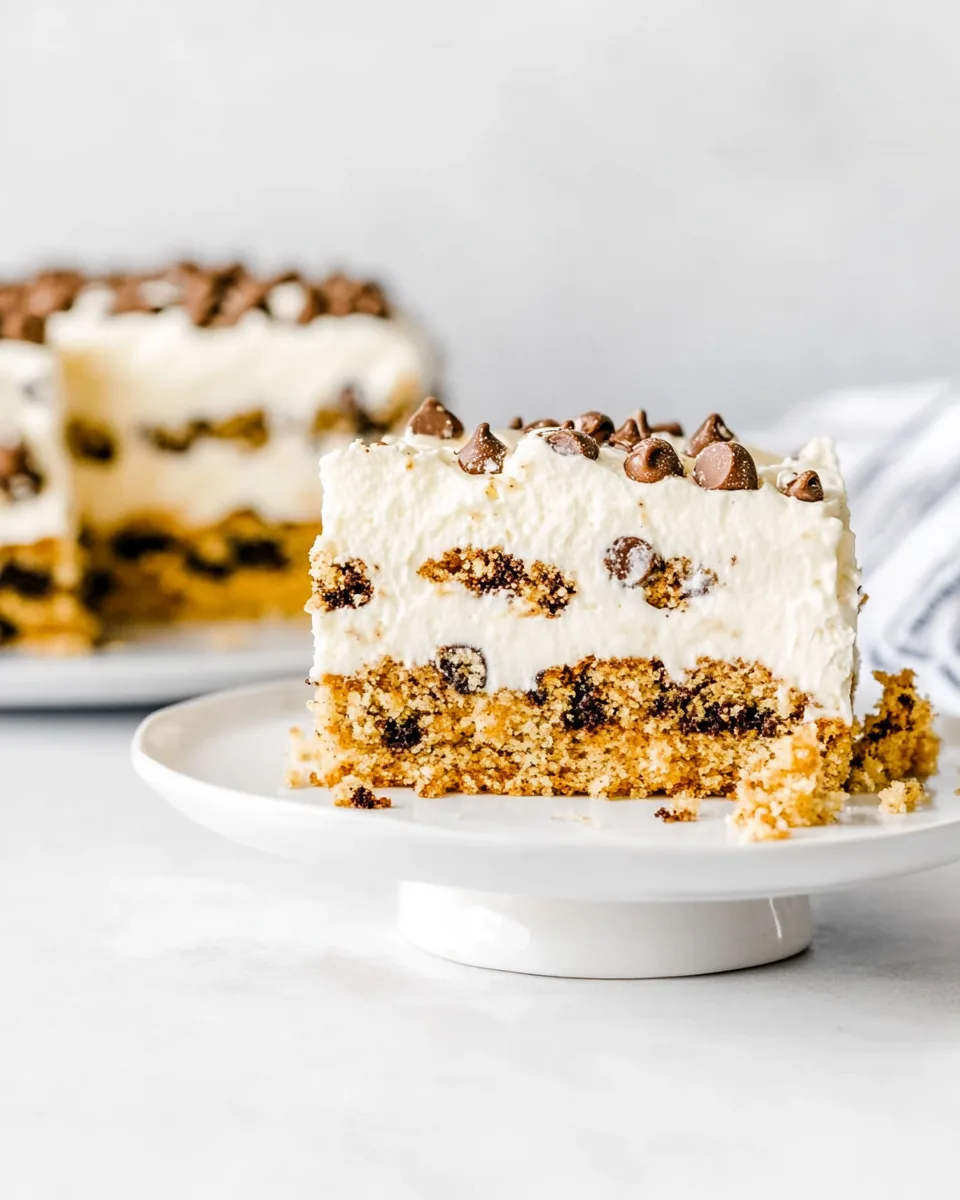
The beauty of the Chocolate Chip Cookie Icebox Cake lies in its layers. With each bite, you experience the delightful contrast between the creamy pudding and the crunchy cookies. The combination creates a texture that’s simply divine, and it makes every serving a little celebration!
Effortlessly Simple
Who doesn’t love a dessert that requires minimal effort? This recipe is straightforward, using just a few ingredients like chocolate chip cookies, instant pudding mix, and whipped topping. You don’t need advanced baking skills to impress your guests!
Perfect for Any Occasion
This cake is versatile enough to suit any gathering—be it a birthday party, holiday, or a cozy family dinner. It’s a dessert that pleases everyone, making it a must-have in your recipe collection.
Make-Ahead Convenience
The Chocolate Chip Cookie Icebox Cake is designed to be made ahead of time. Just prepare it the night before and let it chill in the fridge. The flavors meld beautifully, allowing you to serve a delicious dessert without any last-minute fuss.
Crowd-Pleaser
When I bring this cake to gatherings, people can’t resist going back for seconds. It has a way of bringing smiles to faces and sparking conversations. I often find myself giving out the recipe because it’s just too good to keep to myself!
Customizable Delight
Feel free to switch up the cookies or pudding flavor according to your taste. Whether you want a classic chocolate chip flavor or something a little different, the base of this recipe is perfect for experimenting!
Ingredients to Make Chocolate Chip Cookie Icebox Cake

Using the right ingredients in the Chocolate Chip Cookie Icebox Cake is vital for achieving the perfect texture and flavor. The combination of creamy and crunchy elements is what makes this dessert irresistible. Here’s a look at the key players that make this cake a showstopper.
- 1 (18.2-ounce) package chocolate chip cookies: The foundation of this cake, these cookies provide that classic chocolate chip flavor and texture. I recommend using family-sized boxes to ensure you have enough.
- 2 (3.4-ounce) packages instant vanilla pudding mix: This adds a creamy and rich filling. Make sure to choose regular pudding mix for the best consistency.
- 2-1/4 cups whole milk: Essential for mixing with the pudding and creating a luscious layer. Whole milk gives the best creamy texture.
- 1 (8-ounce) container frozen whipped topping: This contributes to the cake’s lightness and creaminess. Using regular whipped topping is important for maintaining the right consistency.
Cooking Instructions for Chocolate Chip Cookie Icebox Cake
Making the Chocolate Chip Cookie Icebox Cake is as easy as pie, or should I say, cake? Follow these simple steps to create this delightful dessert that will wow your family and friends!
- Start by lining an 8×8-inch baking pan with parchment paper, leaving an overhang for easy removal later. Set this aside—it’s a simple step that will save you a lot of trouble when serving.
- Next, take 1 heaping cup of whipped topping and set it aside. This will be for the final layer, ensuring your cake looks pristine and inviting.
- In a large mixing bowl, combine both packets of instant vanilla pudding mix and whole milk. Whisk them together briskly for about 1 minute, or until the mixture is smooth and creamy. You’ll want to see the pudding thicken just a bit.
- Now, gently fold the remaining whipped topping into the pudding mixture. Use a spatula and be gentle to keep the light and airy texture that will make your cake so delightful.
- Now it’s time to layer! Begin by placing an even layer of chocolate chip cookies in the bottom of your prepared pan. Break them apart as needed to make them fit snugly.
- Pour half of the pudding and whipped topping mixture over the cookie layer, spreading it gently with the back of a large spoon to create an even layer.
- Add another layer of cookies on top, following up with the remaining pudding mixture. Again, spread it to ensure it’s even.
- Finish with a final layer of cookies. This will give the cake its signature look and texture once served.
- Finally, spread the reserved cup of whipped topping evenly over the top layer of cookies. This adds a lovely finishing touch and a beautiful presentation.
- Cover the cake and refrigerate for at least 8 hours, or overnight. This is where the magic happens as the flavors meld and the cookies soften.
- When you’re ready to serve, carefully cut the cake into squares. For an extra touch, consider crumbling a few reserved cookies on top as a garnish.
Things Worth Knowing
- Chilling Time Matters: It’s vital to let the cake chill for a minimum of 8 hours. This not only helps the flavors meld but also ensures the cookies soften to the right texture.
- Cookie Selection: Choose cookies that are not overly soft. Firm cookies will hold their shape better throughout the layering process.
- Whipped Topping Quality: Using regular whipped topping ensures your cake stays creamy. Avoid sugar-free varieties as they can turn watery.
- Cutting Technique: Use a sharp chef’s knife when cutting the cake. Running the knife under warm water before each cut can help prevent sticking.
Variations to Try
If you’re looking to mix things up a bit with the Chocolate Chip Cookie Icebox Cake, you’re in luck! This recipe is incredibly versatile, allowing you to explore different flavors and combinations.
- Chocolate Cookies: For an extra chocolatey twist, try using chocolate chip cookies or even Oreo cookies in place of traditional cookies.
- Nut Variations: Add chopped nuts like walnuts or pecans between the layers for added crunch and flavor.
- Fruit Addition: Incorporate fresh fruit such as banana slices or strawberries between layers for a fresh, fruity touch.
- Flavorful Pudding: Experiment with other pudding flavors, such as chocolate or butterscotch, to switch things up.
- Miniature Versions: Create individual servings using small cups or jars for a fun presentation at parties.
- Layered Parfaits: Instead of a cake, layer the ingredients in a glass for a parfait-style dessert that’s visually stunning.
- Storage: I recommend eating the cake on days 2 or 3 for the best texture. Store leftovers in the fridge.
- Freezing: While freezing is not recommended for this cake, you can prepare individual components ahead of time and assemble before serving.
Serving This Chocolate Chip Cookie Icebox Cake
When it comes to serving the Chocolate Chip Cookie Icebox Cake, presentation is key! Here are some ideas for making it special:
- Slice Neatly: Use a sharp knife to cut clean squares, ensuring each piece has visible layers.
- Garnish: Consider garnishing with crumbled cookies or a sprinkle of chocolate shavings on top for an elegant touch.
- Serving Temperature: Serve the cake directly from the fridge. It’s best enjoyed cold, which enhances the flavors.
- Occasions: This cake is perfect for birthdays, potlucks, or summer barbecues, making it a versatile dessert choice.
- Pairings: Consider serving with a side of fresh berries or a scoop of vanilla ice cream for an extra indulgence.
- Storage Tips: Ensure any leftovers are kept in a sealed container in the fridge to maintain freshness.
- Seasonal Serving: This dessert can fit any season; try adding seasonal fruits for a fresh twist!
- Leftover Ideas: Use any leftover components to create a layered dessert in individual cups for a fun treat the next day.
FAQ
Conclusion
The Chocolate Chip Cookie Icebox Cake truly stands out as a delightful dessert that combines simplicity with flavor. Its creamy layers and crunchy cookies create a perfect harmony that everyone will love. I encourage you to give this recipe a try—you won’t be disappointed. It’s an easy way to impress your guests and create lasting memories around the table!

Chocolate Chip Cookie Icebox Cake
Equipment
- 8 x 8-inch baking pan
Ingredients
- 1 package chocolate chip cookies 18.2-ounce size
- 2 packages instant vanilla pudding mix 3.4-ounce each
- 2-1/4 cups whole milk
- 1 container frozen whipped topping 8-ounce, thawed, divided
Instructions
- Line an 8×8-inch pan with parchment paper, leaving an overhang for easy removal. Set aside for now.
- Remove 1 heaping cup of whipped topping and set it aside as well.
- In a large bowl, combine both pudding mixes and milk and briskly whisk together for about 1 minute or until smooth.
- Take the remaining whipped topping and gently fold it into the pudding mixture until completely incorporated.
- Place down an even layer of cookies in the prepared pan, breaking them apart as needed to fit the pan.
- Top with half the pudding mixture and use the back of a large spoon to gently spread into an even layer.
- Top with one more layer of cookies.
- Add the rest of the pudding, again spreading it into an even layer.
- Add the last layer of cookies.
- Finally, spread on the reserved cup of whipped topping in an even layer.
- Cover the cake and refrigerate for 8 hours.
- When ready to serve, cut the cake into squares and, if desired, crumble a few reserved cookies on top as a garnish.
Notes
- Note 1: You’ll need a lot of cookies for this cake, so make sure to get the family-sized box (18-ounce) instead of the original (13-ounce) size. When it comes to the type of cookies, avoid soft or chewy cookies. I prefer Chips Ahoy original Chocolate Chip Cookies.
- Note 2: Use two boxes of regular instant pudding mix—not sugar-free, low-fat, or cook-and-serve. Be sure to get the small 3.4-ounce boxes. When using the pudding mix, follow my recipe directions—don’t prepare it according to package instructions.
- Note 3: Cool Whip is a common brand of frozen whipped topping and the one I use in the test kitchen. Be sure to use regular, not sugar-free or reduced-fat, which can become watery. You can also make your own; the recipe for homemade whipped cream is in the blog post!
- Note 4: When cutting the cake, use a sharp chef’s knife and make decisive cuts. Run the knife under warm water and dry it on a kitchen towel before cutting and repeat for each slice.
- Storage: I recommend eating the cake on days 2 or 3. It needs 12 hours to soften properly, but it can become watery after several days. To store the cake, serve it directly from the fridge. Any leftovers should be returned to the fridge promptly. Freezing is not recommended.